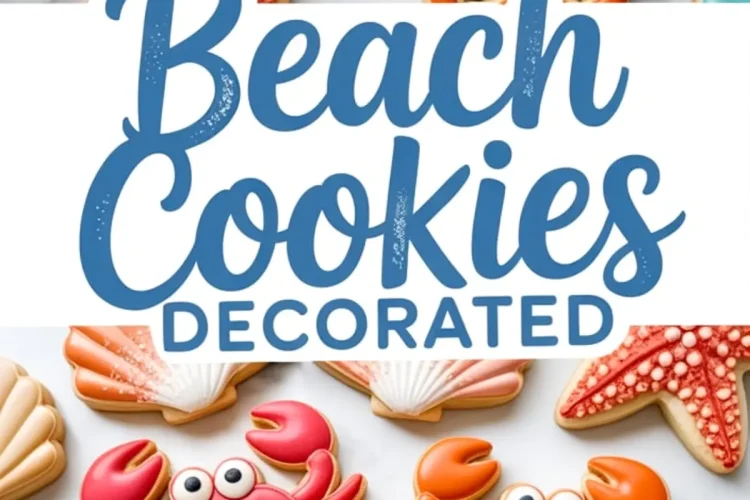
Decorated cookies can say more than a cake ever could. They travel easily, decorate a table fast, and spark conversations between bites. These beach-themed cookies do exactly that. Crabs with little candy eyes, pastel starfish, piped waves in soft teal—each one tells a small summer story.
This post will walk you through my approach to making Beach Cookies that hold their shape, take on royal icing well, and let you decorate with confidence even if this is your first time trying royal icing.
I’ve made these cookies for pool parties, baby showers, and end-of-year beach day treats. The joy is always the same: a tray full of edible beach art.

Following a special diet?
Every recipe on this site can be converted to gluten-free, vegan, dairy-free, keto, nut-free or egg-free with adjusted ratios so nothing falls flat.
Try the Recipe Converter →A Reliable Sugar Cookie Dough That Bakes Without Spreading

You’ll begin with a classic base that stays sturdy without turning hard. This sugar cookie dough holds crisp edges, making it ideal for detailed beach cookie cutters—shells, starfish, or even beach balls.
The butter should be softened, but not melted. That’s key to achieving the right texture. Creaming it with granulated sugar for a full three minutes helps the dough bake up light without puffing.
I’ve tested almond extract in several batches. It adds a warm depth that complements the vanilla. But if you’re making a large batch for a mixed crowd, sticking to vanilla alone keeps the flavor safe for more palates.
How I Roll and Shape These Beach Sugar Cookies
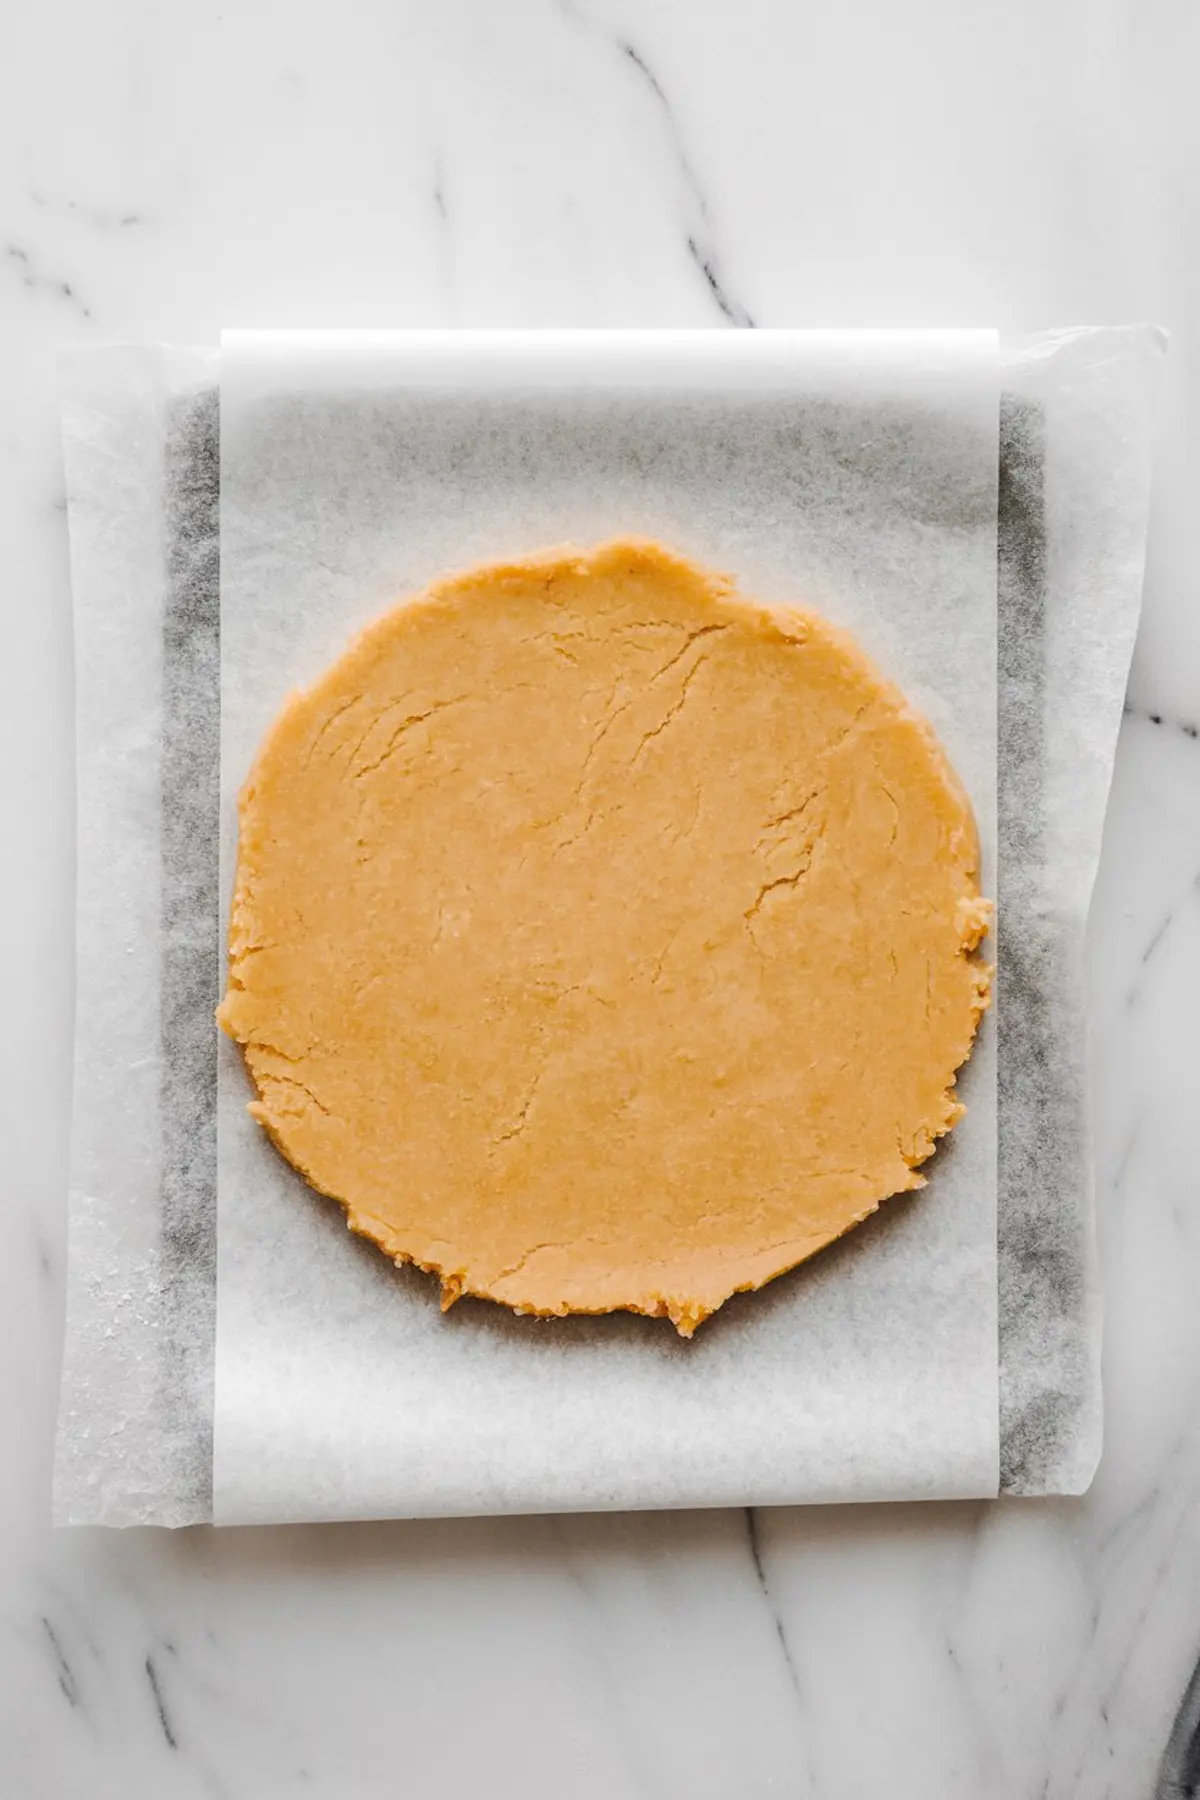
Chill the dough discs until they’re firm enough to hold a clean edge but still pliable under your rolling pin. I roll mine to a quarter inch thickness. Thinner dough bakes too fast and gets brittle. Thicker dough risks puffing.
Use cookie cutters in varied summer themes. I use a crab cutter, a rounded shell, and sometimes a simple circle for beach ball cookies. This dough supports sharp curves, so don’t shy away from detail.
Bake at 350°F just until the edges turn golden. Overbaking dries them out. Cooling them fully on a wire rack gives a smooth, cool surface for decorating.
Try this variation: Chocolate Pistachio Cookies for a nutty, rich contrast to these light sugar bases.
Preparing Royal Icing for Beach-Themed Cookies
Start with sifted powdered sugar and meringue powder. You’ll need two consistencies: one thick for outlines, one thinned with warm water for flooding.
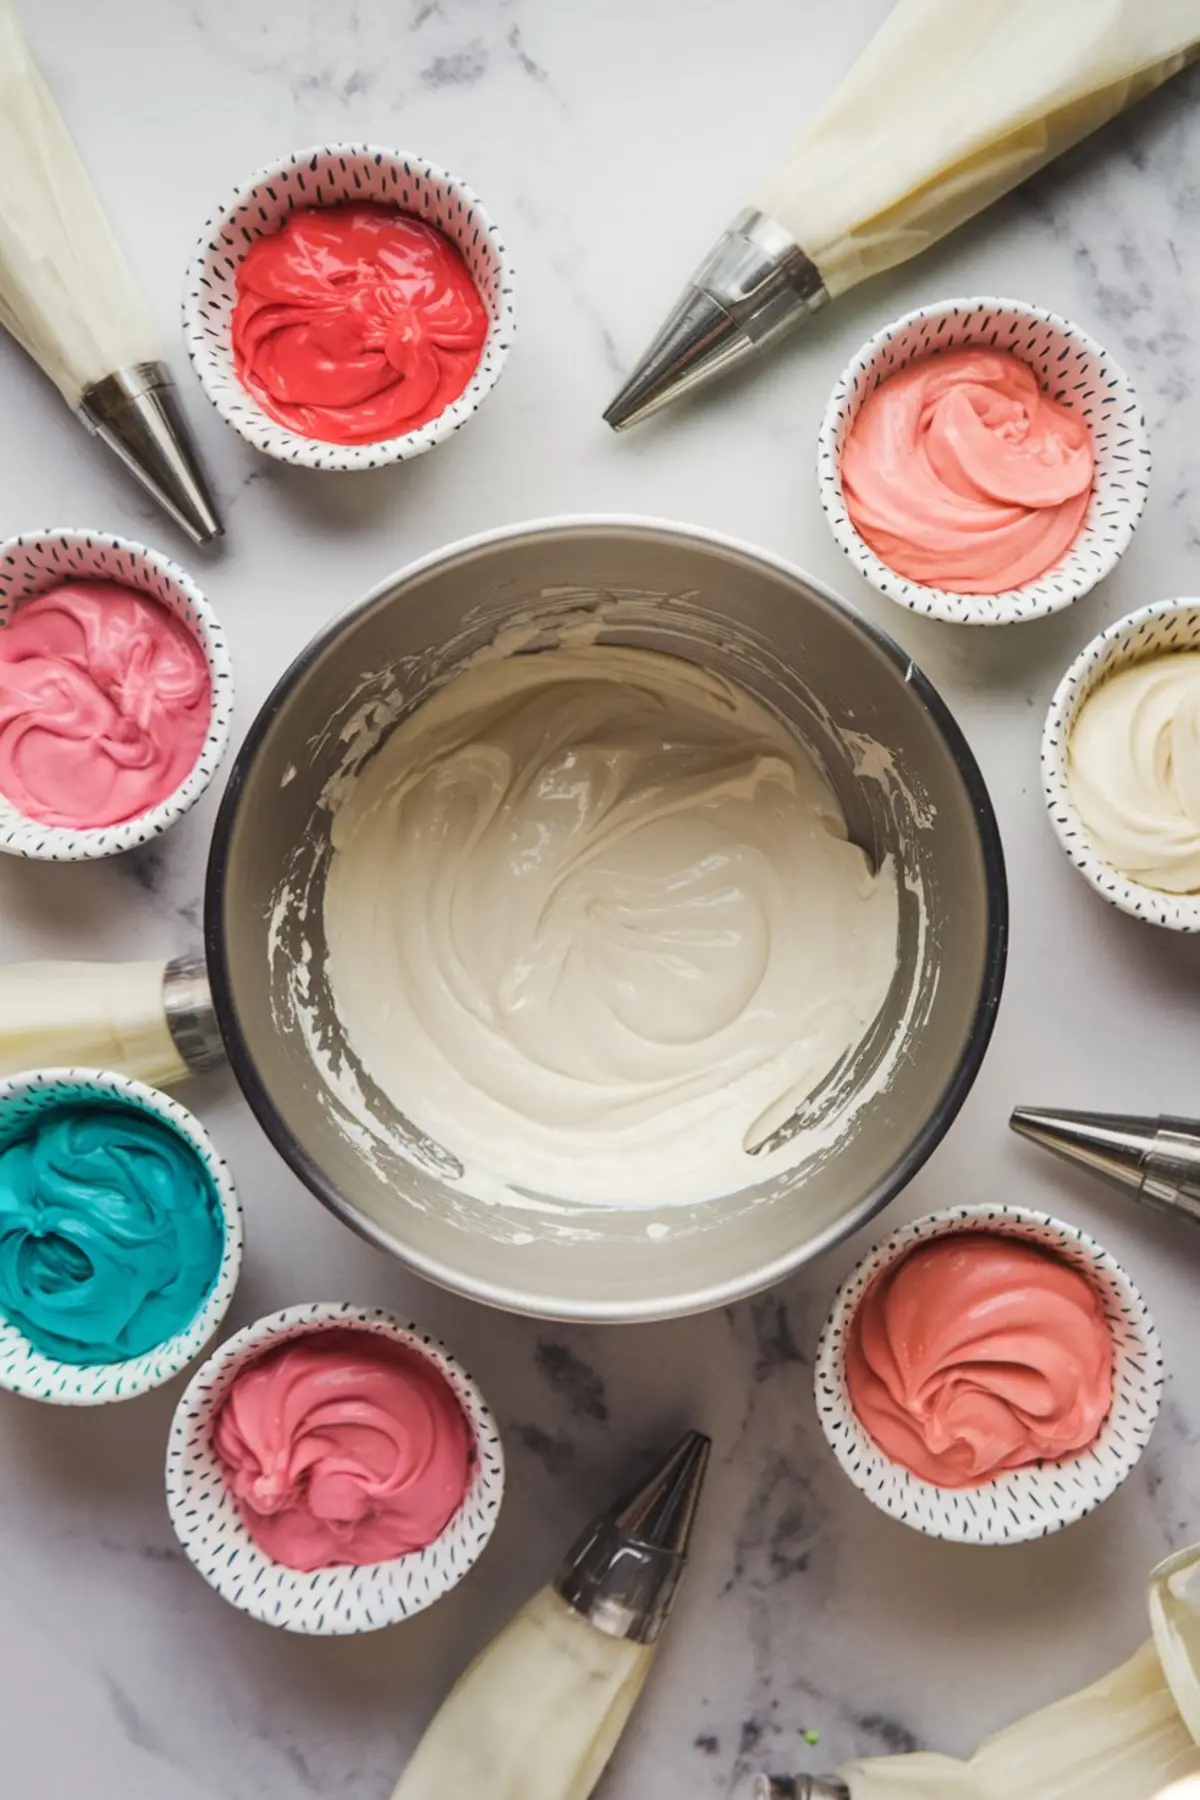
Mix the stiff icing first. Beat until it holds peaks, about 5 minutes. Divide and color it with gel food coloring in ocean tones: coral, ivory, teal, sand, pale pink.
If you’re new to royal icing, test on a plate before decorating cookies. Let the icing sit for a few minutes to settle any air bubbles, and always keep unused portions covered with plastic wrap.
How I Decorate These Ocean Cookies with Piping Precision
Start with outlines. Pipe with the thicker icing around your shape. Flood the inside with thinned icing and use a scribe or toothpick to guide it into corners.
For starfish, I pipe five arms in coral, then add white dots using a small tip or even a toothpick. For crabs, I fill the body in red, pipe claws and legs separately, and finish with sugar pearl eyes.
Octopuses work well on round cookies. Flood with a pastel purple or blue, then pipe tentacles like sun rays. Wait until it’s dry before adding eyes to prevent bleeding.
These decorations dry best overnight. Don’t rush the process. Air drying helps the cookies develop a smooth finish without smudges.
My Icing Tip: Why Gel Food Coloring Works Better Than Liquid

In my early attempts, I used liquid colors from the grocery store. They made the icing too thin, caused color separation, and dulled over time.
Gel food coloring gives vibrant hues without altering texture. You’ll also use less product for better results. It’s worth keeping a small collection of core colors in your pantry.
How to Store and Transport Beach Themed Cookies
Let the decorated cookies dry uncovered for at least eight hours. Once fully set, stack them between parchment in an airtight container.
I’ve mailed these across the country. The trick is to use a snug box with padding between layers. Always stack similar shapes together to prevent breaking off detailed edges.
Keep the cookies in a cool, dry place. Avoid storing in the fridge, which can soften the royal icing. At room temperature, they last up to a week with no loss in flavor.
Planning a themed celebration? These Minecraft Cookies offer a fun, blocky alternative for younger guests.
One Swap That Changes the Dough Flavor
I’ve made this same dough using brown sugar in place of white. The texture stays similar, but the flavor deepens. It adds a caramel note that pairs beautifully with the almond extract.
If you want your beach sugar cookies to stand out, try swapping in half brown sugar. It works especially well for shapes like beach balls or shells where the color contrast from the icing still shows brightly.
Final Thoughts: Your Cookies, Your Canvas
Decorated beach cookies are more than a dessert. They become part of your celebration. Each one reflects your color choices, your piping practice, and your creativity.
You don’t need a bakery setup. Just time, the right dough, and icing you can trust. These cookies always draw compliments. And once you see how fun it is to decorate them, they’ll show up on your table every summer.
Save this recipe to your Pinterest board for your next ocean-themed bash or summer desserts.
And if you try it, I’d love to hear how it went. Share your experience in the comments—or ask a question if you’re unsure about any step.
Beach Cookies Recipe

Decorated beach cookies are a colorful and creative dessert made with classic sugar cookies and royal icing. These cookies feature fun beach-themed designs like crabs, starfish, and seashells. The sugar cookies hold their shape well, and the royal icing allows for detailed decoration using beachy colors and piped features.
Ingredients
- FOR THE SUGAR COOKIES
- 1 cup (226g) unsalted butter, softened
- 1 cup (200g) granulated sugar
- 1 large egg
- 1 ½ teaspoons vanilla extract
- ½ teaspoon almond extract (optional)
- 3 cups (375g) all-purpose flour
- 1 ½ teaspoons baking powder
- ½ teaspoon salt
- FOR THE ROYAL ICING
- 4 cups (480g) powdered sugar, sifted
- 3 tablespoons meringue powder
- 5–6 tablespoons warm water
- Gel food coloring in beach tones (red, coral, peach, teal, ivory, etc.)
- Edible sugar pearls or black nonpareils for eyes
Instructions
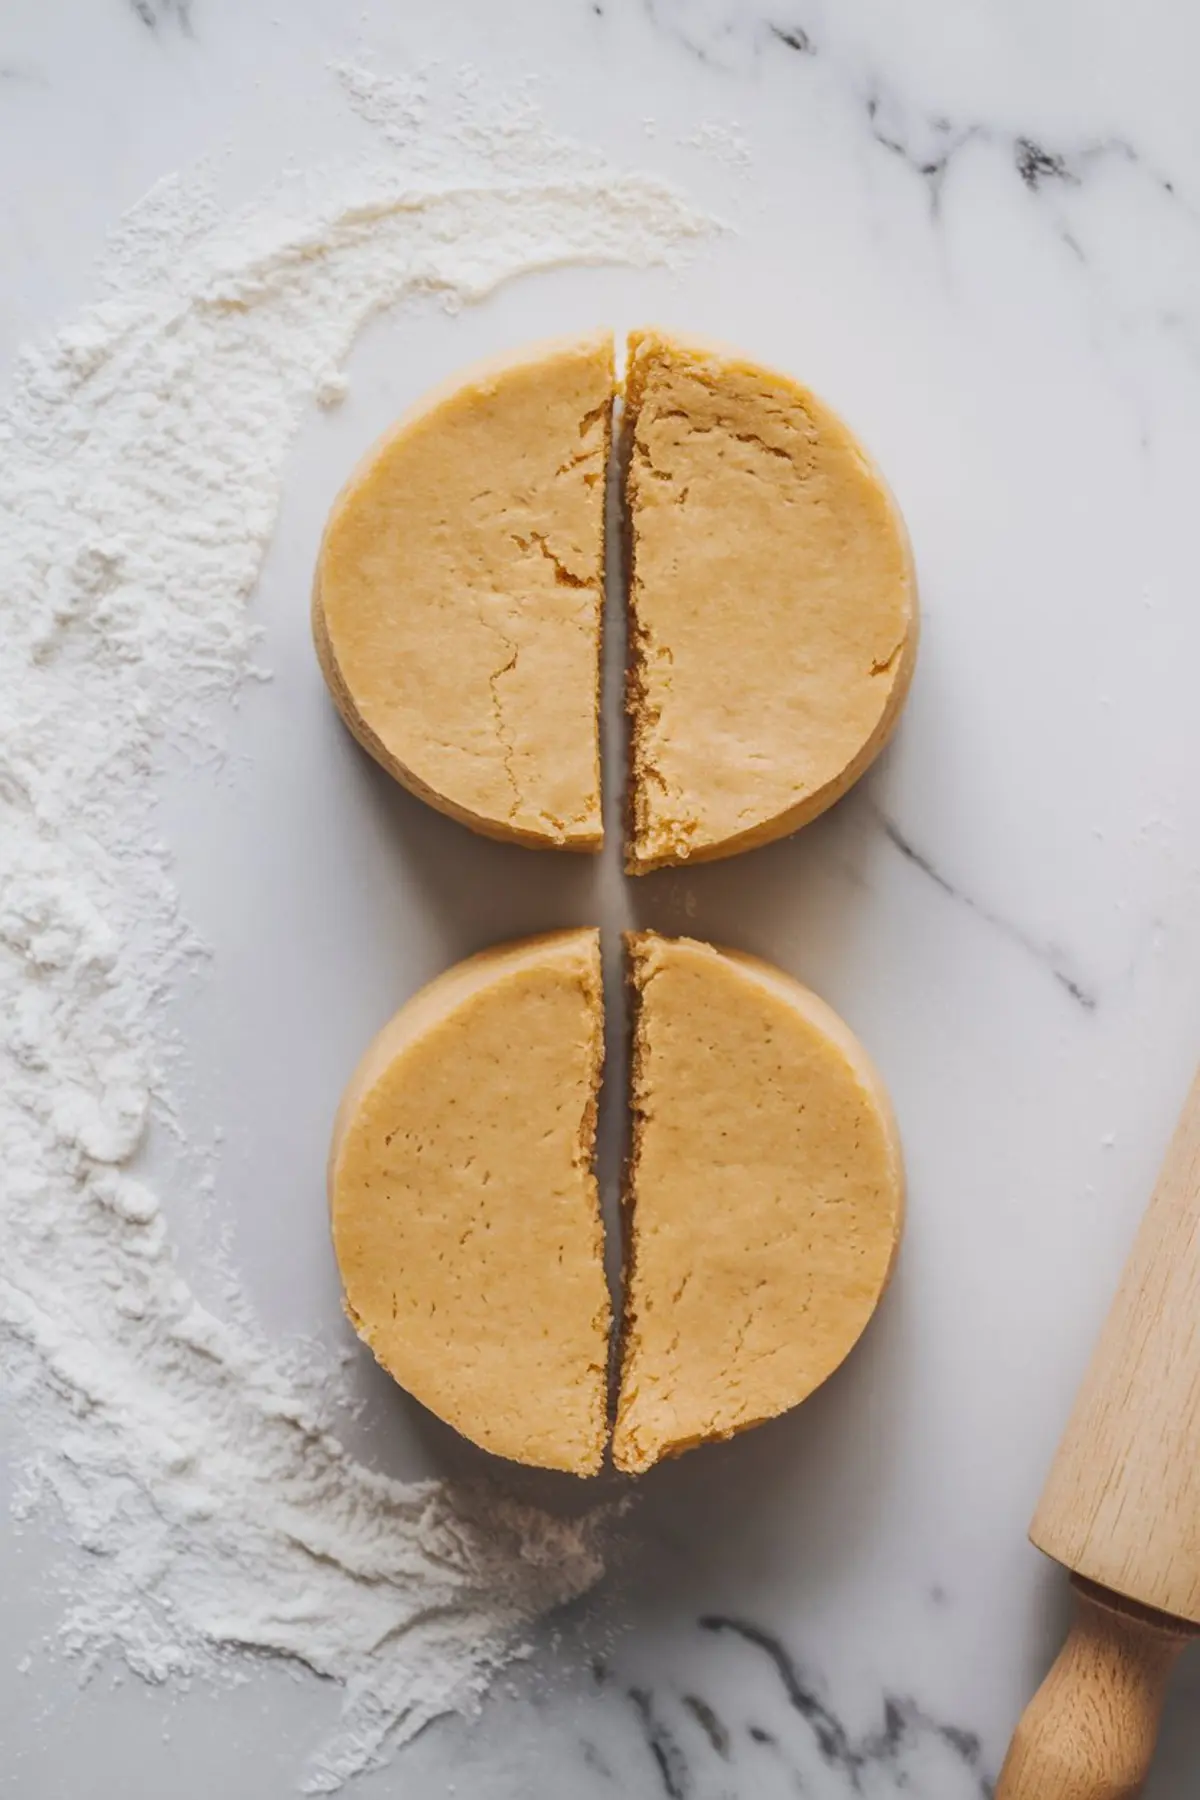
- MAKE THE COOKIE DOUGH: In a large bowl, cream the softened butter and sugar together on medium speed for 2–3 minutes until light and fluffy. Add the egg, vanilla extract, and almond extract (if using), and mix until well combined. In a separate bowl, whisk together the flour, baking powder, and salt. Gradually add the dry ingredients to the wet mixture on low speed until a dough forms. Divide the dough in half, shape each half into a disc, wrap in plastic wrap, and refrigerate for 1 hour.
- ROLL AND CUT THE COOKIES: Preheat the oven to 350°F (175°C). Roll out one disc of dough on a lightly floured surface to about ¼-inch thickness. Use cookie cutters in shapes like crabs, shells, starfish, and octopuses. Place the cut cookies on a parchment-lined baking sheet, spacing them about 1 inch apart. Bake for 9–11 minutes or until the edges are just barely golden. Let cookies cool completely on a wire rack before decorating.
- PREPARE THE ROYAL ICING: In the bowl of a stand mixer fitted with the paddle attachment, mix powdered sugar and meringue powder on low speed. Add 5 tablespoons of warm water and mix for 2 minutes on low, then increase to medium-high and beat for 4–5 minutes until stiff peaks form. Divide the icing into bowls and tint with gel food coloring. Thin some of the icing to flooding consistency using small amounts of water, and leave other portions at piping consistency.
- DECORATE THE COOKIES: Use piping consistency icing to outline shapes, and flood with thinned icing to fill in. For starfish, use coral or pink icing to outline and flood, then add small white dots on top for texture. For shells, use pastel colors and pipe in a fan motion to mimic shell ridges, optionally brushing with shimmer dust once dry. For crabs, flood with red icing, then use a small piping tip to add claws and legs. Finish with sugar pearls or piped icing eyes. For octopuses, use a round cutter for the body, flood with color, and pipe tentacles around the edges. Add eyes last. Allow decorated cookies to dry uncovered for at least 8 hours or overnight before stacking or packaging.
Notes
Use a scribe tool or toothpick to help spread royal icing into corners and pop air bubbles. Keep icing covered when not in use to prevent it from drying out. Let each layer of icing dry before adding details on top for best results.
Nutrition Information
Yield
30Serving Size
1Amount Per Serving Calories 70Total Fat 1gSaturated Fat 0gTrans Fat 0gUnsaturated Fat 1gCholesterol 8mgSodium 73mgCarbohydrates 13gFiber 0gSugar 3gProtein 2g