
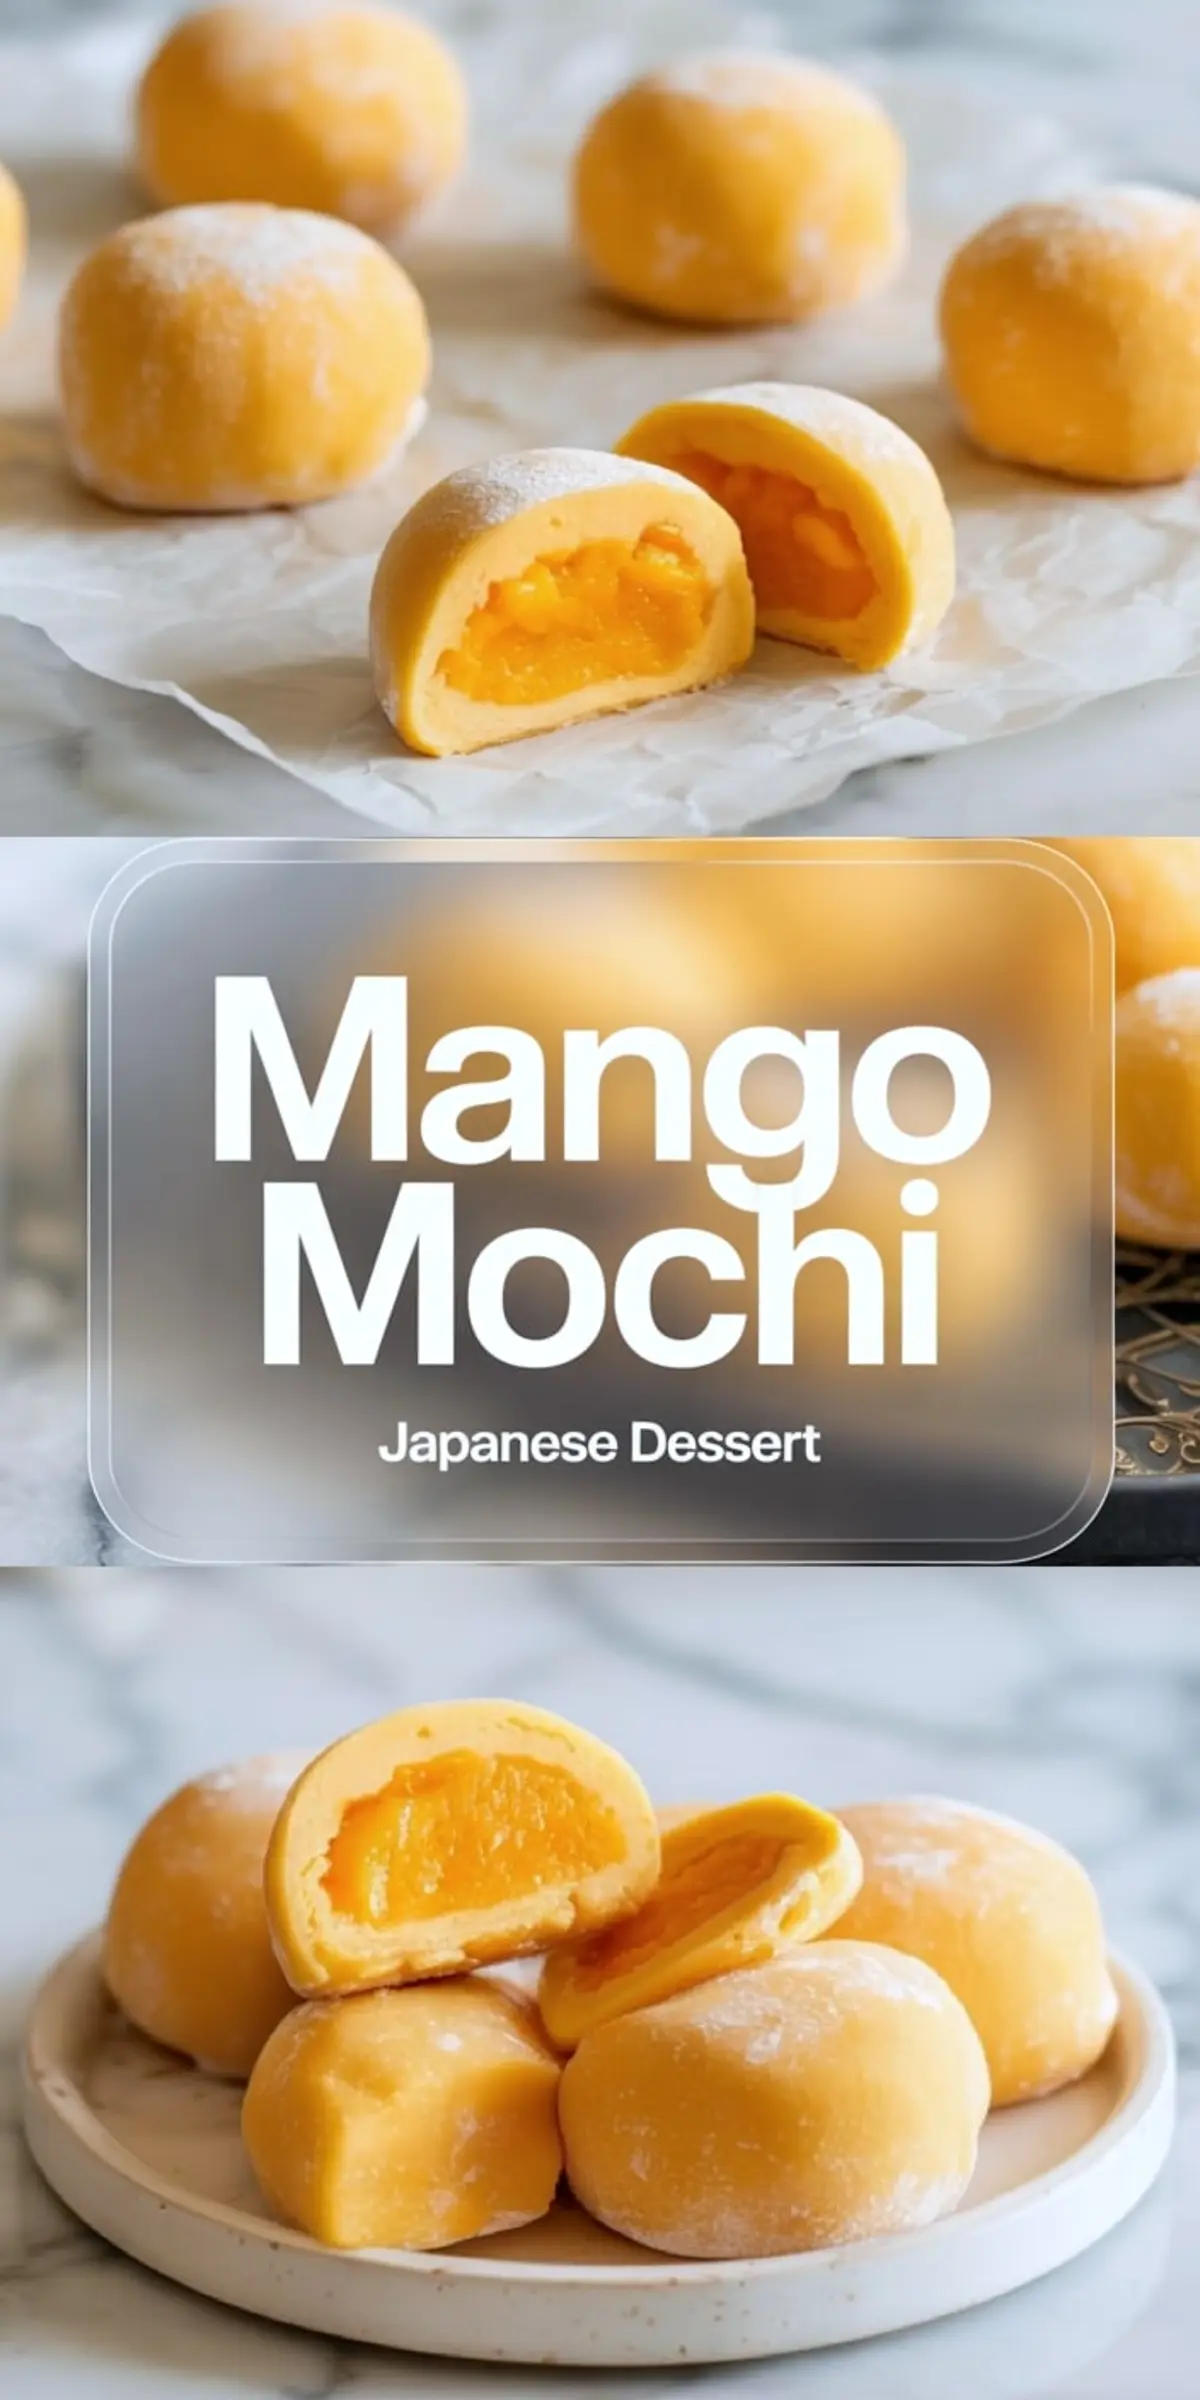
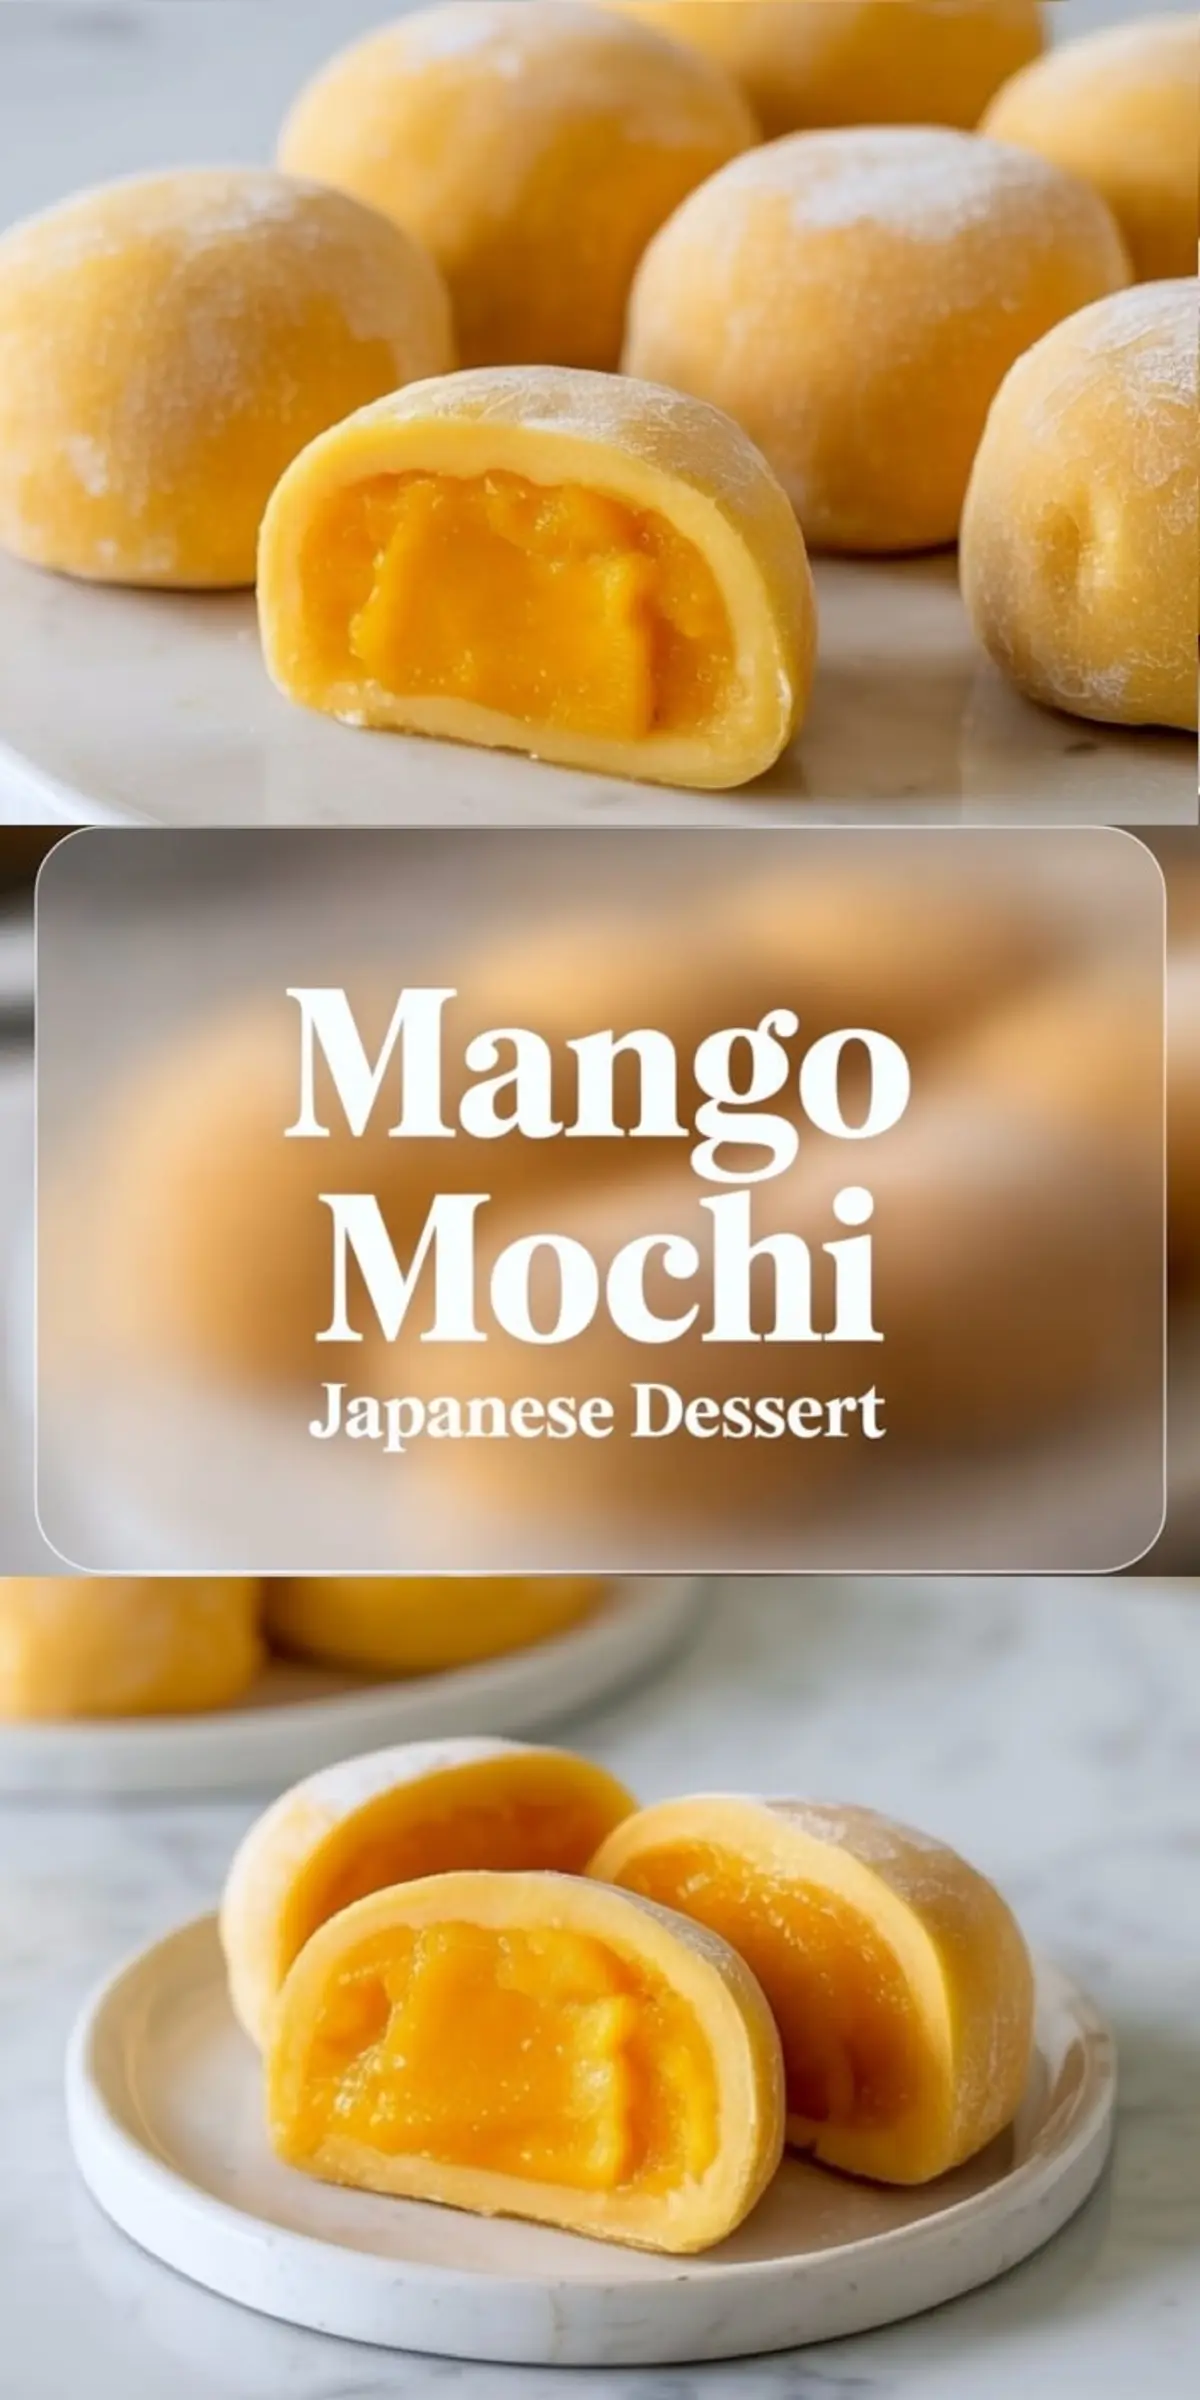
This homemade mango mochi recipe pairs the chewy texture of classic Japanese dessert with a chilled mango filling that tastes like a bite of summer. It’s a fun baking recipe that uses real fruit, simple pantry ingredients, and a few tricks for easy shaping. If you’re curious about Asian desserts or just want to try a new mochi recipe, this one lands right in that sweet spot between playful and rewarding.
Following a special diet?
Every recipe on this site can be converted to gluten-free, vegan, dairy-free, keto, nut-free or egg-free with adjusted ratios so nothing falls flat.
Try the Recipe Converter →Glutinous rice flour works differently from regular flour. It creates structure without gluten, which gives mochi its signature stretch. The dough starts out sticky, but the heat pulls everything together.
I use a 1:3 ratio of sugar to flour in the dough. This keeps the mochi slightly sweet without making it brittle or dry. Too much sugar softens the dough too fast and can cause cracking after wrapping.
The mango filling stays scoopable because of the cornstarch. A chilled puree would slide around and resist shaping. Cooked and thickened fruit holds its shape and keeps the mochi balanced.
Choosing Ingredients That Actually Work
Start with ripe mangos that give slightly when pressed. I prefer Ataulfo or honey mangos for this because they’re smooth, not stringy, and have bright flavor.
Fresh lemon juice sharpens the fruit and keeps the filling from going flat. If your mango is overly ripe or already tangy, reduce the lemon slightly.
The dough needs glutinous rice flour, often labeled as mochiko. Regular rice flour will not work. The two behave very differently under heat. Mochiko stays stretchy, almost bouncy, after cooking.
Dusting with cornstarch prevents everything from sticking. Potato starch also works and creates a silkier finish, but it can clump more quickly if the humidity is high.
You’ll find this approach again in my Lemon Butter Mochi recipe, where similar techniques help the batter bake up smooth and slightly chewy.
Spotlight on the Filling: Getting the Right Texture
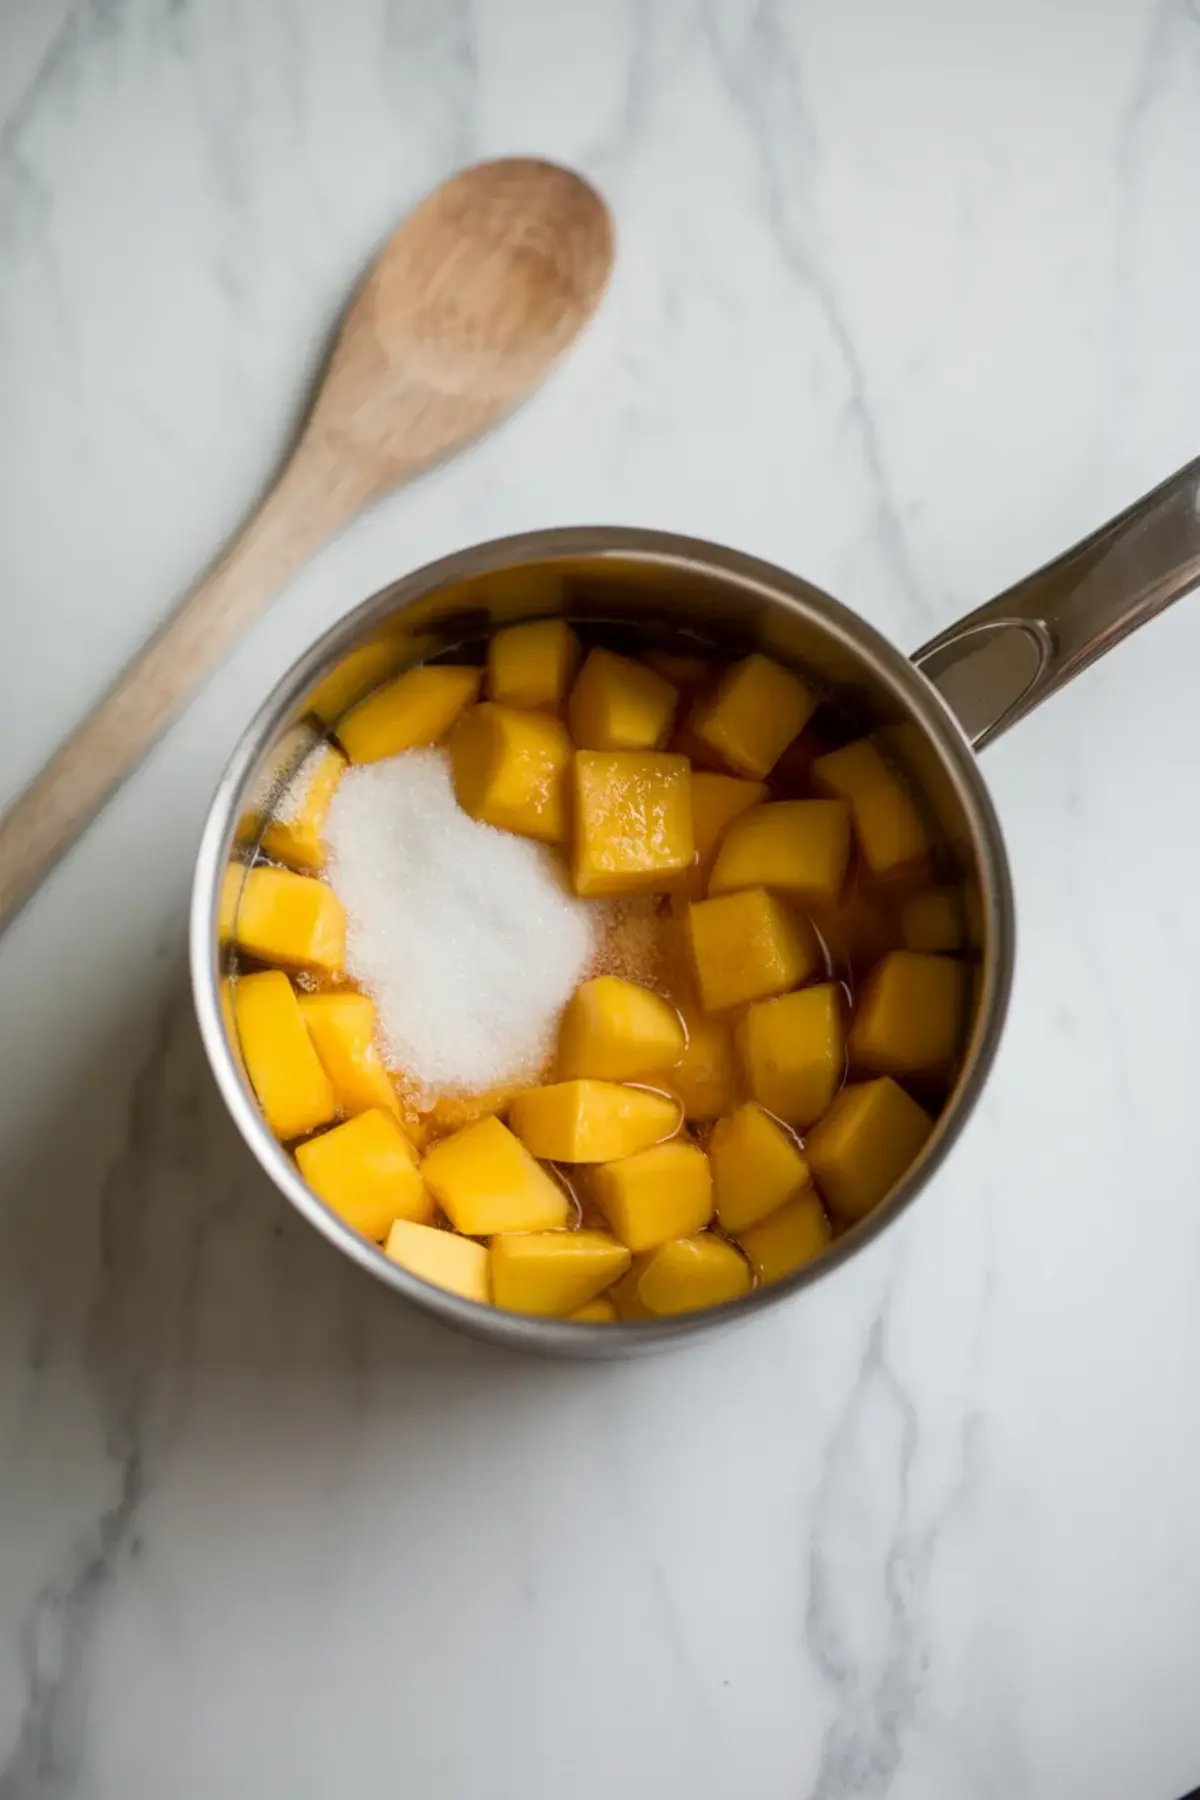
A good mango mochi recipe starts with a scoopable center. That’s why I cook the fruit with sugar first, then thicken with a small amount of cornstarch after blending.
If your mango doesn’t break down easily, use a hand blender directly in the pan. The puree should look glossy and coat a spoon.
Freezing the balls after chilling gives you just enough time to shape without the fruit softening too quickly. I don’t skip this step anymore. It makes the wrapping process cleaner and less frustrating.
You can see a similar use of cooling and layering in my Lemon Lush Dessert, where temperature timing is key.
Sensory Notes During the Cooking Process
The mochi dough turns from white and milky to opaque and glossy. That’s how you know the starches have cooked.
After the final microwave round, stir the dough with a wet spatula. It should resist a bit but still move in one piece. If it feels loose, it needs more heat.
Let the dough cool just until it stops steaming. If it’s too hot, the mango will melt on contact. If it’s too cold, the dough stiffens and won’t seal smoothly.
Rolling the final mochi between your palms smooths out seams and gives them that soft, round finish.
I take a similar approach with the Matcha Pound Cake, where you read the batter’s cues instead of relying on the clock.
How to Spot Underdone or Overdone Dough
Undercooked mochi will tear and feel wet inside. Overcooked dough gets rubbery and won’t stretch without cracking.
Aim for opaque, slightly shiny dough that stretches but bounces back when pinched. The center should feel firm once filled but still soft enough to bite cleanly through.
Trust the appearance and feel. Temperature is harder to judge since microwave wattage varies.
Common Problems and Simple Fixes
Dough too sticky? Dust your hands and surface again. Don’t knead extra flour into it.
Filling leaking through? It wasn’t cold enough. Freeze longer next time.
Dough cracking at the seams? It cooled too much. Warm it briefly in the microwave and try again.
Mochi turning wet after storage? Store in a single layer with parchment between pieces to reduce sweating.
Flavor Variations to Try
Add 1 tablespoon coconut milk to the dough for a creamier chew.
Swap mango for strawberries and reduce the lemon by half. Strawberries release more liquid, so use 1 extra teaspoon cornstarch.
Mix in a pinch of ground ginger to the mango filling to give it warmth.
Coat the finished mochi in shredded coconut instead of cornstarch for added texture.
How to Store It Without Losing the Texture
Mochi can sit at room temperature for up to 1 day in a sealed container.
In the fridge, it keeps for 2 to 3 days. Let it warm to room temperature before serving for better chew.
To freeze, wrap each mochi individually and store in a container for up to 1 month. Thaw overnight in the fridge or at room temp for 2 hours.
Avoid microwaving chilled mochi. It ruins the texture.
Tips From Testing It Repeatedly
Use a silicone mat to prevent sticking instead of parchment. Wet your spatula before stirring the hot dough so it glides.
Shape the dough pieces before you take out the frozen filling. It saves time and prevents melting.
Use gloves if your hands run warm. The mango softens quickly during shaping.
Serving Suggestions for Homemade Mango Mochi
Serve chilled with green tea for a clean finish. Cut one in half and plate with whipped cream.
Pack in a lunchbox with a small ice pack. Arrange with other Asian desserts for a themed dessert board.
Eat right out of the fridge when no one’s watching.
Save This Recipe and Share What You Tried
Save this mango mochi recipe to your Homemade Mochi or Asian Desserts board to come back to it later. If you tried a different fruit or added a twist, share it in the comments. I’d love to hear how yours turned out.
Homemade Mango Mochi Recipe
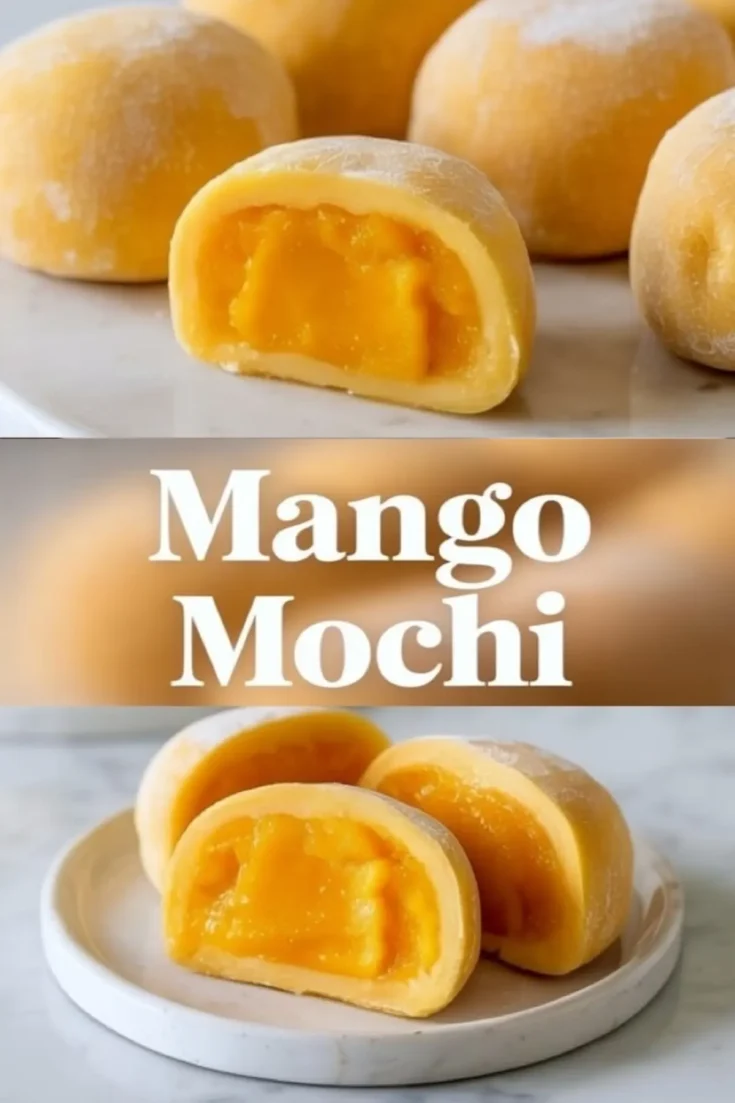
This mango mochi recipe blends juicy tropical flavor with the soft, chewy texture of traditional Japanese dessert favorites. Made with just a few simple ingredients, this homemade mochi is perfect for anyone who enjoys fun, hands-on sweets. Ideal for experimenting with Asian desserts or bringing something new to your treat rotation. It’s one of those fun baking recipes that’s surprisingly easy but incredibly satisfying. Enjoy this soft, chewy mango dessert chilled or room temp.
Ingredients
- FOR THE MANGO FILLING
- 1 ½ cups fresh mango, chopped (about 2 medium mangos)
- 2 tbsp sugar (adjust to taste)
- 2 tsp cornstarch
- 1 tbsp lemon juice
- FOR THE MOCHI DOUGH
- 1 cup glutinous rice flour (also called mochiko)
- ¼ cup sugar
- ¾ cup water
- Cornstarch or potato starch, for dusting
Instructions
- MAKE THE MANGO FILLING: In a small saucepan, combine the chopped mango, sugar, and lemon juice. Cook over medium heat, stirring occasionally, until the mango breaks down and becomes soft, about 5 to 7 minutes.
- PUREE AND THICKEN: Use a hand blender or potato masher to blend the mango mixture until smooth. Stir in the cornstarch and continue cooking for 2 to 3 minutes until the mixture thickens to a scoopable consistency.
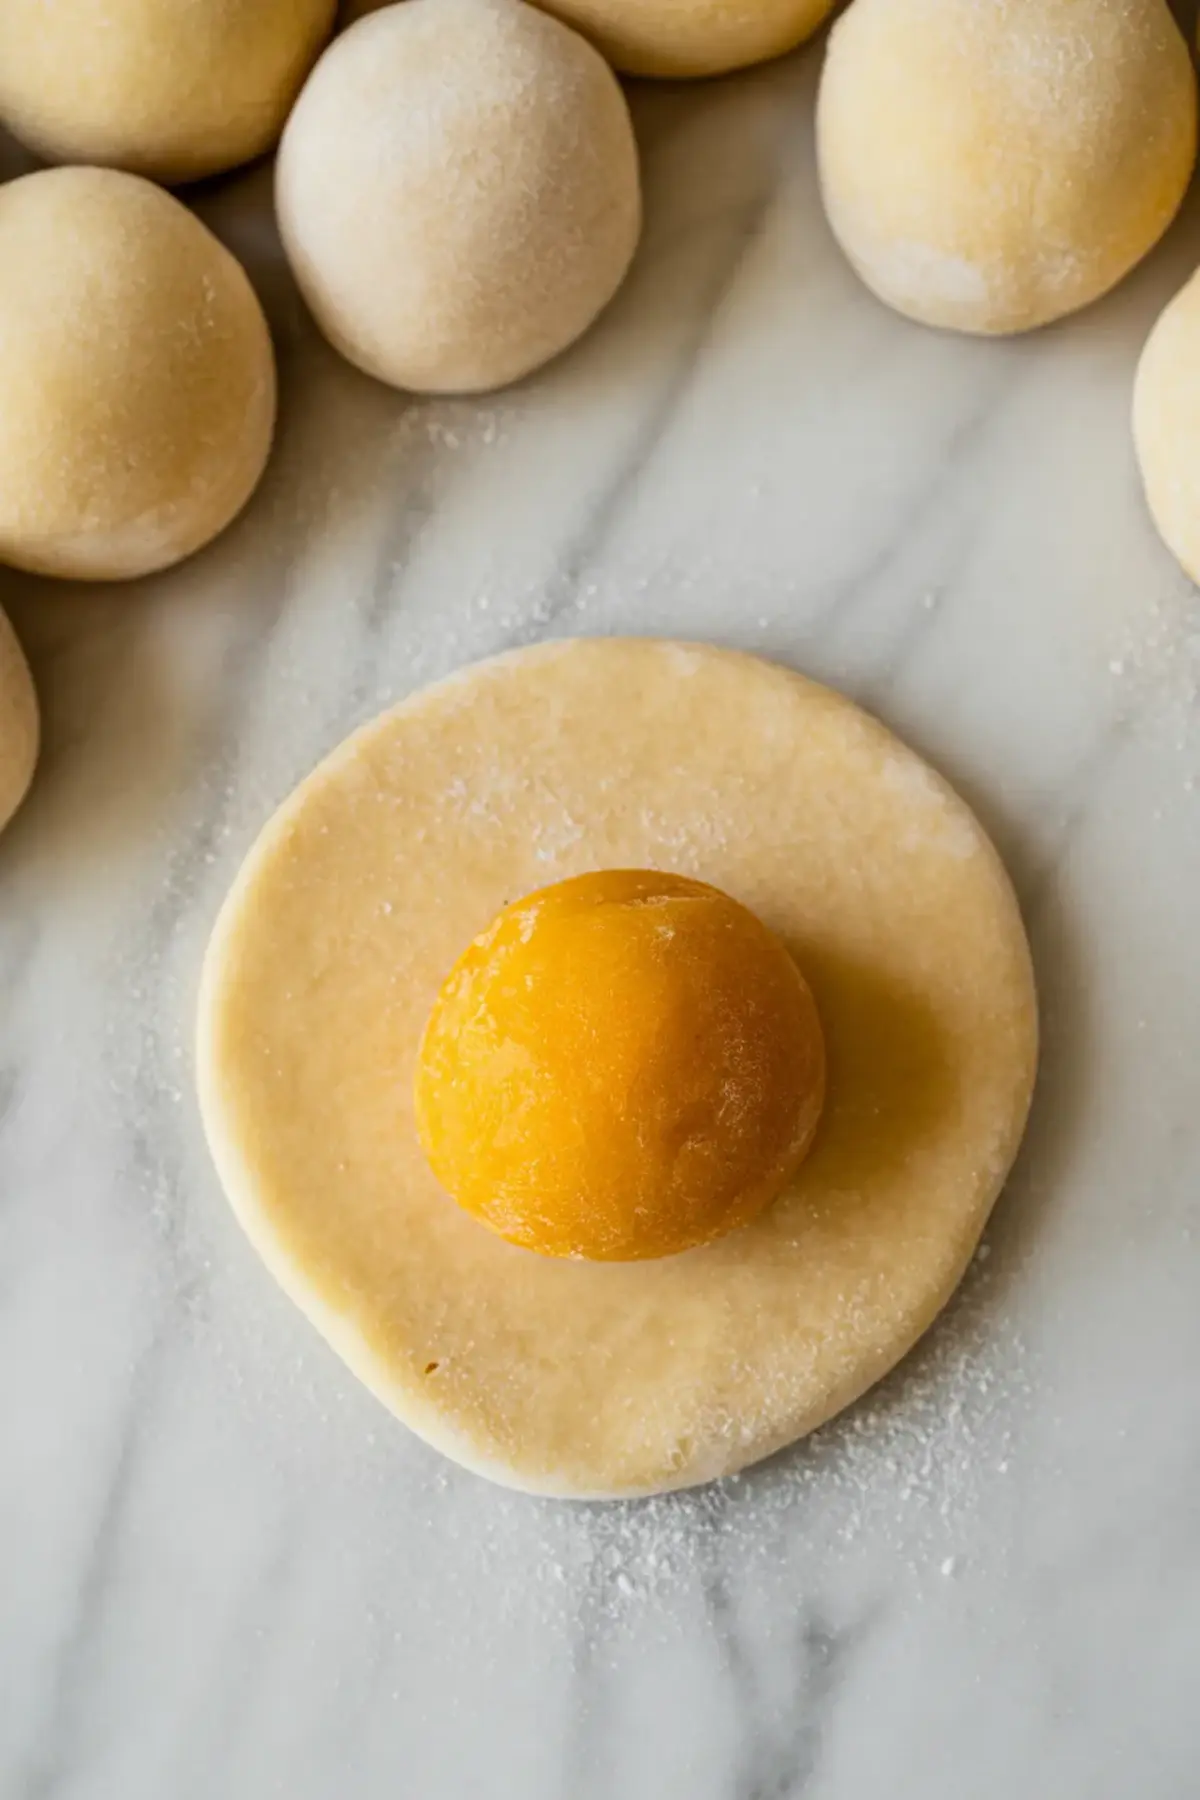
- CHILL AND PORTION: Transfer the mango mixture to a bowl and refrigerate until firm, about 1 hour. Once chilled, scoop into small 1-teaspoon-sized balls and freeze until solid to make wrapping easier.
- MAKE THE MOCHI DOUGH: In a microwave-safe bowl, mix glutinous rice flour, sugar, and water until smooth. Cover loosely with plastic wrap or a microwave-safe plate.
- COOK THE DOUGH: Microwave on high for 1 minute, stir with a wet spatula, then microwave for another minute. Stir again, then microwave one final time for 30 seconds. The dough should look opaque and feel stretchy.
- COOL THE DOUGH: Let the mochi dough cool for a few minutes until it's warm but not too hot to handle.
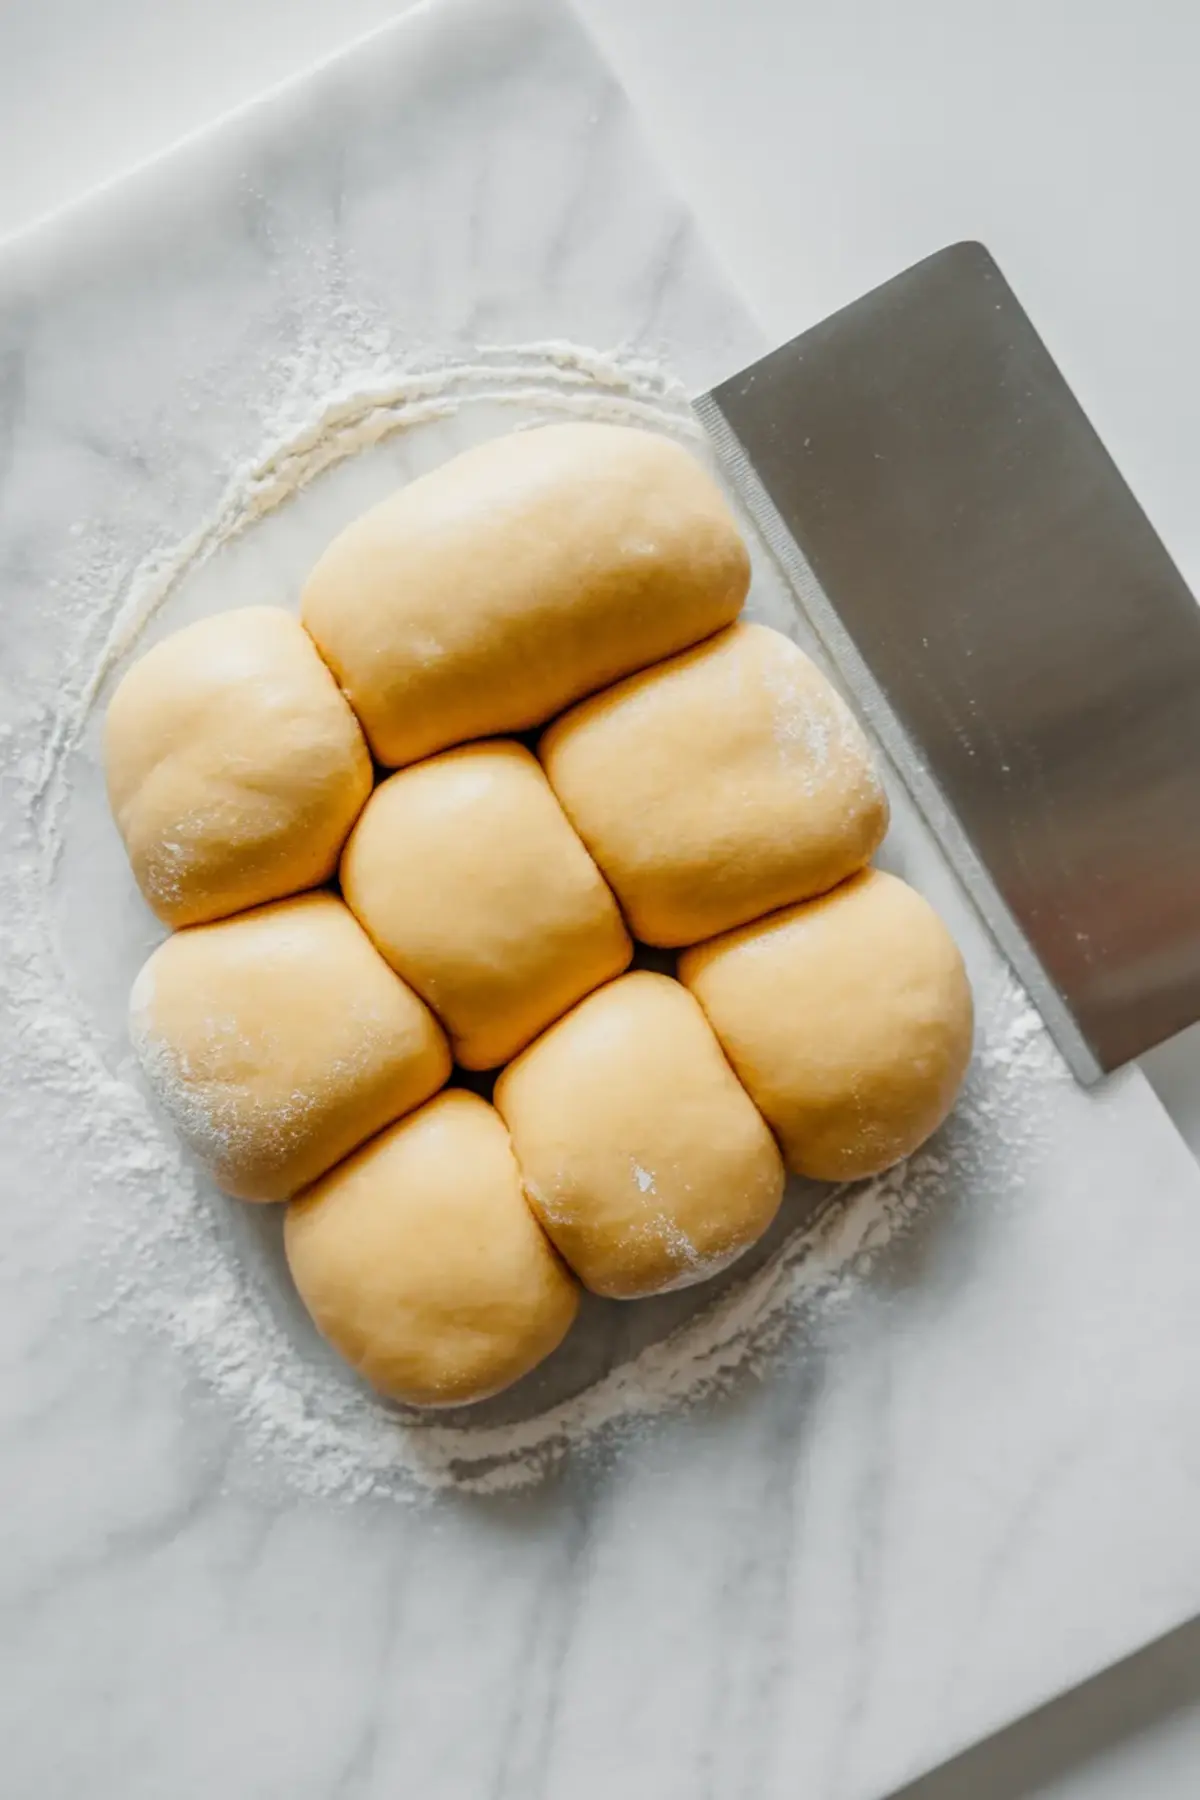
- PREPARE TO SHAPE: Generously dust your work surface and hands with cornstarch. Turn the dough onto the surface and divide into 8 equal portions using a bench scraper or knife.
- FILL AND SHAPE: Flatten one piece of dough into a 3-inch-wide disc. Place a frozen mango ball in the center. Gently stretch and pinch the dough around the filling to seal it, then roll between your palms to form a smooth ball.
- FINISH THE MOCHI: Repeat the process with the remaining dough and filling. Lightly dust each mochi with cornstarch to prevent sticking.
Notes
Store finished mochi in an airtight container at room temperature for up to 1 day, or refrigerate for up to 3 days. For best texture, allow refrigerated mochi to come to room temperature before eating.