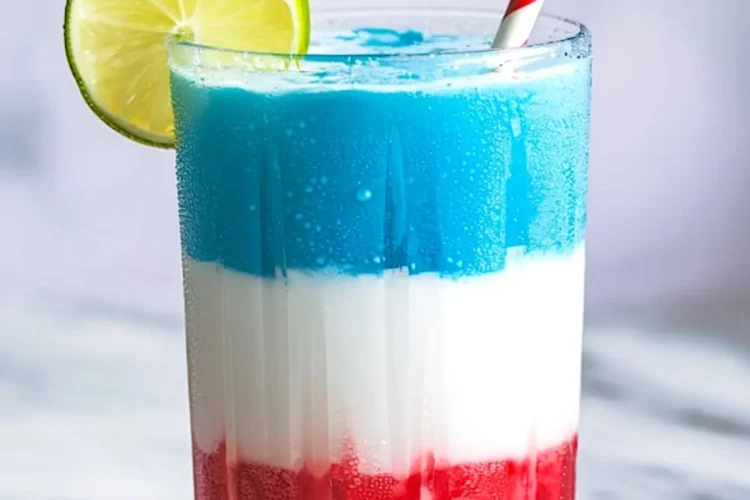
You’ve seen layered slushies before, at carnivals, fairs, or maybe in your local grocery freezer. But building your own from fresh fruit and real flavor? That’s where things get interesting. This red, white, and blue cocktail isn’t just for show. It’s about control. You get to decide how sweet, how creamy, and how frozen you want each sip. And when it’s hot and humid out, nothing hits like a tall glass stacked with color and crushed ice.
You’ll learn how to layer it properly, what ingredient swaps matter, and why some versions melt into a mess while others stay crisp and striped.
Following a special diet?
Every recipe on this site can be converted to gluten-free, vegan, dairy-free, keto, nut-free or egg-free with adjusted ratios so nothing falls flat.
Try the Recipe Converter →Why This Patriotic Slushie Actually Works
Most layered drinks fall flat because the liquids mix. That’s usually because they ignore density. The real secret? Start with the heaviest blend on the bottom and move lighter as you go. Each layer here is thick enough to stand on its own but light enough to sip through a straw. I’ve made these for the Fourth of July, backyard birthdays, and even just for fun on a Sunday afternoon. They never last long.

Red Layer: Frozen Fruit and Juicy Base Keep It Bold
The red base should anchor the drink. I use frozen strawberries or cherries with cranberry juice or fruit punch. That’s where the color really comes from. If your fruit isn’t sweet enough, a little simple syrup helps. But I always taste it first before blending. Ice is optional here. If you start with frozen fruit, you may not need it. If the texture runs too thin, add just a few cubes to thicken.
White Layer: Creamy Coconut Blends Smoothly With Lemon
The middle layer always surprises people. Canned coconut milk makes it rich, but lemonade cuts through the heaviness. I sometimes add a tablespoon of sweetened condensed milk for extra body. Ice is non-negotiable here—it gives it that necessary slush factor. You want this layer thick and pale, not watery or foamy.
I’ve compared full-fat and light coconut milk in this layer. Full-fat gives a better structure and color contrast. The lighter version just doesn’t hold its own when poured. For visual appeal and stability, I stick with the full-fat every time.
Blue Layer: Sharp Color Without Artificial Aftertaste

Blue raspberry drinks are common here, but I prefer frozen blueberries. They give a natural color and a deeper flavor. I blend them with a blue sports drink and sometimes a touch of syrup. If you go this route, avoid over-blending. Too much liquid will make the mix too thin to layer. Aim for the consistency of a thick smoothie.
Layering Technique That Actually Keeps Lines Clean
To layer cleanly, chill each mixture for at least 10 minutes before assembly. I pour the base layer, freeze for 5–10 minutes, then add the next with the back of a spoon to slow the flow. This is the difference between striped and swirled.
Work with gravity. Always pour the next layer gently. The spoon helps disperse the weight so you don’t break through the layer beneath it.
Glassware and Freezer Tips for Clean Presentation
Tall, narrow glasses make the layers stand out. I’ve also used mason jars, which keep things cold longer. Between each layer, freezing is essential. Without that short chill, you’ll get bleeding between the stripes.
Don’t skip the chill time. Even five minutes helps set the boundary between flavors.
Serving Notes and Festive Touches That Actually Matter
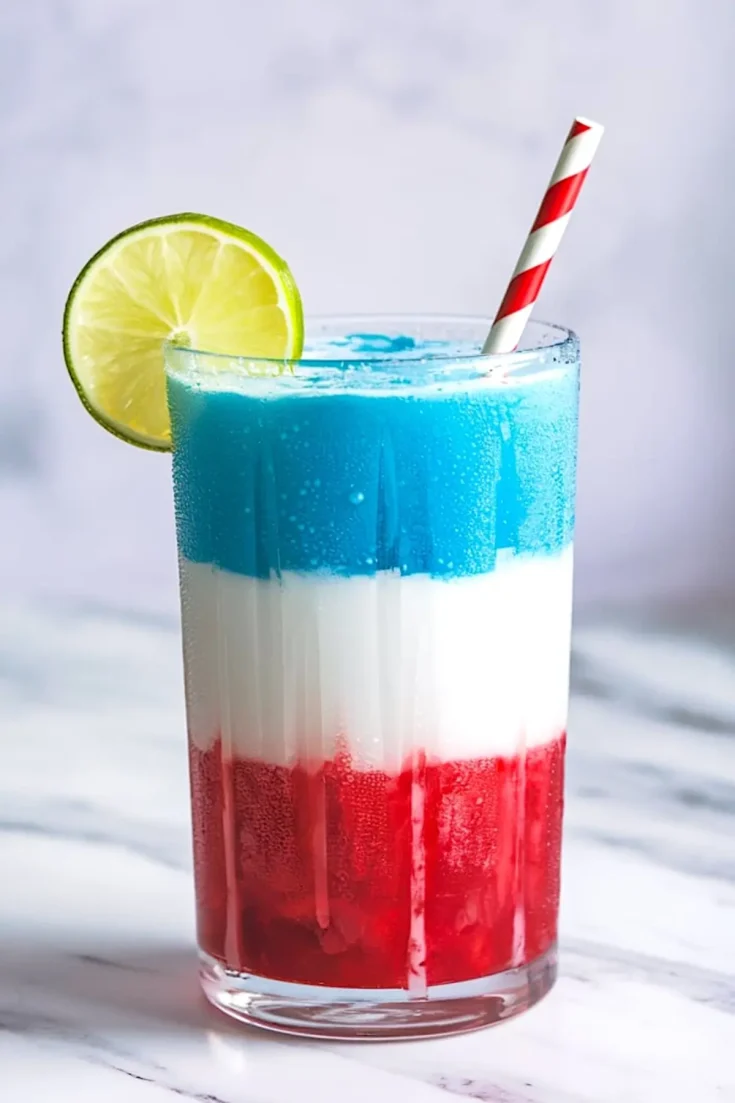
Serve with a lime slice and a red-striped straw. It’s not just cute. The lime adds brightness, especially after the sweetness of the condensed milk layer. I like to add it just before serving so it stays fresh.
You can spike this with a splash of rum or vodka if you’re serving adults. Keep the base layers the same—just add the alcohol after blending, before pouring.
How Long Does a Patriotic Slushie Hold Its Shape?
If layered and frozen between steps, the drink will hold for about 20–30 minutes before softening. I don’t recommend making it too far ahead. You can prep the blends earlier in the day and store them separately in jars. Then build when ready to serve.
This helps avoid color blending and soggy bottoms.
Want More Red, White & Blue Ideas?
You can serve this alongside these Patriotic Chocolate Balls for a no-bake treat, or pair with Fireworks Sugar Cookies for a fun Fourth of July dessert table. If you’re planning ahead, Patriotic Cheesecake makes a great chilled centerpiece.
Save This Patriotic Slushie for Later and Share Your Twist
If this red, white, and blue slushie makes it to your summer celebration, I’d love to know how you built yours. Did you switch the order? Use different fruits? Share your tips in the comments.
And don’t forget to save this to your 4th of July board on Pinterest so you have it ready next time the heat rolls in.
Patriotic Slushie Recipe
Cool off with a colorful, fruity layered slushie that’s perfect for patriotic holidays or fun summer gatherings. This recipe uses simple ingredients and a layering method based on density to create bold, clean stripes in red, white, and blue. Each layer can be customized for sweetness or creaminess, and you can build them in any order—just pour from heaviest to lightest.
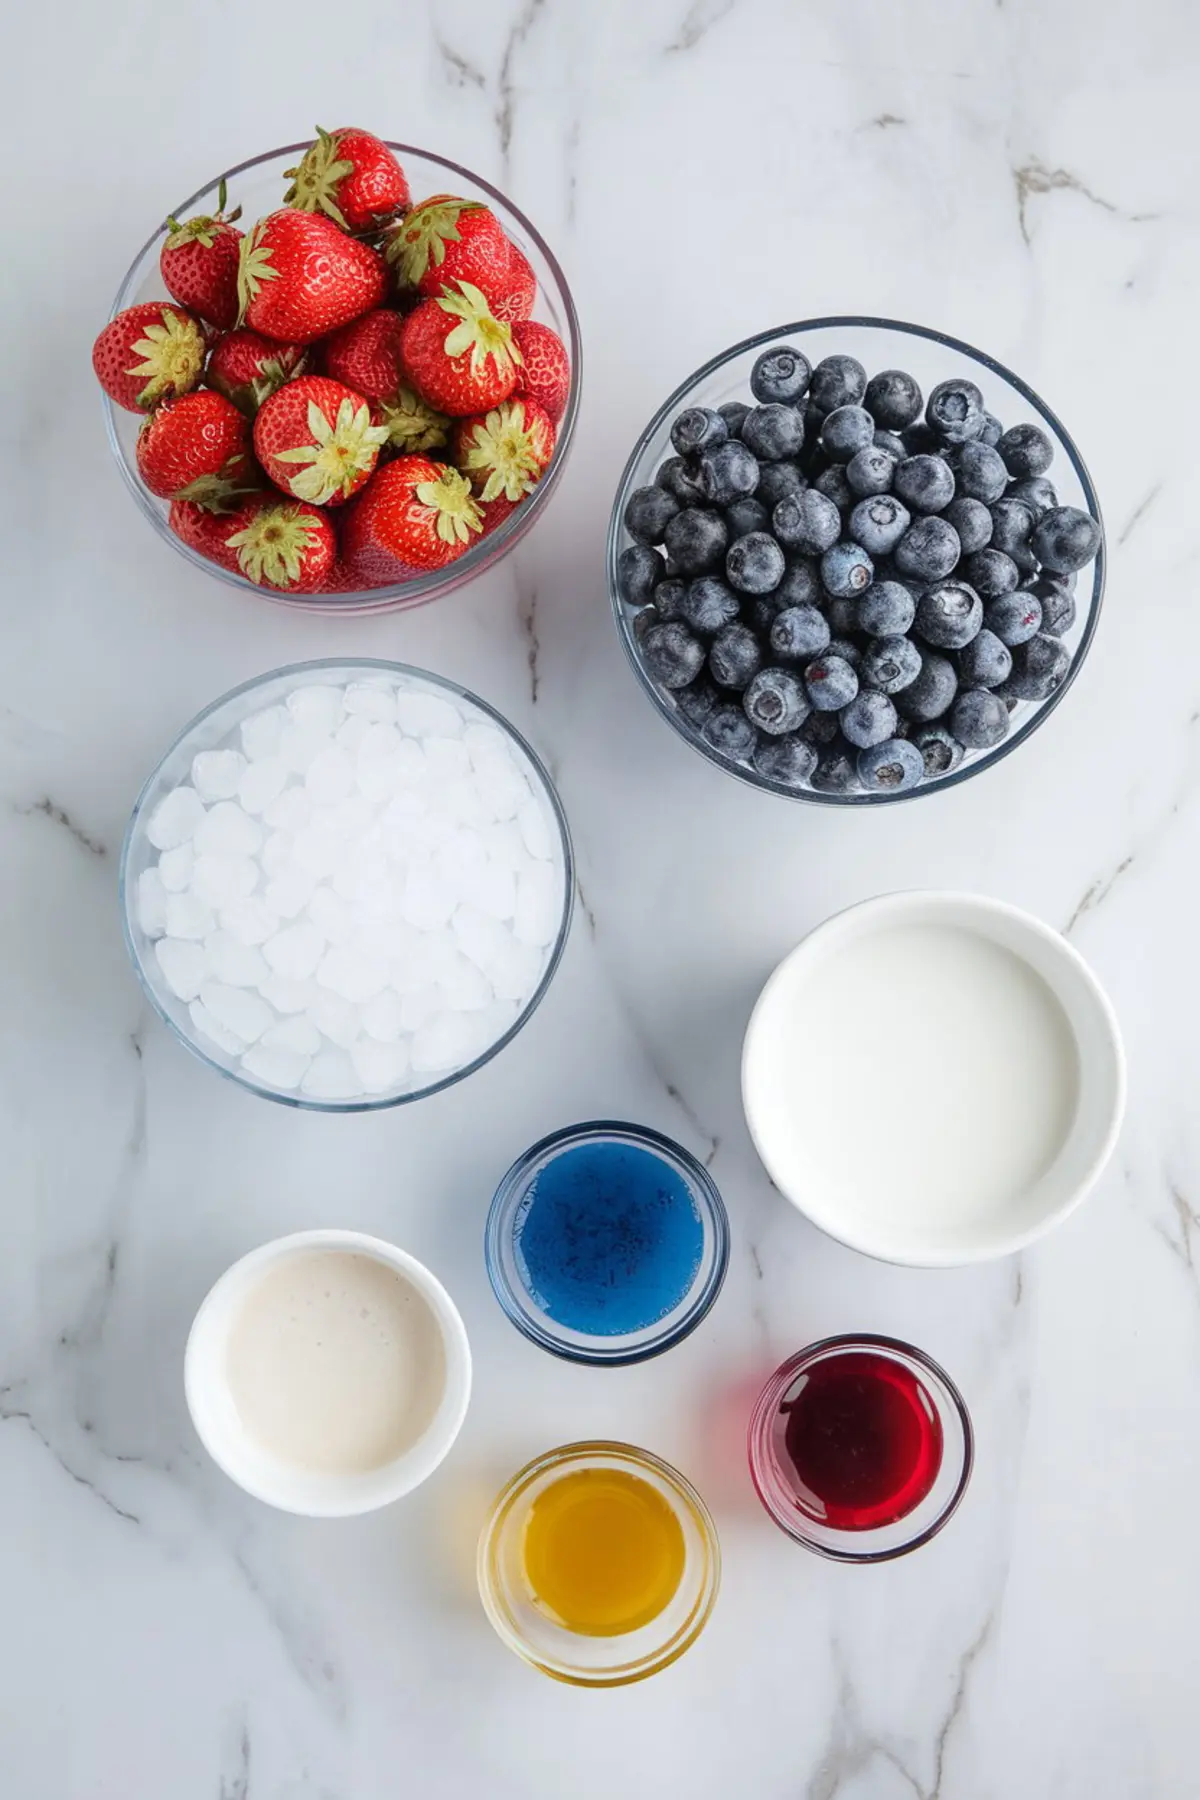
Ingredients
- FOR THE RED LAYER
- 1 cup frozen strawberries or cherries
- 1/2 cup cranberry juice or fruit punch
- 1 tbsp simple syrup (optional)
- A small handful of ice (only if needed for thickness)
- FOR THE WHITE LAYER
- 1 cup ice
- 1/2 cup canned coconut milk
- 1/4 cup lemonade
- 1 tbsp sweetened condensed milk (optional)
- FOR THE BLUE LAYER
- 1 cup frozen blueberries or blue raspberry drink
- 1/2 cup blue sports drink (such as Gatorade or Powerade)
- 1 tbsp simple syrup (optional)
- A small handful of ice (optional)
- OPTIONAL GARNISH
- Lime slice
- Red and white striped paper straw
Instructions
- MAKE THE BLUE LAYER: Add frozen blueberries, blue sports drink, and simple syrup to a blender. Blend until smooth and thick, aiming for a pourable texture without being too watery. Transfer the mixture to a jar and place in the freezer.
- MAKE THE WHITE LAYER: Rinse the blender, then add ice, coconut milk, lemonade, and sweetened condensed milk if using. Blend until creamy and thick. Pour into another jar and freeze until ready to layer.
- MAKE THE RED LAYER: Rinse the blender again and add frozen strawberries, cranberry juice or fruit punch, and simple syrup. Blend until smooth and vibrant. Store in the freezer alongside the other layers.
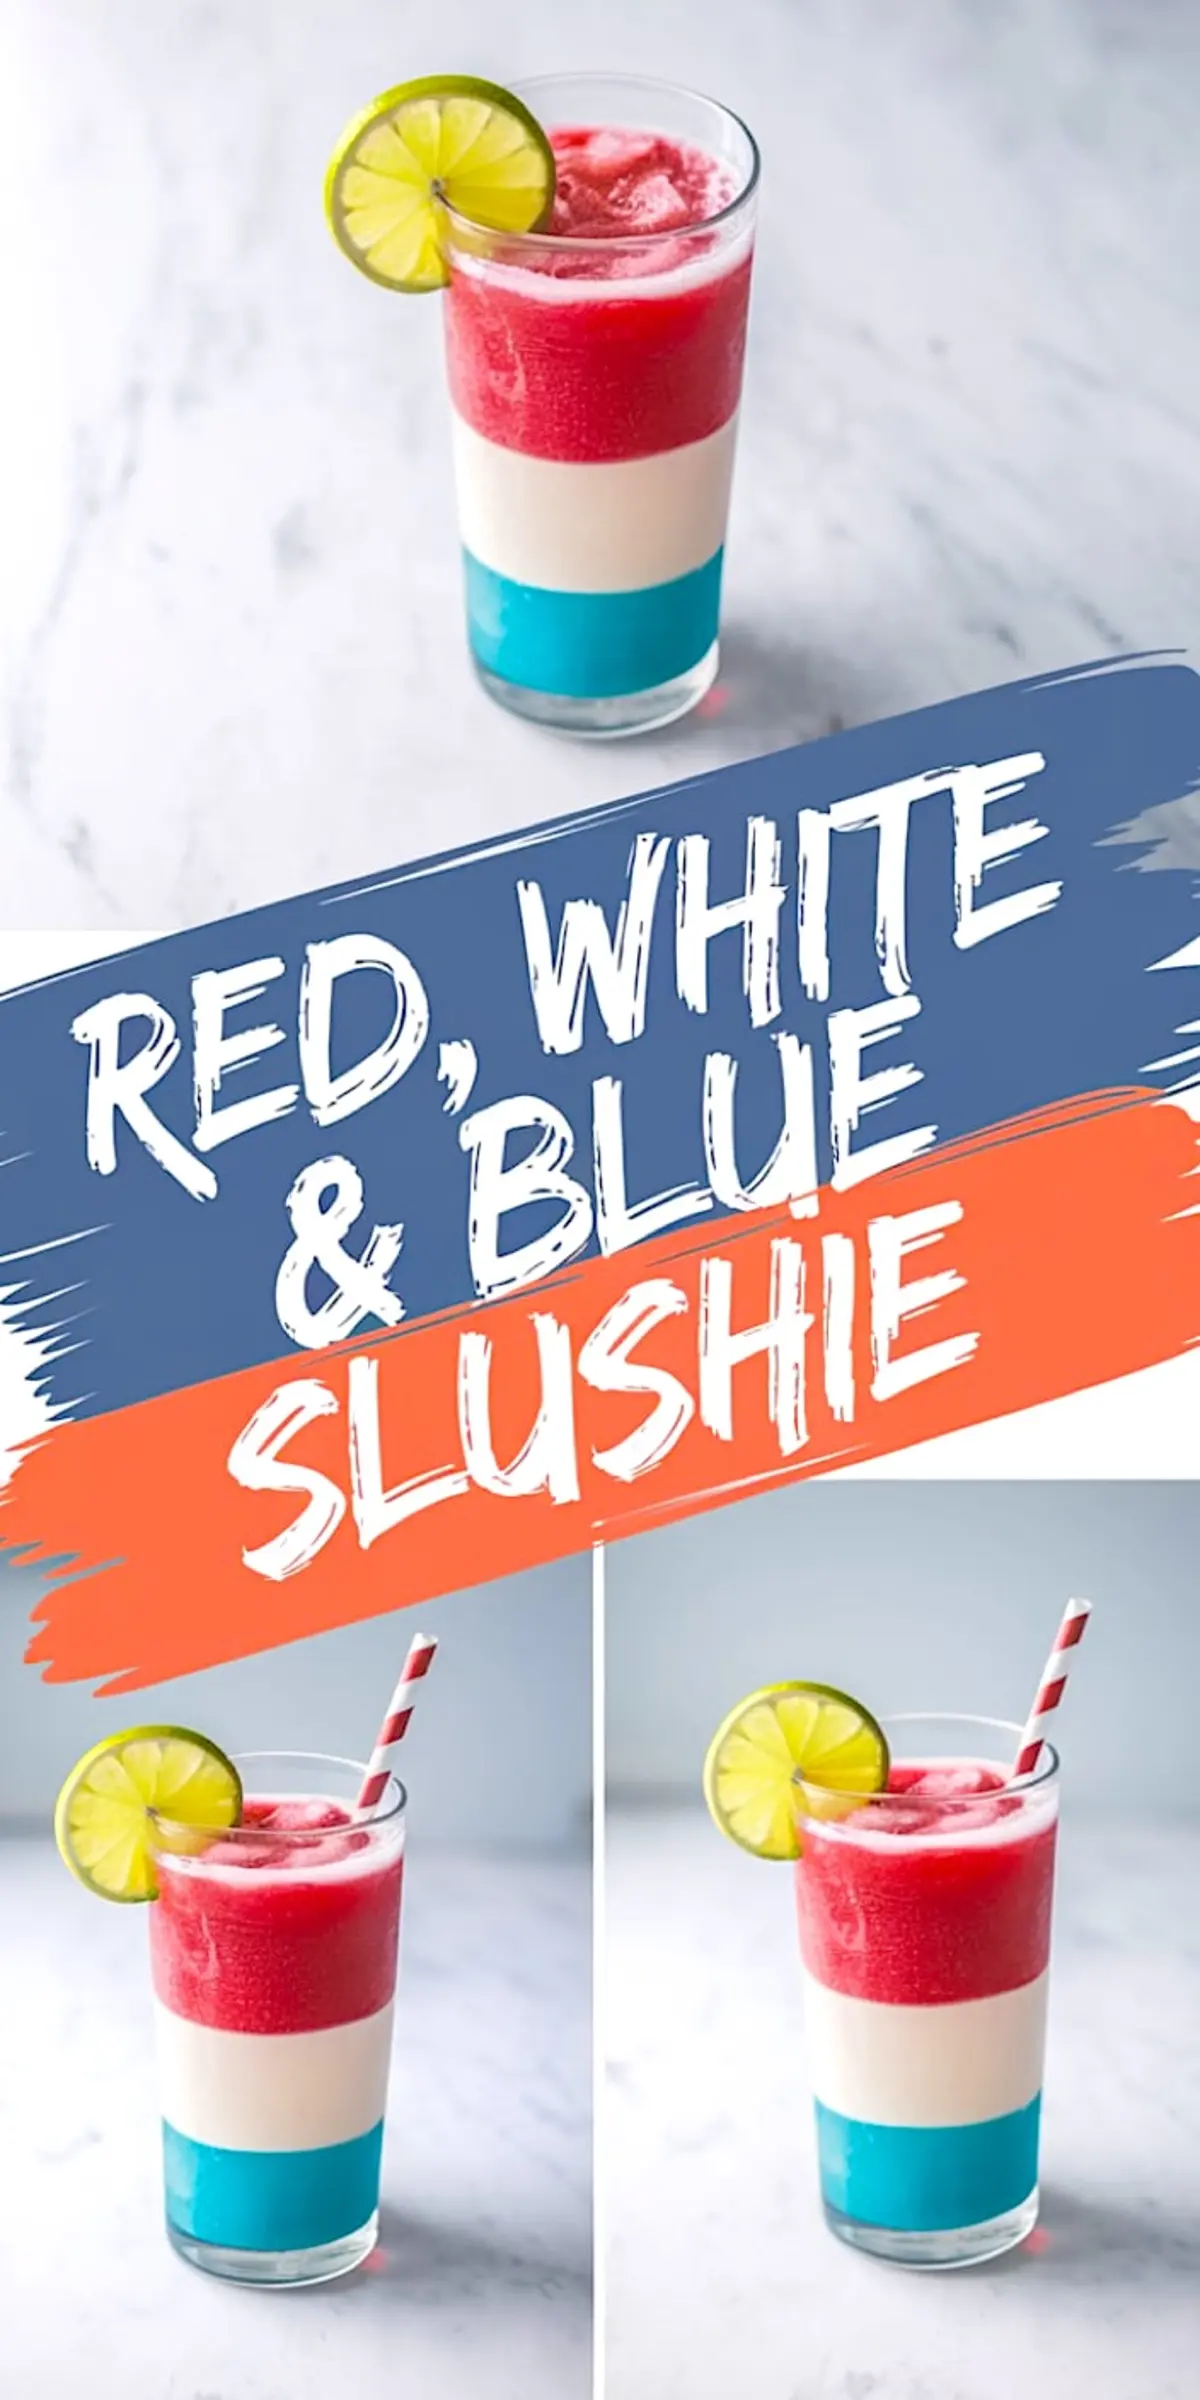
- CHOOSE YOUR LAYERING ORDER: Decide between the classic red-white-blue order or the reversed blue-white-red version. Always use the heaviest mixture as the base to prevent mixing between layers.
- POUR THE FIRST LAYER: Pour the thickest, heaviest mixture into a serving glass to form the bottom layer. Freeze for 5–10 minutes to set before adding the next layer.
- ADD THE MIDDLE LAYER: Gently pour the second layer over the back of a spoon to maintain separation. Return the glass to the freezer for another 5 minutes to firm it up.
- ADD FINAL LAYER AND GARNISH: Pour the final layer over a spoon to complete the slushie. Add a lime slice and a festive straw before serving immediately.
Notes
For best visual results, avoid overfilling layers and keep each one as thick as possible. Simple syrup can be adjusted or omitted based on sweetness preferences. A high-speed blender works best for a smooth consistency.
Nutrition Information
Yield
2Serving Size
1Amount Per Serving Calories 363Total Fat 14gSaturated Fat 11gTrans Fat 0gUnsaturated Fat 1gCholesterol 3mgSodium 65mgCarbohydrates 65gFiber 5gSugar 51gProtein 3g