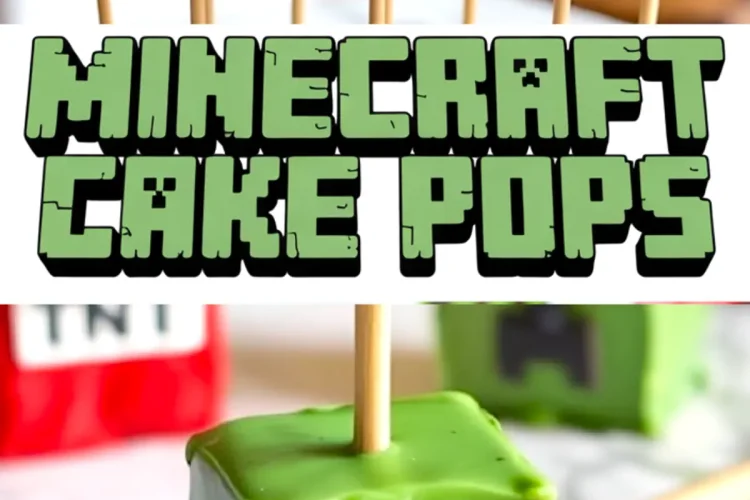
There’s a reason cake pops keep showing up at birthday tables. You can hold one in your hand, no fork needed. They’re tidy. They’re fun. And with the right idea, they’re downright clever. If you’re planning a Minecraft birthday party and want a dessert that makes kids light up, these Minecraft cake pops do exactly that.
This post will walk you through how to make cake pops inspired by Minecraft characters and blocks, using ingredients you likely already have at home. You’ll also find tips that come from experience — from how to avoid cracked chocolate shells to how to keep your colors bold without fancy equipment.
Unlike a tiered Minecraft theme cake that takes hours to carve and frost, these cake pops offer something simpler. But they still feel special. That’s the balance I like to strike for kids’ parties — fuss-free on your end, exciting on theirs.
Following a special diet?
Every recipe on this site can be converted to gluten-free, vegan, dairy-free, keto, nut-free or egg-free with adjusted ratios so nothing falls flat.
Try the Recipe Converter →What You’ll Need to Make Minecraft Cake Pops
The base of these cake pops starts with a boxed cake mix. Chocolate or vanilla both work well. Once baked and cooled, you’ll crumble the cake and mix it with just enough frosting to hold it together. I’ve used both store-bought and homemade frosting here. If I have time, I make a basic buttercream. But for party prep, a good tub of frosting does the job just fine.
You’ll also need candy melts in green, white, black, and brown. If your store only has basic colors, a little gel food coloring can shift white melts to whatever you need. Don’t use water-based food dye — it seizes the chocolate. Use oil-based coloring if needed.
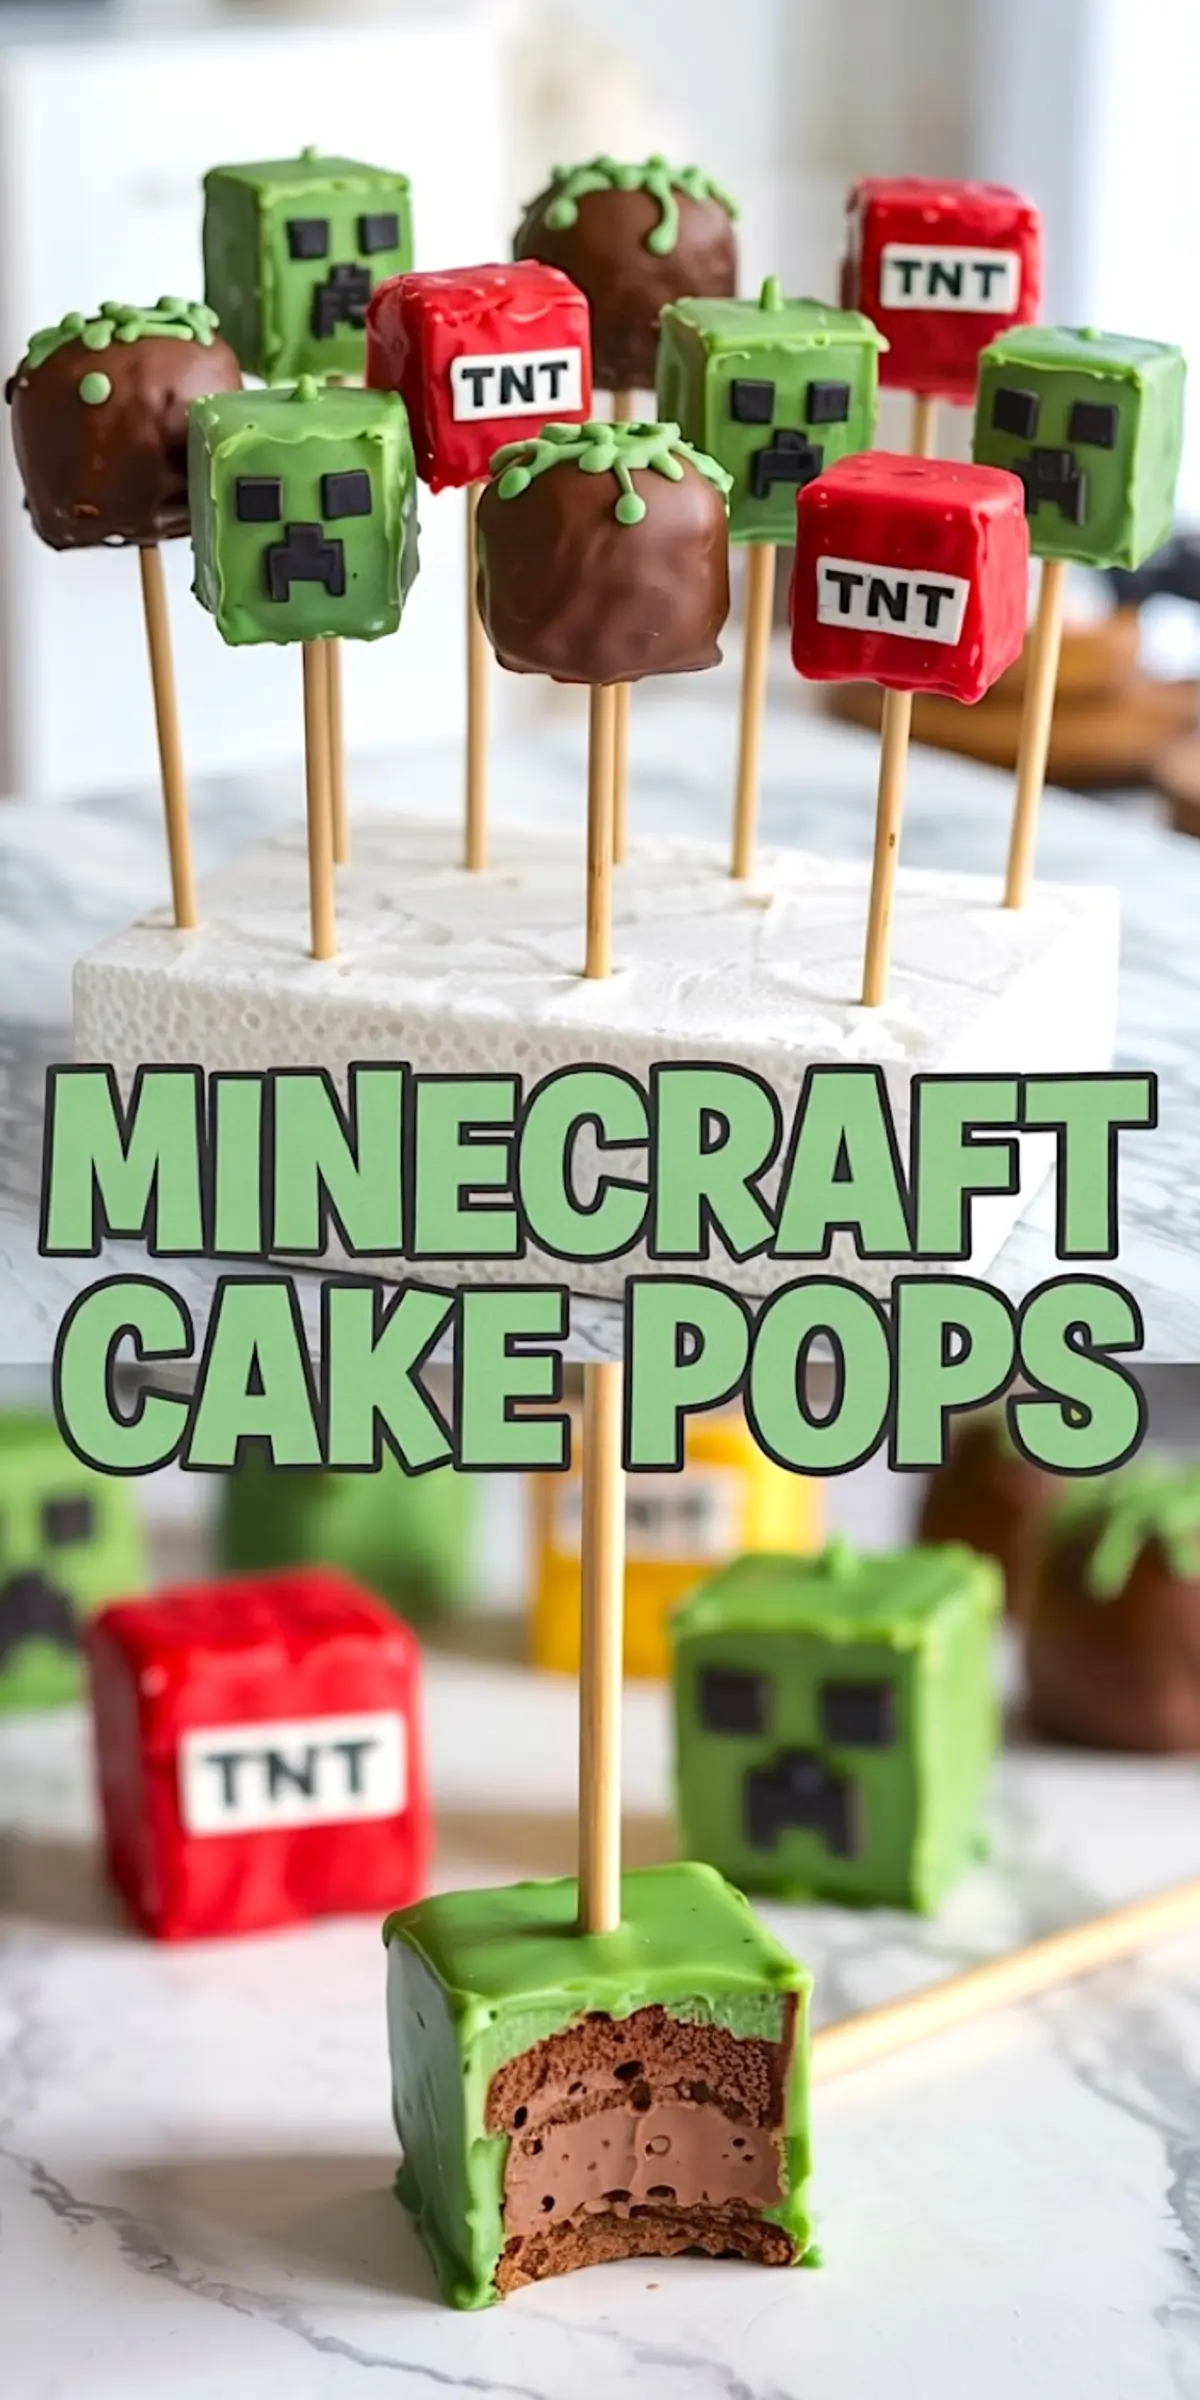
And then there’s the decoration. For Creeper faces or TNT blocks, I use edible markers or tiny squares of fondant. You can also cut shapes out of melted candy melts spread thin on parchment, then attach them after dipping.
Step-by-Step Instructions for Minecraft Desserts on Sticks
Once your cake is baked, crumble it in a large bowl. Use clean hands. Add frosting a spoonful at a time. Stop once the texture feels like playdough. It should hold together easily but not feel sticky.
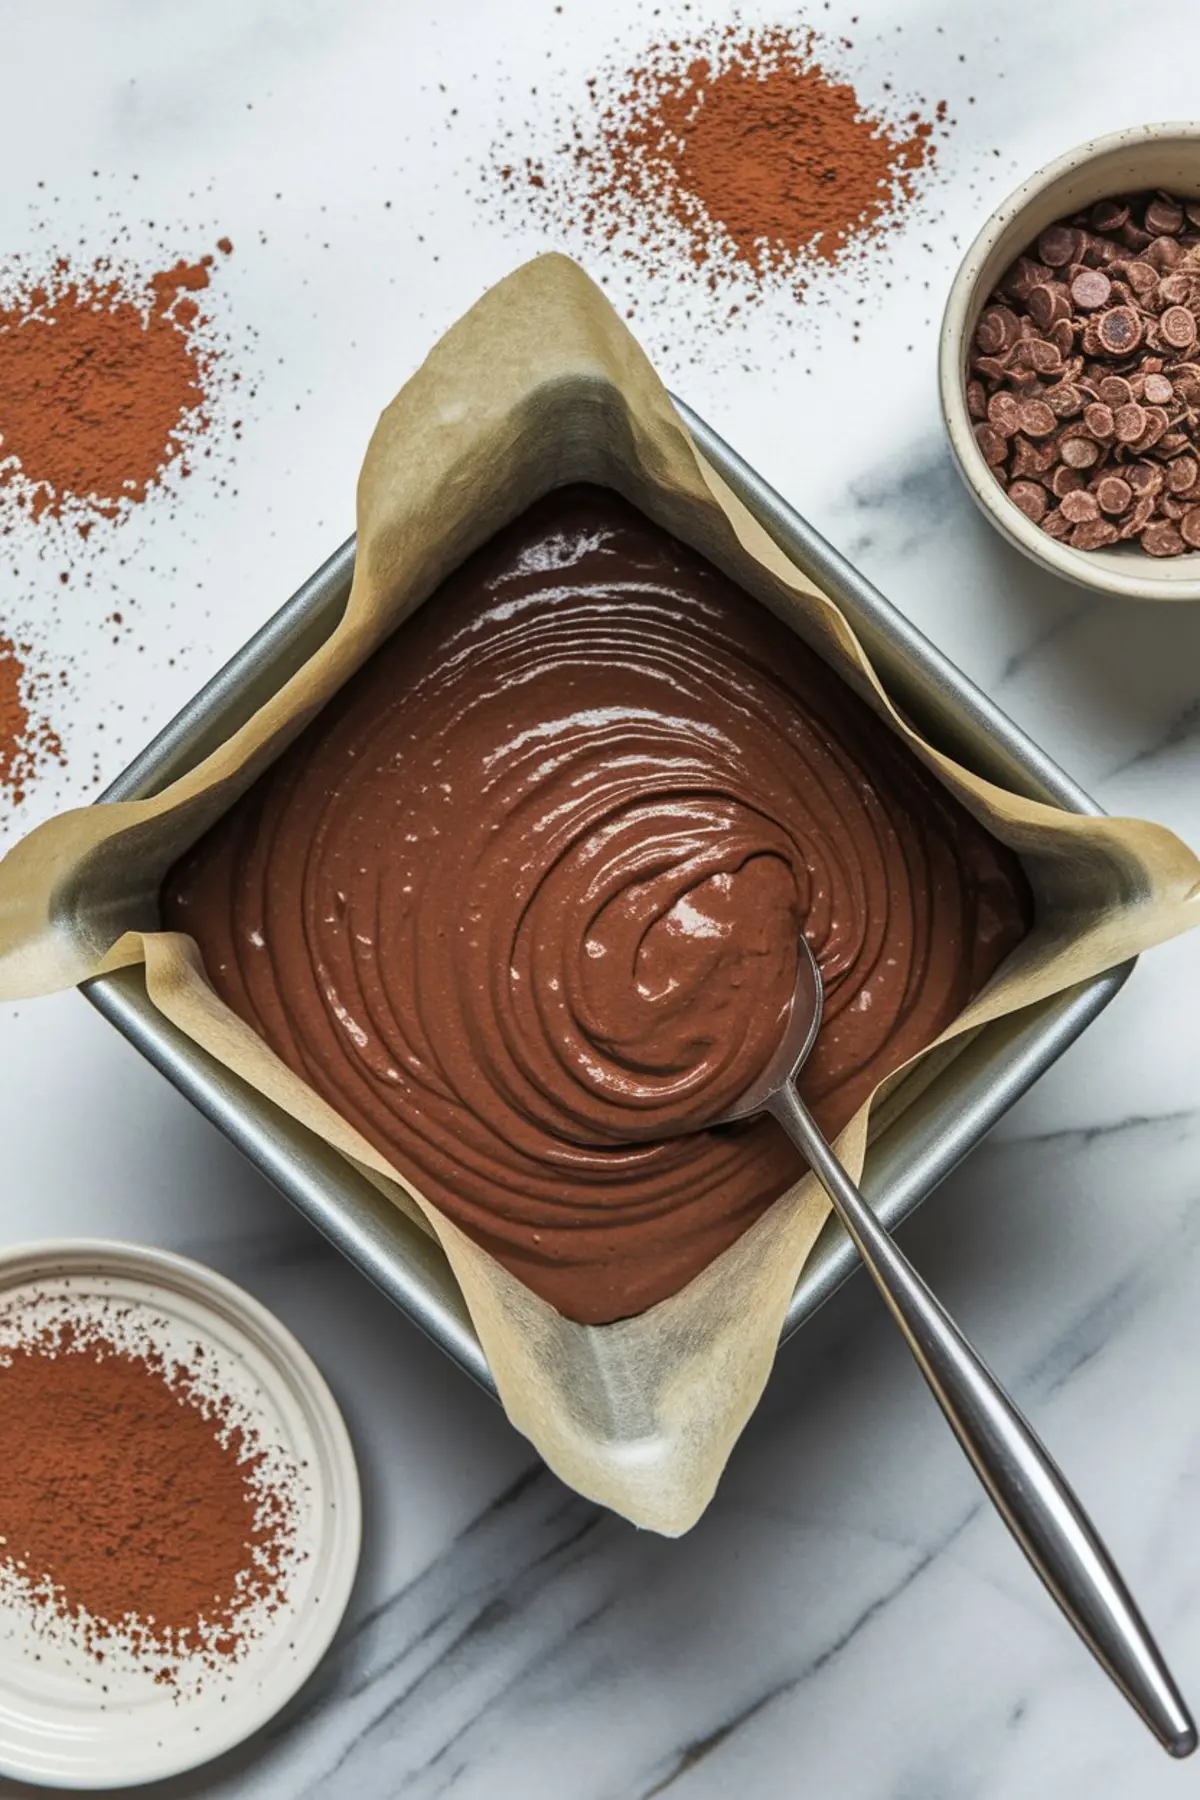
Roll your cake into balls or cubes. Cubes give a more Minecraft look, but balls are faster and easier to dip. Chill them for 20 minutes in the fridge or 10 in the freezer. If they’re too soft, they fall apart when dipped.
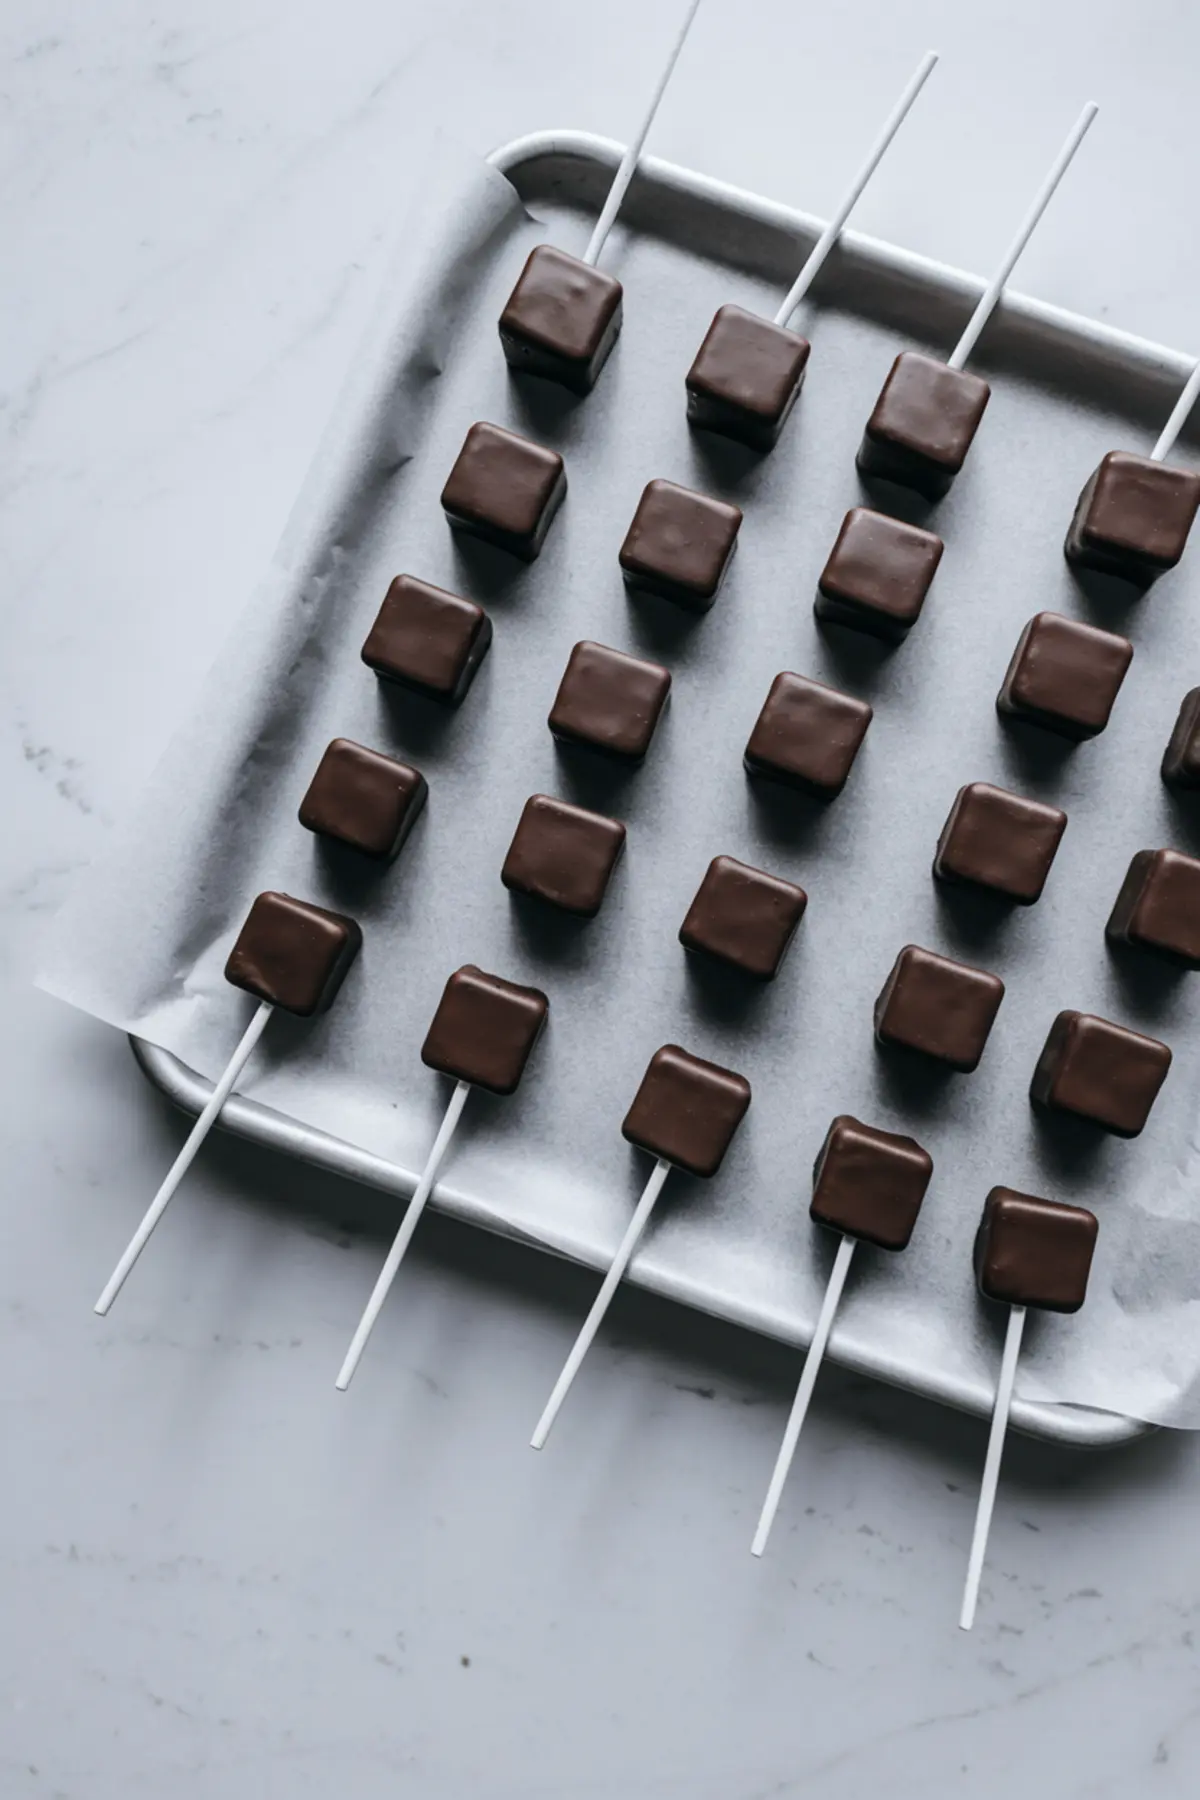
Melt the candy melts gently. I always microwave in short bursts, stirring between each one. Dip your stick into the melted coating, then press it into the cake ball. This helps it stay secure.
Let the cake pops sit upright until the coating sets at the base. Then dip fully into the melted candy. Tap off extra coating gently — never bang the stick. That causes cracks.
Decorate while the coating is still soft, or attach decorations with a little melted candy as glue once they set.
Minecraft Cake Ideas for Easy Party Wins
I’ve made these cake pops for two Minecraft birthday parties now. One was all Creepers. Bright green pops with black fondant faces. The other had a mix: TNT blocks, grass blocks, and Endermen. Both times, the kids recognized them instantly. That’s the magic of iconic shapes and color schemes.
Compared to a full Minecraft birthday party cake, this project takes far less time and leaves you with flexible serving sizes. You can make a dozen. Or forty. You can pack them in lunchboxes or place them upright in a Styrofoam base covered in green paper for a display.
And if you’re already making other Minecraft desserts, like Minecraft cookies or Minecraft cupcakes, these pops round out the table beautifully.
Tips I’ve Learned from Making Cake Pops (And Fixing Mistakes)
Cake pops can crack if the cake is too cold or if the coating is too hot. Let the pops come to fridge temperature before dipping, and let the candy cool slightly after melting.
Use a tall narrow cup for dipping. It gives you more depth and smoother coverage.
I’ve tested glass and metal bowls for melting candy. Metal holds heat longer. That’s helpful if you’re dipping a big batch, but it also makes over-heating more likely. For short batches, glass gives more control.
Add oil-based food coloring if you can’t find the exact shade. Gel coloring in candy melts sometimes gives streaks, so mix thoroughly and work fast.
Keep your coating thin. If it’s too thick, it pulls the cake pop off the stick.
Why Minecraft Snacks Like These Work So Well
When you plan a themed party, dessert should feel festive without turning into a week-long project. These Minecraft cake pops strike that balance. You can prep them a day ahead. You can keep designs simple or add detail if you enjoy that sort of thing.
Kids recognize them right away. Parents love that they’re easy to grab. And you don’t need to refrigerate them, which helps if the party’s outdoors.
These also work well next to Minecraft cupcakes ideas or a DIY Minecraft cake if you’re building a full dessert table. Everything ties together through color and shape. You don’t need matching plates or balloons. The cake pops do the work.
Make It Your Own with Small Variations
I’ve seen readers adapt this recipe with brownie bites instead of cake. That gives a richer base and skips frosting entirely. You can also make red velvet for Nether blocks or yellow cake with chocolate chips for pixel gold.
Texture matters too. Don’t over-mix the cake and frosting — it shouldn’t be mushy. You want it to hold shape without feeling heavy.
And if you want more crunch, try dipping in chocolate with a bit of crispy rice added. That gives the illusion of blocky texture without changing the overall look.
Try It, Share It, Save It
If you make these Minecraft cake pops, I’d love to hear how they turned out. Leave a comment if you hit a snag or want to share your party setup. I read them all.
Save this post on Pinterest so you can come back to it later. The images will help when you’re decorating.
Save this post to your Birthday Cake Ideas board on Pinterest so you can come back to it when planning your next party. The images will help when you’re decorating.
Minecraft Cake Pops
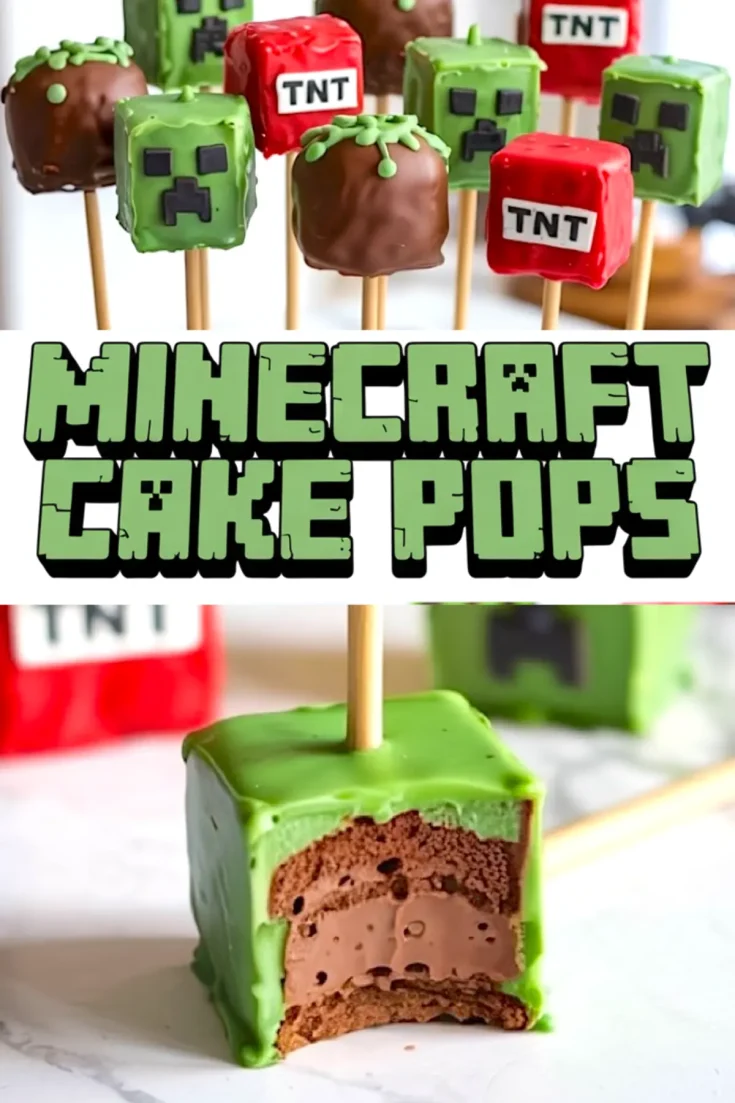
Minecraft Cake Pops bring the pixelated fun of the game into the kitchen. These cube-shaped treats combine moist chocolate cake, a smooth ganache filling, and a crisp candy coating. They're finished with fondant details to resemble favorite blocks like Creepers, TNT, and grassy terrain. This recipe is great for themed parties or creative baking sessions with kids.
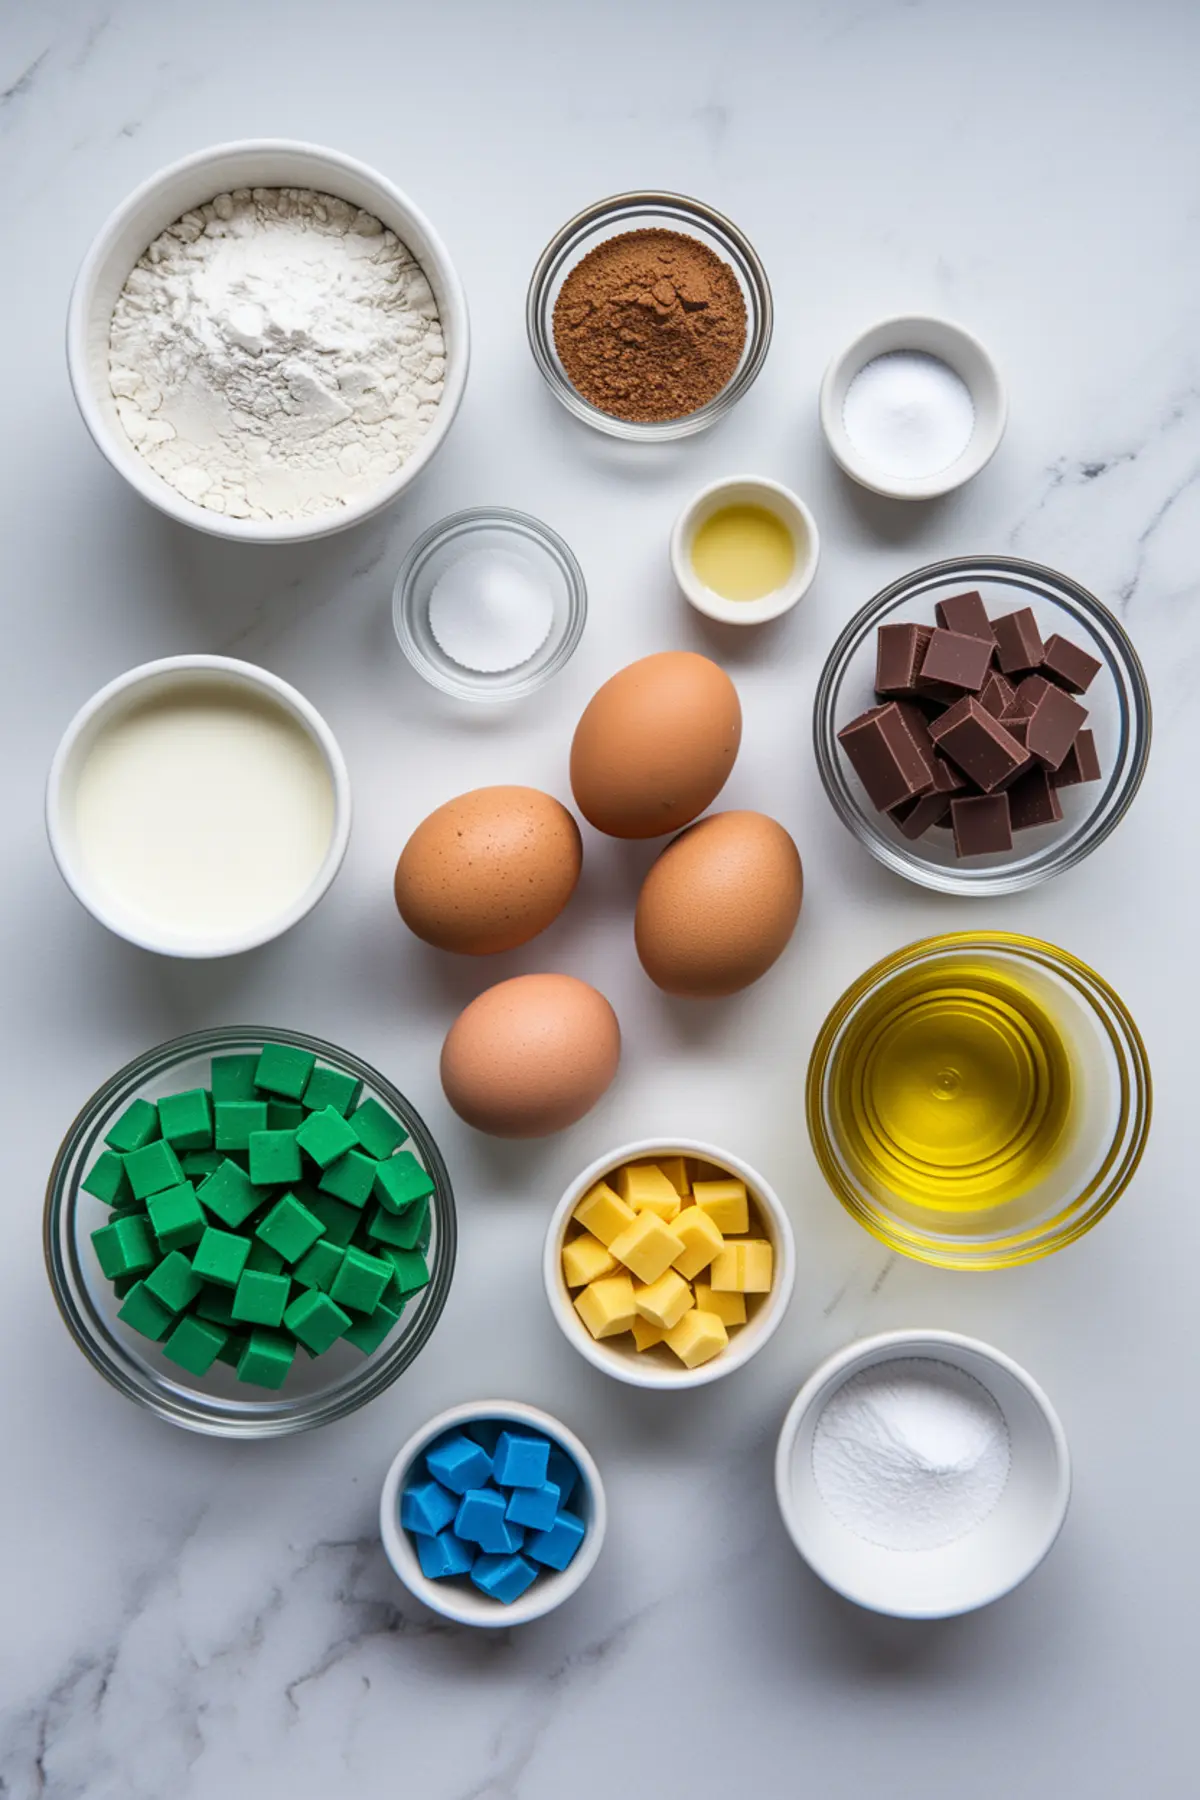
Ingredients
- FOR THE CAKE LAYER
- 1 ½ cups all-purpose flour
- 1 cup granulated sugar
- ½ cup unsweetened cocoa powder
- 1 tsp baking soda
- ½ tsp salt
- 1 cup buttermilk (or milk plus 1 tbsp vinegar)
- ½ cup vegetable oil
- 2 large eggs
- 2 tsp vanilla extract
- FOR THE GANACHE FILLING
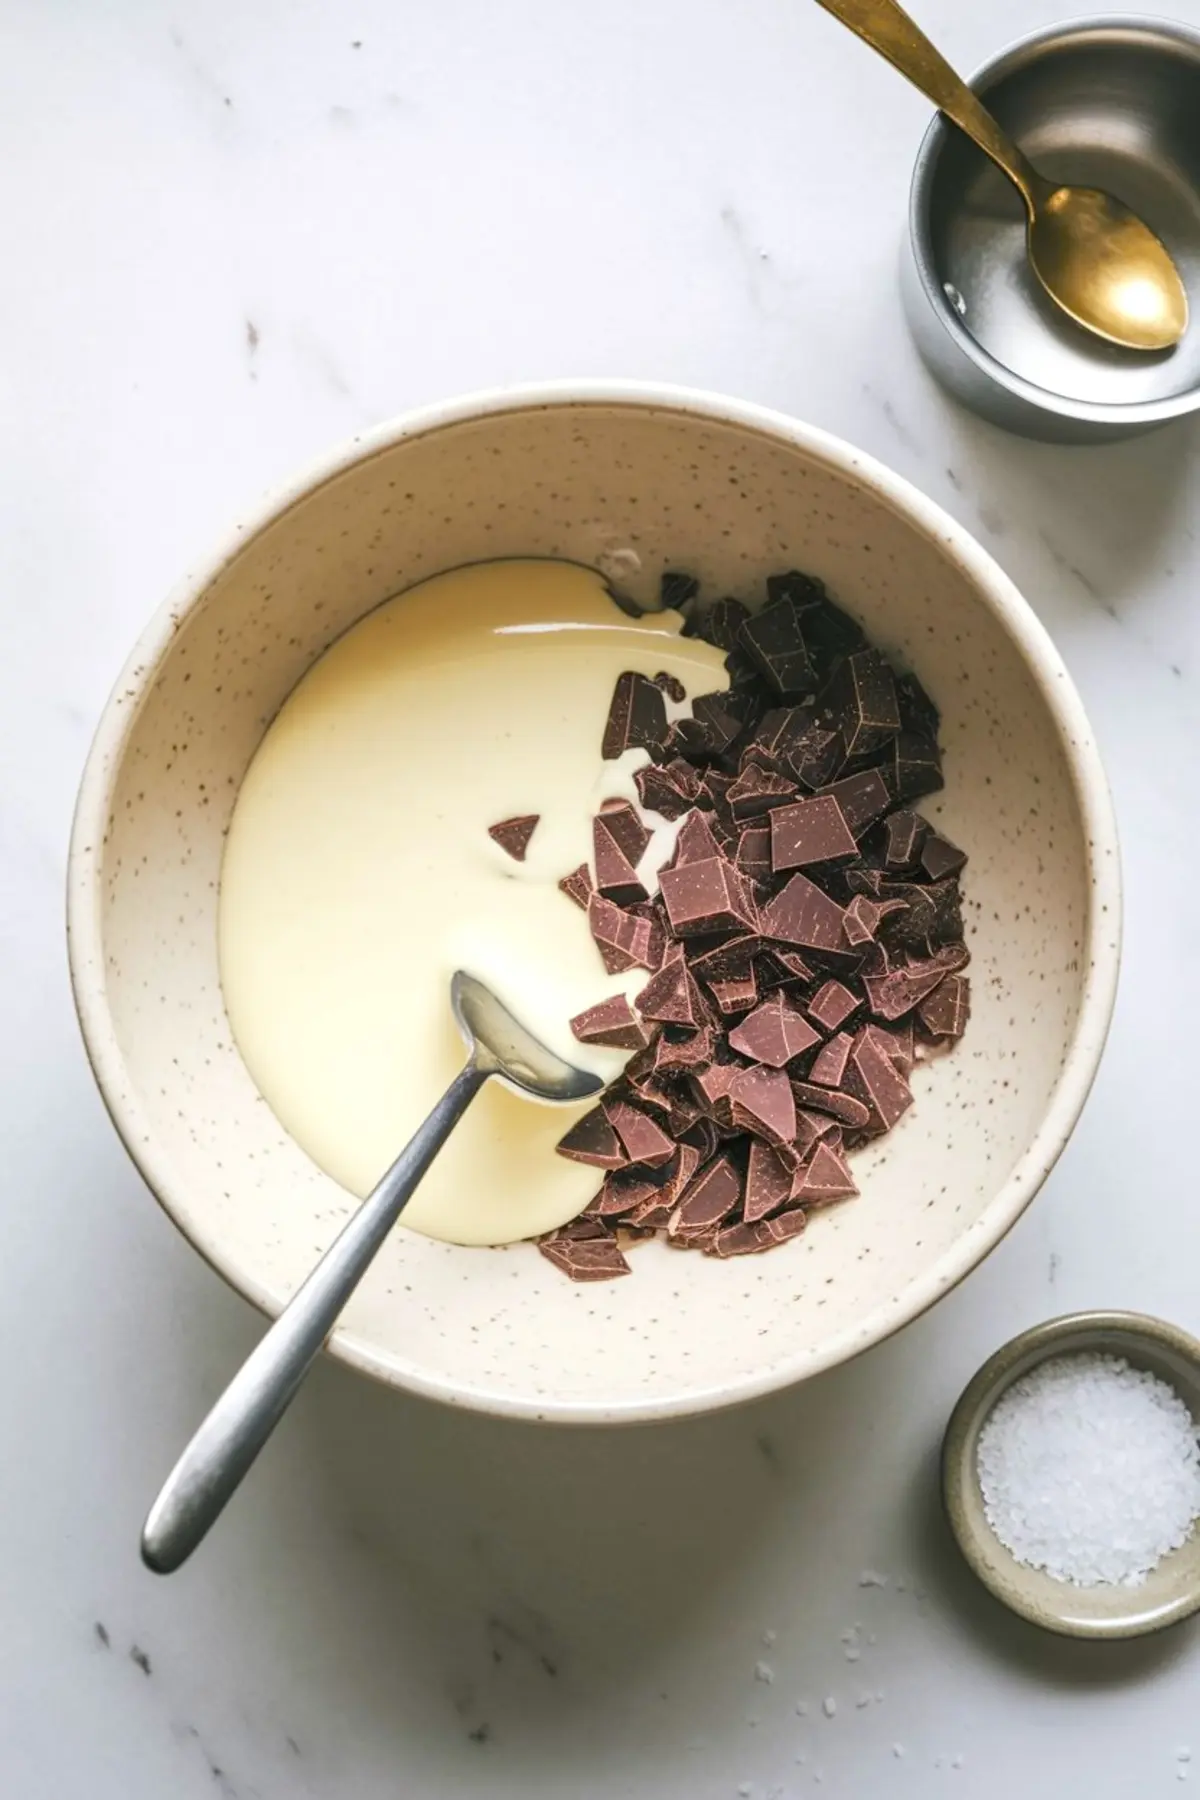
- 8 oz semi-sweet chocolate, chopped
- ½ cup heavy cream
- Pinch of salt
- FOR THE CHOCOLATE SHELL
- 12 oz candy melts (green, red, and brown varieties for color-coding)
- 1 tbsp coconut oil or shortening (optional, for smoother dipping)
- FOR THE FONDANT DECORATIONS
- Pre-colored fondant in green, black, red, white, brown, and yellow
- Cornstarch or powdered sugar (for dusting)
- Edible glue or water
- Small rolling pin
- Sharp knife or fondant cutters
- Toothpicks or small paintbrushes (for attaching details)
Instructions
- BAKE THE CHOCOLATE CAKE: Preheat the oven to 350°F (175°C) and line a 9x9-inch baking pan with parchment paper. In a medium bowl, whisk together the flour, cocoa powder, baking soda, salt, and sugar. In a separate bowl, mix the buttermilk, oil, eggs, and vanilla until well combined. Add the wet ingredients to the dry and stir until the batter is smooth. Pour into the prepared pan and bake for 25–30 minutes, or until a toothpick inserted into the center comes out clean. Let the cake cool completely, then crumble it into fine pieces using your hands or a fork.
- MAKE THE GANACHE: Heat the cream in a small saucepan over medium heat until it begins to simmer. Pour the hot cream over the chopped chocolate in a heatproof bowl and let it sit for 1–2 minutes. Stir until the chocolate is fully melted and the mixture is smooth and glossy. Allow the ganache to cool slightly until it reaches a thick but spreadable consistency.
- ASSEMBLE THE POPS: Take a small portion of the crumbled cake and flatten it in your palm. Place a small amount of ganache in the center, then wrap the cake around the ganache to form a cube shape. Repeat with the remaining mixture. Chill the shaped cubes in the refrigerator for 30 minutes to firm up.
- COAT THE POPS: Insert a lollipop stick into each chilled cube. Melt the candy melts in a microwave-safe bowl in 30-second intervals, stirring between each, until fully melted. If needed, add coconut oil or shortening to thin the coating. Dip each cake cube into the melted coating, turning to coat evenly and tapping off any excess. Place the coated pops upright in a styrofoam block or cake pop stand and let them set completely.
- DECORATE WITH FONDANT: To make a Creeper face, roll out green fondant and cover the top of the pop. Cut small rectangles from black fondant for the eyes and mouth and attach with edible glue or a damp brush. For a TNT block, cover the pop in red fondant and add a white fondant strip across the middle. Write or stick black fondant letters spelling “TNT” on the strip. For a grass block, cover the bottom in brown fondant and the top in green fondant, letting it slightly overhang the sides. Use a knife or modeling tool to create pixel-like texture lines. Use molds or templates for clean, consistent details if desired.
Notes
Use gloves while shaping and decorating to avoid fingerprints on fondant. Store finished cake pops in an airtight container at room temperature for up to 3 days, or refrigerate for longer shelf life.
Nutrition Information
Yield
18Serving Size
1Amount Per Serving Calories 400Total Fat 16gSaturated Fat 6gTrans Fat 0gUnsaturated Fat 8gCholesterol 32mgSodium 198mgCarbohydrates 63gFiber 2gSugar 43gProtein 4g
I have deleted the orginal pin I had saved to Pinterest because you have been forcing this pin to my boards 3 times a day everyday. I have since blocked you and reported you as potential Spam, but still everyday I have 3 forced pins from you. Please take care of this problem. I am now in the process of reporting you to Pinterest yet again but in more detail
Hi Rhonda, I understand how frustrating those repeat pins feel. What you’re seeing usually comes from Pinterest’s own “Picked for you” suggestions. The platform will sometimes resurface a pin you once opened or saved, even if you’ve removed or blocked the original account. Unfortunately creators don’t have a way to turn that feature on or off for individual users.
To clear them out, try these steps:
• Remove the pin from each board again, then head to Settings → Privacy & data → Personalization and disable “Picked for you.”
• On mobile, you can also open one of the unwanted pins, tap the three-dot menu, and choose Hide Pin or See less like this.
• If you’re comfortable, clear your Pinterest cache or log out and back in after making those changes. That helps the algorithm re-index your interests.
My recipes should only appear when you decide to save or search for them. I hope these tips give you back control of your feed 😊. Feel free to let me know if the issue sticks around, and I’ll pass any extra details to Pinterest support.