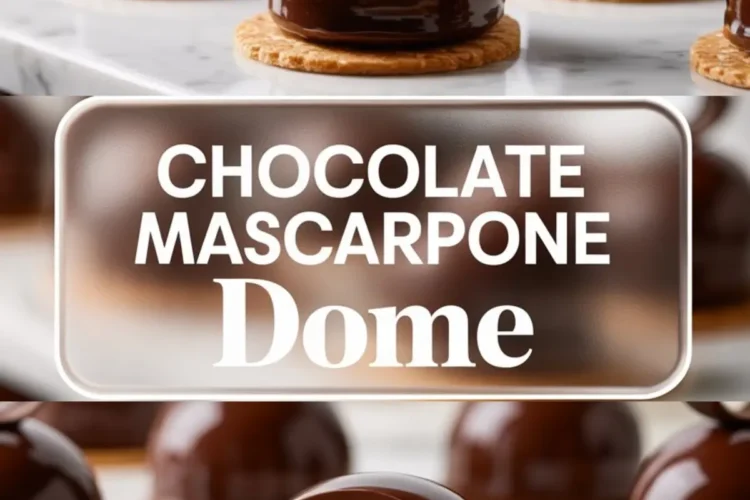
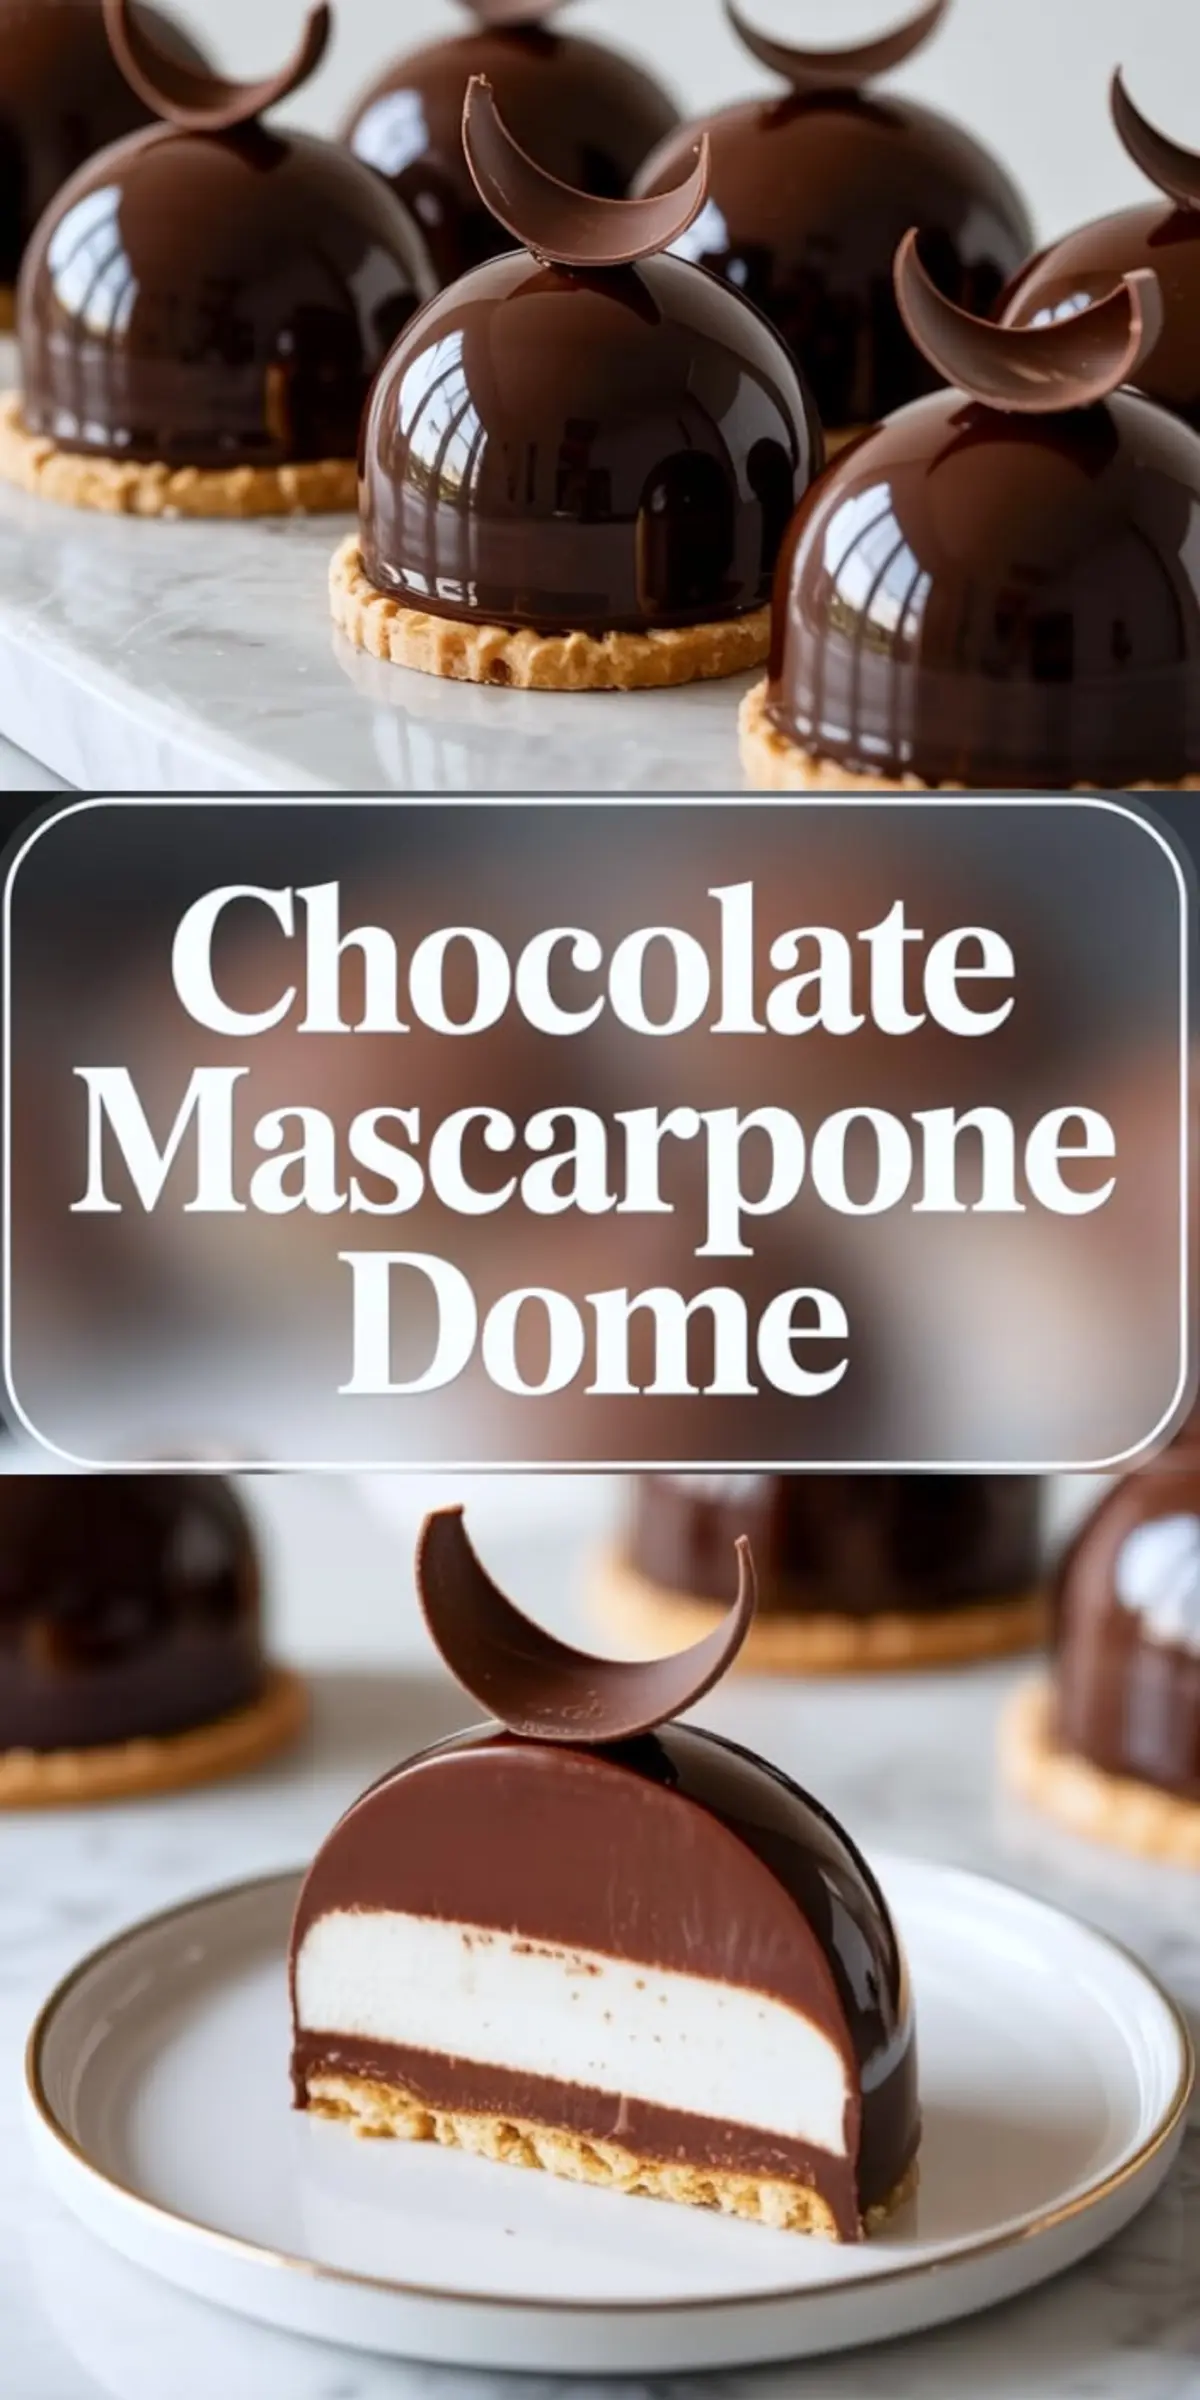
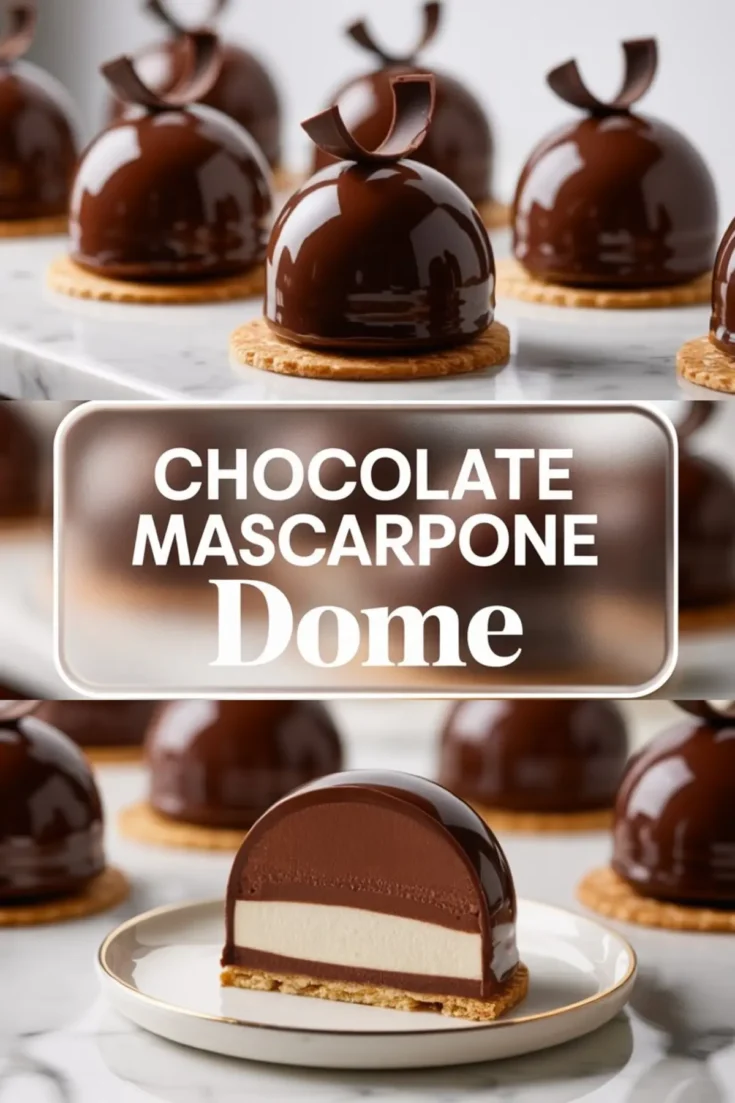
This chocolate mascarpone dome recipe layers airy chocolate mousse and creamy mascarpone filling inside a glossy chocolate shell. Each dome dessert sits on a crisp cookie base and finishes with a dramatic mirror glaze. These individual chocolate domes make an elegant treat for dinner parties or holidays. Chocolate Dome, Chocolate Dome Dessert, Dome Desserts, and Chocolate Shells all describe this refined and impressive presentation.
The structure relies on freezing each dome before glazing. Freezing ensures clean unmolding and a flawless surface for the mirror glaze to cling to. Without this step, the mousse won’t hold its shape.
The ratio between chocolate mousse and mascarpone mousse keeps the texture rich but balanced. I’ve used a 2:1 ratio by volume to avoid overwhelming the mascarpone. Too much chocolate mousse would make the center indistinct, and too much mascarpone would lack support.
Temperature matters more than people expect. The mirror glaze must be poured at 32 to 35°C. That’s the point where it coats evenly without melting the dome or sliding off.
I’ve tested higher and lower. Either way, the result suffers. Room temperature domes with a slightly cooled glaze give the cleanest finish.
Ingredient Breakdown and Why They Matter
The chocolate mousse begins with 200g of dark chocolate between 60 to 70% cacao. This range keeps the mousse rich without bitterness. I wouldn’t go higher unless you adjust the sugar.
The whipped cream lightens the mousse and provides structure. I add just 1 tablespoon of sugar sometimes, depending on the chocolate’s bitterness. The small amount keeps the mousse from leaning too sweet.
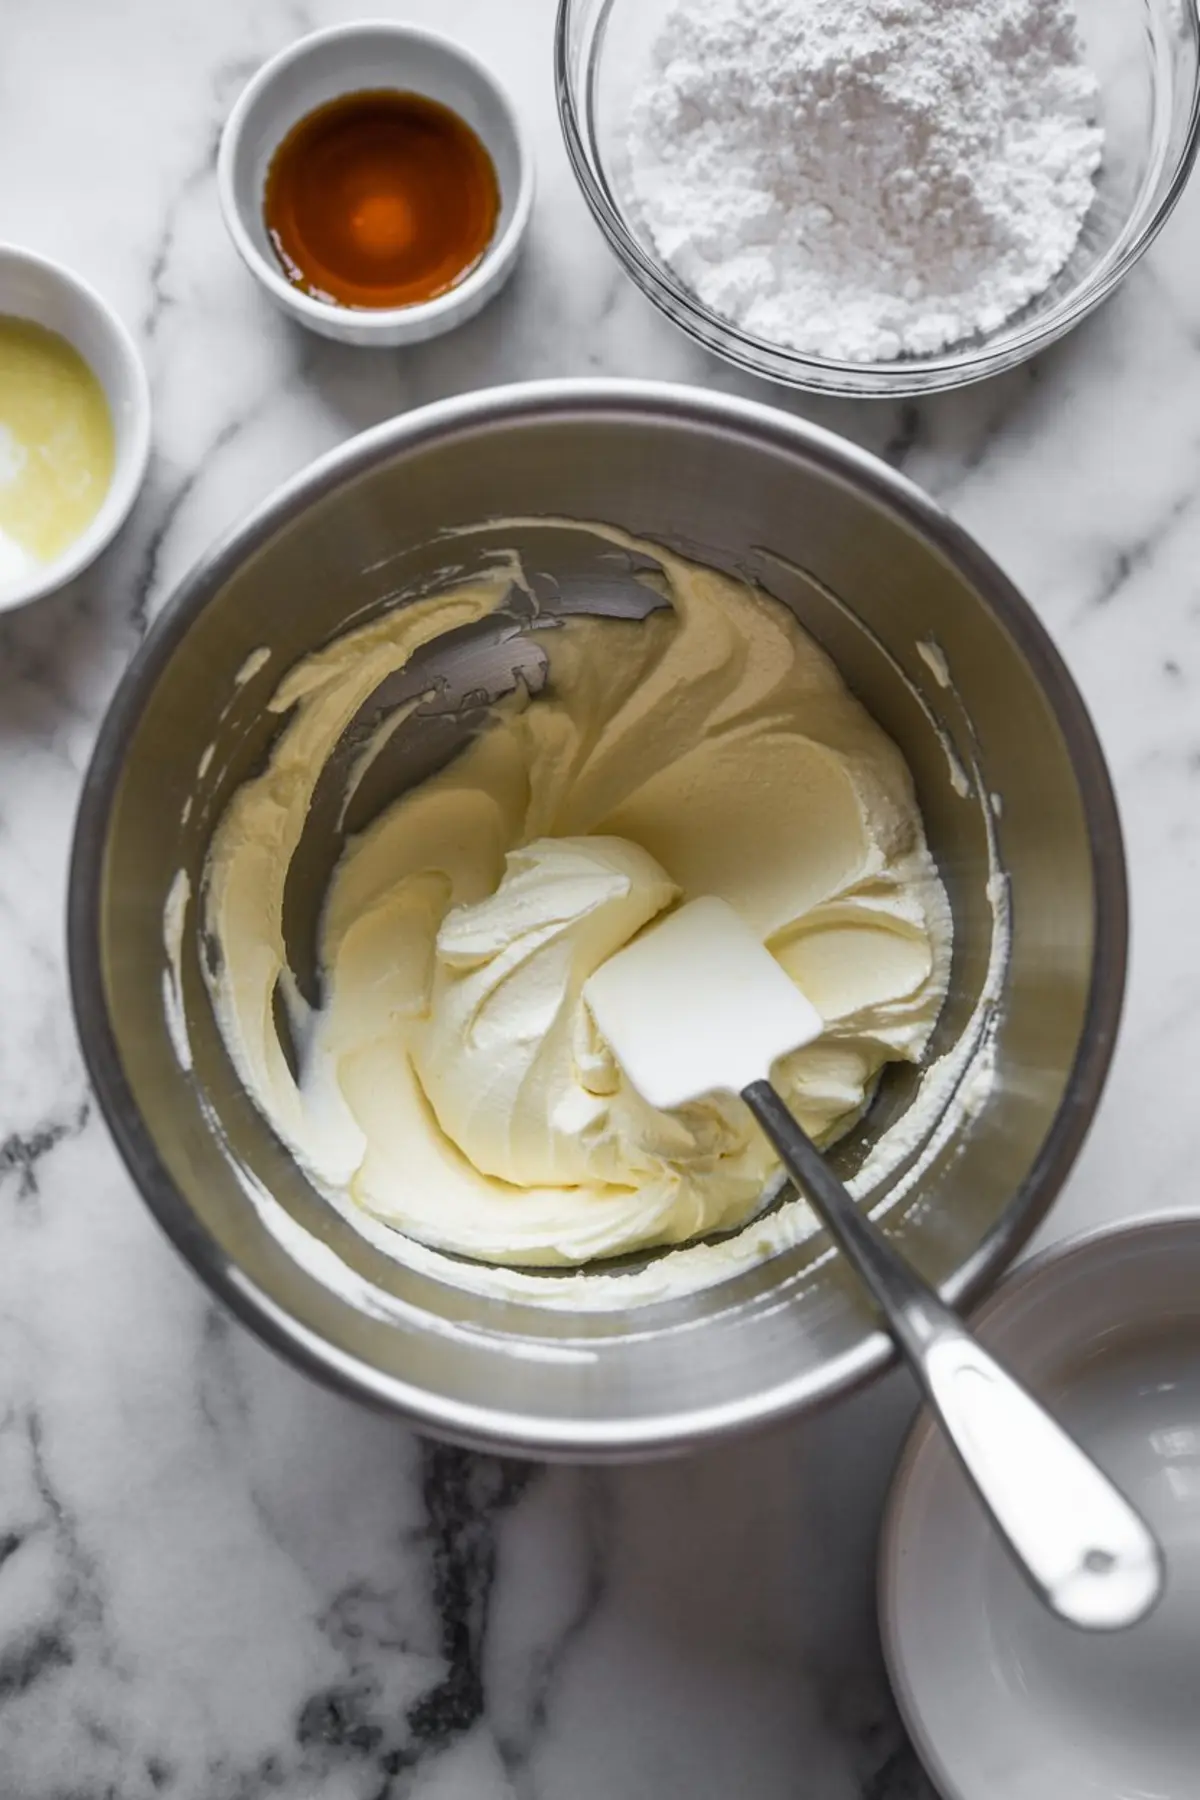
The mascarpone mousse holds its own. Mascarpone gives a thicker body than whipped cream alone and avoids the watery feel that sometimes happens with whipped toppings. I’ve found 2 tablespoons of powdered sugar add the right lift without turning it sugary.
For the cookie base, I use digestive biscuits or graham crackers. Both crush finely, but digestives hold their shape longer. The melted butter binds the crumbs and chills into a clean base for assembly.
The mirror glaze includes glucose syrup or corn syrup for shine. It also prevents crystallization. Regular sugar alone won’t yield the same glossy surface. I bloom the gelatin in cold water first, then stir it into the glaze just after melting the chocolate.
If you’ve never worked with mirror glaze, this Chocolate Ganache Recipe might be a simpler starting point. Both rely on emulsion and timing, but ganache is more forgiving.
Focus on the Chocolate Shell and Glaze

The mirror glaze matters more than decoration. It seals the mousse and creates the first impression. I pour it once the domes are completely frozen.
Use a digital thermometer here. Guessing the temperature by touch can cause trouble. I wait until it cools slightly but still feels warm. A smooth pour means the domes are cold and the glaze is right.
Avoid bubbles in the glaze. Stir gently, don’t whisk. Even a few bubbles can create gaps on the shell. Pour in one motion from the center outward. If needed, tap the rack gently to even the layer.
For more mousse-focused recipes, you might enjoy this High-Protein Cottage Cheese Chocolate Mousse with its smoother, protein-packed texture.
Tips for Assembly and Timing

I layer the domes starting with chocolate mousse at the base, then mascarpone in the center. Freeze immediately after smoothing the tops. Overnight works best.
Once frozen, press each dome gently onto a cookie base. They should sit level, not tilt. Let them thaw in the fridge if serving the same day. I recommend glazing them the morning of the event.
If you’re curious about using chocolate in layered bakes, the Chocolate Mousse Brownies offer a denser, sliceable version of the same mousse idea.
Save This Recipe and Share Your Experience
If this chocolate mascarpone dome recipe gave you ideas, save it to your board for later. It’s a satisfying one to revisit once you get the hang of the glaze.
If you try it, let me know in the comments how it turned out. I’d love to hear which base you chose or if you added your own variation.
Chocolate Mascarpone Dome
This chocolate dome dessert is filled with silky mascarpone cream and coated in a glossy chocolate shell for a show-stopping treat. The perfect individual dome dessert to serve at dinner parties or special occasions. Learn how to create smooth chocolate domes with a rich filling and stunning presentation. A must-try for lovers of refined chocolate desserts and elegant pastry work.
Ingredients
- FOR THE CHOCOLATE MOUSSE:
- 200g dark chocolate (60–70%)
- 300ml heavy cream
- 1 tsp vanilla extract
- 1 tbsp sugar (optional, depending on your chocolate)
- FOR THE MASCARPONE MOUSSE:
- 250g mascarpone cheese
- 150ml heavy cream
- 2 tbsp powdered sugar
- 1 tsp vanilla extract
- FOR THE BASE:
- 150g digestive biscuits or graham crackers
- 60g unsalted butter, melted
- FOR THE MIRROR GLAZE:
- 100g dark chocolate, chopped
- 100g sugar
- 100g glucose syrup (or corn syrup)
- 60ml water
- 60ml heavy cream
- 8g powdered gelatin
- 40ml cold water (to bloom gelatin)
Instructions
- MAKE THE CHOCOLATE MOUSSE: Melt the dark chocolate using a double boiler or in the microwave in 30-second intervals, stirring between each until smooth. Let it cool slightly. In a separate bowl, whip the heavy cream to soft peaks, then fold in vanilla extract and sugar if using. Add one-third of the whipped cream to the melted chocolate and fold gently to lighten the mixture. Fold in the remaining cream until fully combined and smooth. Transfer the mousse to a piping bag and refrigerate while preparing the other components.
- PREPARE THE MASCARPONE MOUSSE: In a medium bowl, whisk mascarpone cheese with powdered sugar and vanilla extract until smooth and creamy. In a separate bowl, whip the heavy cream to soft peaks. Gently fold the whipped cream into the mascarpone mixture until fully combined. Transfer to a piping bag.
- ASSEMBLE THE LAYERS IN DOME MOLDS: Using silicone half-sphere molds, pipe chocolate mousse into each mold to fill halfway. Tap the molds gently on the counter to eliminate air bubbles and level the surface. Pipe a smaller amount of mascarpone mousse into the center of each dome. Fill the rest of the mold with more chocolate mousse and smooth the tops with an offset spatula. Freeze the domes for at least 6 hours or overnight until completely firm.
- MAKE THE COOKIE BASE: Crush digestive biscuits or graham crackers into fine crumbs using a food processor or by hand. Combine the crumbs with melted butter and mix until evenly moistened. Press the mixture into a flat, even layer about ½ inch thick on a lined baking sheet. Chill in the refrigerator until firm, then cut out 6 rounds using a cookie cutter sized to match the diameter of the dome molds. Keep refrigerated until assembly.
- PREPARE THE MIRROR GLAZE: Bloom the powdered gelatin by sprinkling it over cold water and letting it sit for 5 to 10 minutes. In a small saucepan, combine sugar, glucose syrup, water, and heavy cream. Heat the mixture over medium heat until it just begins to boil. Remove from heat and add chopped dark chocolate, stirring until melted and smooth. Add the bloomed gelatin and stir until fully dissolved. Let the glaze cool to 32–35°C (body temperature) before using to ensure proper consistency for glazing.
- GLAZE THE DOMES: Once fully frozen, unmold the domes and place them on a wire rack set over a tray to catch excess glaze. Pour the mirror glaze evenly over each dome, making sure it covers the surface completely. Let the glaze drip off and set for a few minutes. Using a spatula, carefully lift each dome and place it onto a cookie base. Keep refrigerated until ready to serve.
Notes
To check mirror glaze temperature, use a digital thermometer for accuracy. Domes can be frozen (unglazed) for up to one week. Glazed domes can be kept in the refrigerator for up to 48 hours.
Nutrition Information
Yield
6Serving Size
1Amount Per Serving Calories 739Total Fat 43gSaturated Fat 26gUnsaturated Fat 17gCholesterol 107mgSodium 640mgCarbohydrates 67gFiber 2gSugar 58gProtein 21g