
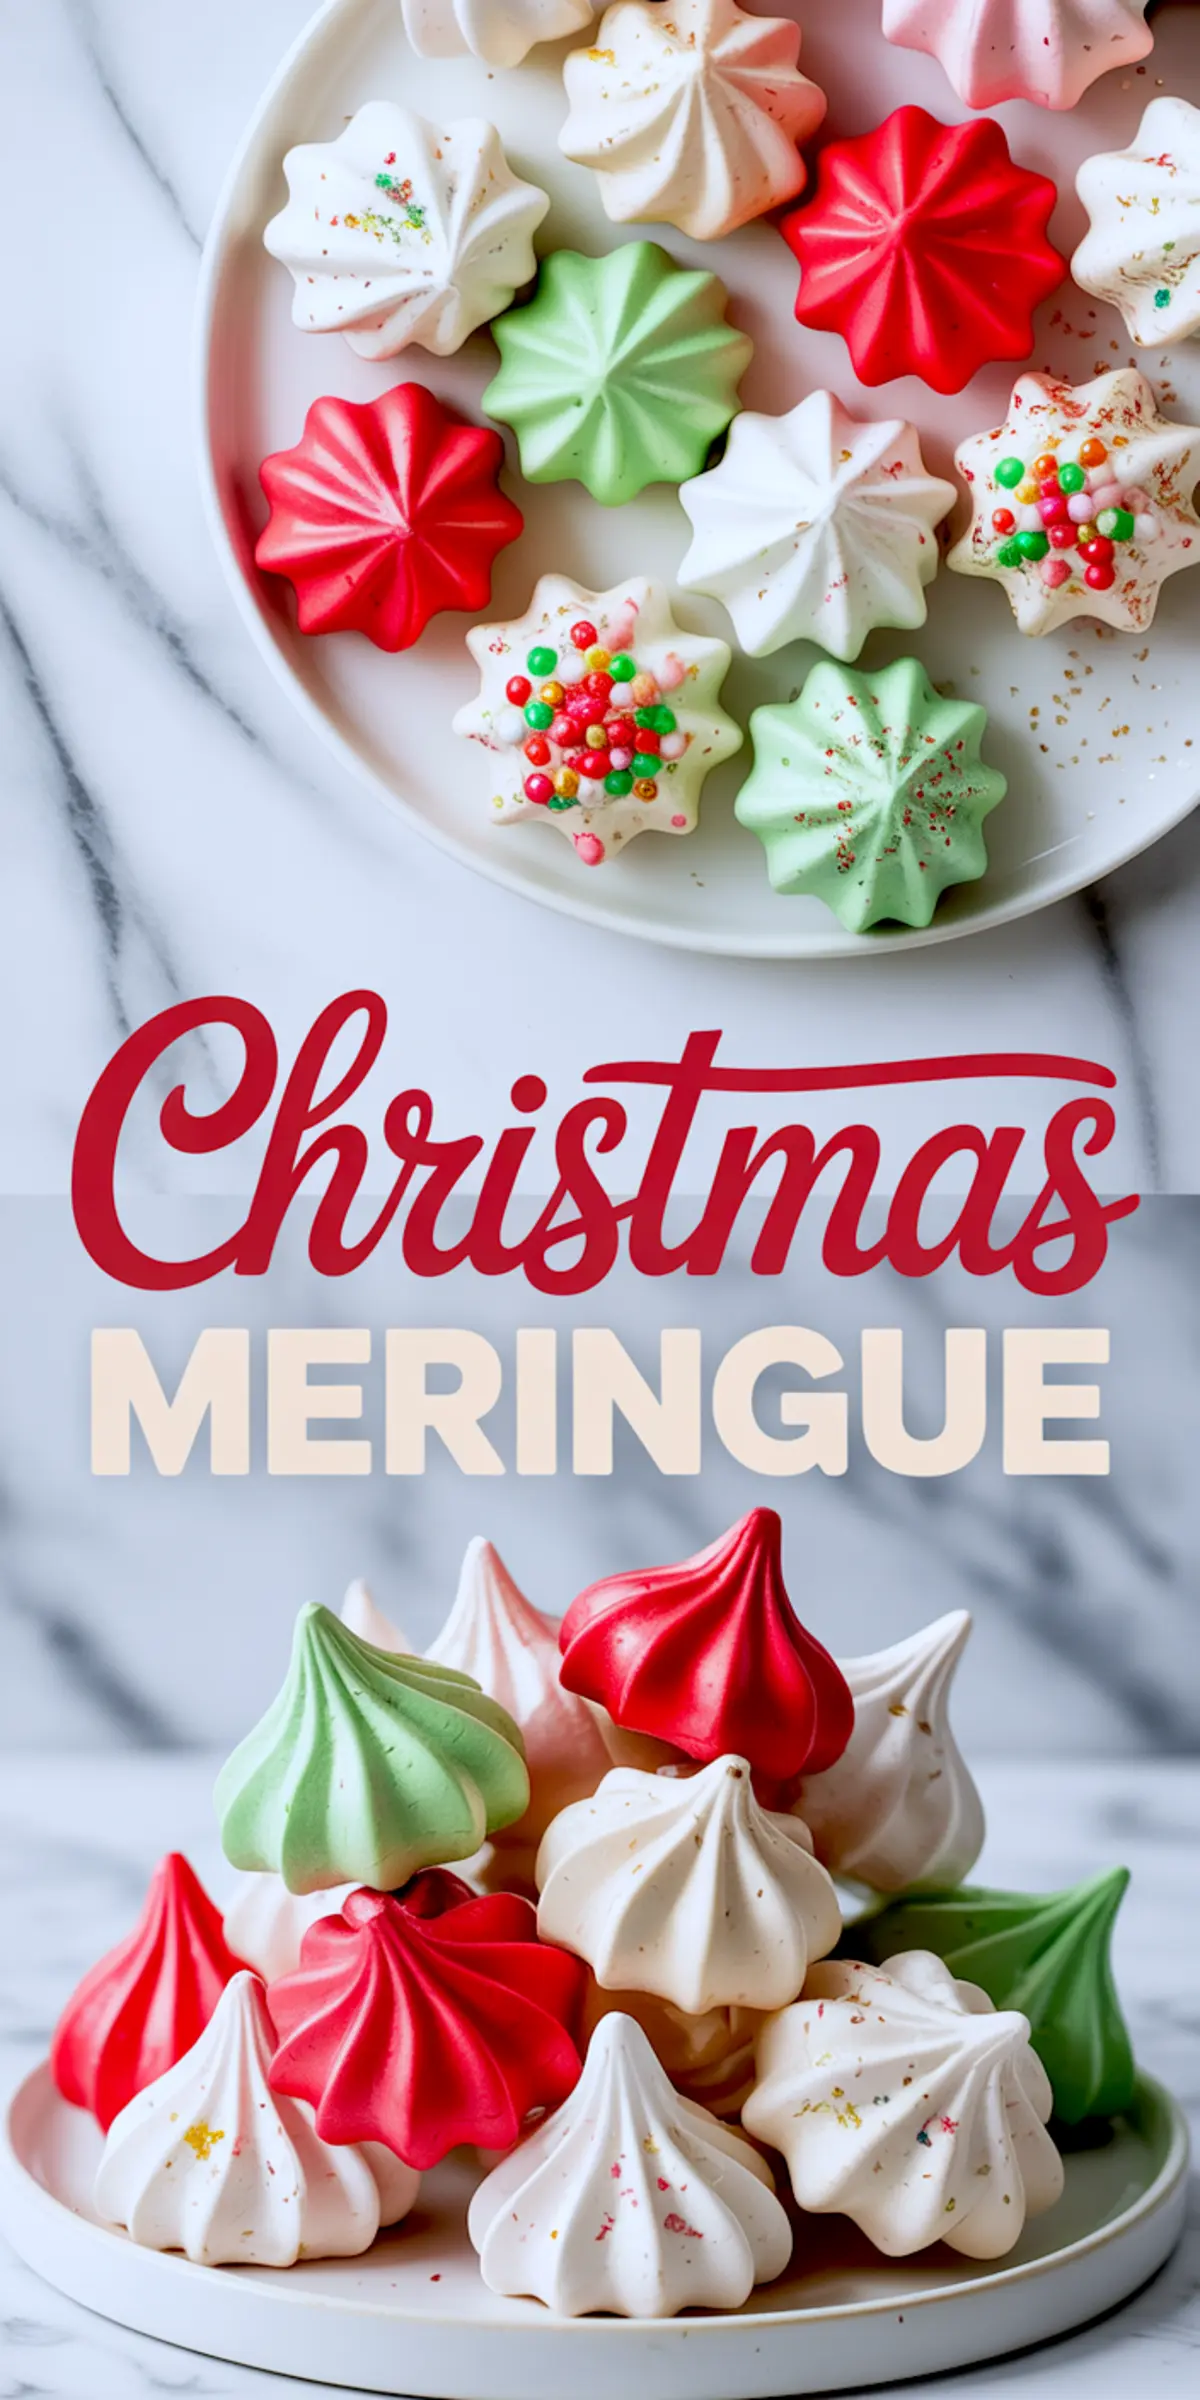
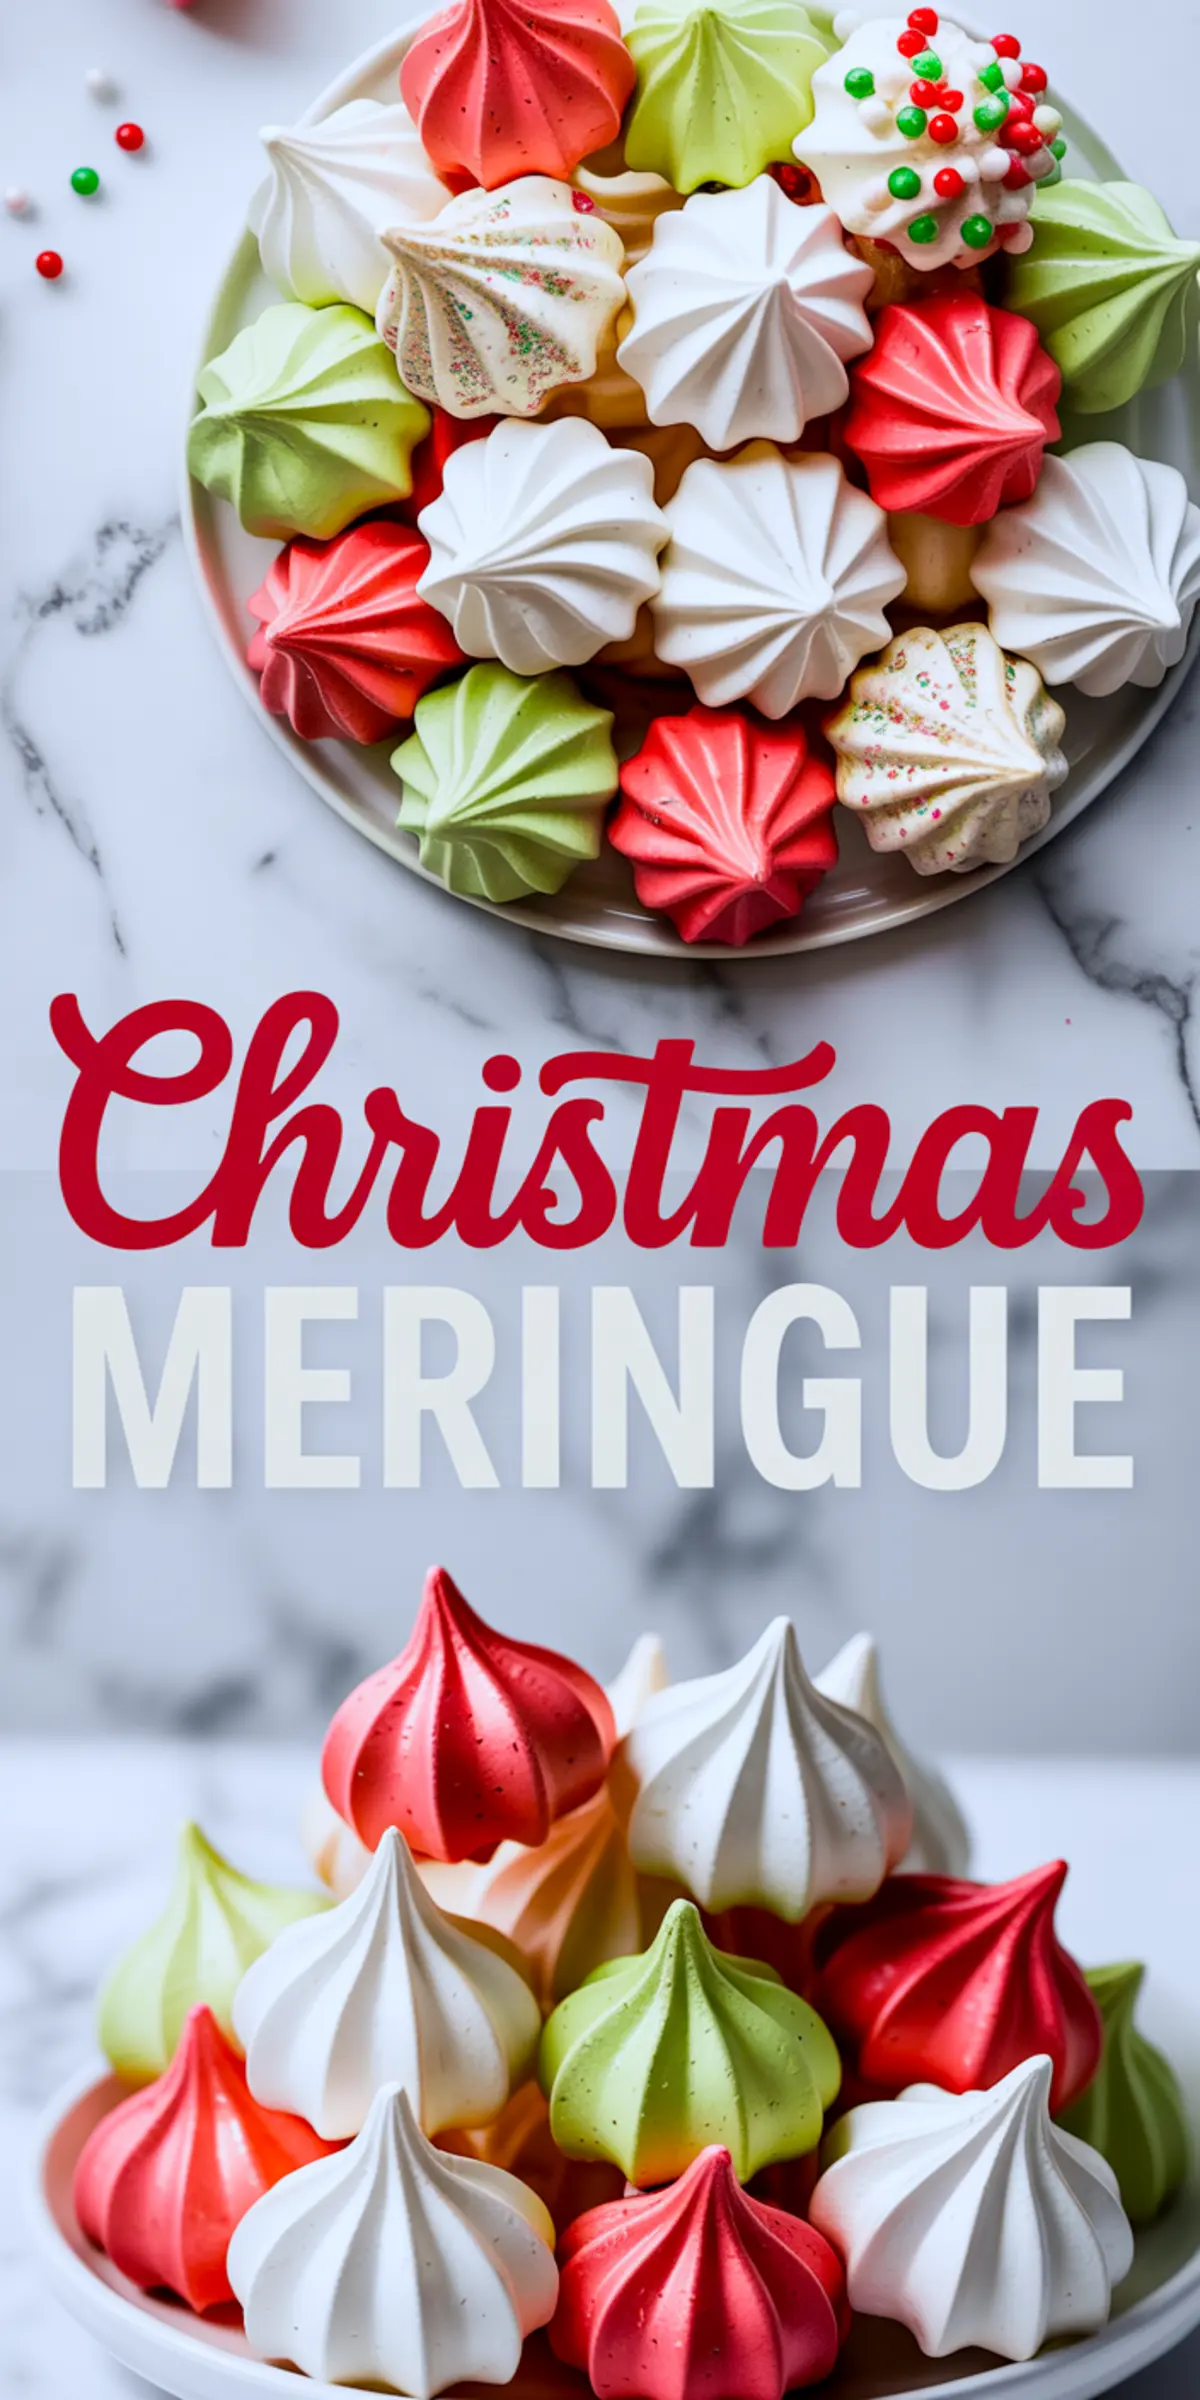
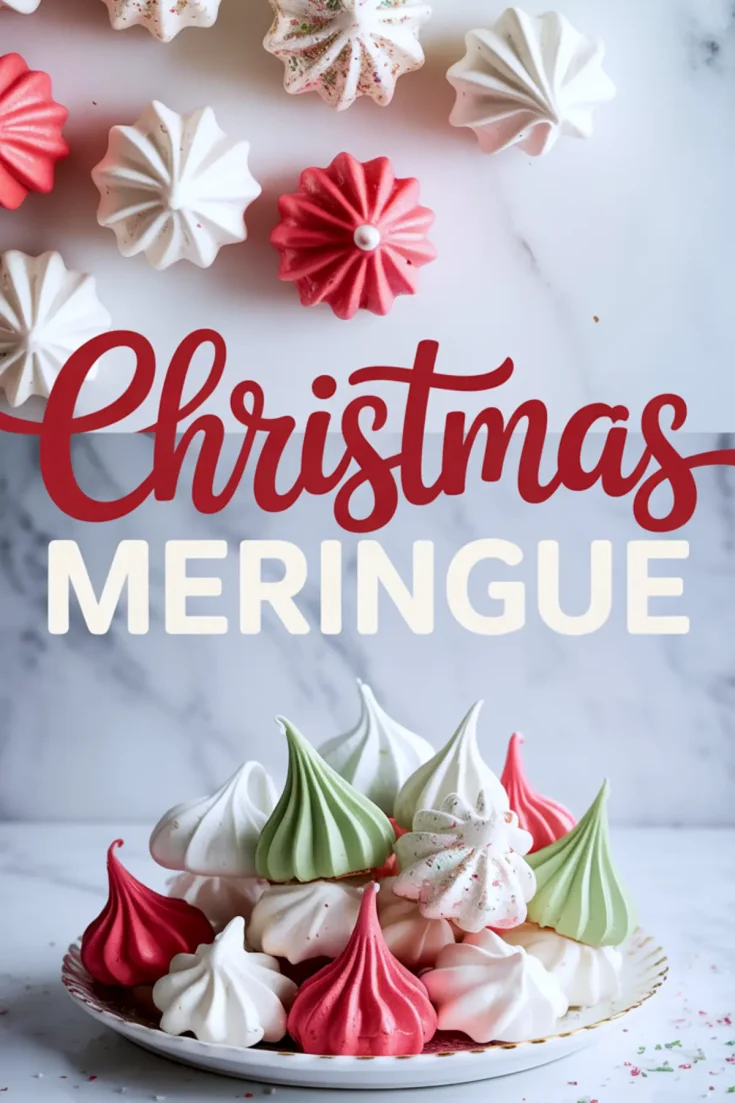
These Christmas Meringue Kisses are crisp, light, and gently sweet with a texture so airy they practically vanish on your tongue. You’ll learn how to make a classic meringue cookie recipe that feels fancy but comes together with just egg whites, sugar, and a pinch of practice. They belong on every holiday desserts table, nestled between the shortbread and truffles. The recipe looks delicate, but it’s dependable and with a few small tips, you’ll get flawless results every time.
This isn’t just about meringue cookies. It’s about giving your cookie tray something visually striking, something melt-away soft. A bowl of these adds lightness and contrast beside richer treats. For anyone building out their Christmas baking recipes this year, these are a must.
Following a special diet?
Every recipe on this site can be converted to gluten-free, vegan, dairy-free, keto, nut-free or egg-free with adjusted ratios so nothing falls flat.
Try the Recipe Converter →Why This Recipe Lives in My Christmas Binder
I first started making these as part of a last-minute tray when I needed one more cookie type to balance out the buttery shortbread. That year, they were the first to disappear. People always ask how something so simple can taste so refined. That’s the charm.
Christmas meringue ideas often sound complicated, but the trick lies in patience. The egg whites need time to whip. The sugar needs time to dissolve. The kisses need time to bake. You can’t rush a good meringue, but you don’t need to baby it either.
The Egg Whites Matter More Than You Think
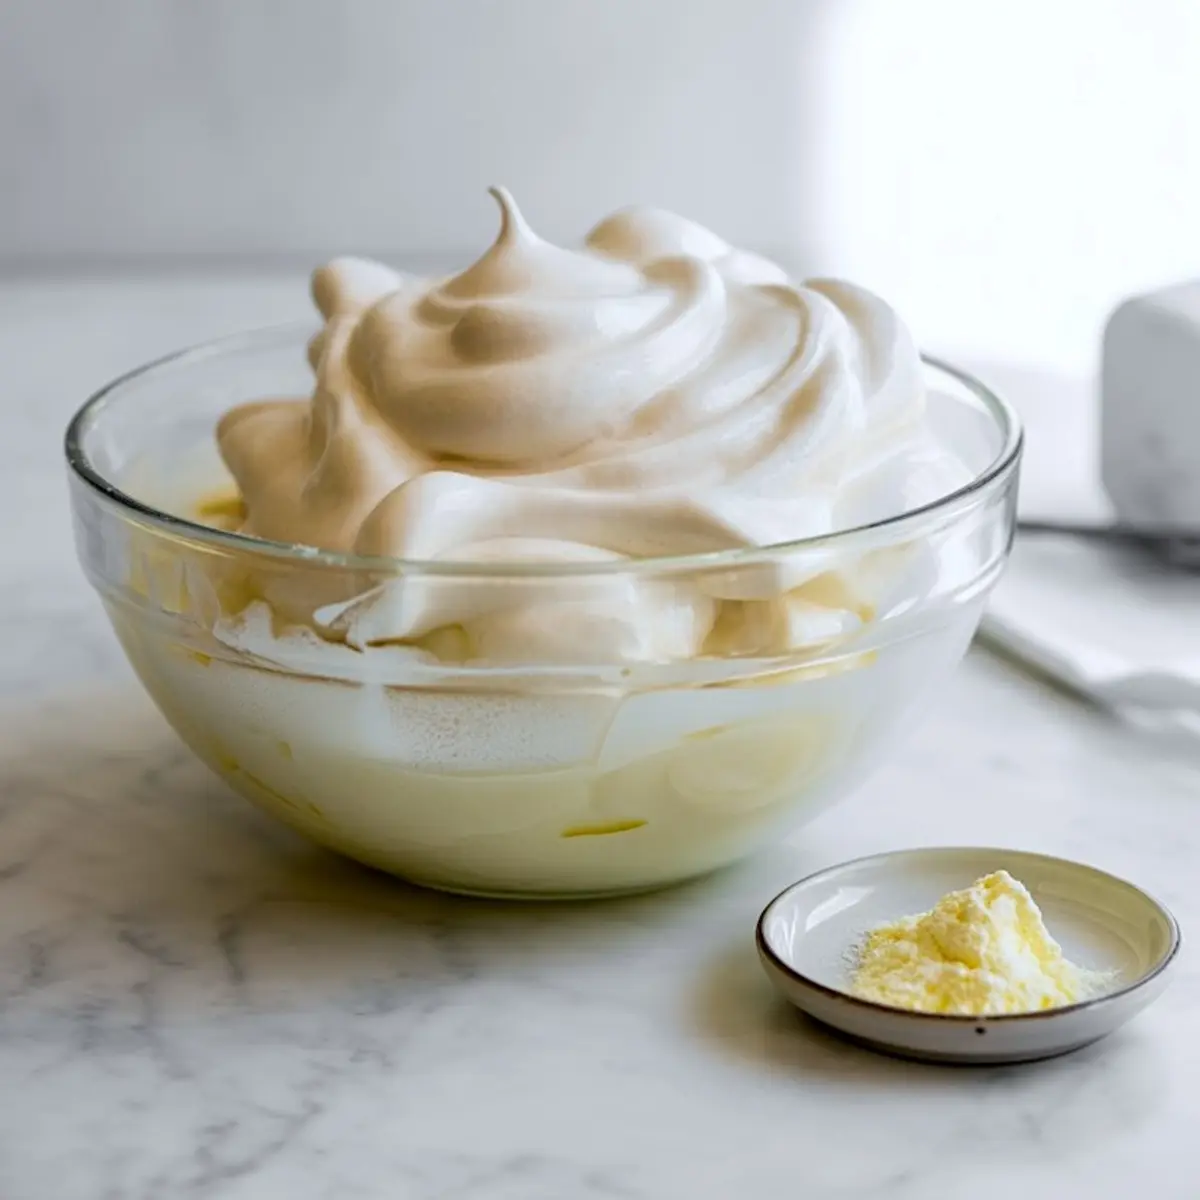
Use room temperature egg whites that one detail changes everything. Cold whites resist volume. Warm ones expand beautifully. I always separate my eggs cold from the fridge, but then let the whites sit out for 30 minutes.
Cleanliness plays a role here. If there’s even a trace of grease in your bowl, the whites won’t whip. I wipe mine down with a splash of vinegar and a clean paper towel before starting. This one step saved me so much guesswork.
Sugar Slowly, or the Texture Suffers
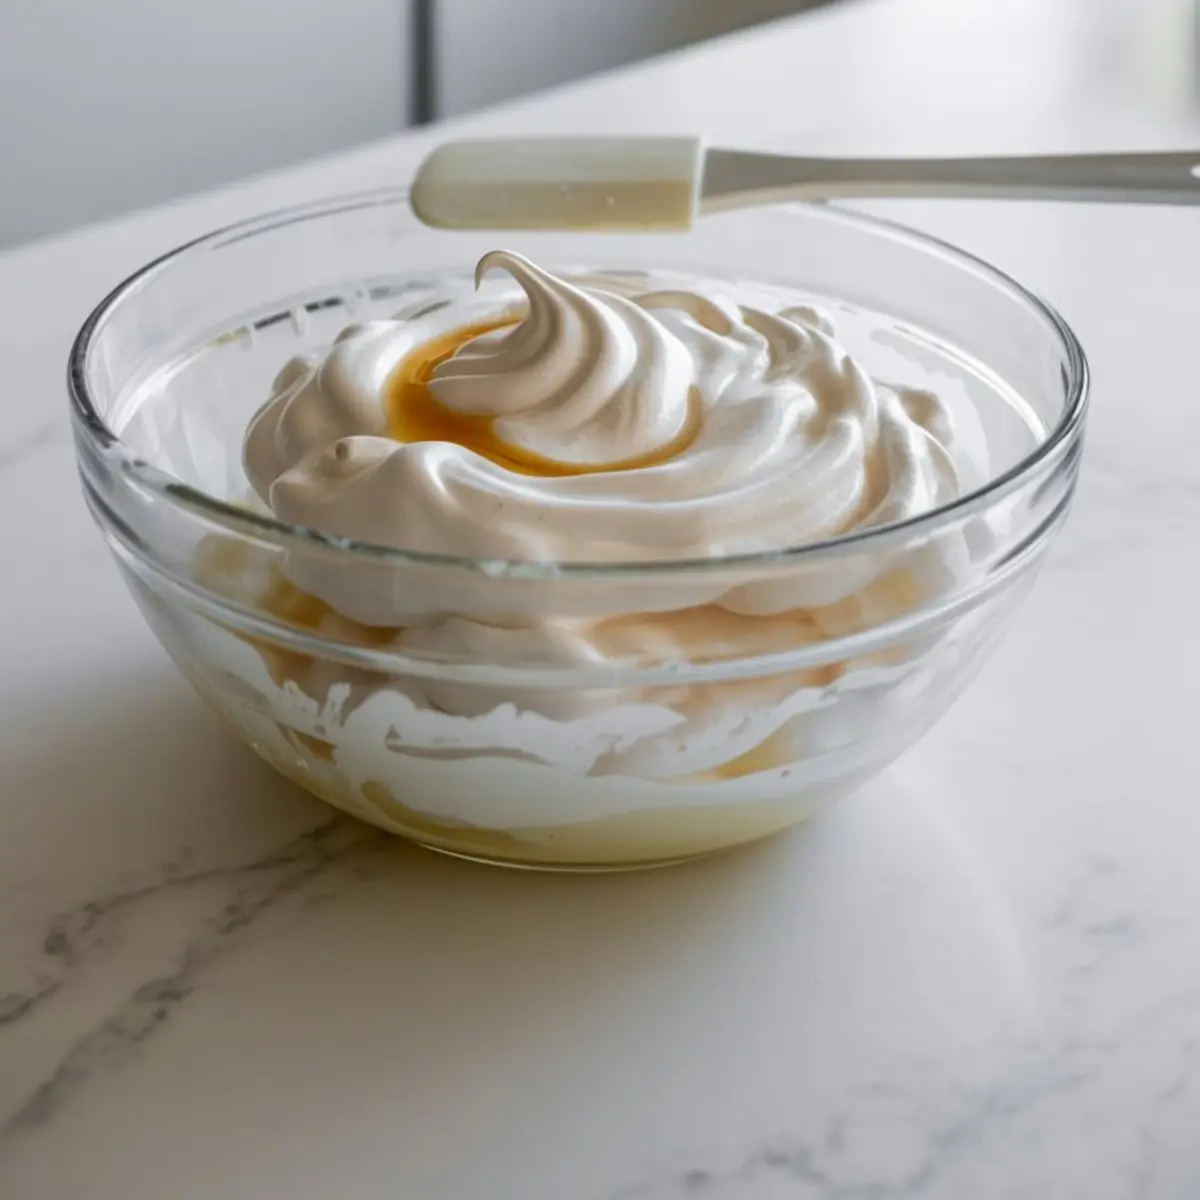
Use granulated sugar and add it slowly one tablespoon at a time. Let it dissolve completely between additions. This is what gives the meringue its glassy sheen and prevents grittiness.
I’ve tested it with caster sugar too, and while it dissolves faster, the final texture wasn’t any better. Regular sugar works best here.
Cream of Tartar vs. Lemon Juice
I’ve used both. Cream of tartar gives more structure and is more reliable if your kitchen runs warm. Lemon juice works in a pinch, but I always go back to the tartar. My notes from last December remind me the batch with tartar piped better and held its shape more cleanly.
Color Is Optional, but Fun
You can keep these white, or you can tint them. I prefer using gel food coloring since it doesn’t affect the meringue’s consistency. A little goes a long way.
For striped kisses, I use a toothpick to paint lines of color inside the piping bag before filling it. It’s one of those tricks that feels silly until you see the swirl pattern come out.
Shaping and Baking the Meringue Kisses
I use a star tip to pipe 1 to 1.5 inch kisses on a parchment-lined tray. These don’t spread, so you can pipe them fairly close. Keep your piping bag vertical and steady for the best shape.
Bake at 200°F. The low temperature keeps the color pale and the texture crisp. Don’t open the oven. Not even to peek. The meringue is drying, not baking in the traditional sense.
After baking, let them cool inside the turned-off oven for an hour. This slow cooling process makes all the difference. If I pull them out too fast, they crack. Leave them be.
Storage That Keeps Them Crisp
Once cool, transfer the meringues to an airtight container. I use a metal cookie tin lined with parchment and keep them at room temperature. Avoid humidity these cookies don’t like moisture.
They stay fresh for up to 2 weeks. Honestly, they rarely last that long in my house. These disappear quickly off any holiday desserts table.
Christmas Meringues That Fit Anywhere on the Table
These are versatile. Add them to your tray beside this Christmas Chocolate Bark, or package a few alongside Christmas Macarons as edible gifts.
You can flavor the batch with peppermint or stick to vanilla. I like making a half-and-half batch to offer contrast. The peppermint always gets compliments, but the vanilla balances out the tray.
They also play well with richer textures. Add a few beside slices of this Classic Yule Log and the crispness becomes even more noticeable.
Serving Note: How I Use Them in Holiday Spread
For holiday brunch, I serve them in a vintage glass bowl. For gifting, I layer parchment between stacks and tuck them into tins. You could even crumble a few over whipped cream and berries for a light dessert.
On the table, they offer color if you tint them, and height if you pile them. They fill gaps between brownies, fudge, and cakes beautifully.
A Final Note and Invitation to You
This is the Christmas Meringue Cookie recipe I trust year after year. It’s the one I reach for when I want to offer something sweet that feels a bit lighter.
Save this on Pinterest to your Christmas Themed Desserts board so you have it ready for the season. And if you make a batch, leave a comment. I’d love to hear if you went with peppermint or vanilla—or if you tried a color swirl that made you smile.
Christmas Meringue Kisses Recipe
Christmas meringue cookies bake up light, crisp, and melt-in-your-mouth sweet. I pipe them into festive shapes or swirls, add a few sprinkles, and let the oven do the work low and slow. This meringue cookie recipe uses just egg whites, sugar, and a pinch of salt, but the texture always turns out airy and delicate. I save this with my favorite Christmas meringues when I want something easy for the holiday desserts table that still feels homemade. It’s a go-to for meringue Christmas ideas that double as edible gifts or cookie tray fillers. Add it to your Christmas baking recipes and meringue recipe list for a sweet that looks harder than it is.
Ingredients
- 4 large egg whites, at room temperature
- ½ teaspoon cream of tartar
- 1 cup granulated sugar
- 1 teaspoon vanilla extract or ¼ teaspoon peppermint extract
- Red and green gel food coloring (optional)
Instructions
- PREHEAT THE OVEN: Set the oven to 200°F (93°C) and line two baking sheets with parchment paper. Avoid foil as it can cause the meringues to stick.
- WHIP THE EGG WHITES: In a clean, grease-free stand mixer bowl fitted with the whisk attachment, beat the egg whites on medium speed until foamy, about 1 minute.
- ADD CREAM OF TARTAR: Add the cream of tartar and continue beating until soft peaks form. The mixture should hold lines when the whisk moves through it.
- INCORPORATE THE SUGAR: With the mixer running, add the granulated sugar one tablespoon at a time. Allow each addition to dissolve fully before adding the next. This process helps achieve a smooth, glossy meringue.
- WHIP TO STIFF PEAKS: Increase the mixer speed to high and beat for 6–8 minutes, until stiff, glossy peaks form. The meringue should hold a firm point and feel smooth when rubbed between your fingers. If it feels gritty, continue beating.
- FLAVOR THE MERINGUE: Add the vanilla extract or peppermint extract and beat briefly to combine. Mix just until incorporated to avoid over-whipping.
- COLOR THE MERINGUE: Divide the mixture into separate bowls if using food coloring. Add a small amount of gel food coloring with a toothpick and gently fold it in. For striped kisses, paint stripes of gel color inside the piping bag before filling it with white meringue.
- PIPE THE MERINGUE: Fit a piping bag with a star tip and pipe 1 to 1.5 inch wide kisses onto the prepared baking sheets. Space them close together as they won’t spread during baking.
- BAKE THE MERINGUES: Bake for 90 minutes without opening the oven door. The meringues should remain pale and dry to the touch.
- COOL IN THE OVEN: After baking, turn off the oven, crack the oven door slightly, and leave the meringues inside for 1 hour. This gradual cooling prevents cracking and helps set their texture.
- REMOVE AND STORE: Once fully cool, gently lift the meringues off the parchment. Store in an airtight container at room temperature for up to 2 weeks.
Notes
Make sure all tools are completely clean and grease-free—any oil or moisture can prevent the egg whites from whipping properly. Wiping your bowl and whisk with a bit of vinegar and letting them dry fully can help ensure success. Use gel food coloring instead of liquid to preserve the meringue's texture.
Nutrition Information
Yield
60Serving Size
1Amount Per Serving Calories 14Total Fat 0gSaturated Fat 0gTrans Fat 0gUnsaturated Fat 0gCholesterol 0mgSodium 4mgCarbohydrates 3gFiber 0gSugar 3gProtein 0g
Hi there and Merry Christmas
When do you add the sparkles or the little beads?
Planning on making these this Christmas. they are so cute. Thanks for sharing
Hi Nadia, and Merry Christmas to you too 🎄 You’ll want to add the sparkles or nonpareils right after piping the meringue onto the baking sheet, before they go into the oven. Can’t wait to hear how yours turn out 😊
They turned out not bad at all (for a first timer (😂😂😂). I’m sure next Christmas they’ll be even better….. thanks again
I’ve made meringues the last few years. I am never sure when the sugar is dissolved during the whipping process, and if I am adding the sugar too quickly. But I am also concerned to add the sugar too slowly and whip the egg whites too long. Is it possible to over whip the egg whites by adding the sugar too slowly? What are some signs to look for if you’ve whipped too little or too long?
Hey Carolyn! You can add sugar slowly without a problem, as long as you’re not over-whipping the egg whites while waiting. Once they’re foamy, add the sugar a spoonful at a time. To check if it’s dissolved, rub a bit between your fingers—if it feels gritty, keep mixing.
If under-whipped, the peaks will droop and look dull. If over-whipped, the mix gets dry, clumpy, or starts to separate. Aim for glossy peaks that hold their shape.
I made these for the first time. They taste amazing. Great directions. The only thing I’m not sure about is they were just a little sticky to touch. Does this fade within time of them setting out (I just made them today). Why would that be?
Hey Kris! Really glad the flavor and directions worked out for you. That slight stickiness can happen, especially if there’s humidity in the air or if they didn’t dry out fully during baking. Meringues should be crisp and dry once cooled, but if they feel tacky, try letting them sit out uncovered overnight in a cool, dry spot. You can also pop them back in a low oven (around 200°F or 90°C) for 15–20 minutes to help dry them out further. Let me know how they feel tomorrow.