
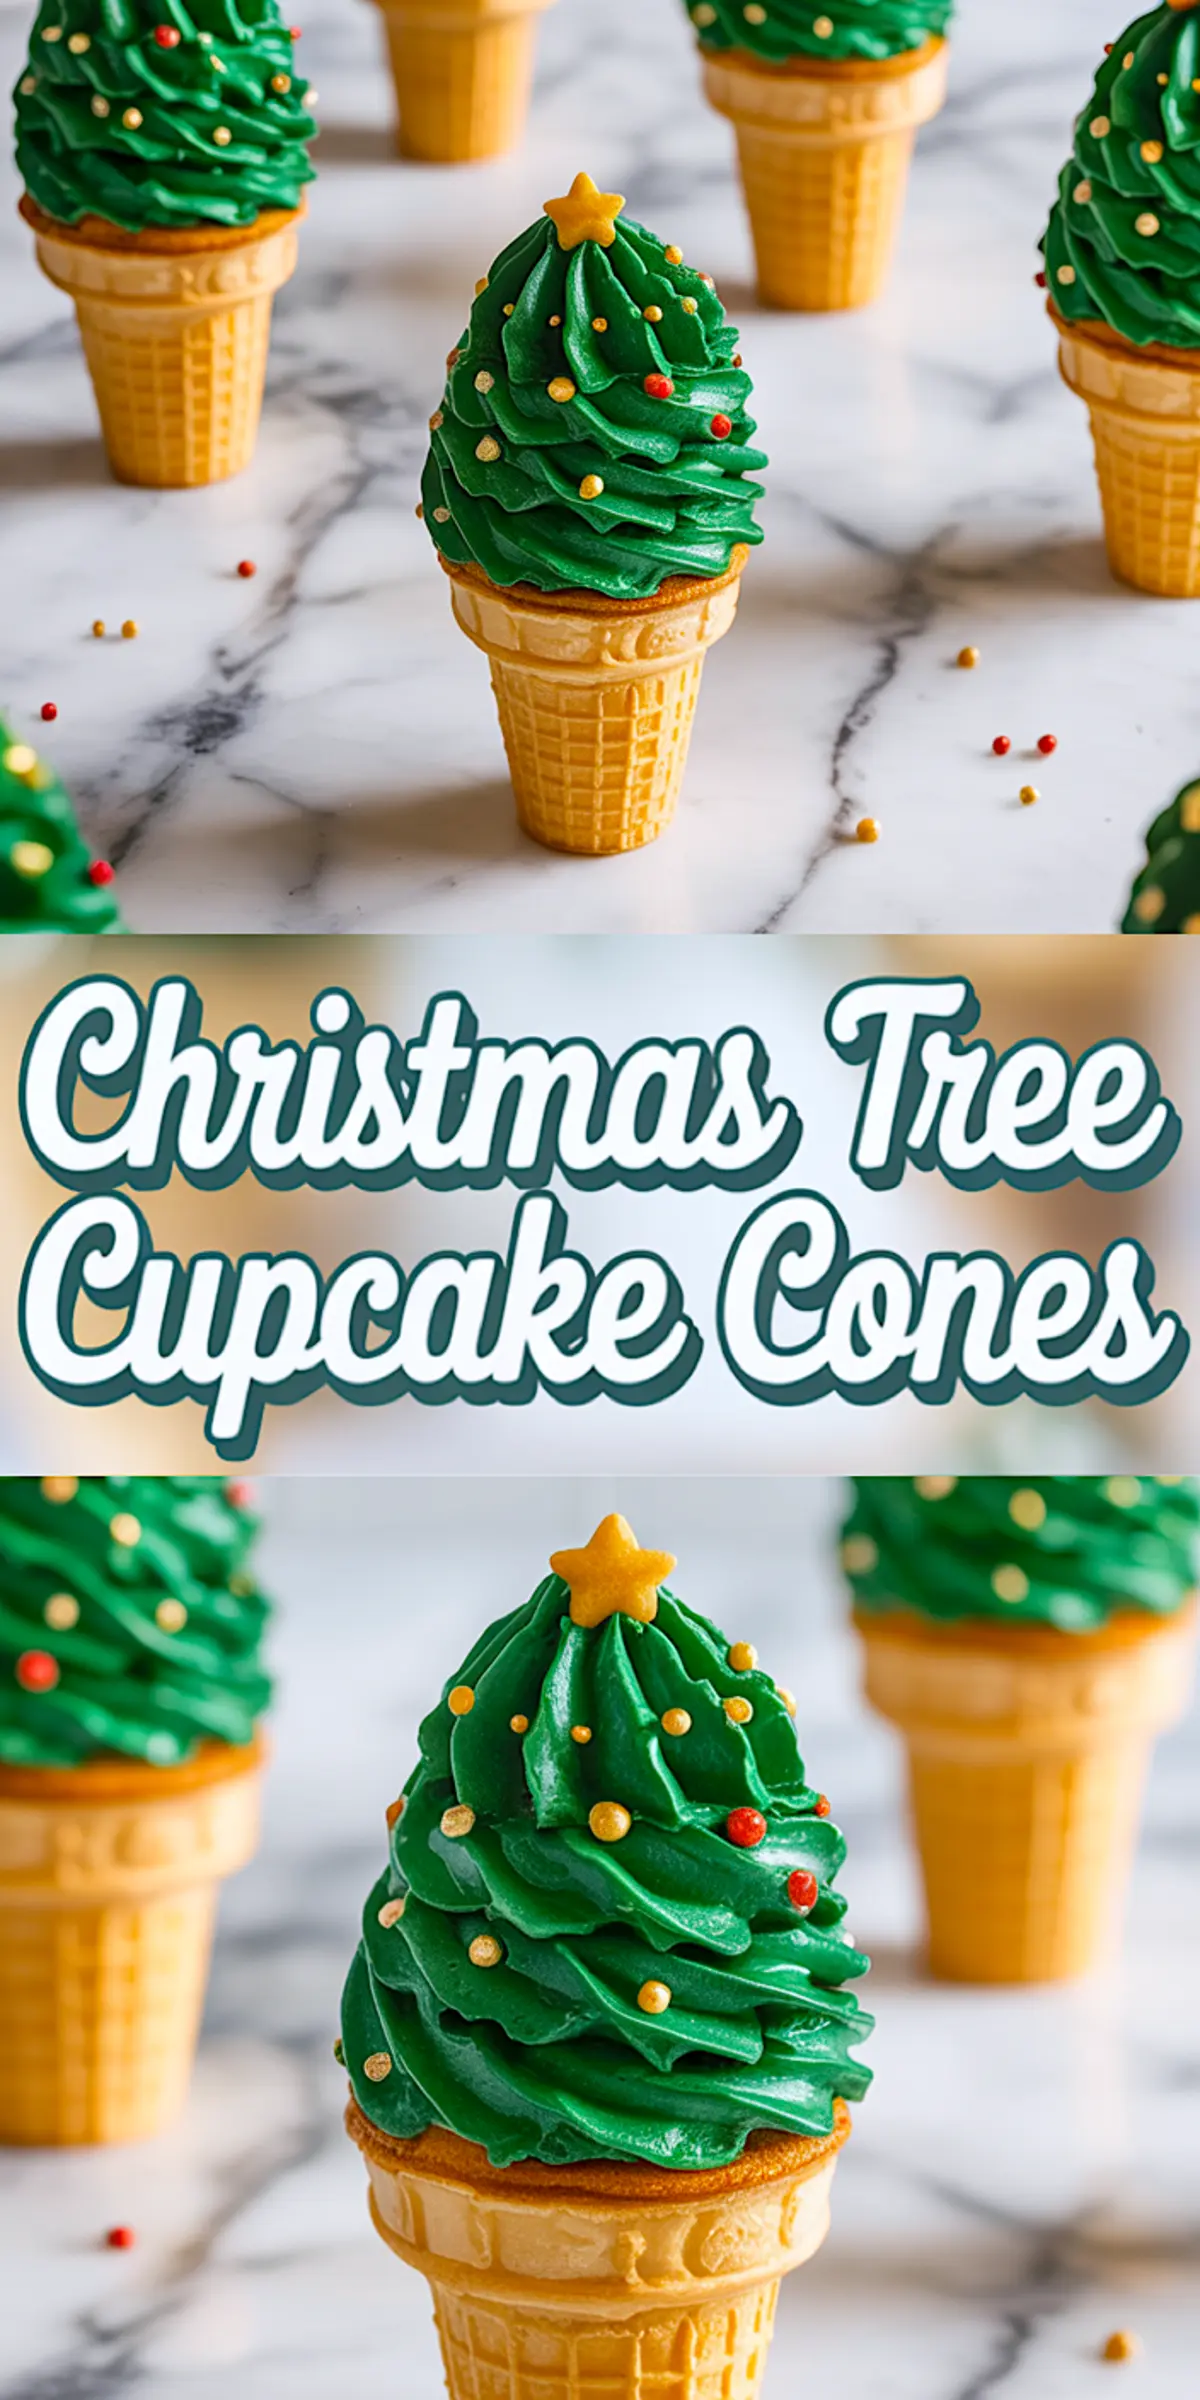
These Christmas Tree Cupcake Cones offer a cheerful update to the usual Christmas cupcakes. They look like mini Christmas tree ice creams but bite into one and you’ll find a soft, fluffy cupcake tucked inside. You’ll get the full joy of Christmas cooking, the surprise of a hidden center, and all the charm of Christmas snacks in one.
You’re going to learn exactly how to bake, decorate, and serve them confidently. This isn’t just a novelty. It’s a smart, hands-on holiday dessert that travels well, stands up straight, and makes a striking statement on a festive table. I’ve made these with kids, brought them to office parties, and even used them as edible placeholders for Christmas dinner.
Following a special diet?
Every recipe on this site can be converted to gluten-free, vegan, dairy-free, keto, nut-free or egg-free with adjusted ratios so nothing falls flat.
Try the Recipe Converter →Why I Use Ice Cream Cones Instead of Liners
Flat-bottomed ice cream cones are the foundation of this recipe. I prefer these over cupcake liners because they’re both functional and edible. They eliminate the need for extra serving ware and keep mess to a minimum during parties. Plus, you don’t need to peel anything back, which makes them ideal for younger hands during Christmas cupcakes recipes activities.
The cones also hold their shape better when baked upright in a muffin tin. I wrap a small strip of foil around the base of each one just to be safe. They don’t tip or spread the way paper liners sometimes do.
If you’re also planning Christmas Tree Cake Pops, you’ll already have the cones and decorations prepped. These recipes work well in tandem.
The Secret to Moist Cupcakes Inside the Cone
This batter uses sour cream and milk as the core moisture components. I’ve tested versions with buttermilk, but the tang from sour cream offers more control and a finer crumb. The milk loosens the batter just enough to rise smoothly without overflowing the cone.
Eggs and softened butter give the base its richness, while baking powder and a touch of soda help them lift inside the cones. Don’t skip that small amount of salt it rounds out th sweetness and keeps the flavor profile from falling flat.
Between the Christmas Tree Brownies and these, this batter holds its own for stability and structure.
Tip: Sour cream gives better moisture retention than yogurt here. I’ve tried both side by side, and sour cream gives a longer-lasting softness that still pipes and cools cleanly.
How the Buttercream Gets That Evergreen Look
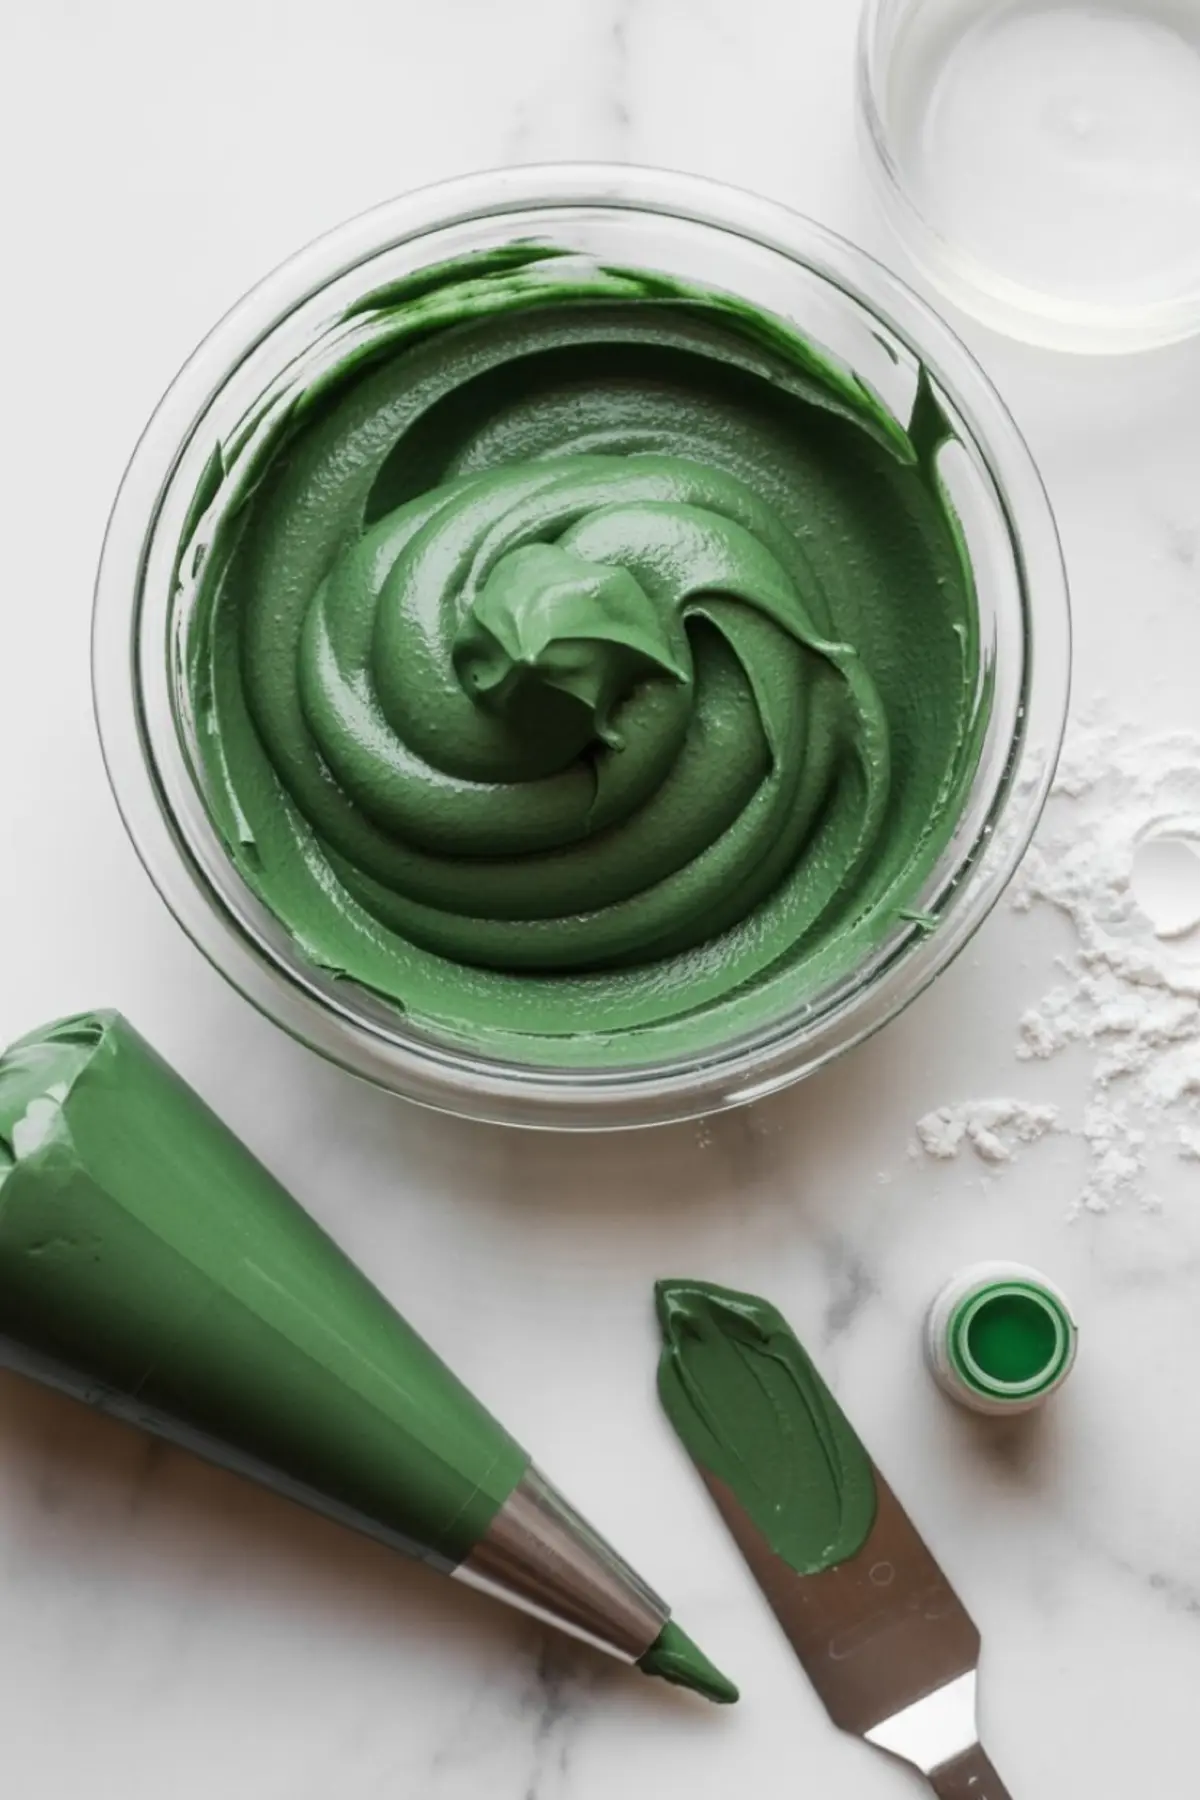
For the frosting, I rely on American buttercream because it’s sturdy and pipeable. You want something that holds the shape of a Christmas tree without sliding or sagging. I beat the butter until it’s nearly white before adding sugar and cream. This base ensures the green food coloring sits evenly without looking streaky.
Gel coloring, not liquid. That makes the biggest difference. I use just enough to reach an evergreen tone that still looks edible. If you overdo the color, it starts to look like plastic. You’ll know the right hue when it reminds you of fir branches, not neon.
Piping with a large star tip like Wilton 1M lets you create tall, defined swirls. Start from the base and spiral up. Practice one or two on parchment before going straight to the cupcake cones.
If you liked the technique used in our Christmas Tree Cream Puffs, you’ll enjoy this one too. It’s forgiving and fun.
Decorating Like a Pro Without the Fuss
A simple gold star topper anchors each tree visually. I usually use fondant stars I make ahead, but star sprinkles work well if you’re short on time. Use round red and gold sprinkles for the “ornaments,” spacing them out like a real tree.
A light dusting of edible glitter adds shimmer but isn’t necessary. I’ve served them with and without it and no one complains either way. What matters is keeping the trees upright, colorful, and cleanly frosted.
These also double beautifully as centerpieces. Tuck a few of them upright into a foam block wrapped in foil, and suddenly you’ve got a standing forest of cupcake trees. People will take photos. Trust me.
Ingredient Comparison: Sour Cream vs. Buttermilk in the Cupcake Base
I’ve tested this recipe with both. Sour cream gives a thicker batter that holds better inside the cone and bakes into a tight crumb that doesn’t sink. Buttermilk offers more rise but often leads to overflow, especially in a cone. For stability and rich texture, sour cream is the better choice. I use it consistently and have fewer surprises in the oven.
If you’re making both these and the Christmas Tree Cake Dip, the sour cream can be shared across recipes to cut prep time.
Storage and Serving Strategy for Best Results
Store the frosted cupcake cones at room temperature in a cool, dry spot. Avoid the fridge. Cold makes the cones go soft and soggy. I keep them loosely covered with a tall box or foil tent to preserve the shape without damaging the frosting.
You can bake and cool the cupcakes a day in advance. Frosting and decorating should happen closer to serving time. The frosting sets just enough to stay put during transport if you give it about 30 minutes at room temperature.
Set them in a muffin tin or shallow tray during transport to keep them upright. I sometimes wrap the bottom third of each cone in foil again for added structure if I’m driving them to a party.
Need more ideas for festive holiday baking? You might enjoy these Christmas Tree Cake Pops as a no-fuss make-ahead option.
Try These and Bring the Tree to the Table
These Christmas Tree Cupcake Cones bring whimsy and structure together. They’re tidy enough for kids, charming enough for adults, and festive enough for your holiday photo backdrop. You can decorate them simply or make a whole forest of variations depending on your supplies and time.
If you try them, I’d love to hear how they turned out. Leave a comment below or ask a question if anything needs clarification.
And if you want to come back to this idea closer to your party planning day, save this to your holiday baking board on Pinterest.
Christmas Tree Cupcake Cones
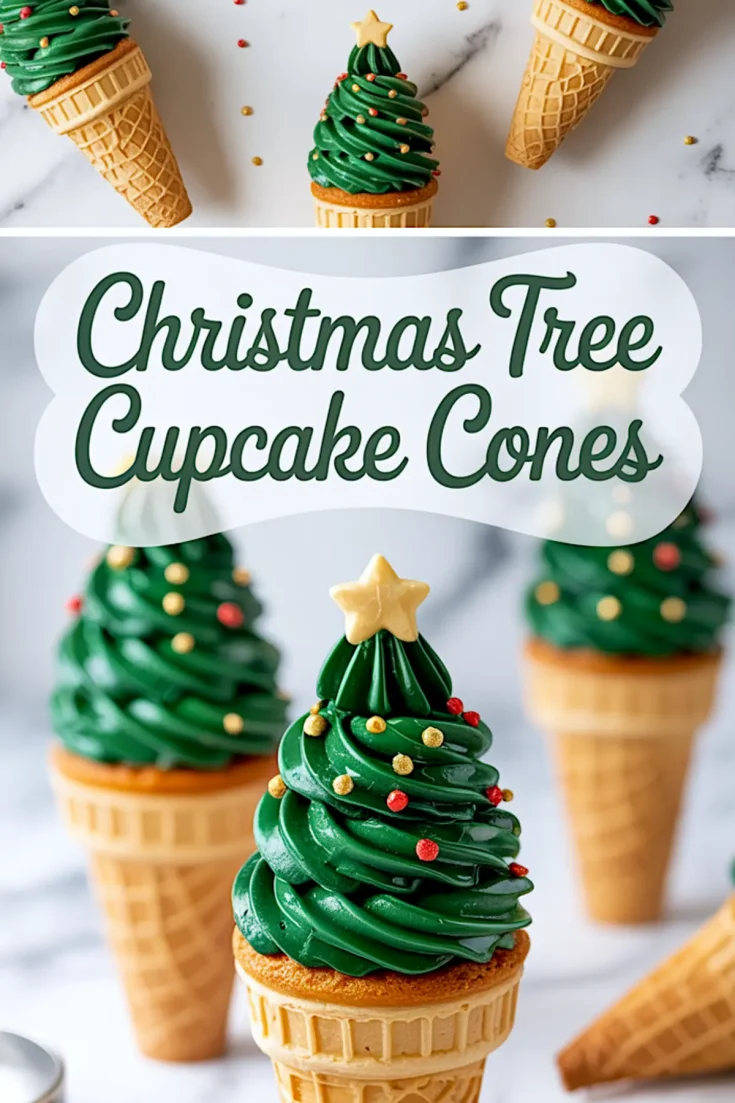
These Christmas Tree Cupcake Cones are a festive twist on traditional Christmas cupcakes—baked inside ice cream cones and decorated to look like mini Christmas trees! With colorful frosting and sprinkles, they resemble Christmas tree ice cream treats but are actually soft, moist cupcakes hidden inside. Ideal for Christmas snacks, party treats, or a fun family activity during Christmas cooking season. These whimsical Christmas cupcakes recipes bring cheer to any dessert table and are perfect for creating Instagram-worthy Xmas food. Try them as a creative alternative to classic holiday baking ideas this season!
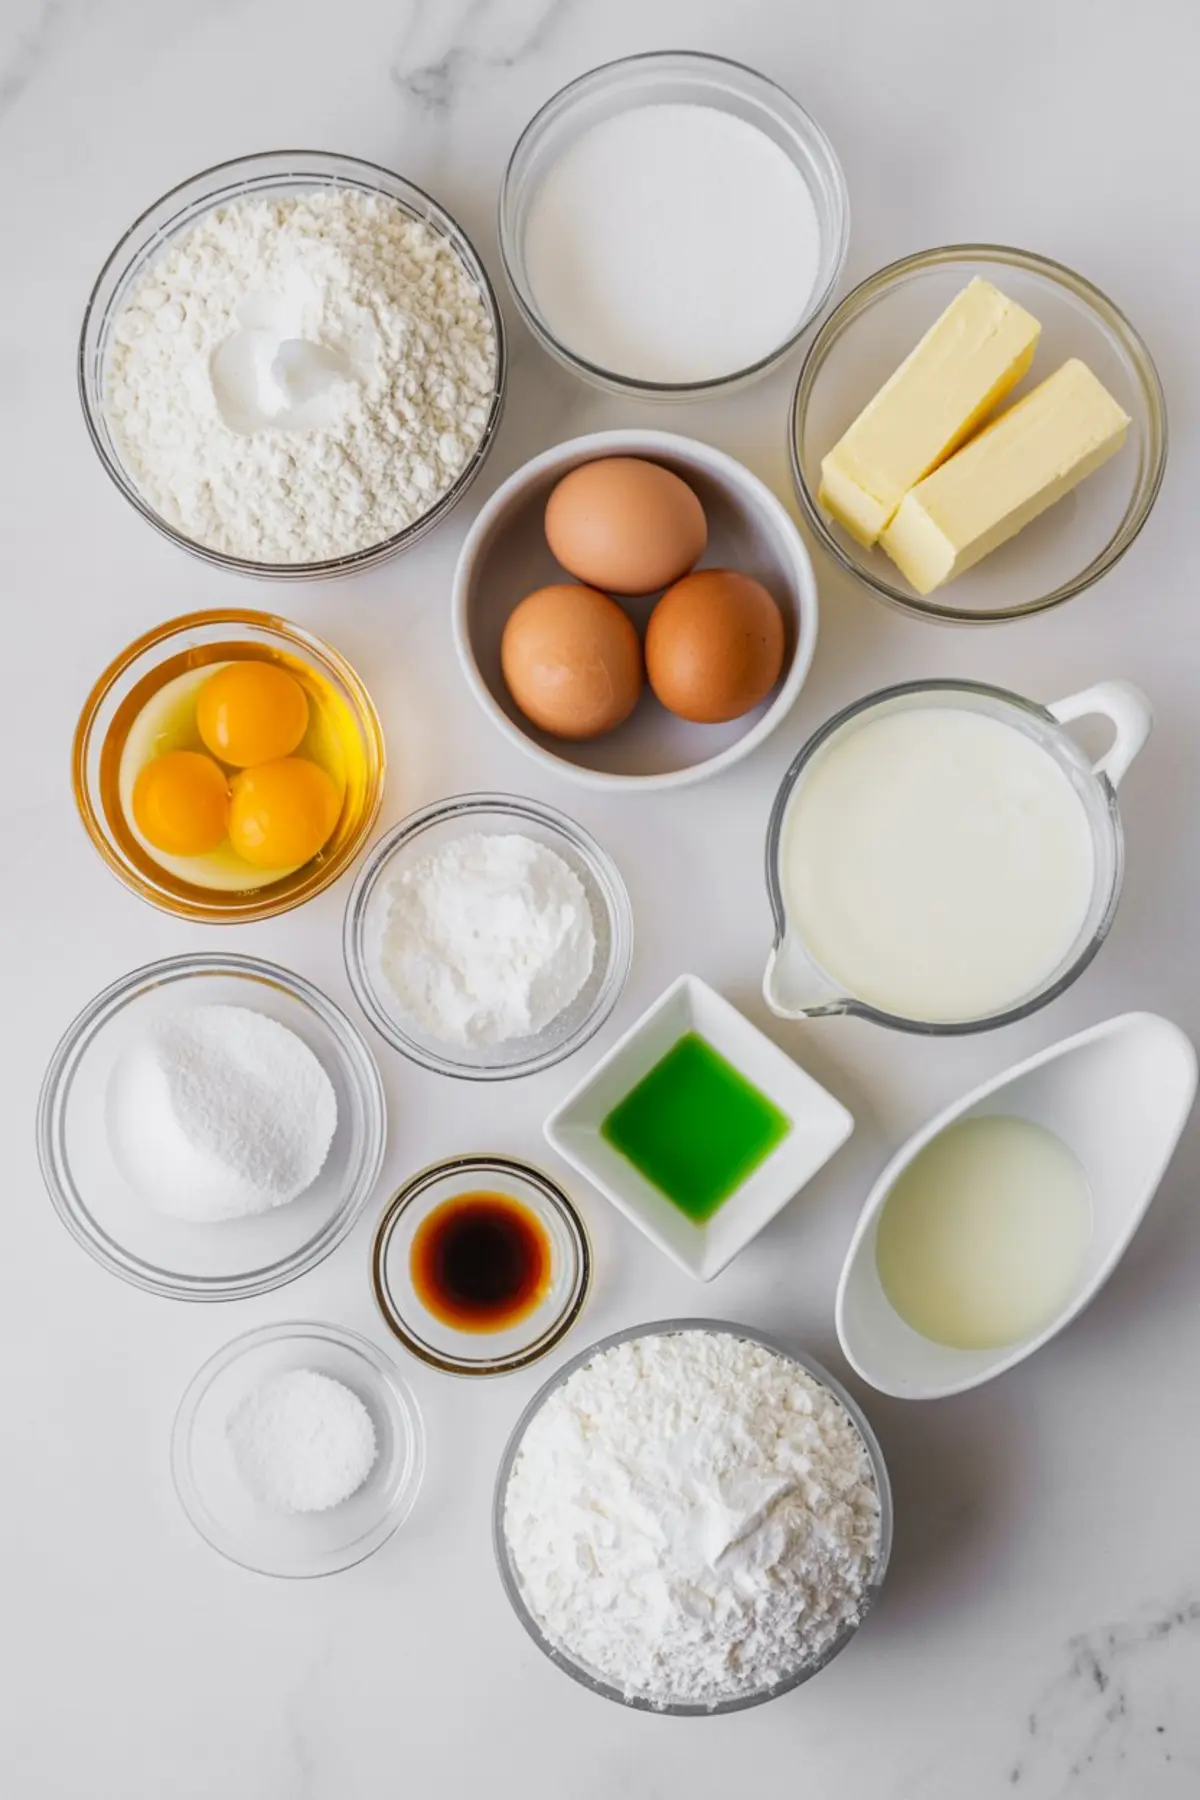
Ingredients
- FOR THE CUPCAKES
- 12 flat-bottomed ice cream cones
- 1 ¼ cups all-purpose flour
- 1 tsp baking powder
- ¼ tsp baking soda
- ¼ tsp salt
- ½ cup unsalted butter, softened
- ¾ cup granulated sugar
- 2 large eggs
- 1 ½ tsp vanilla extract
- ½ cup sour cream
- ¼ cup milk
- FOR THE BUTTERCREAM FROSTING
- 1 cup unsalted butter, softened
- 3 ½ cups powdered sugar
- 2–3 tbsp heavy cream or milk
- 1 ½ tsp vanilla extract
- Green gel food coloring
- DECORATIONS
- Gold star sprinkles or fondant stars
- Red, gold, or multicolored round sprinkles
- Optional: edible glitter
Instructions
- PREHEAT AND PREPARE: Preheat the oven to 350°F (175°C). Arrange the ice cream cones upright in a muffin tin, one cone per cavity, to keep them stable while baking. Set aside.
- MIX DRY INGREDIENTS: In a medium bowl, whisk together the flour, baking powder, baking soda, and salt until well combined. Set aside.
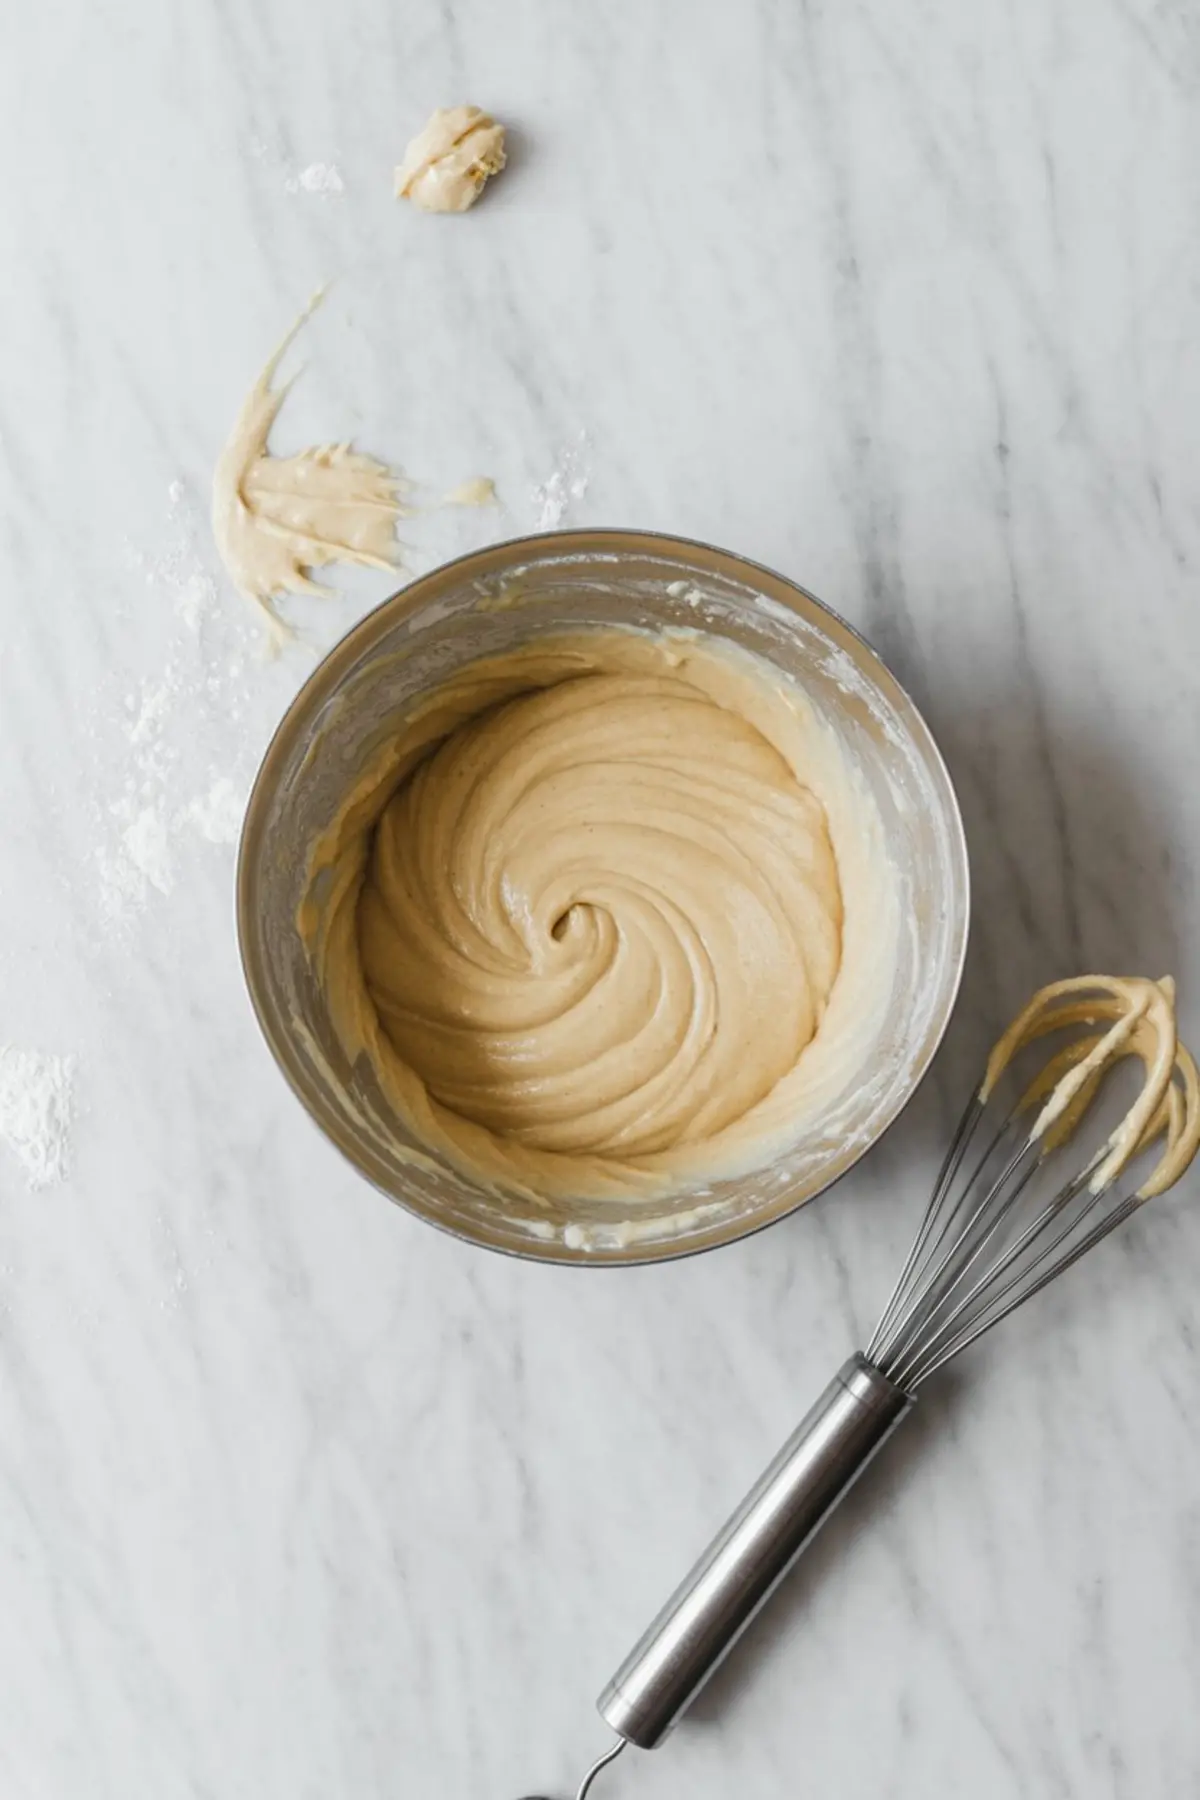
- CREAM BUTTER AND SUGAR: In a large bowl, beat the softened butter and granulated sugar together until the mixture is light and fluffy, about 2 to 3 minutes using a hand or stand mixer on medium speed.
- ADD EGGS AND VANILLA: Beat in the eggs one at a time, mixing well after each addition. Stir in the vanilla extract until evenly incorporated.
- COMBINE WET AND DRY: Mix in the sour cream and milk until smooth. Gradually add the dry ingredients to the wet mixture, stirring just until combined. Do not overmix.
- FILL THE CONES: Spoon or pipe the batter into the cones, filling each about two-thirds full. Leave space at the top for the cupcakes to rise during baking.
- BAKE: Place the muffin tin in the oven and bake for 18 to 22 minutes, or until a toothpick inserted into the center of a cupcake comes out clean. Let the cones cool completely before decorating.
- MAKE THE FROSTING: In a large bowl, beat the butter until creamy and smooth. Add the powdered sugar one cup at a time, mixing on low speed after each addition. Add the vanilla and 2 tablespoons of cream or milk. Increase the mixer to high and beat until the frosting is fluffy. Add green gel food coloring and mix until the color is evenly distributed. Adjust color as needed for a rich evergreen tone.
- PIPE THE TREES: Fit a piping bag with a large star tip, such as a Wilton 1M. Pipe tall swirls of green frosting onto each cooled cupcake cone to resemble a Christmas tree shape.
- DECORATE: Place a gold star sprinkle or fondant star at the top of each frosting swirl. Add round sprinkles as ornaments around the tree. For extra sparkle, lightly dust with edible glitter if using.
Notes
To help cones stand securely in the muffin tin, wrap the base of each with a strip of foil to keep them upright during baking. Store decorated cones at room temperature for up to 2 days in a cool, dry area. Avoid refrigerating, as cones may soften.
Nutrition Information
Yield
12Serving Size
1Amount Per Serving Calories 891Total Fat 51gSaturated Fat 31gTrans Fat 1gUnsaturated Fat 17gCholesterol 185mgSodium 297mgCarbohydrates 100gFiber 1gSugar 80gProtein 10g