A Smooth and Creamy Christmas Fudge with Real Eggnog and Nutmeg
This eggnog fudge recipe gives you a creamy, sliceable treat that blends white chocolate, marshmallow crème, and warm holiday spices. It holds its shape, melts gently on the tongue, and adds a festive flavor to any Christmas dessert tray.
You’ll learn how to make it smooth, how to avoid graininess, and how to use eggnog without overpowering the base. This recipe fits right into your list of easy eggnog treats or homemade fudge recipes for gifting season.
The texture is soft but stable. The sweetness is balanced. And it sets without the need for complicated equipment. That’s the kind of recipe I like to return to each year.
Following a special diet?
Every recipe on this site can be converted to gluten-free, vegan, dairy-free, keto, nut-free or egg-free with adjusted ratios so nothing falls flat.
Try the Recipe Converter →What Makes This Holiday Fudge Work So Well
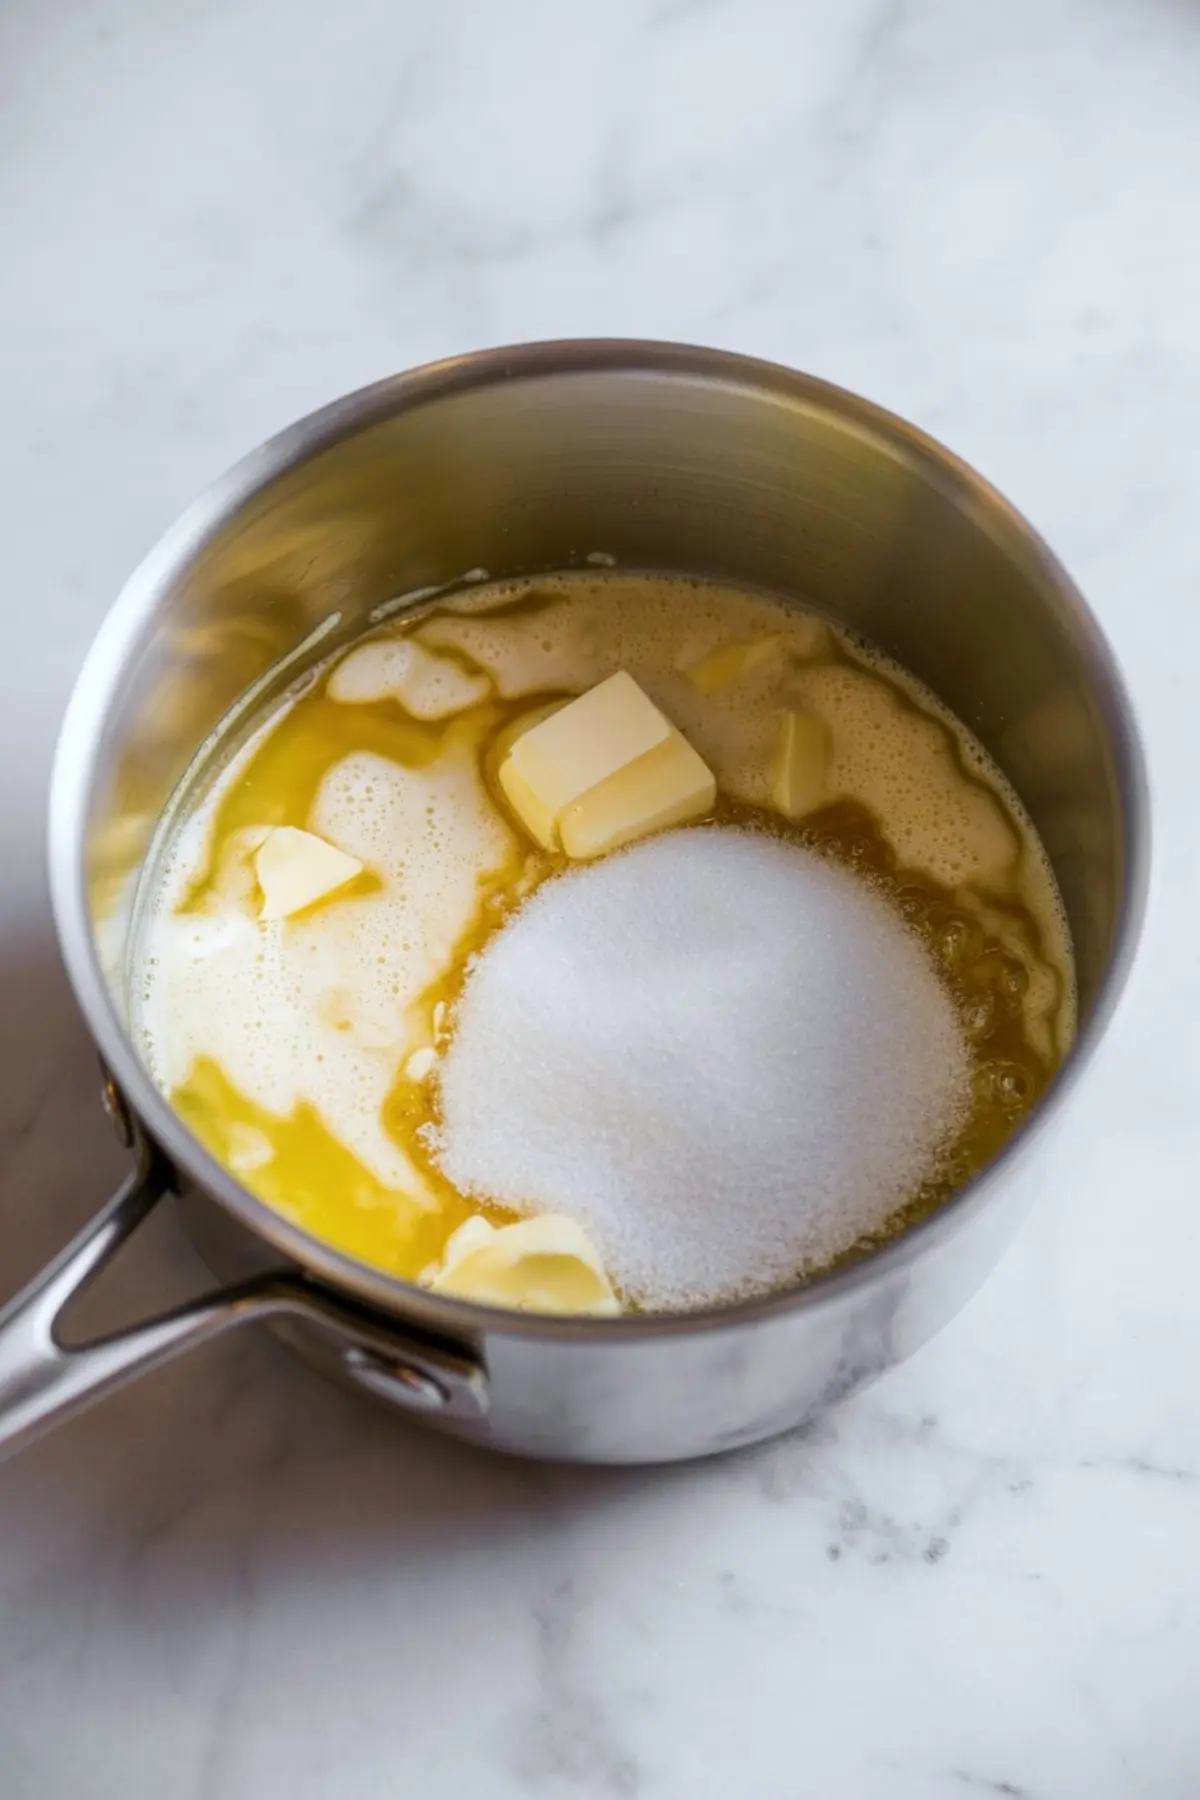
The ratio of sugar to butter to eggnog creates a thick base that sets smoothly once cooled. It starts with two cups of sugar, three quarters of a cup of butter, and the same amount of eggnog. That mix bubbles into a glossy foundation that blends cleanly with the rest of the ingredients.
You don’t technically need a thermometer, but I still use one. Boiling the base until it hits 234°F gives a firmer, more reliable fudge. I’ve made this without a thermometer too, by watching for that frothy, glossy boil that looks almost like caramel foam. But for gifting or clean slices, I stick with the thermometer.
If you’ve made my Gingerbread Fudge before, you’ll notice a similar process but with a lighter, creamy finish instead of the deep molasses bite.
Try the gingerbread version here.
Why Nutmeg and White Chocolate Matter Most
Nutmeg brings warmth and character. It makes this feel like a true eggnog dessert, not just vanilla fudge with a splash of cream. I grate mine fresh to get the oils and full aroma, but jarred ground nutmeg works too if that’s what you have.
The white chocolate chips form the structure once they melt into the hot base. Without them, the fudge would lack both body and flavor. I use real white chocolate chips with cocoa butter. Some lower-cost chips include fillers that leave a waxy texture or break during melting. Stick to quality here. It makes a difference.
For something with a bit more bite and a peppermint twist, you might enjoy my White Chocolate Peppermint Fudge next.
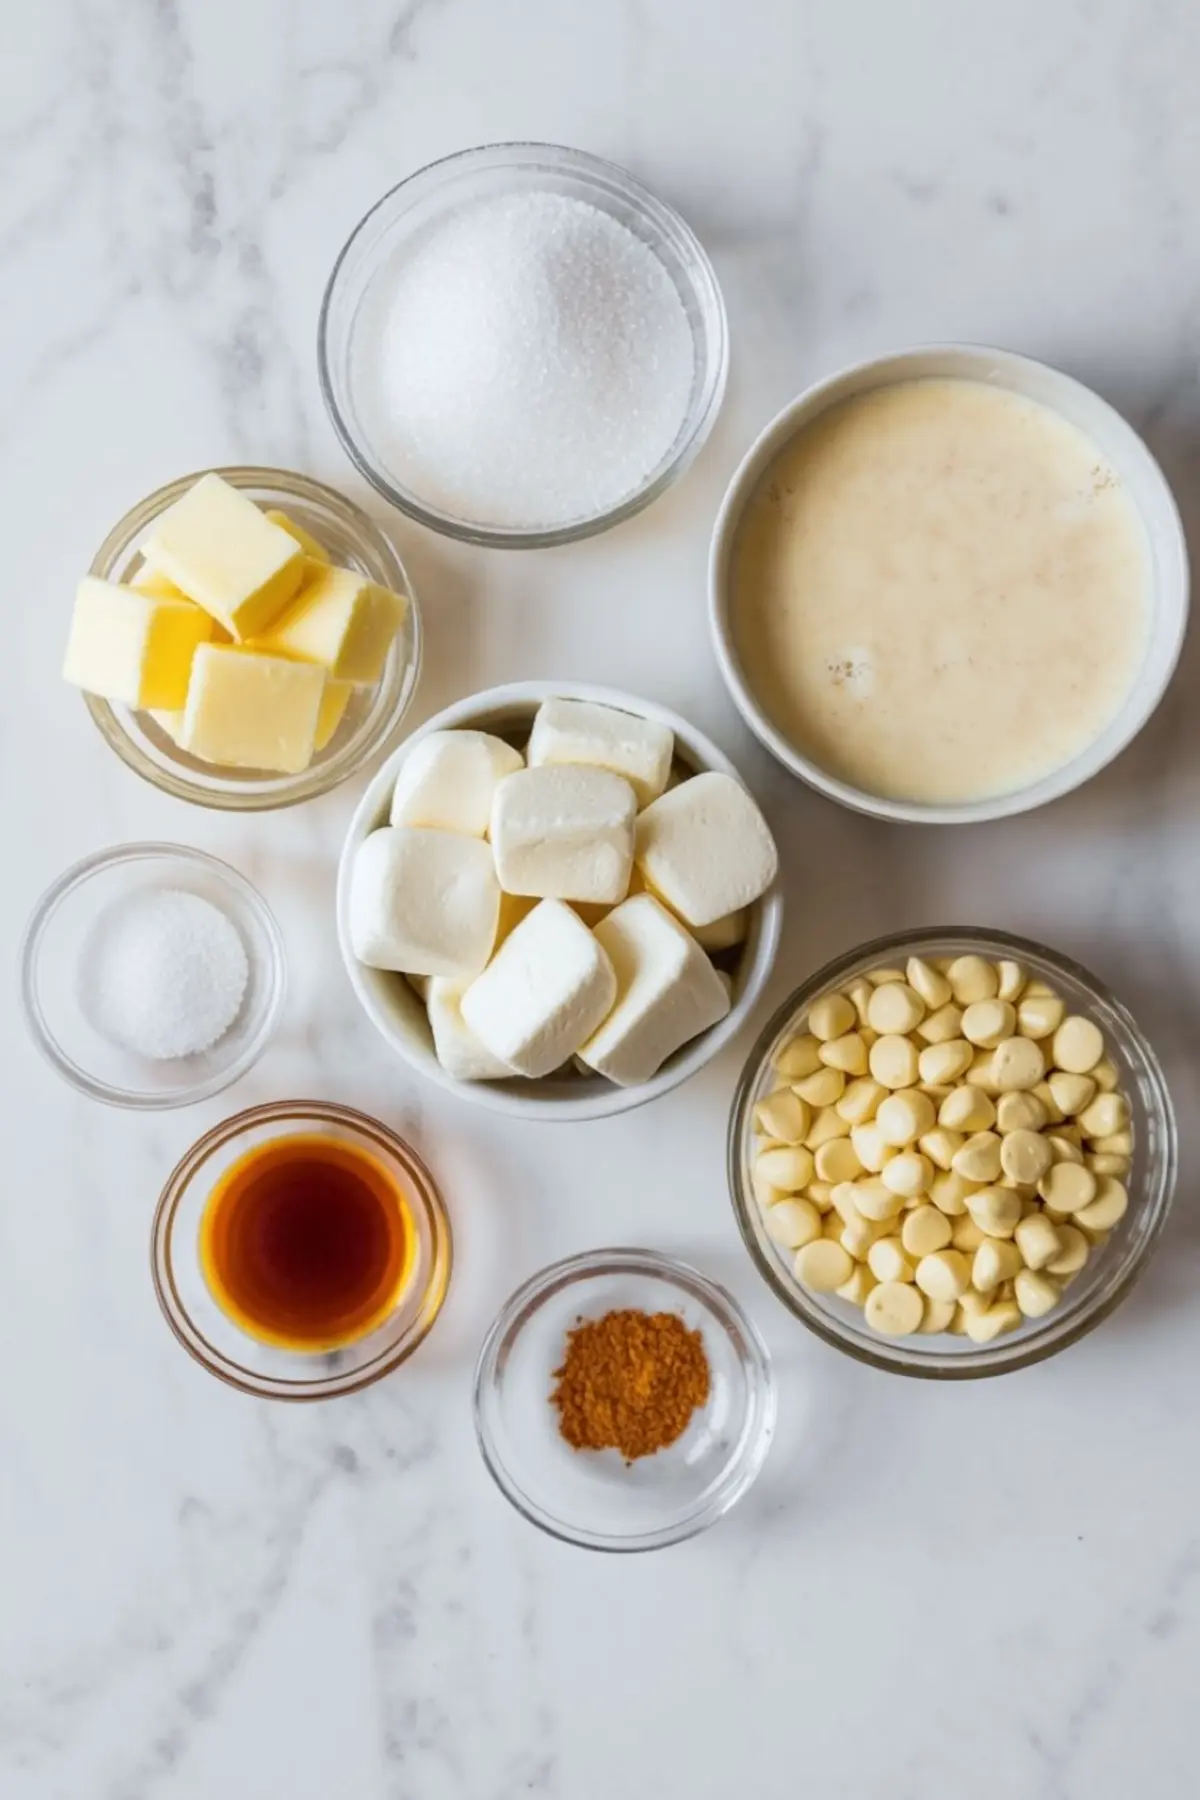
Ingredient Breakdown and Substitution Tips
Granulated sugar builds structure and brings clarity to the base flavor. I’ve tested with part brown sugar, but it always shifts the flavor too far into caramel. Stick with white sugar here.
Butter adds richness. Use unsalted so you can control the salt level at the end. That small pinch matters more than people think.
Eggnog carries both flavor and moisture. I go with store-bought eggnog that already includes spice. If you’re using homemade, make sure it’s unspiked and smooth. In a pinch, you can use half-and-half with nutmeg and a drop of vanilla, but the result won’t have that same holiday depth.
Marshmallow crème creates the creamy texture. It melts cleanly into the mix and keeps the finish soft but sliceable. It’s a key part of what makes this work without becoming grainy.
A pinch of salt helps round the sweetness. Don’t skip it.
This recipe reminds me a lot of how I approach Eggnog Snickerdoodles. A classic base, a seasonal twist, and just enough spice to make it sing.
Step-by-Step Visual and Sensory Guide
Once your pan is lined, start by gently combining the butter, sugar, and eggnog. Medium heat is enough. The butter should melt slowly, and the sugar will dissolve into a soft ivory-colored liquid.
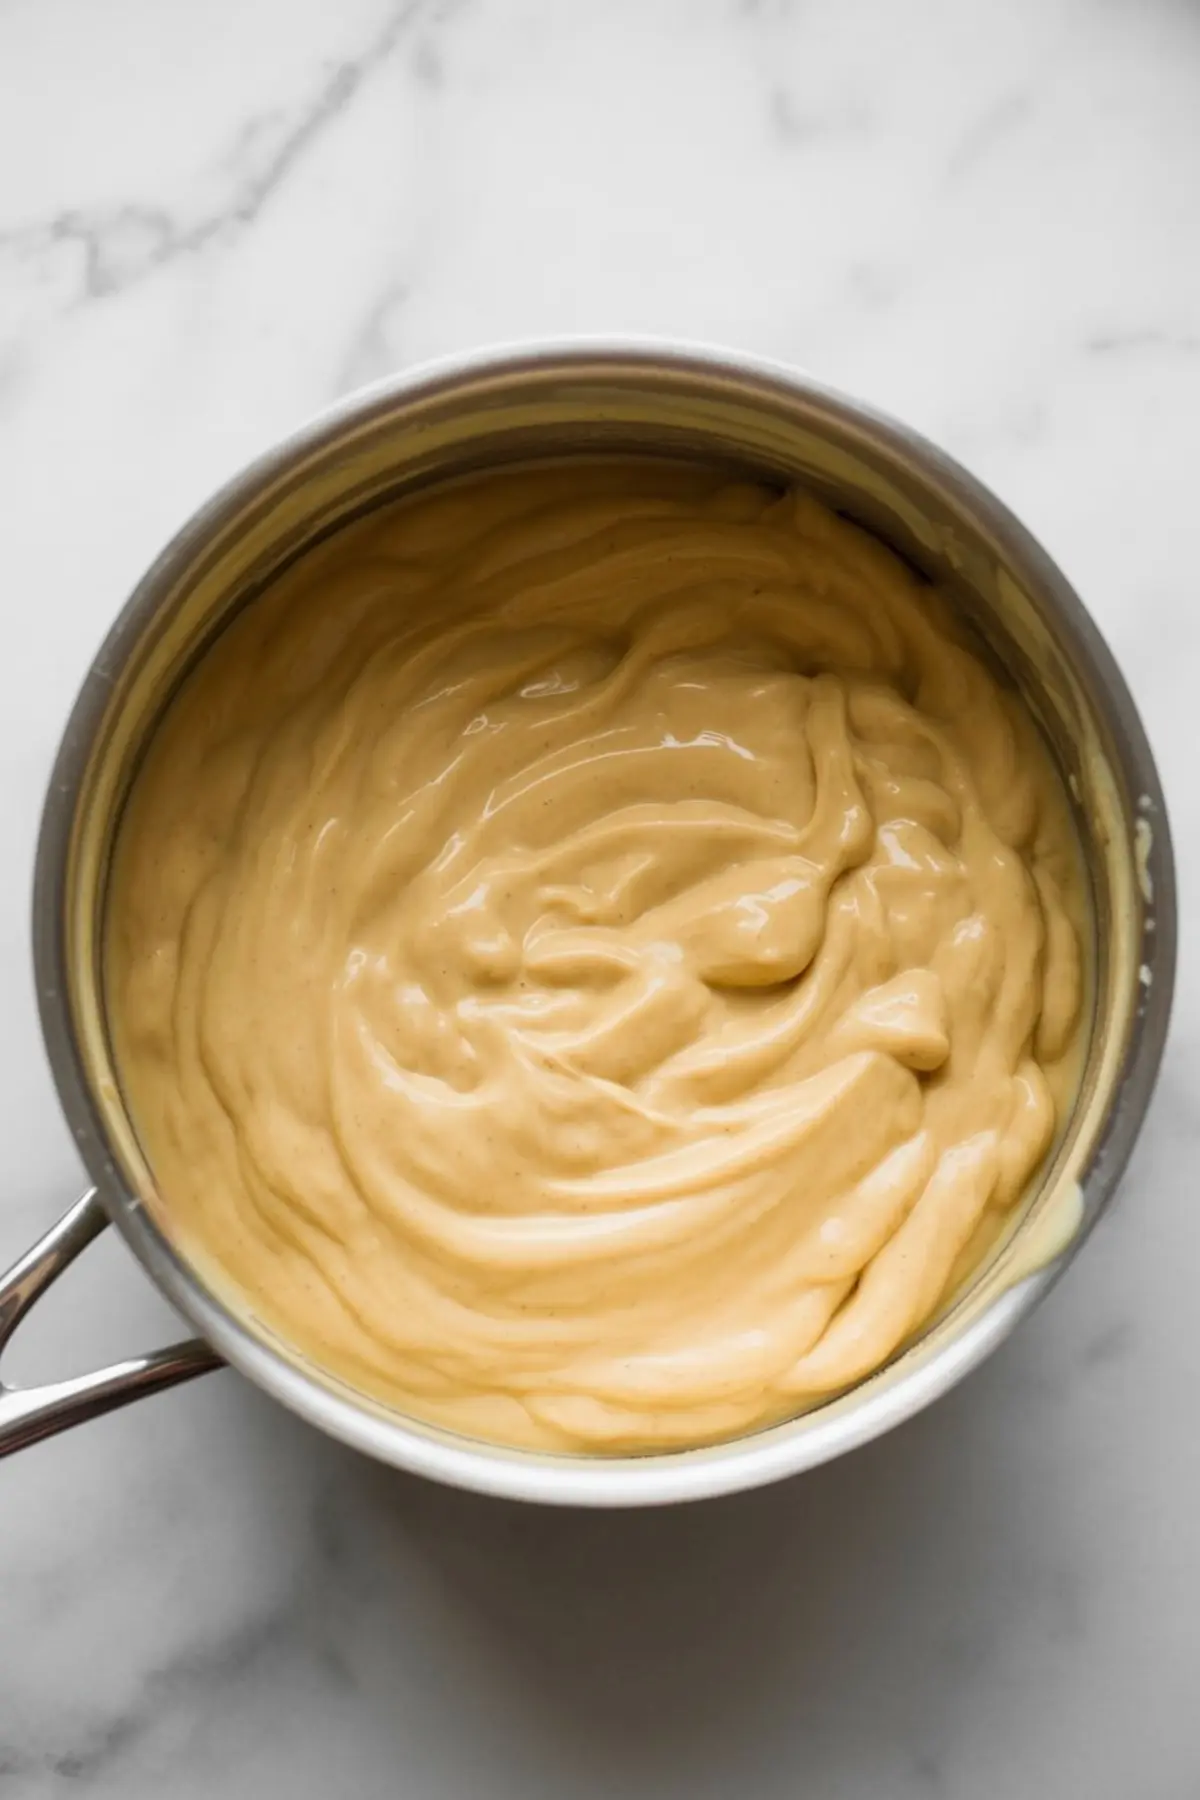
When it starts to boil, stop stirring and let it roll. If you’re using a thermometer, watch for that 234°F mark. If not, look for a frothy surface with thick bubbles rising steadily.
Remove it from heat and quickly stir in the marshmallow crème, white chocolate chips, vanilla, nutmeg, and salt. It should turn creamy and smooth without lumps. Work quickly before it begins to thicken.
Pour it into the lined pan and smooth the top with a spatula. A gentle tap on the counter helps release any trapped air bubbles.
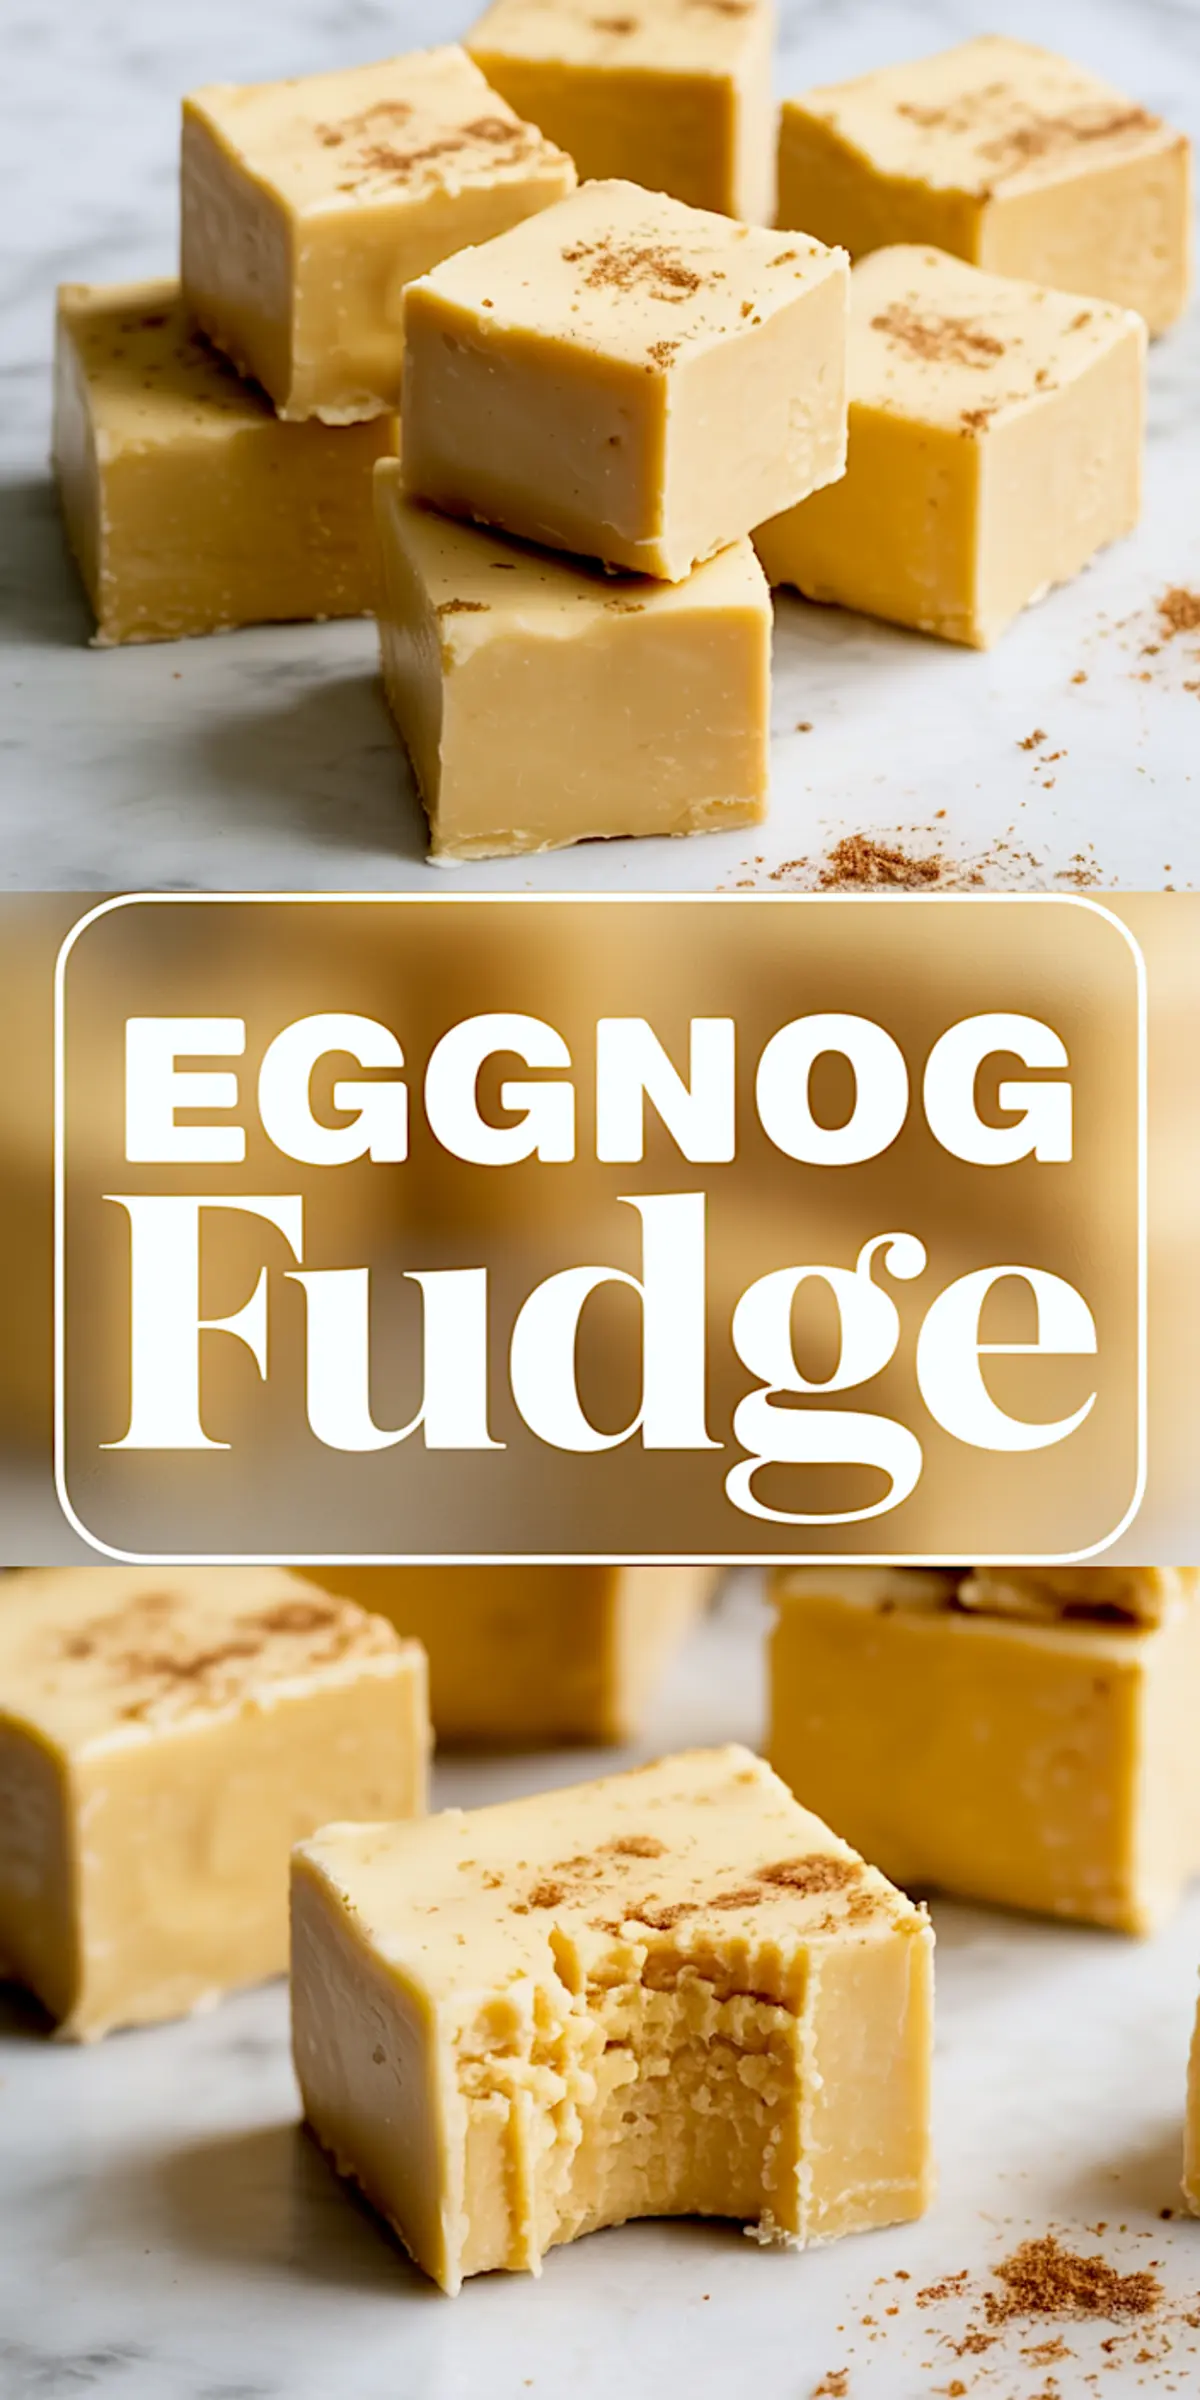
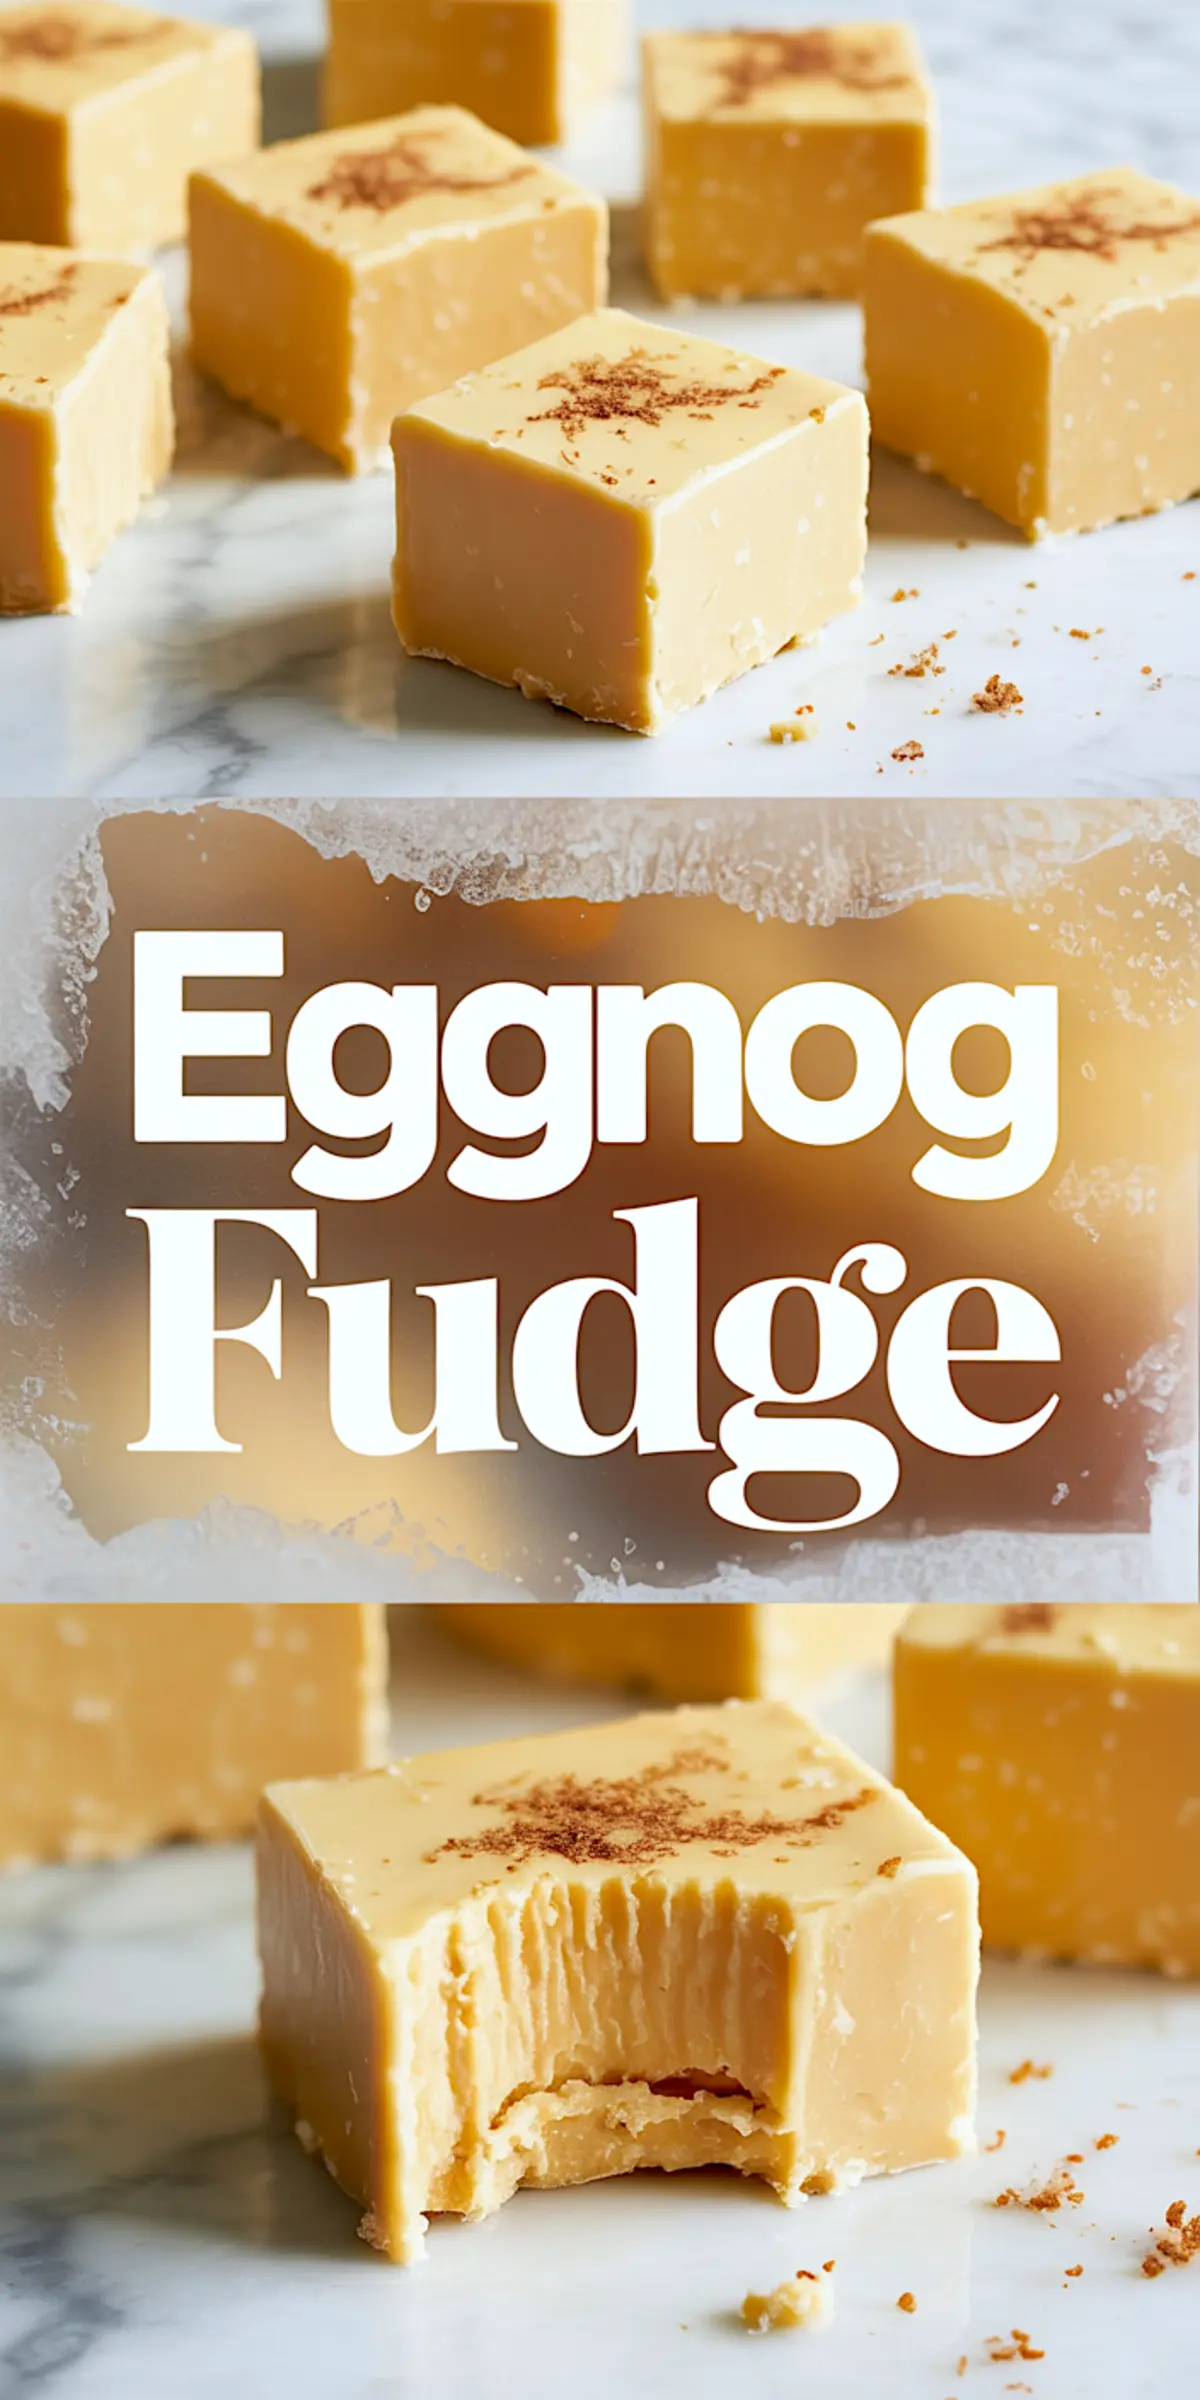
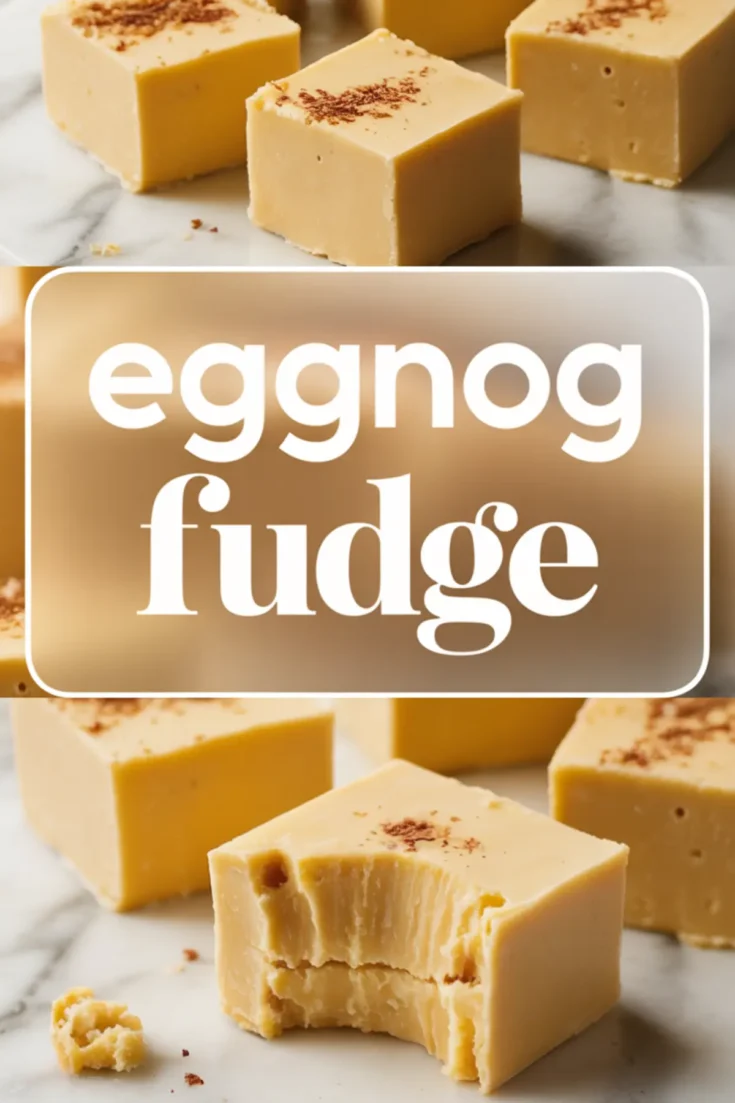
Grate a little fresh nutmeg on top while it’s still warm. It adds a subtle finish and looks beautiful once set.
How to Know When It’s Ready
The fudge sets in stages. Let it cool on the counter for an hour, then transfer to the fridge for another three hours. It should feel firm but slightly soft to the touch.
If it sticks to your knife when cutting, it needs more chill time. If it crumbles, it may have boiled a little too long. You’ll get a feel for the timing after your first batch.
I like to cut it into one-inch squares and lift it with the parchment for clean edges. It stores well, but softens nicely at room temperature before serving.
Common Mistakes and How to Fix Them
If the mixture separates, it’s often because the boil happened too fast or the heat was too high. Next time, lower the heat and take it slow.
If it’s grainy, the sugar may not have fully dissolved before boiling. Make sure everything is smooth before the boil starts.
If it doesn’t set, it likely didn’t reach the soft ball stage. A thermometer prevents this problem entirely.
For extra guidance on fudge texture, you can also compare to the method used in my Eggnog Thumbprint Cookies, where the goal is a soft but structured finish.
Flavor Variations That Work Well
You can add a tablespoon of dark rum or bourbon to give it an adult edge. Just stir it in with the vanilla after removing from heat.
For a cinnamon version, replace half the nutmeg with ground cinnamon and dust the top with cinnamon sugar instead.
If you want more texture, stir in a half cup of finely chopped toasted pecans before pouring the mix into the pan.
Add crushed cookies to the top for a crunchy finish. Gingersnaps or vanilla wafers both work.
How to Store and Keep It Fresh
On the counter, this fudge keeps for two days in a cool room.
In the fridge, sealed in an airtight container, it stays good for up to two weeks.
You can freeze it in layers between parchment for up to three months. Let it thaw overnight in the fridge before slicing.
The flavor deepens after a day or two, so I often make it ahead.
Practical Tips From My Kitchen
Use a heavy-bottomed saucepan to avoid scorching. Thin pans heat unevenly and cause separation.
Keep your thermometer clipped on from the start. It’s easier to control the boil that way.
Grease your parchment paper lightly. Even with lining, the corners can stick if you skip this step.
Wipe your knife between each slice. It makes the pieces cleaner and neater for gifts or trays.
How to Serve It
Add it to your holiday cookie tin as the creamy bite in the mix.
Wrap pieces in wax paper and tie with string for homemade gifts.
Serve with coffee or hot cocoa after dinner.
Cut it into shapes using small holiday cookie cutters for party platters.
Pair it with salty nuts or pretzels for a balanced treat table.
Save This Recipe for the Holidays
Pin this eggnog fudge recipe so you have it ready for Christmas baking. It’s quick, festive, and a crowd-pleaser on any dessert tray.
Let me know how yours turned out in the comments. Did you add anything new? I’d love to hear if you gave it a twist.
Eggnog Fudge Recipe
Make a batch of this easy eggnog fudge for a cozy Christmas treat! This holiday eggnog fudge recipe is rich, creamy, and packed with festive flavor thanks to real eggnog and warming spices. Perfect for gifting or adding to your Christmas fudge platter, this simple recipe is one of our favorite holiday fudge ideas. No candy thermometer needed – just a smooth, melt-in-your-mouth bite every time. If you’re looking for homemade fudge recipes for the holidays, this one’s a must-try. Great for eggnog dessert lovers and perfect for your fudge recipes easy collection!
Ingredients
- 2 cups white granulated sugar
- ¾ cup unsalted butter
- ¾ cup eggnog (store-bought or homemade)
- 1 (7 oz) jar marshmallow crème
- 1 (12 oz) package white chocolate chips
- 1 tsp vanilla extract
- ½ tsp freshly grated nutmeg (plus more for garnish)
- Pinch of salt
Instructions
Notes
Use high-quality white chocolate chips for the smoothest texture. Store fudge in an airtight container in the refrigerator for up to 2 weeks. Let sit at room temperature for 10 minutes before serving for best flavor.