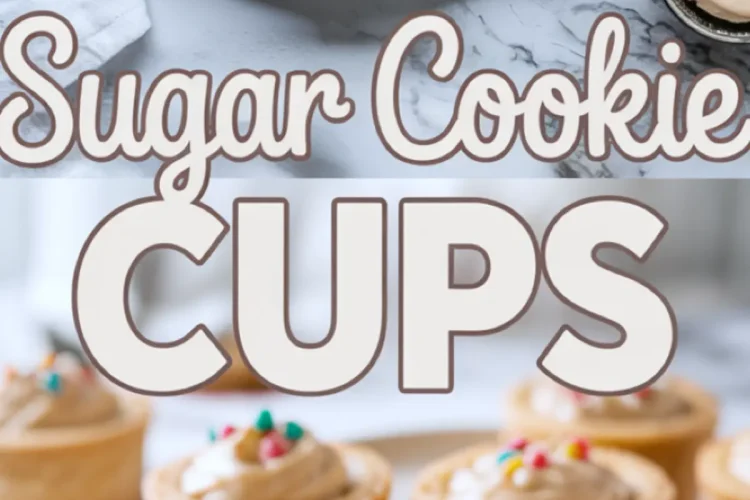
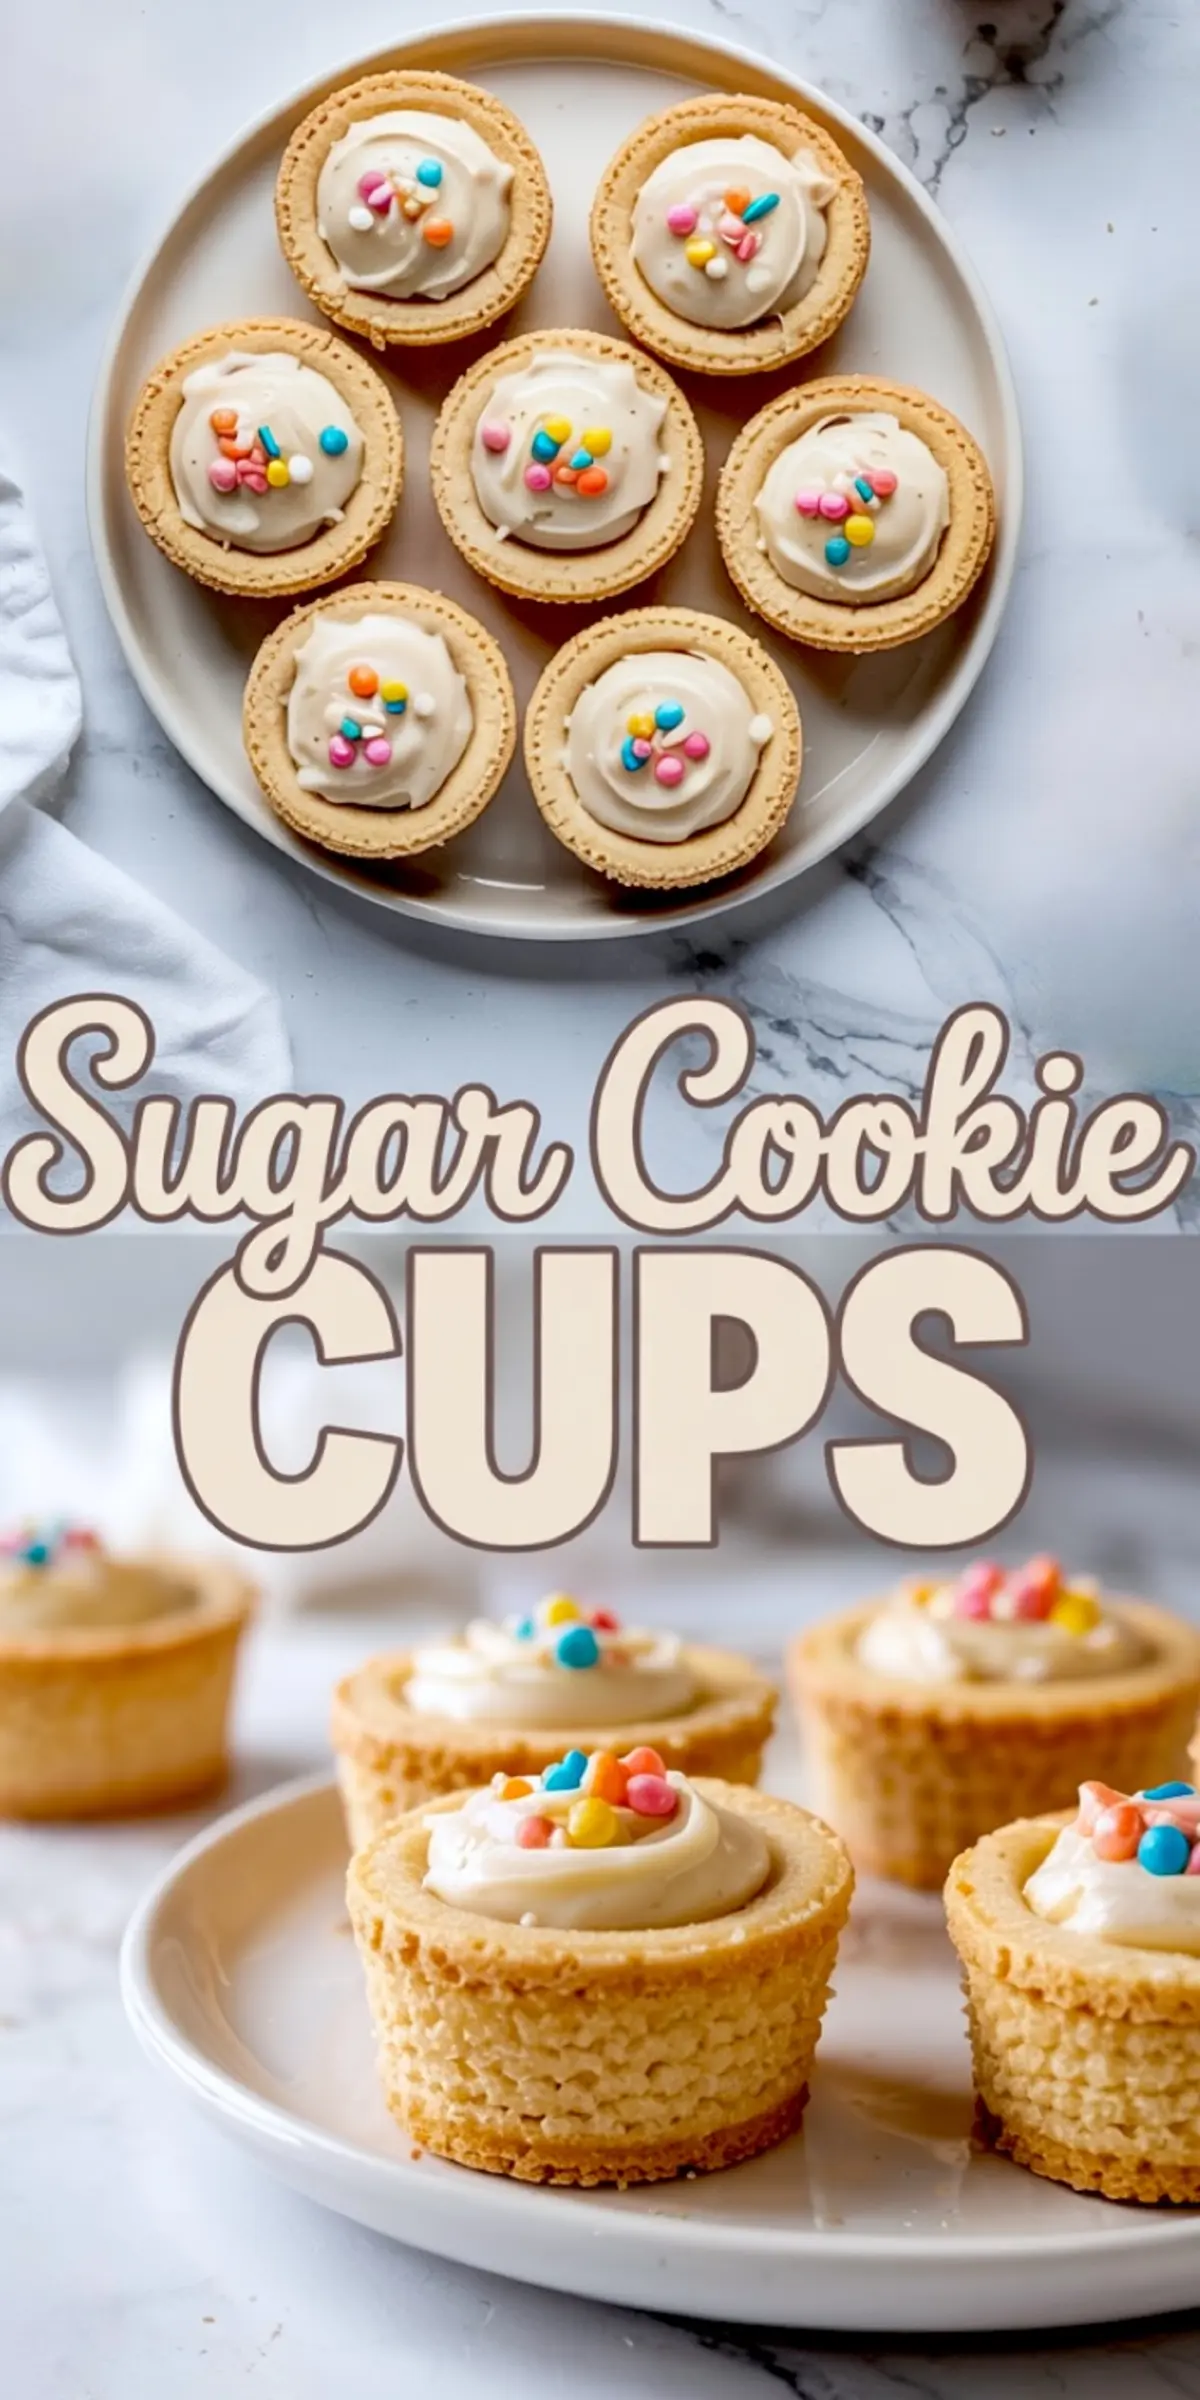
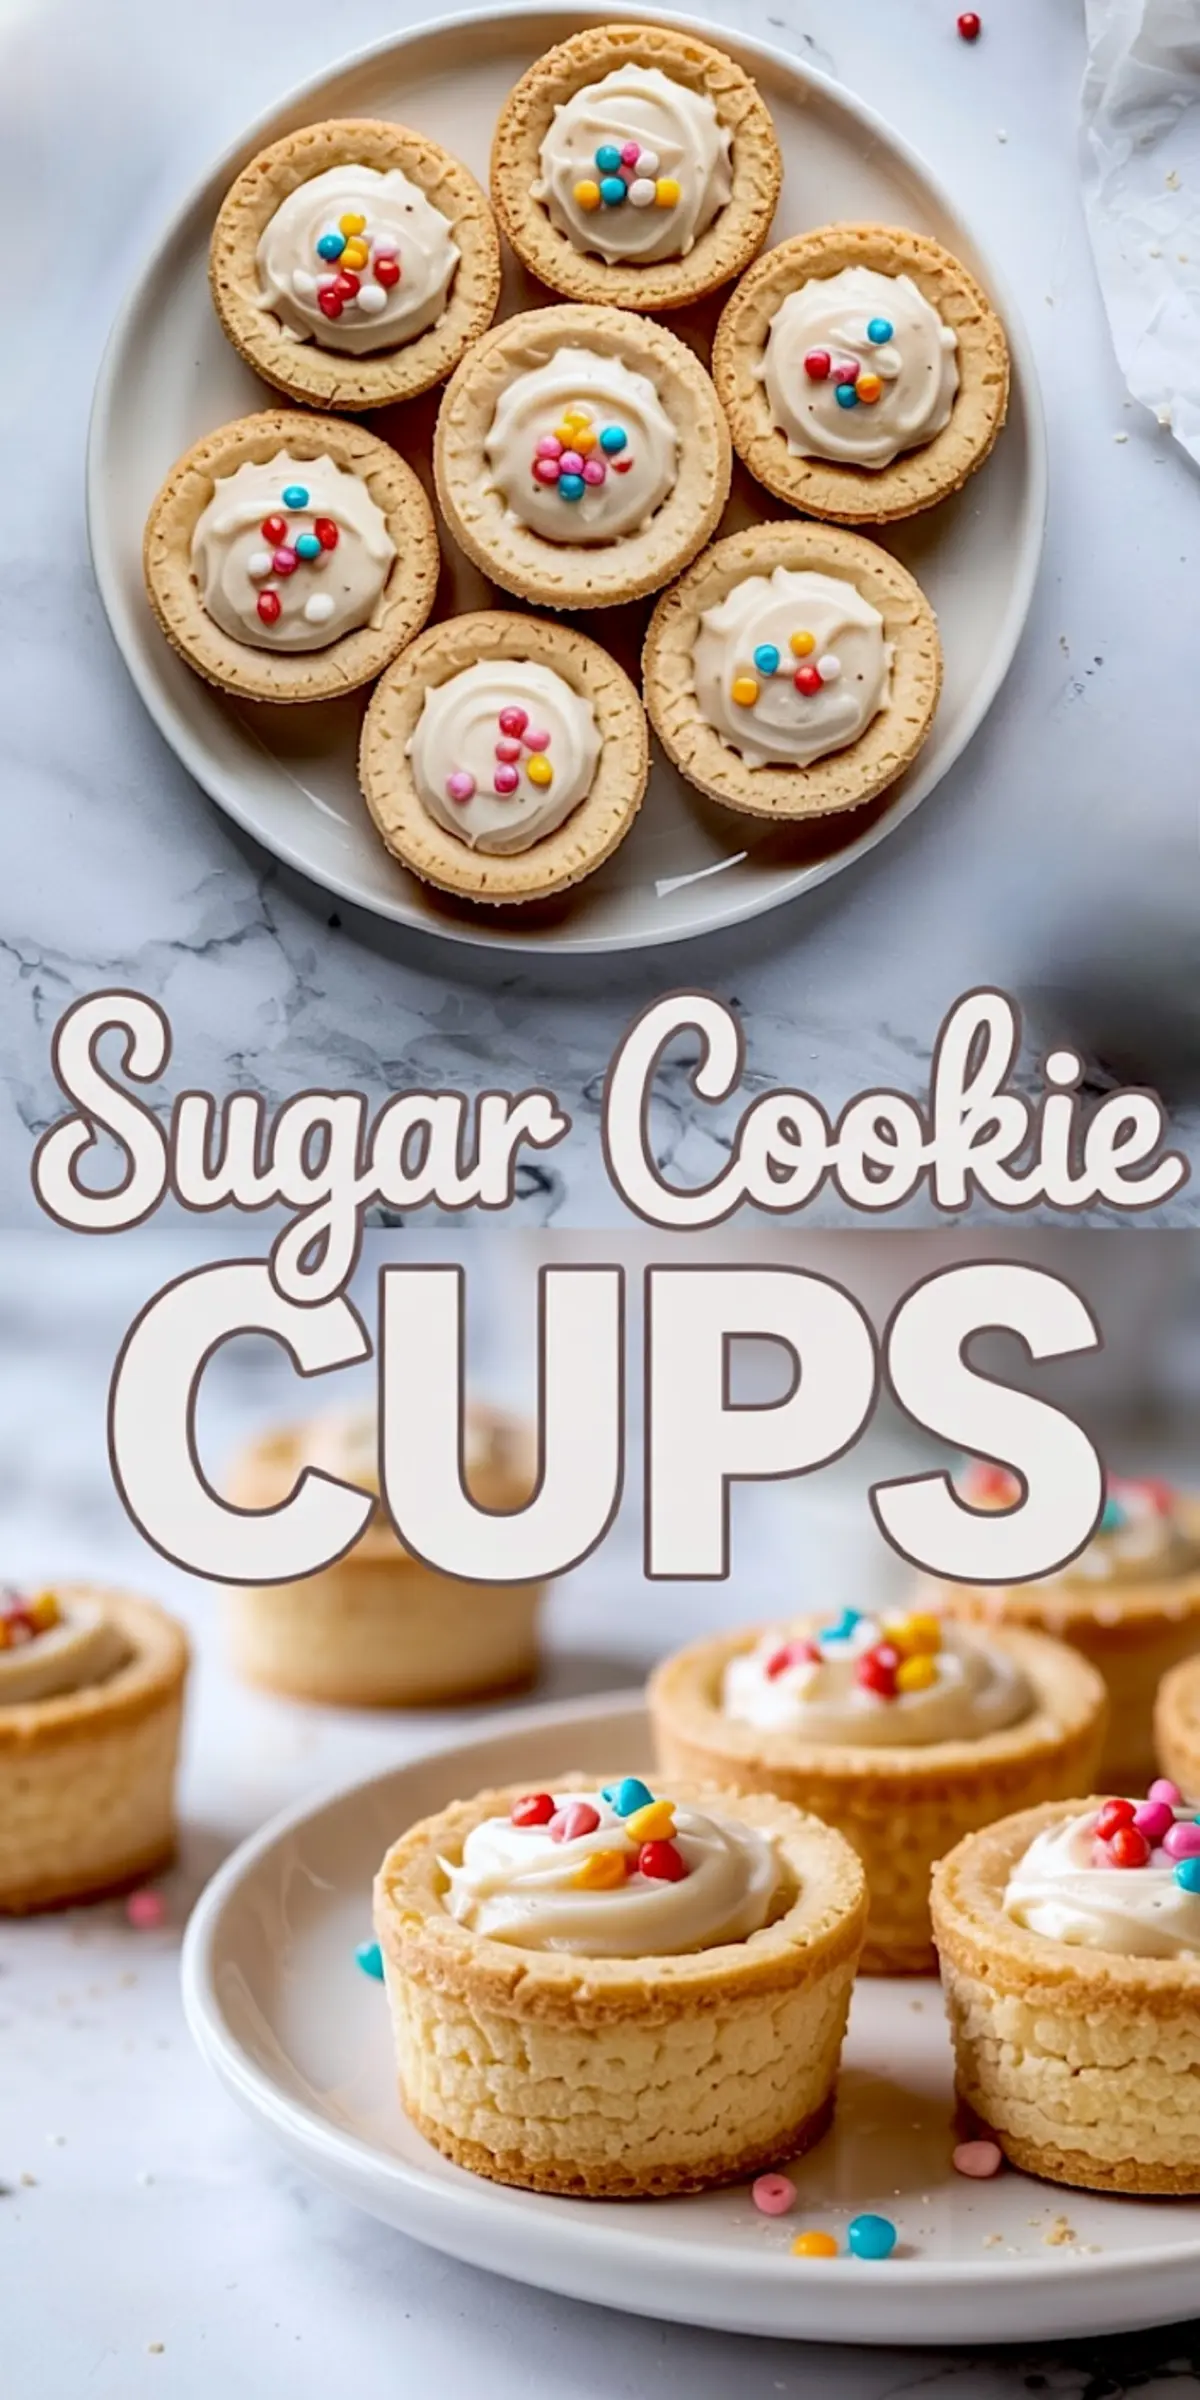
Sugar cookie cups are a clever twist on classic cookies, baked in muffin tins to create little edible bowls that hold frosting, jam, or even chocolate.
This mini cookie cups recipe gives you the confidence to make finger desserts that look polished without requiring hours of decorating. You’ll learn how to shape, bake, and fill the cups, plus how to prepare a smooth vanilla frosting that pipes beautifully.
You also get insights into why each ingredient matters, so the next time you bake cookie cups for Christmas or any gathering, you’ll know exactly how to adjust and still achieve the best results.
Following a special diet?
Every recipe on this site can be converted to gluten-free, vegan, dairy-free, keto, nut-free or egg-free with adjusted ratios so nothing falls flat.
Try the Recipe Converter →Sugar Cookie Cups Work for Parties and Holidays
The biggest reason I return to this recipe is consistency. The dough holds its shape, the cups bake evenly, and the frosting stays light but stable. That makes them reliable for busy holidays when trays fill quickly.
If you are browsing cookie cup ideas, you’ll notice how versatile they are. A single batch can be decorated with sprinkles for Christmas, fresh berries in summer, or even a drizzle of melted chocolate for everyday treats.
For more decorating inspiration, you can check out these Christmas Lights Sugar Cookies, which show how color can completely change the mood of a simple cookie.
The Role of Each Ingredient in the Cookie Dough
Butter provides flavor and structure. I prefer unsalted so I can control the salt myself. The creamed butter and sugar give the dough its tender bite. Sugar also helps the edges brown into a light golden shade, which is key for presentation.
The single egg binds everything without making the dough too soft. Vanilla adds warmth, and I never skip it. Flour, baking powder, and salt work together to give lift and balance. The right amount of flour matters. Too much makes the cups dense, too little and they collapse.
If you like testing, compare this to my sugar cookie icing that hardens. Both recipes use simple staples, but the goals differ. One is built to hold its shape while the other is meant to dry firm for decorating.
A Personal Note on Frosting Choices
The frosting here uses butter, powdered sugar, cream, and vanilla. I’ve tried both heavy cream and milk, and the difference shows. Cream creates a fluffier swirl, while milk keeps the frosting softer. My notes remind me that cream works better if you plan to pipe tall designs, while milk works fine if you want a smoother spooned finish.
For variety, you can also use Vanilla Buttercream Frosting, which pipes even higher and holds up longer on display. I switch depending on the event. Sometimes you need sturdy swirls that stand out on a party platter, other times a light topping works best.
Preparing the Dough with Confidence
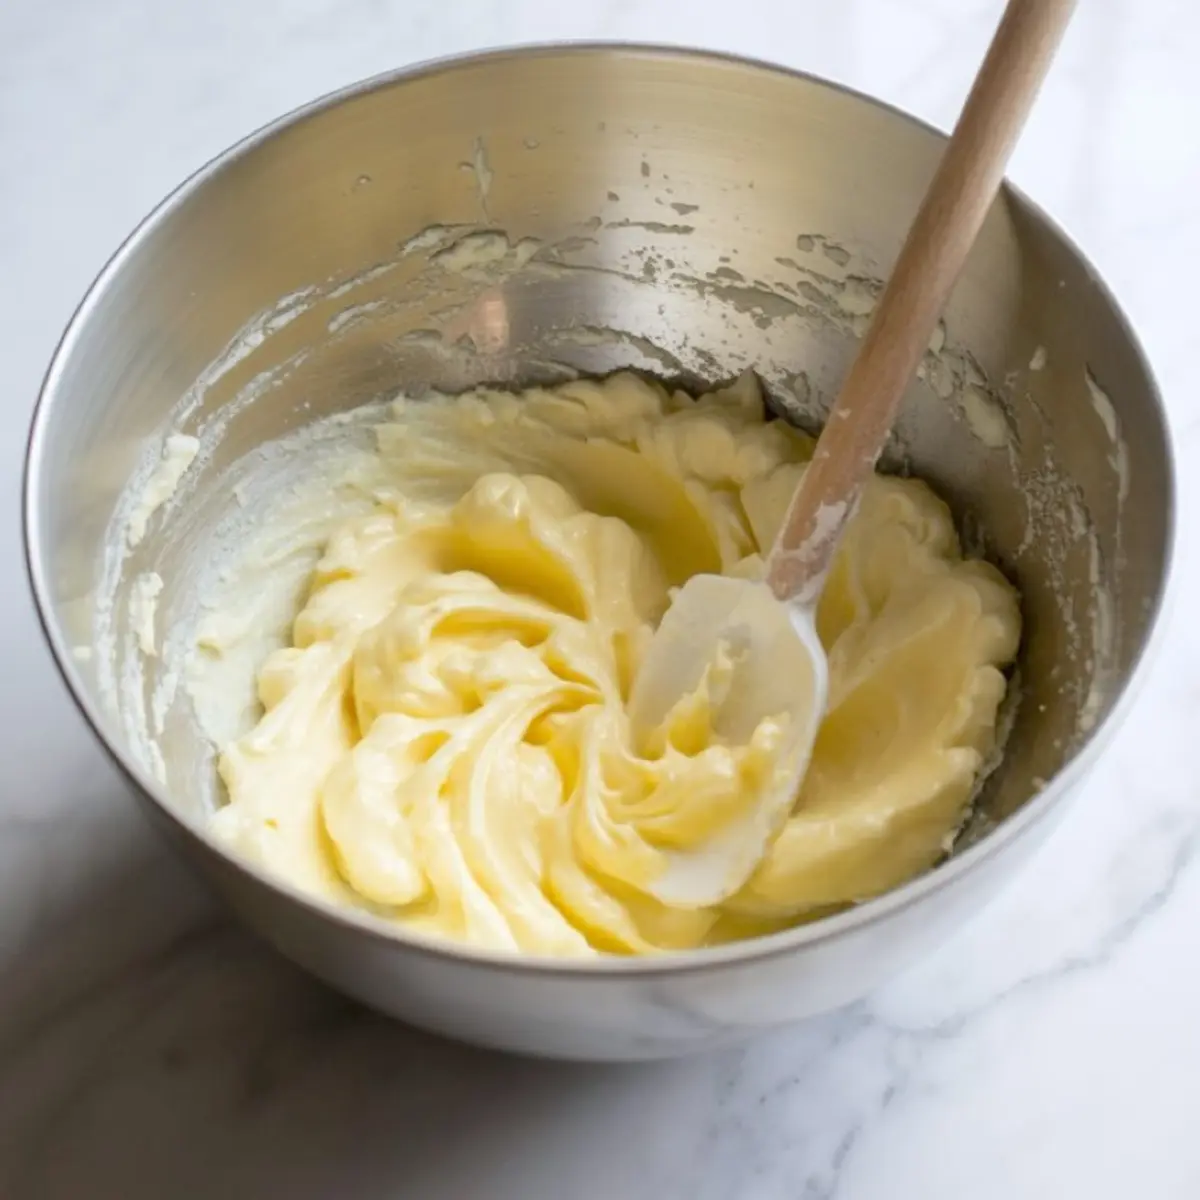
Creaming butter and sugar is more than mixing. The air incorporated here gives the cookies their lightness. Spend those two or three minutes letting the mixer work, and you’ll notice the difference. Add the egg and vanilla slowly, then fold in the dry ingredients.
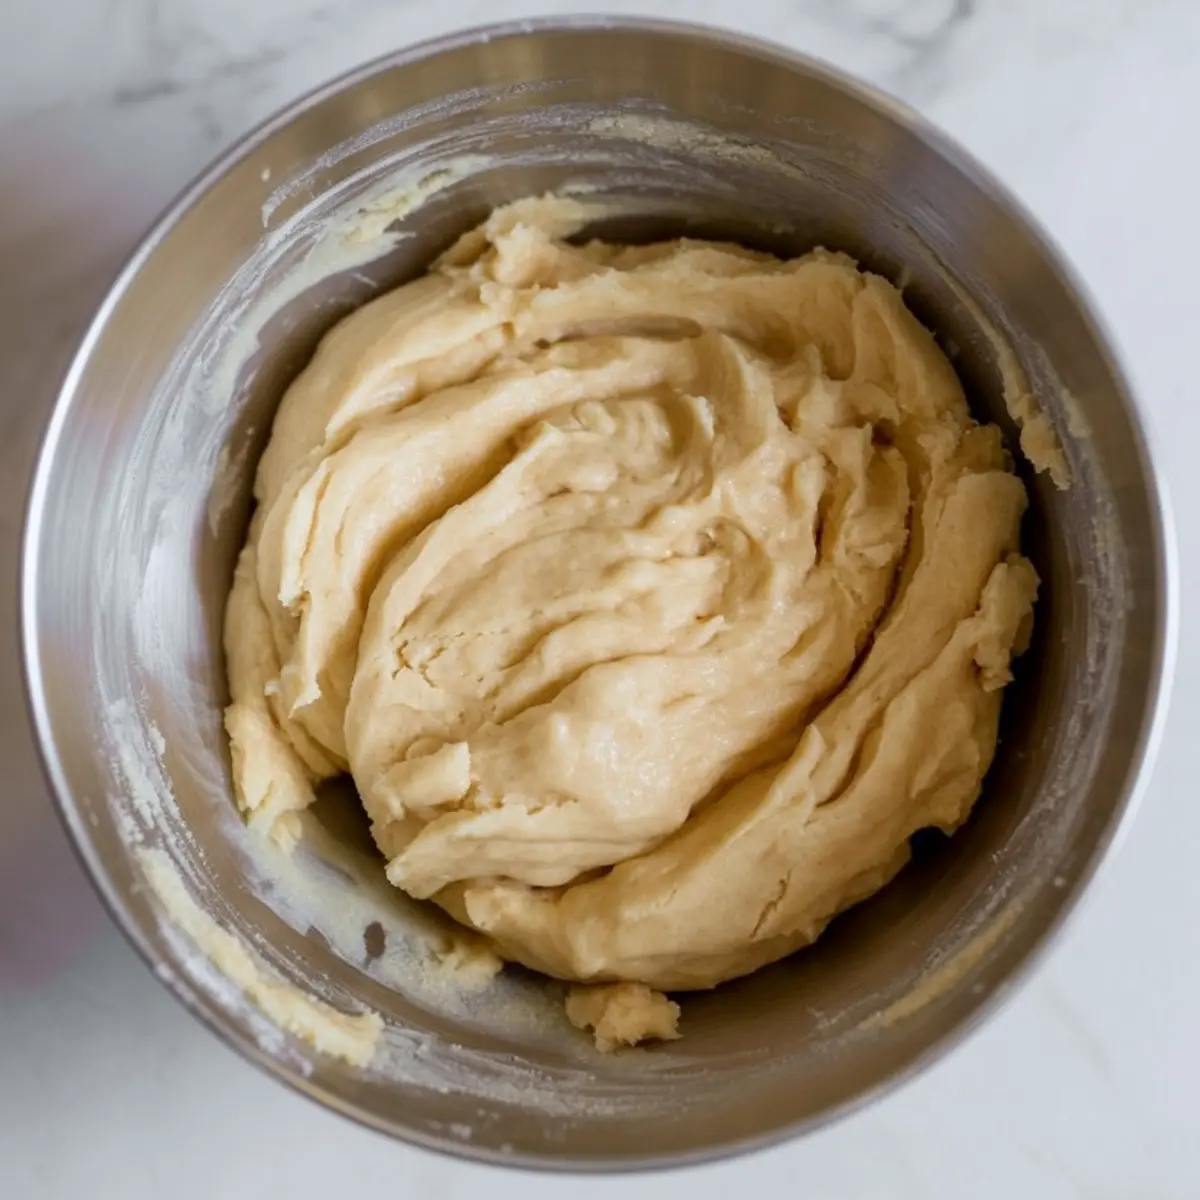
This stage sets the foundation. If the dough feels too soft, let it chill briefly. That small step prevents spreading in the oven. I’ve made the mistake of rushing and ended up with cups that looked more like flat muffins. A short rest in the fridge saves the batch.
Shaping and Baking into Cups
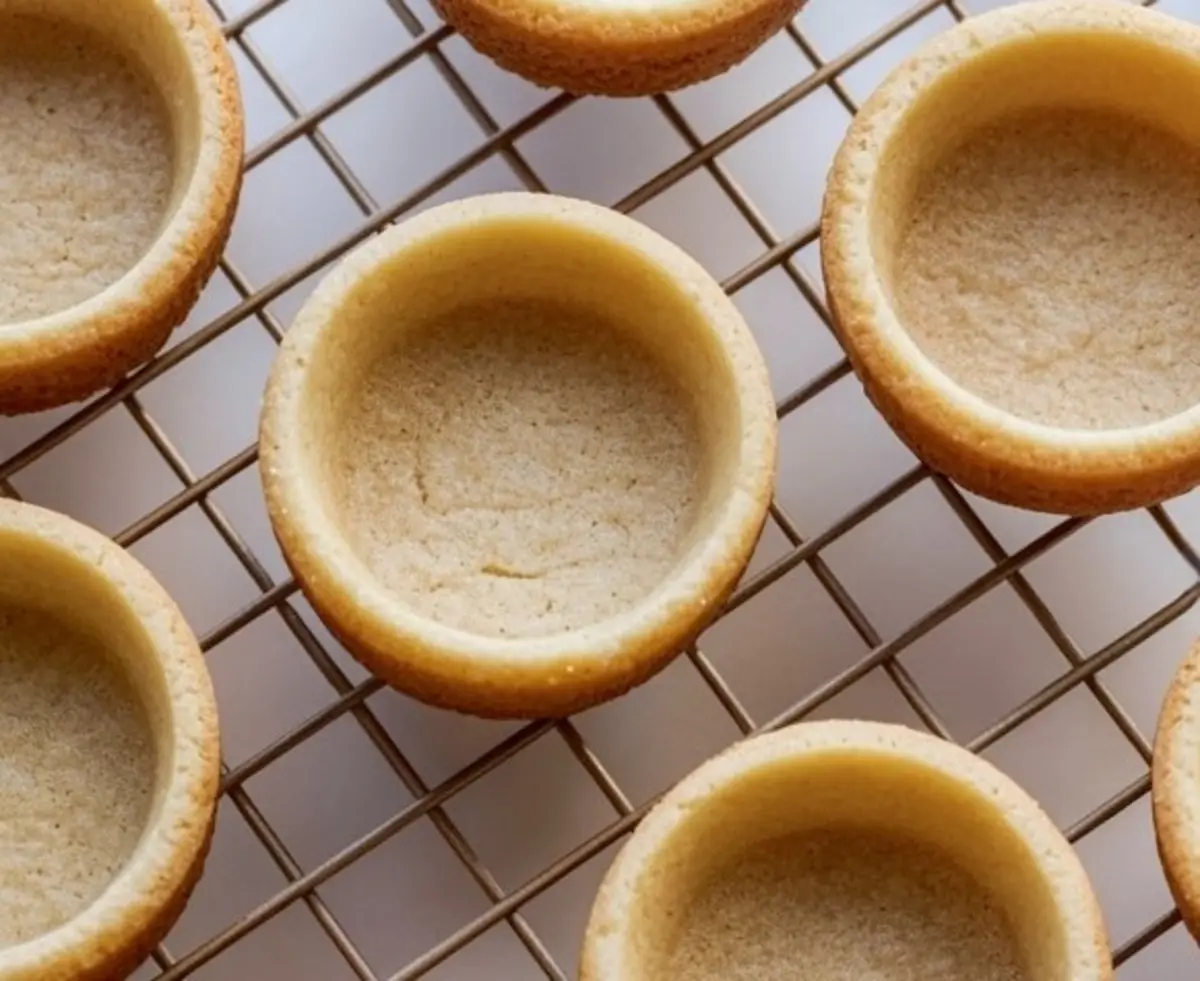
Pressing dough into the muffin tin creates the cup structure. Two tablespoons per cavity is enough to form a base and sides. Bake until edges show light color.
The important part happens after baking. While the cups are still warm, press the centers down with a spoon or a small measuring cup. This gives space for frosting. Without this step, the centers puff too much. It feels a little odd at first, but once you see the even wells, it makes sense.
Mixing the Vanilla Frosting

Beat the butter until smooth before adding powdered sugar. Work in stages to avoid clouds of sugar dust. Cream or milk loosens the mixture, while vanilla gives depth. The texture should look light and spreadable, not stiff.
If you like experimenting, tint the frosting with food coloring. Pastels suit spring gatherings, while red and green fit December trays. The frosting holds color well and stays bright once piped.
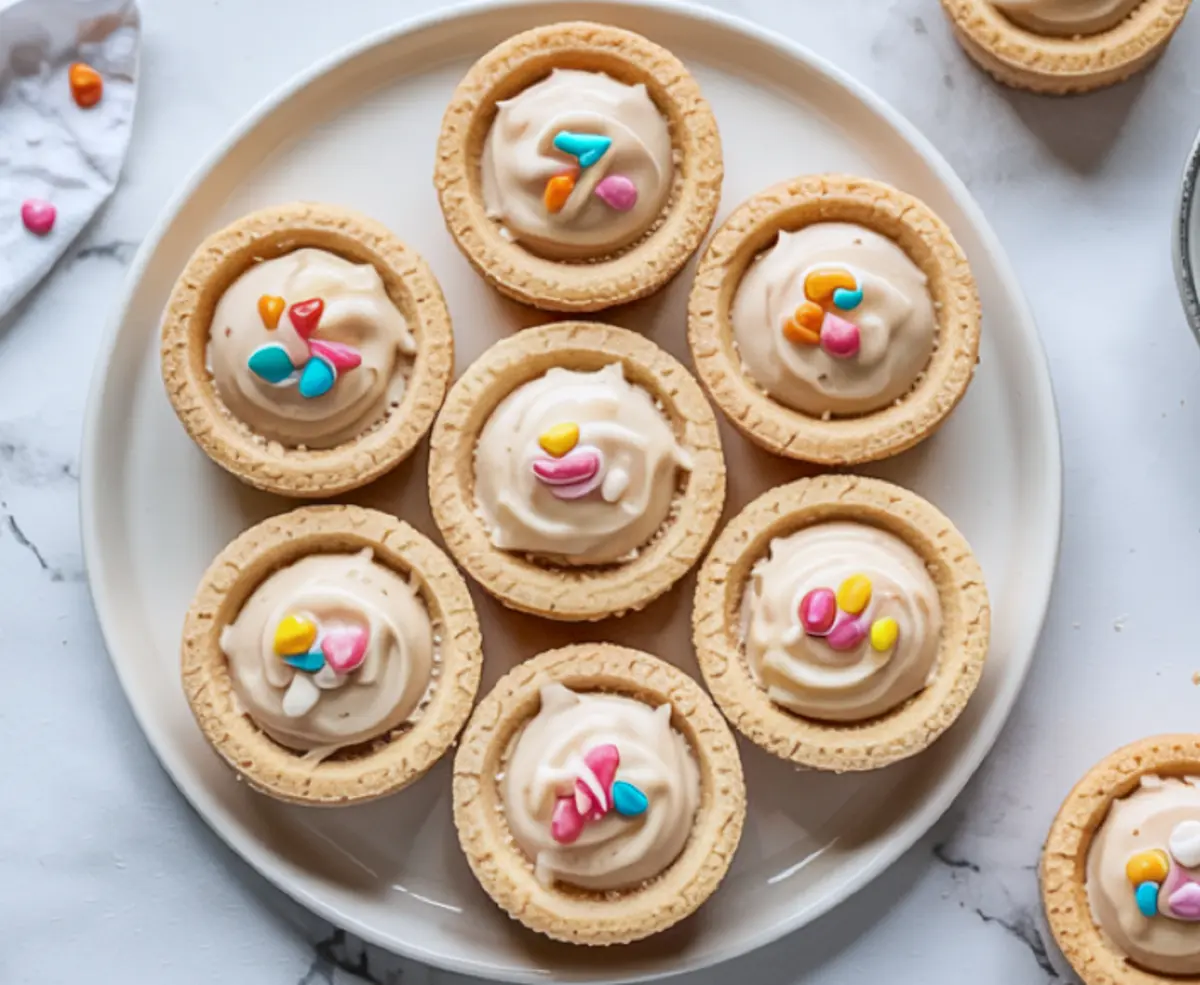
Assembling and Decorating the Cookie Cups
Pipe the frosting into cooled cups using a circular motion. The wells hold a generous amount without spilling over. Then comes the fun part. Add sprinkles, chocolate chips, berries, or crushed candy. Each decoration changes the personality of the dessert.
These cookie cups remind me of Christmas sugar cookie bars. Both use a familiar base but present it in a different form. Bars cut into squares, while cups offer individual servings that feel special without extra effort.
Serving and Storing Mini Cookie Cups
Serve sugar cookie cups the same day for the freshest bite. If you chill them, the frosting firms slightly, which some people prefer. For parties, I often make the cups one day ahead, then frost just before serving.
To store leftovers, place them in an airtight container in the fridge for up to three days. The flavor stays balanced, and the cookie base holds texture. For those who enjoy finger desserts, these cups make gifting easy since they travel well in small boxes.
You can also pair them with a sugar cookie dip on the same table for a fun contrast—cups with frosting on one side, creamy dip on the other.
Final Thoughts and Invitation to Share
Sugar cookie cups carry the spirit of homemade baking into bite-sized form. They suit Christmas gatherings, birthday parties, or quick family treats. Once you try them, you’ll keep the recipe in your own rotation the same way I do.
Save this recipe to your Pinterest board so it’s ready for your next event. Share in the comments how your batch turned out or what filling you chose. Did you stick with vanilla frosting or experiment with jam or chocolate? I would love to hear your ideas.
Sugar Cookie Cups with Vanilla Frosting

Sugar cookie cups bake in mini muffin tins with soft centers that hold any filling—chocolate, jam, or cream. I use a sugar cookie dough that holds its shape well, then press the middles gently after baking. These mini cookie cups make great finger desserts for parties or gifting. I keep this cookie cups recipe in rotation for Christmas because it’s easy to prep and decorate with sprinkles or colored icing. If you’re collecting cookie cup ideas that don’t take much time but still feel festive, this one fits. It’s a mini cookie cups recipe I return to often for holidays and everyday sweets. Great for dessert trays, Christmas gatherings, or quick batch baking when time is short.
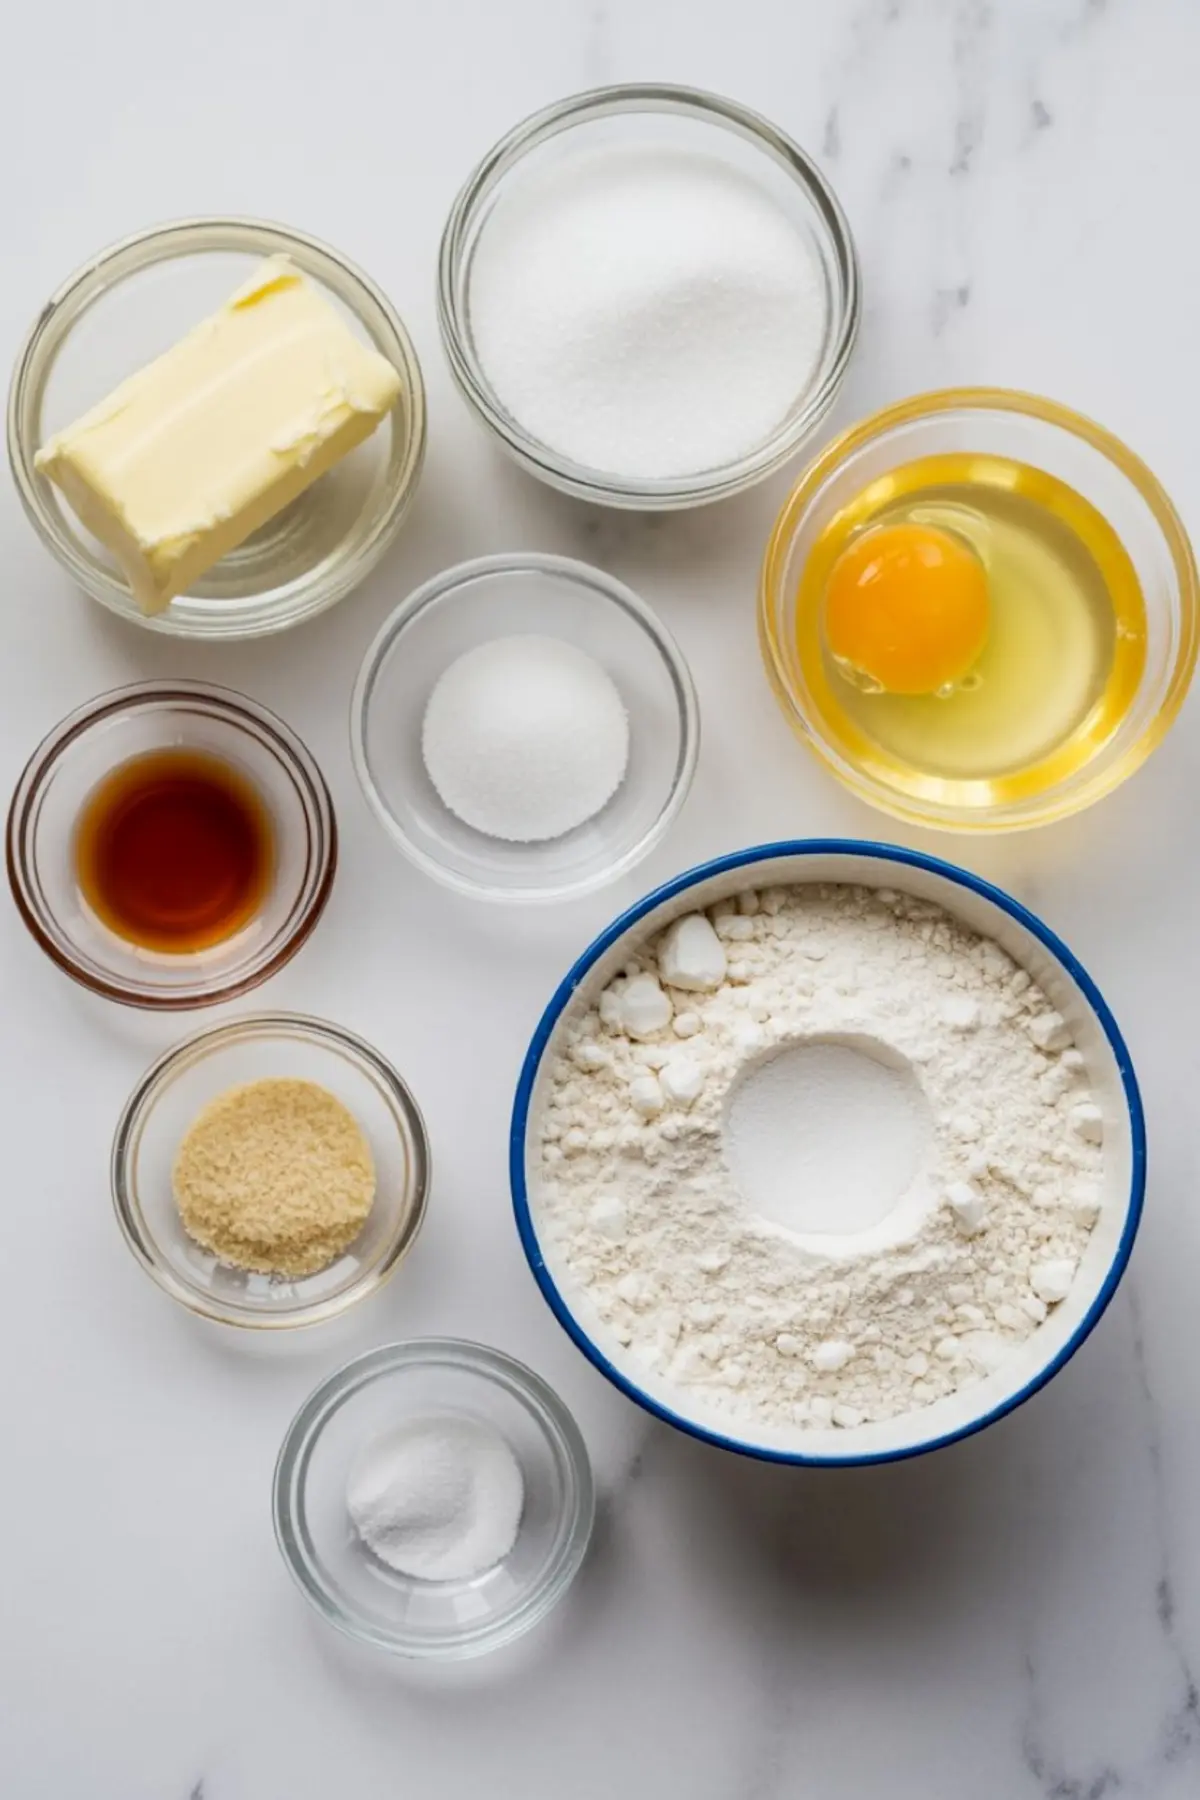
Ingredients
- For the Sugar Cookie Cups:
- 1 cup (226g) unsalted butter, softened
- 1 cup (200g) granulated sugar
- 1 large egg
- 1½ teaspoons vanilla extract
- 2½ cups (312g) all-purpose flour
- ½ teaspoon baking powder
- ¼ teaspoon salt
- FOR THE VANILLA FROSTING:
- ½ cup (113g) unsalted butter, softened
- 1½ cups (180g) powdered sugar
- 2 tablespoons heavy cream or milk
- 1 teaspoon vanilla extract
- Pinch of salt
- OPTIONAL TOPPINGS:
- Rainbow sprinkles
- Mini chocolate chips
- Fresh berries
- Crushed candy
Instructions
- PREPARE THE DOUGH: In a large mixing bowl, cream the softened butter and granulated sugar together using a hand mixer or stand mixer until light and fluffy, about 2 to 3 minutes. Add the egg and vanilla extract, then beat until smooth. In a separate bowl, whisk together the flour, baking powder, and salt. Gradually add the dry ingredients to the wet mixture, mixing just until combined. Do not overmix.
- SHAPE THE COOKIE CUPS: Preheat the oven to 350°F (175°C). Grease a standard 12-cup muffin tin with nonstick spray. Scoop about 2 tablespoons of dough into each cavity and press the dough evenly into the bottom and up the sides to form a cup shape. Bake for 10 to 12 minutes, or until the edges are lightly golden. Immediately after removing from the oven, use a spoon or the back of a measuring tablespoon to gently press down the centers to deepen the wells. Let cool in the pan for 10 minutes, then transfer to a wire rack to cool completely.
- MAKE THE FROSTING: In a medium bowl, beat the softened butter until smooth and creamy. Gradually add powdered sugar, mixing on low speed to prevent a mess. Add vanilla extract, a pinch of salt, and cream or milk. Increase the mixer speed to medium-high and beat for 2 to 3 minutes until the frosting is fluffy and smooth. Spoon the frosting into a piping bag or a zip-top bag with the corner snipped off.
- ASSEMBLE THE COOKIE CUPS: Pipe the frosting into the cooled cookie cups using a circular motion to create a swirl. Top with your choice of sprinkles, mini chocolate chips, berries, or crushed candy. Serve immediately or chill slightly for a firmer texture.
Notes
For a shortcut, pre-made sugar cookie dough can be used, but the texture may vary. To store, keep cookie cups in an airtight container in the refrigerator for up to 3 days. Frosting can be tinted with gel food coloring for themed celebrations.
Nutrition Information
Yield
12Serving Size
1Amount Per Serving Calories 230Total Fat 8gSaturated Fat 5gTrans Fat 0gUnsaturated Fat 3gCholesterol 25mgSodium 115mgCarbohydrates 35gFiber 2gSugar 12gProtein 5g