

This sugar cookie icing that hardens is a glossy, egg free icing made with 2 cups of sifted powdered sugar, 2 tablespoons of milk, 2 tablespoons of light corn syrup, and a little vanilla. It mixes in about 10 minutes, covers around 24 medium cookies, and dries firm at room temperature in 8 to 12 hours, so the cookies can be stacked, boxed, or shipped.
Corn syrup is what makes it work. It gives the icing a shine and just enough flexibility that the surface sets hard without cracking or turning chalky. No meringue powder, no raw egg whites, and nothing you cannot find in a regular kitchen.
“I made this today. It was good! My frosting came out shiny and it hardened just fine. I did add more milk to get it to the consistency that I wanted and added a bit more vanilla. I’ll be using this recipe again.” Donna, a reader

Following a special diet?
Every recipe on this site can be converted to gluten-free, vegan, dairy-free, keto, nut-free or egg-free with adjusted ratios so nothing falls flat.
Try the Recipe Converter →The Icing in Numbers
- Makes: enough icing for about 24 medium cookies
- Hands-on time: about 10 minutes
- Ratio: 2 cups powdered sugar to 2 tablespoons milk and 2 tablespoons corn syrup
- Touch dry: about 1 to 2 hours
- Fully hard: 8 to 12 hours, or overnight, uncovered at room temperature
- Leftover icing: up to 3 days in a sealed jar in the fridge
How Long Cookie Icing Takes to Harden
Plan for a full 8 to 12 hours. The surface usually feels dry to a light touch after an hour or two, but underneath it is still soft, and a fingerprint or a stacked cookie will leave a dent. Once it has dried overnight, the icing is hard all the way through and the cookies can be stacked with parchment between the layers.
Three things slow it down: icing that was thinned too much, a humid kitchen, and covering or refrigerating the cookies while they dry. Leave them uncovered on a tray at room temperature. If you are layering a design, such as dots on top of a flooded base, let each layer dry completely before adding the next one so the colors do not bleed.
What Each Ingredient Does
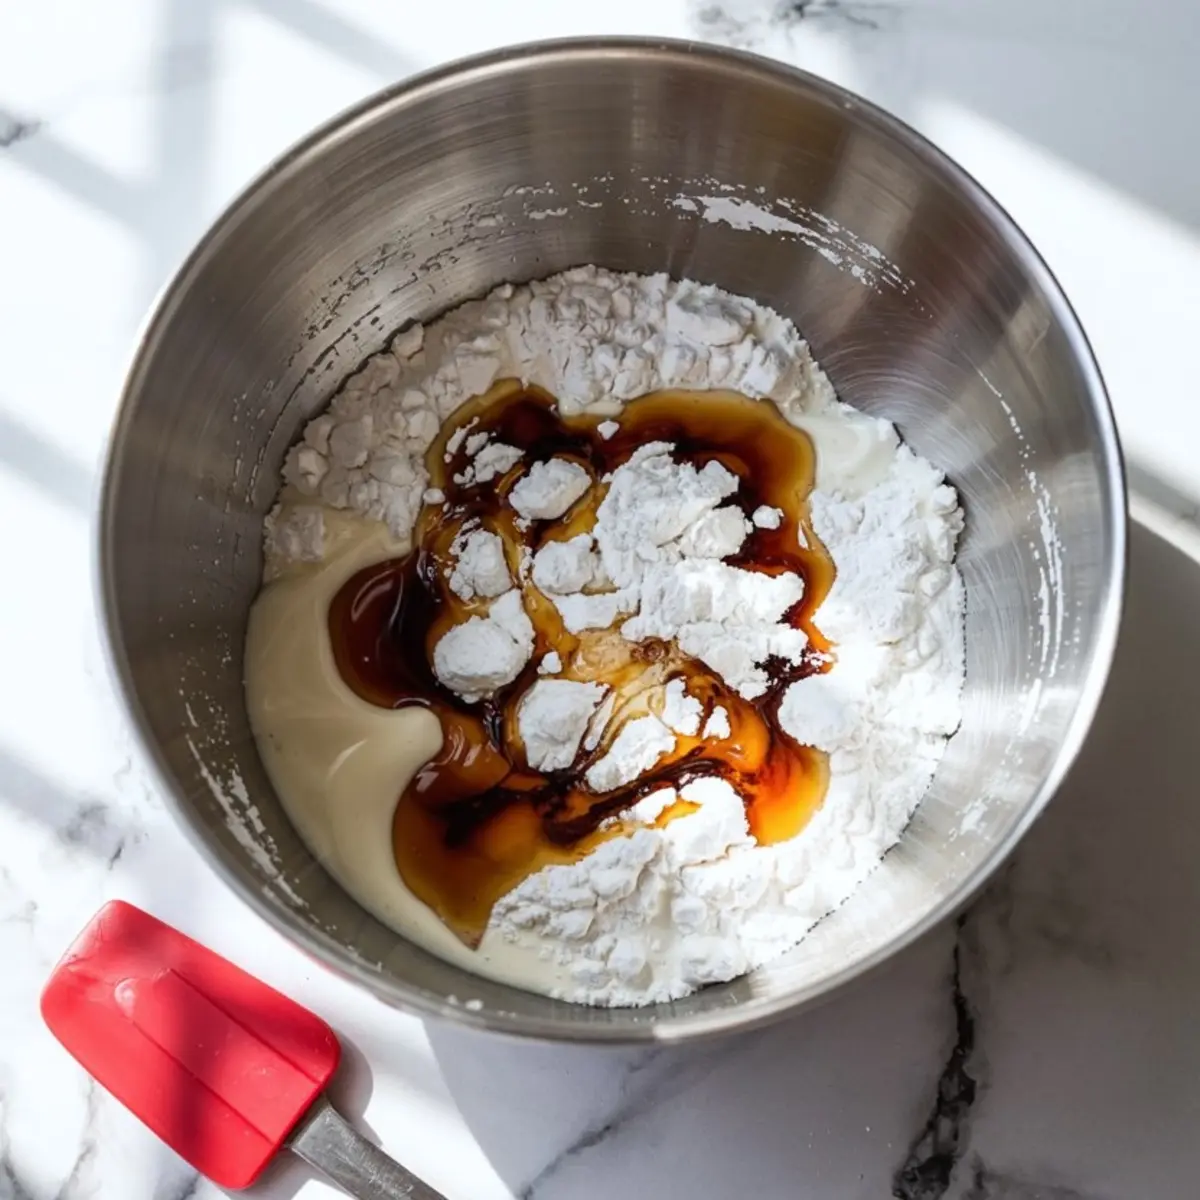
Powdered sugar is the structure. I always sift it first, because lumps never fully dissolve and they ruin the smooth finish. The difference between icing made with sifted sugar and icing made without that step shows on every cookie.
Milk thins the sugar into something workable. I have tried cream too, but milk keeps the icing lighter and it dries more evenly. Thicker dairy slows drying and can leave the surface a little sticky.
Corn syrup is the quiet star. Just 2 tablespoons give the icing its shine and a little elasticity, which is what stops cracks as it sets. Vanilla is your choice: clear vanilla keeps the icing bright white for snowy cookies and true colors, while pure vanilla adds warmer flavor and a slight golden tint that looks lovely under pastel shades.
Corn Syrup Icing or Royal Icing?
Both harden, but they behave differently. Royal icing is made with egg whites or meringue powder and dries matte and very hard, almost brittle. It is the choice for gingerbread houses and tall piped details that must hold their shape.
This corn syrup icing dries with a soft shine and a firm bite that is pleasant to eat. It is easier to make, needs no special ingredients, and is ideal for flooding cut out sugar cookies, simple piping, and holiday cookie trays. If you want a softer, fluffier topping that does not set hard, use this sugar cookie frosting instead, or my cookie frosting recipe that sets on the surface but stays tender underneath.
Getting Flood and Piping Consistency Right
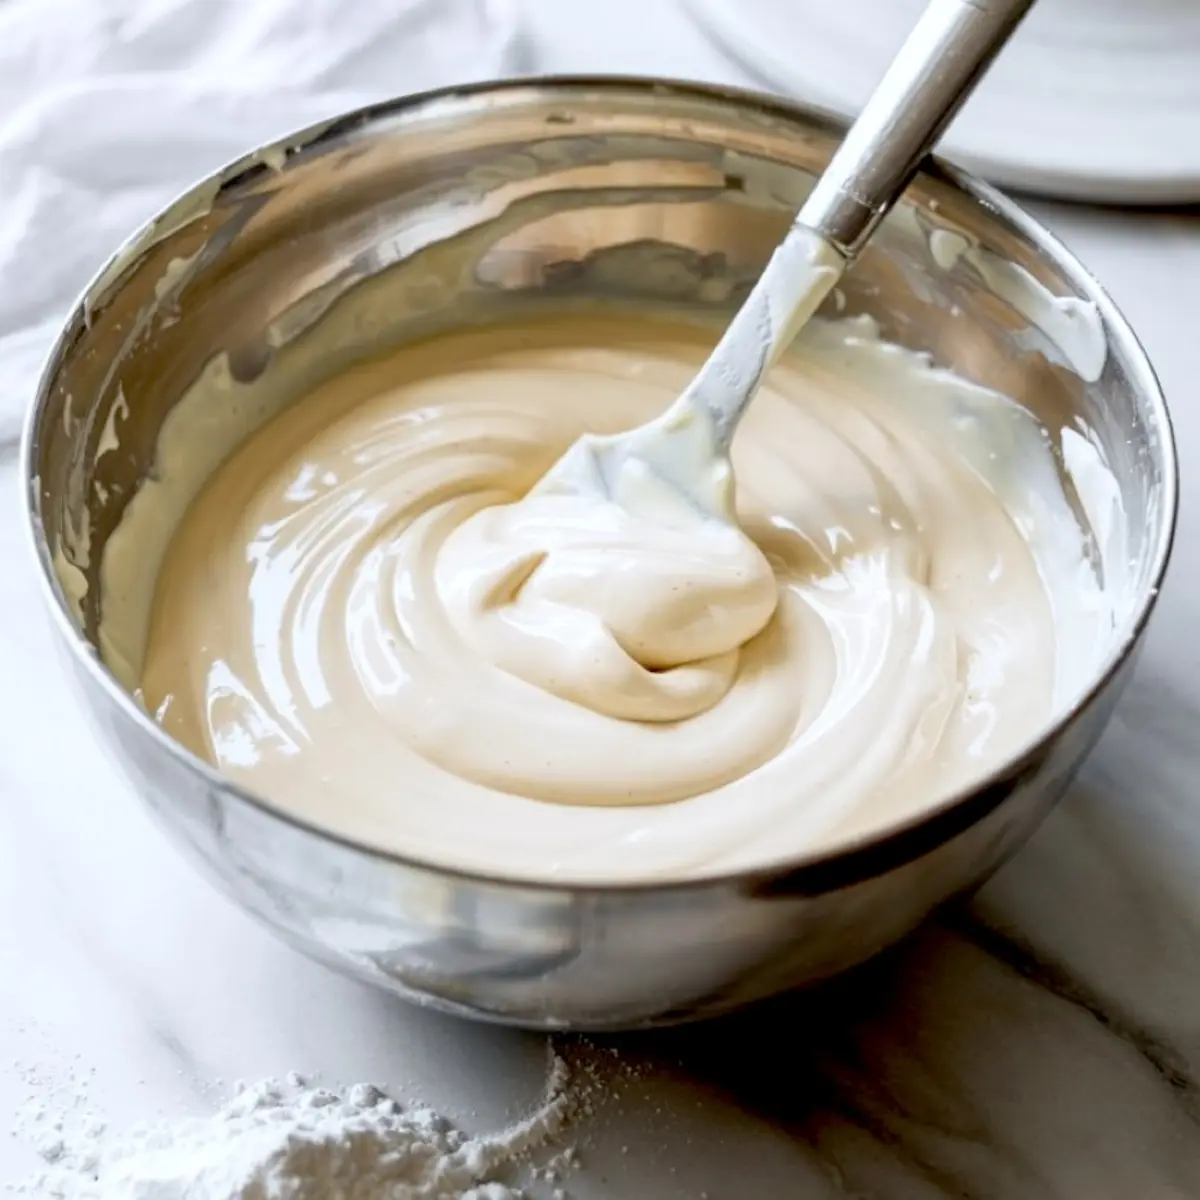
Consistency is where most bakers struggle. Stir the milk and corn syrup into the sifted sugar slowly, then check the texture. It should be thick but still pourable.
Use the spoon test. Drag a spoon through the bowl and count. If the line disappears in about 10 seconds, the icing is right for flooding. If the line holds longer, it is better for piping outlines and details. Too thick? Add milk 1 teaspoon at a time. Too runny? Add sifted powdered sugar 1 tablespoon at a time. Small additions keep you from overcorrecting.
My usual method is to pipe an outline with the thicker icing, thin the rest a little, and flood the center. A few sprinkles on the wet icing add dimension without any special tools.
Coloring Without Losing the Shine

Use gel food coloring. Liquid coloring adds water, thins the icing past the right point, and slows drying. Gel keeps colors bright without changing the texture. Divide the icing into small bowls and add color with a toothpick, since a little goes a long way.
When I decorated cookies for a cookie swap last winter, I tried both gel and powdered color. Gel gave the smooth finish, while powdered color made the icing grainy. That is why I stick with gel. For deep reds and blues, start with clear vanilla so the base stays white.
If the Icing Will Not Behave
- Still soft the next day: it was thinned too far or the room is humid. Next time use less milk and let the cookies dry in a cool, dry spot.
- Running off the edges: the flood icing is too thin. Stir in more sifted powdered sugar and pipe a thicker outline first.
- Dull or blotchy finish: the cookies were covered or chilled while drying, or liquid coloring was used.
- Cracks on the surface: the icing was too thick or the corn syrup was left out.
- Grainy texture: the powdered sugar was not sifted, or powdered coloring was used.
- Colors bled together: the base layer was not dry before the next color went on.
Storing, Stacking, and Shipping Iced Cookies
Once the icing is completely hard, store the cookies in an airtight container with parchment between the layers. That keeps them crisp and the icing glossy. I have mailed decorated cookies across the country with this icing and they arrived without smudges. For gift boxes and tins, my Christmas cookie packaging post has ideas that keep iced cookies safe.
Leftover icing keeps in a sealed jar in the fridge for up to 3 days. Stir it well before using, and add a drop of milk if it has thickened. I often save small portions to drizzle over sugar cookie fudge.
Cookies Worth Icing This Season
For the classic cut outs, start with my 3 ingredient sugar cookies and ice them once they are completely cool. The same icing dresses up Christmas tree sugar cookies, snowflake sugar cookie sandwiches, and gingerbread ornament cookies. It also works as a hard drizzle over Christmas sugar cookie bars and thumbprint cookies.
Outside the holidays, shape the cookies into hearts for Valentine’s Day, stars for birthdays, or simple rounds with sprinkles. For a party table, set iced cookies next to a bowl of sugar cookie dip; the casual dip next to polished cookies is always a hit. For a quick glaze that soaks in rather than setting into a shell, try this powdered sugar icing.
Hard Cookie Icing: Short Answers
Does this cookie icing really harden?
Yes. It dries to a firm, glossy shell in 8 to 12 hours at room temperature, hard enough to stack cookies with parchment between layers.
How do you make icing that hardens without meringue powder?
Mix sifted powdered sugar with a little milk and light corn syrup. The corn syrup helps the icing set firm with a shine, so no egg whites or meringue powder are needed.
Why is my cookie icing not hardening?
Usually it was thinned with too much milk, the kitchen is humid, or the cookies were covered or refrigerated while drying. Let them dry uncovered at room temperature overnight.
Can I use this icing on Christmas cookies I plan to give away?
Yes, that is what it is made for. Once fully dry, the icing does not smudge, so the cookies can be boxed, stacked, or mailed.
Can I make the icing ahead?
Yes. Keep it in a sealed jar in the fridge for up to 3 days, then stir well and loosen with a drop of milk if needed.
Save this icing to your Christmas cookie board so it is ready for decorating season. If you try it, tell me in the comments how your cookies turned out or which colors you used. Every baker brings a different touch, and I love hearing about yours.

Sugar Cookie Icing That Hardens

This sugar cookie icing that hardens is a glossy, egg free cookie icing made with sifted powdered sugar, milk, light corn syrup, and vanilla. It takes about 10 minutes to mix, makes enough icing for about 24 medium cookies, and dries firm at room temperature in 8 to 12 hours. The corn syrup gives the icing its shine and keeps it from cracking as it sets, so no meringue powder is needed. Use it as hard icing for sugar cookies, for flooding and piping Christmas cut outs, gingerbread cookies, and cookies you plan to stack, box, or ship. Use clear vanilla for pure white icing and gel coloring for bright colors. Leftover icing keeps 3 days in the fridge.
Ingredients
- 2 cups powdered sugar, sifted
- 2 tablespoons milk, plus more as needed
- 2 tablespoons light corn syrup
- 1/2 teaspoon vanilla extract (or clear vanilla for a pure white icing)
- Gel food coloring, optional
Instructions
- SIFT THE POWDERED SUGAR: Place the powdered sugar in a large mixing bowl and sift to remove any lumps. This ensures a smooth, clump-free icing base.
- ADD LIQUID INGREDIENTS: Pour in the milk and corn syrup. Stir slowly with a spoon or rubber spatula until the mixture starts to come together.
- STIR IN VANILLA EXTRACT: Add the vanilla and mix until fully incorporated. Use clear vanilla if you want the icing to remain bright white.
- ADJUST CONSISTENCY: Check the texture—it should be thick but still pourable. Add more milk 1 teaspoon at a time to thin it out, or add sifted powdered sugar 1 tablespoon at a time to thicken it.
- COLOR THE ICING: If using multiple colors, divide the icing into separate bowls. Add a small amount of gel food coloring to each and stir until evenly blended.
- DECORATE COOKIES: Transfer the icing to piping bags fitted with decorating tips for detailed work, or use a spoon or offset spatula for spreading and flooding.
- DRY THE COOKIES: Let the decorated cookies air-dry uncovered at room temperature for 8 to 12 hours, or overnight. Avoid refrigeration during this time, as moisture will prevent the icing from setting.
Notes
Let decorated cookies dry uncovered at room temperature for 8 to 12 hours, or overnight, before stacking. Do not refrigerate or cover them while drying, as moisture stops the icing from setting. For flooding, the icing should smooth out in about 10 seconds when a spoon is dragged through it; for piping, it should hold its line longer. Add milk 1 teaspoon at a time to thin or sifted powdered sugar 1 tablespoon at a time to thicken. Use gel food coloring, not liquid. Store unused icing in an airtight container in the refrigerator for up to 3 days and stir well before reusing. For layered designs, let each layer dry completely before adding the next.

I would like to know how this frosting taste. It’s all well and good to have a beautiful looking cookie, but I’d like to know how this frosting actually tastes?
The taste is mild and sweet, almost like a vanilla glaze. It lets the cookie flavor shine through, which is why I reach for it when I want a clean finish without a heavy frosting. I’ve used it on batches for gifting and it never feels overly sugary to me. 😊
How long do you have to wait before you pipe gel onto the flooded iced cookie ?
Hi! I usually wait at least 8 to 12 hours after flooding the cookie before adding any gel or additional details on top. The icing needs to be fully dry and set, or the gel might sink in or smear. I always let them dry uncovered at room temperature overnight to be safe. If your space is humid, giving them even more time can help too.
I have been decorating cookies for years using royal icing. You instructions are the best I have ever seen and that includes haven taken a cookie bouquet class!
Cynthia, hearing that from someone with years of royal icing experience carries real weight. I appreciate it deeply. I remember walking into my first cookie class feeling completely lost, wondering how everyone made their lines look effortless. Over time I learned that clear steps make the whole process feel approachable, and that is the spirit I keep in mind when writing each guide.
Can cookies decorated with this icing be frozen?
Leah, yes, decorated cookies with this icing freeze well once the surface has fully set. I’ve frozen batches for holiday boxes, and the finish stays smooth as long as the icing has dried before packing.
Let the cookies dry overnight at room temperature, then place them in a single layer on a baking sheet and freeze until they feel firm to the touch. After that, you can stack them between pieces of parchment in an airtight container. I try to avoid any pressure on detailed piping, especially if there are raised dots or fine lines.
When you’re ready to thaw them, keep the lid on the container and let them come to room temperature before opening it. That little step keeps condensation from settling on the icing.
Can I make the frosting the night before using it? or will it harden?
It does harden once it’s on the cookies and left out to dry, but the icing itself stays soft as long as it’s stored correctly. I keep mine in the refrigerator in an airtight container with plastic wrap touching the surface, and it remains workable. The hardening only happens during the drying process on the cookies, not while it’s chilled. If it feels a little thicker the next day, a tiny splash of milk brings it right back. 😊
Is there enough time to add sprinkles and what not before the frosting hardens?
Hey, Leigh! You have a short window, but there is enough time. The frosting starts to set, but it stays soft for a few minutes, so sprinkles stick easily. I usually add them right after spreading the frosting because that gives the best result. Happy baking!
Can this frosting be used for cake pops?
Hey, Cindy! This one’s actually more of an icing than a frosting, so it’s not ideal for binding cake pops. It’s designed to harden as it sets, which makes it perfect for decorating cookies but not for mixing into cake crumbs. For cake pops, you’ll want something softer and more creamy—like buttercream, ganache, or even cream cheese frosting—so the mixture holds together when rolled.
You can use this icing to decorate the outside of cake pops once they’re shaped and set, though. It’ll give them a smooth, crisp finish if you’re going for a cookie-style glaze on top. Let me know how you’re planning to decorate and I can help tailor it.
I can’t use it due to Pinterest being all over the amounts. Please fix that.
I wanted to try this out for a gingerbread house but can’t.
Hi! Totally get how confusing it can be when Pinterest displays things oddly. The full recipe with exactt amounts and step by step instructions is on the blog—if you click the “Visit” or “Make it” button near the pin, it’ll take you straight there. That version has everything clearly laid out.
And yes, this icing does hold up well for gingerbread houses. I’ve used it for decorating cookies and assembling small structures, and it sets nice and firm. Let me know if you run into any issues once you have the full recipe.
Can this be used for marbled icing? Swirling gel food coloring on the icing then dipping the cookie. Thanks
Hi, Sharon! Yes, you can definitely use this icing for the marbled look. The trick is to work while the icing is still wet. After flooding your cookie, you can add drops of gel food coloring right onto the surface and gently swirl it using a toothpick or scribe tool. Some people also swirl the gel into a shallow dish of icing and dip the cookie face-down. Both methods work, just make sure your base icing isn’t too thick so the colors can move and blend nicely. I’ve done it a few times and it always turns out a bit different, but that’s part of the fun.
Can I use this icing for gingerbread house instead of royal icing? This recipe sounds so much simpler!
Hi Abigail! I totally get the appeal—this icing is a lot simpler and more approachable than traditional royal icing. For decorating cookies, it works beautifully. But for building a gingerbread house, I’d still recommend sticking with a classic royal icing. This one doesn’t dry quite as firm or strong, so the structure might not hold up as well, especially if the pieces are heavy. If you’re just decorating the surface of the house, though, this icing is a great option.