I remember the first time I tasted a Chocolate Easter Egg Nest Cake. My grandmother placed it on her wooden table with a proud smile. The deep chocolate aroma and the bright pastel eggs gave me a sense of excitement that still stays with me.
I adore the way rich chocolate pairs with playful Easter colors. My passion for baking blossomed from that childhood memory. This dessert feels like a story I get to retell every spring.
Following a special diet?
Every recipe on this site can be converted to gluten-free, vegan, dairy-free, keto, nut-free or egg-free with adjusted ratios so nothing falls flat.
Try the Recipe Converter →My Love for Chocolate Easter Egg Nest Cake
I find great joy in the process of gathering the ingredients and mixing them by hand. The flour, cocoa powder, and sugar remind me of simpler days with my family. I still try to keep that cozy atmosphere in my kitchen whenever I bake.
I keep hot coffee in this recipe to deepen the cocoa notes, though plain hot water works well too. The buttermilk adds a creamy balance, creating a moist crumb you can savor with each bite. My sense of wonder grows as I see the batter transform into a glossy mixture.
Cake Preparation Insights
Preheating the oven to 350°F sets the tone for a delightful baking session. I grease and line a 9-inch round cake pan because I prefer a neat release once the cake is done. The batter gains volume as I blend the buttermilk, oil, eggs, and vanilla extract.
I then pour in the hot coffee slowly, stirring with steady movements. The thin texture can catch you off guard at first, but that leads to a tender crumb in the final result. A quick toothpick test ensures the cake is fully baked without overcooking.
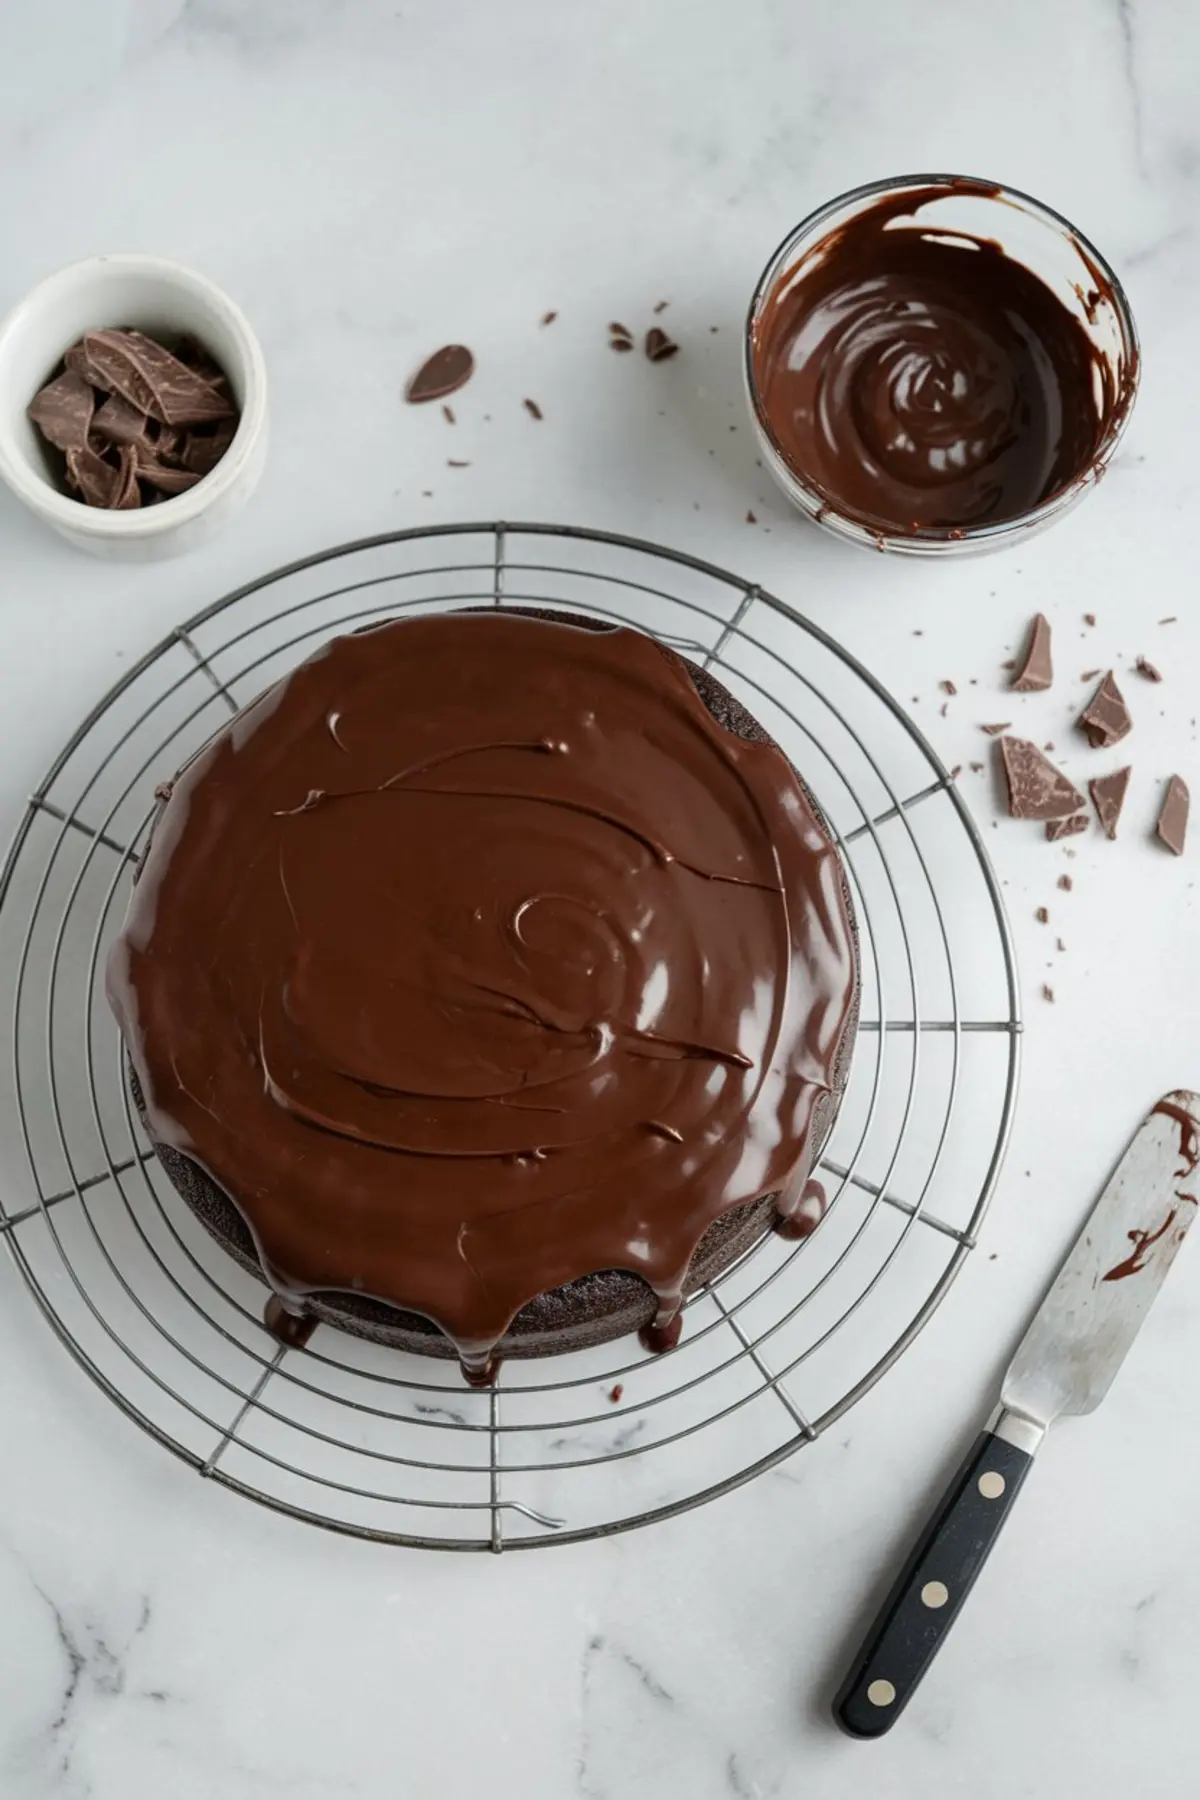
Smooth Chocolate Ganache
I love watching the dark chocolate melt under the gentle warmth of hot cream. The swirl of spoon against bowl feels therapeutic. The moment the butter melts into the mix, you get a shiny topping that makes any dessert feel extra special.
I let it rest for a bit so it’s pourable but still thick enough to coat the cake. A smooth cascade of ganache over the cooled cake always gives me a rush of satisfaction. That silky finish can brighten anyone’s day.
See also – Chocolate Ganache Tart
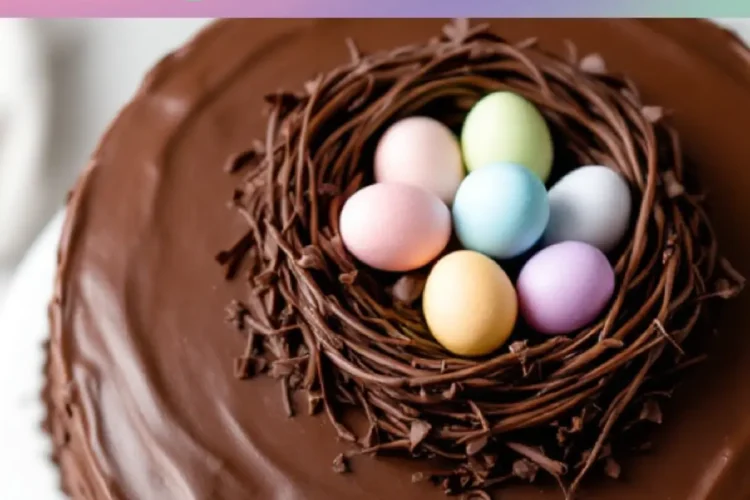
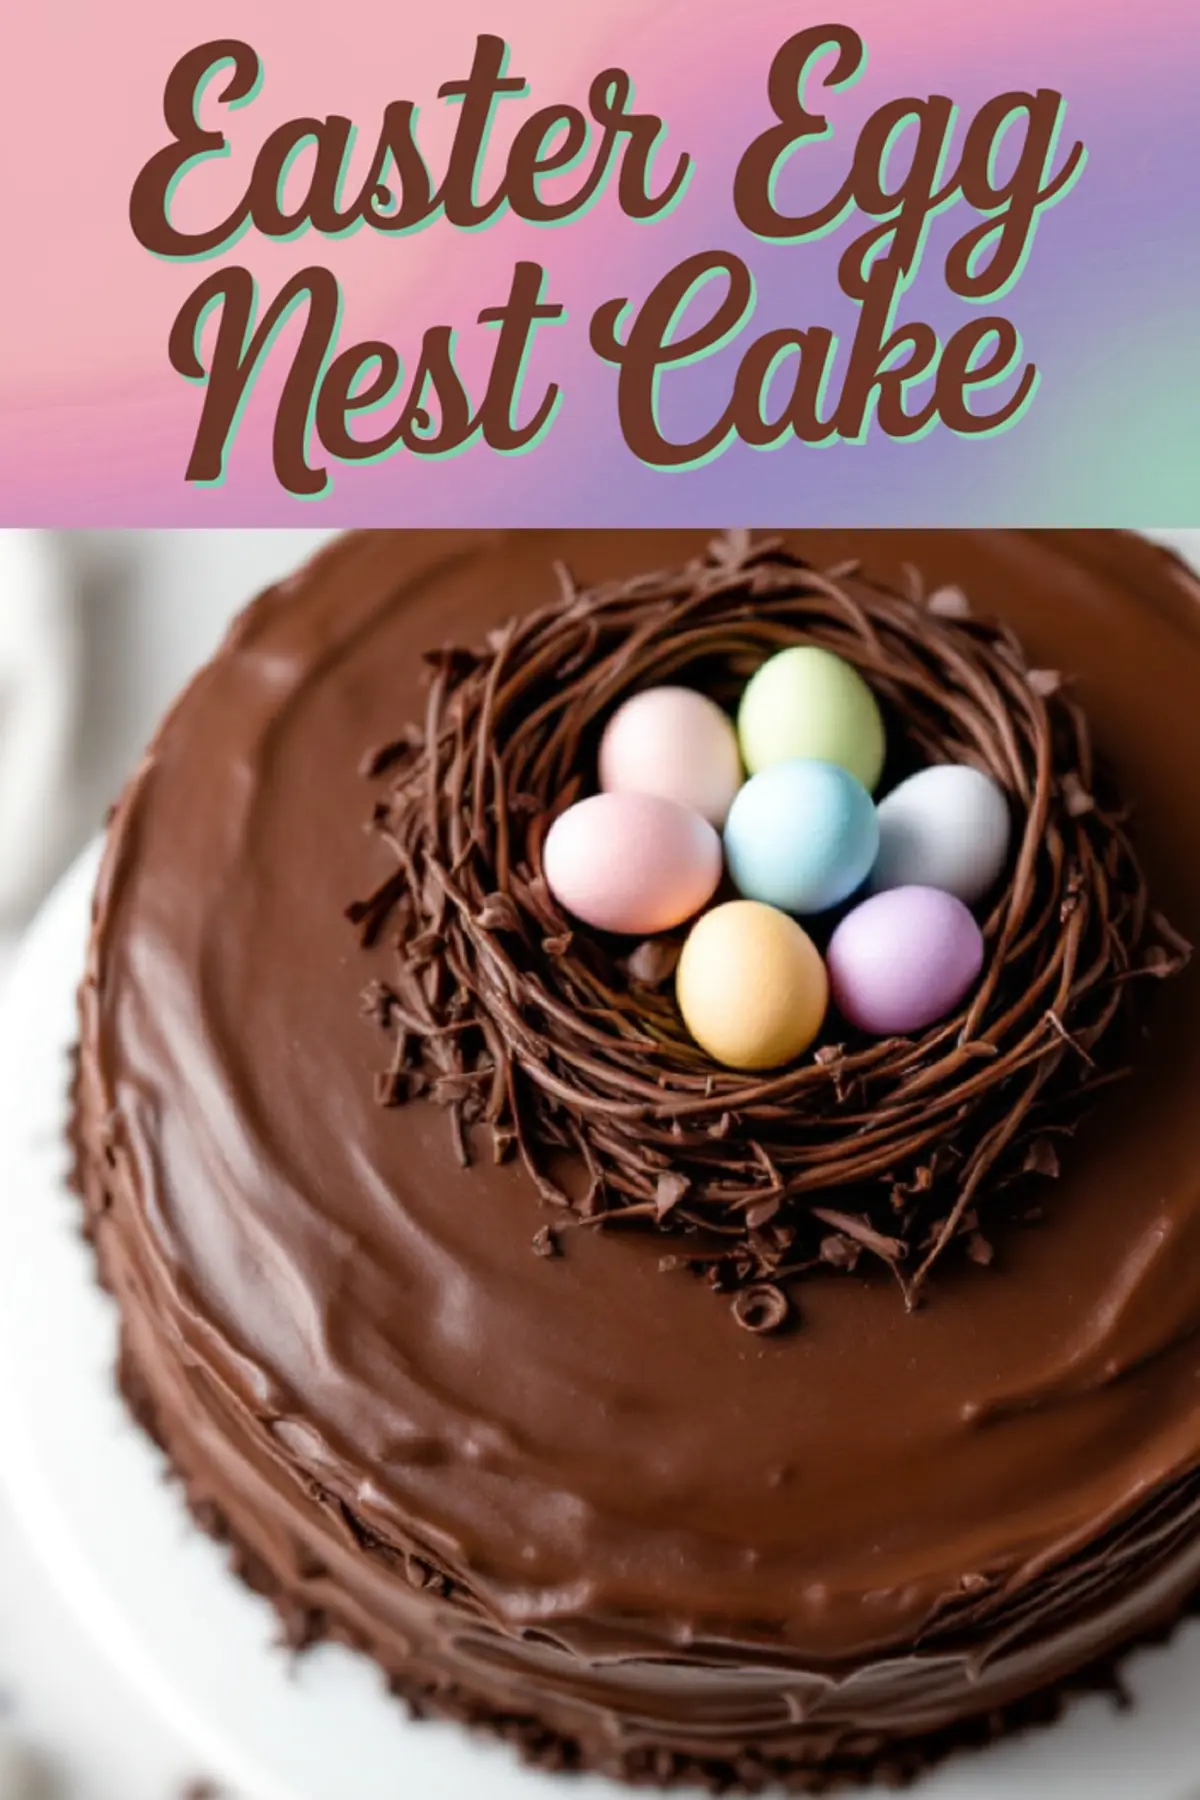
Crafting the Festive Chocolate Nest
I grab a baking tray with parchment and pipe melted dark chocolate in freeform strands. The goal is a shape like a loose bird’s nest that can hold mini eggs later. I keep it in the refrigerator for around 15 minutes until it sets.
The final shape looks intricate but isn’t difficult to manage. I then peel it off carefully and place it on the cake. The colorful mini eggs sit in the middle, bringing a fun Easter theme.
Serving Suggestions and Flavor Twists
Consider a side of fresh berries or a scoop of vanilla ice cream. The fruitiness adds an interesting contrast to the dark chocolate base. Some people also drizzle caramel or fruit sauce on the ganache for a sweeter twist.
I often pair this cake with other treats from my Easter desserts collection.
My Easter sugar cookies add a bright crunch on the side. The Birds Nest Cookies are another fun idea that shares a similar theme and combines well with the Easter egg nest cake.
Practical Tips for Storage and Leftovers
I keep extra slices in an airtight container, but I place the chocolate nest in a separate dish so it doesn’t lose shape. The ganache can hold up for a few days in the fridge, though it tastes best the day it’s made. A quick zap in the microwave renews that gooey texture if the ganache becomes firm.
I also freeze leftover cake layers without the ganache if I plan ahead. A good wrap in plastic keeps it fresh for a couple of weeks. Adding fresh ganache after thawing revives the dessert for another celebration.
Further Inspiration for Easter Baking
I explore other springtime bakes in my Easter desserts collection. The variety encourages everyone to discover flavors that suit their family gatherings. I sometimes serve a spread of cookies, cakes, and pies so guests can sample different treats.
Some bakers switch to white chocolate for the nest, giving a snowy contrast against the dark ganache. Others place small sugar flowers around the eggs to add bright color. I sometimes sprinkle crushed cookies inside the nest for extra crunch.
I also enjoy writing small messages on sugar sheets and tucking them beside the eggs. My niece loves bright sprinkles in pastel shades, which often appear on the cake too. Simple steps can transform the presentation into something personal.
Pin and Share to Keep the Easter Spirit Alive
I see this cake as a way to gather people around a shared treat. The subtle coffee aroma pairs well with holiday brunches or afternoon gatherings. My table often includes a basket of chocolate eggs and a fresh vase of tulips.
This season carries hope, and a homemade dessert can honor that sense of renewal.
I invite you to save this recipe as a pin on your board for quick access later. Please share your own variations or questions in the comments, so we can learn from each other. I value the sense of community that arises from swapping baking tips.
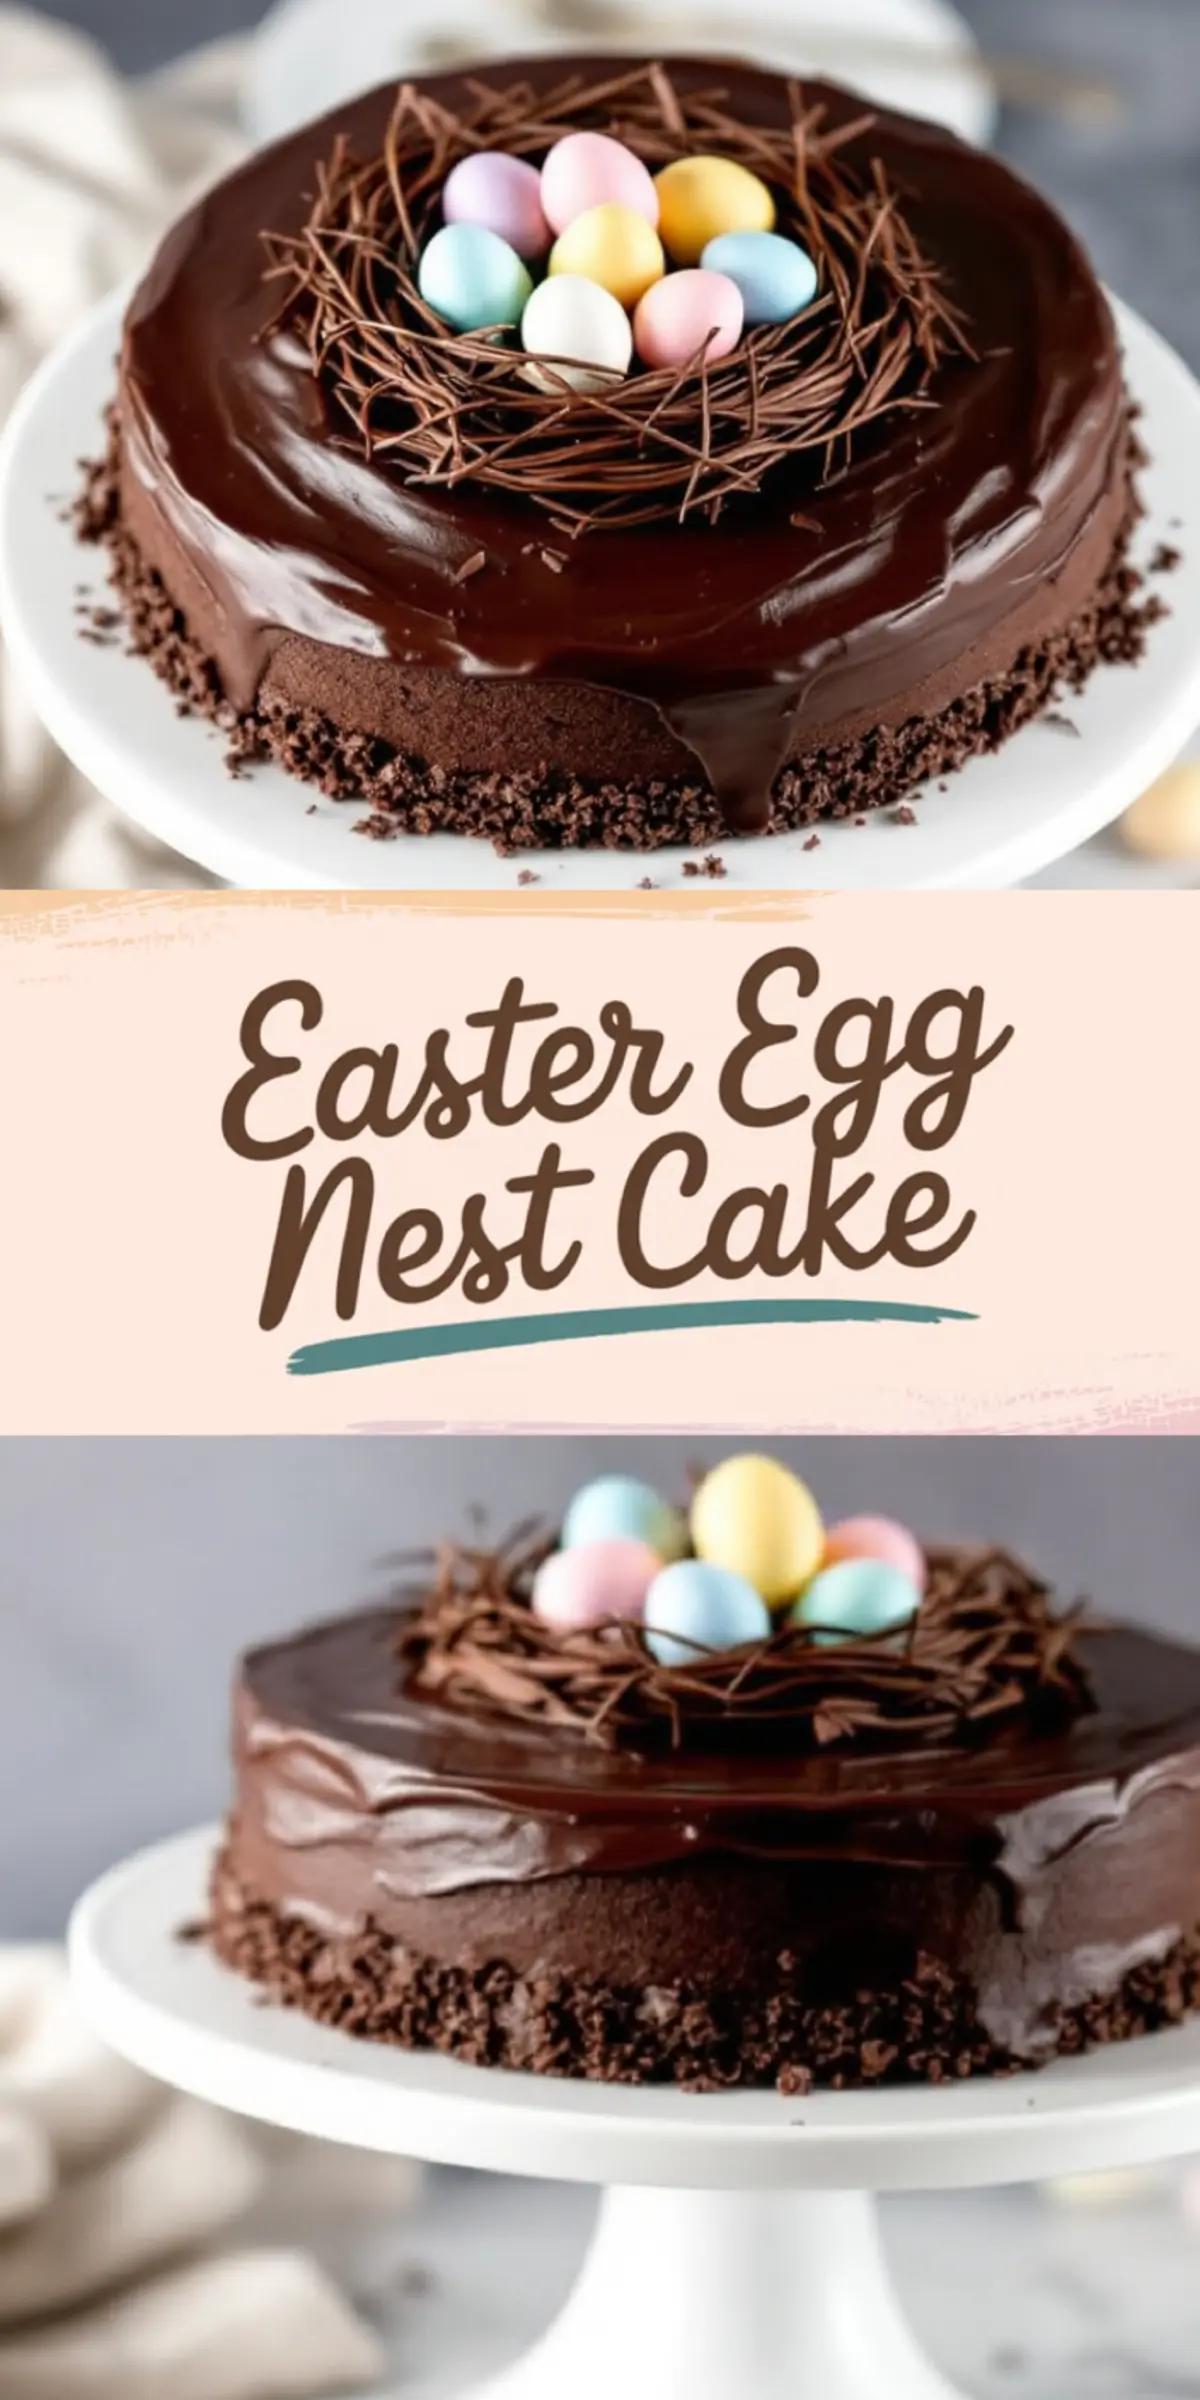
Chocolate Easter Egg Nest Cake Recipe

A rich chocolate cake with a smooth ganache topping, finished with a decorative chocolate nest filled with mini Easter eggs.
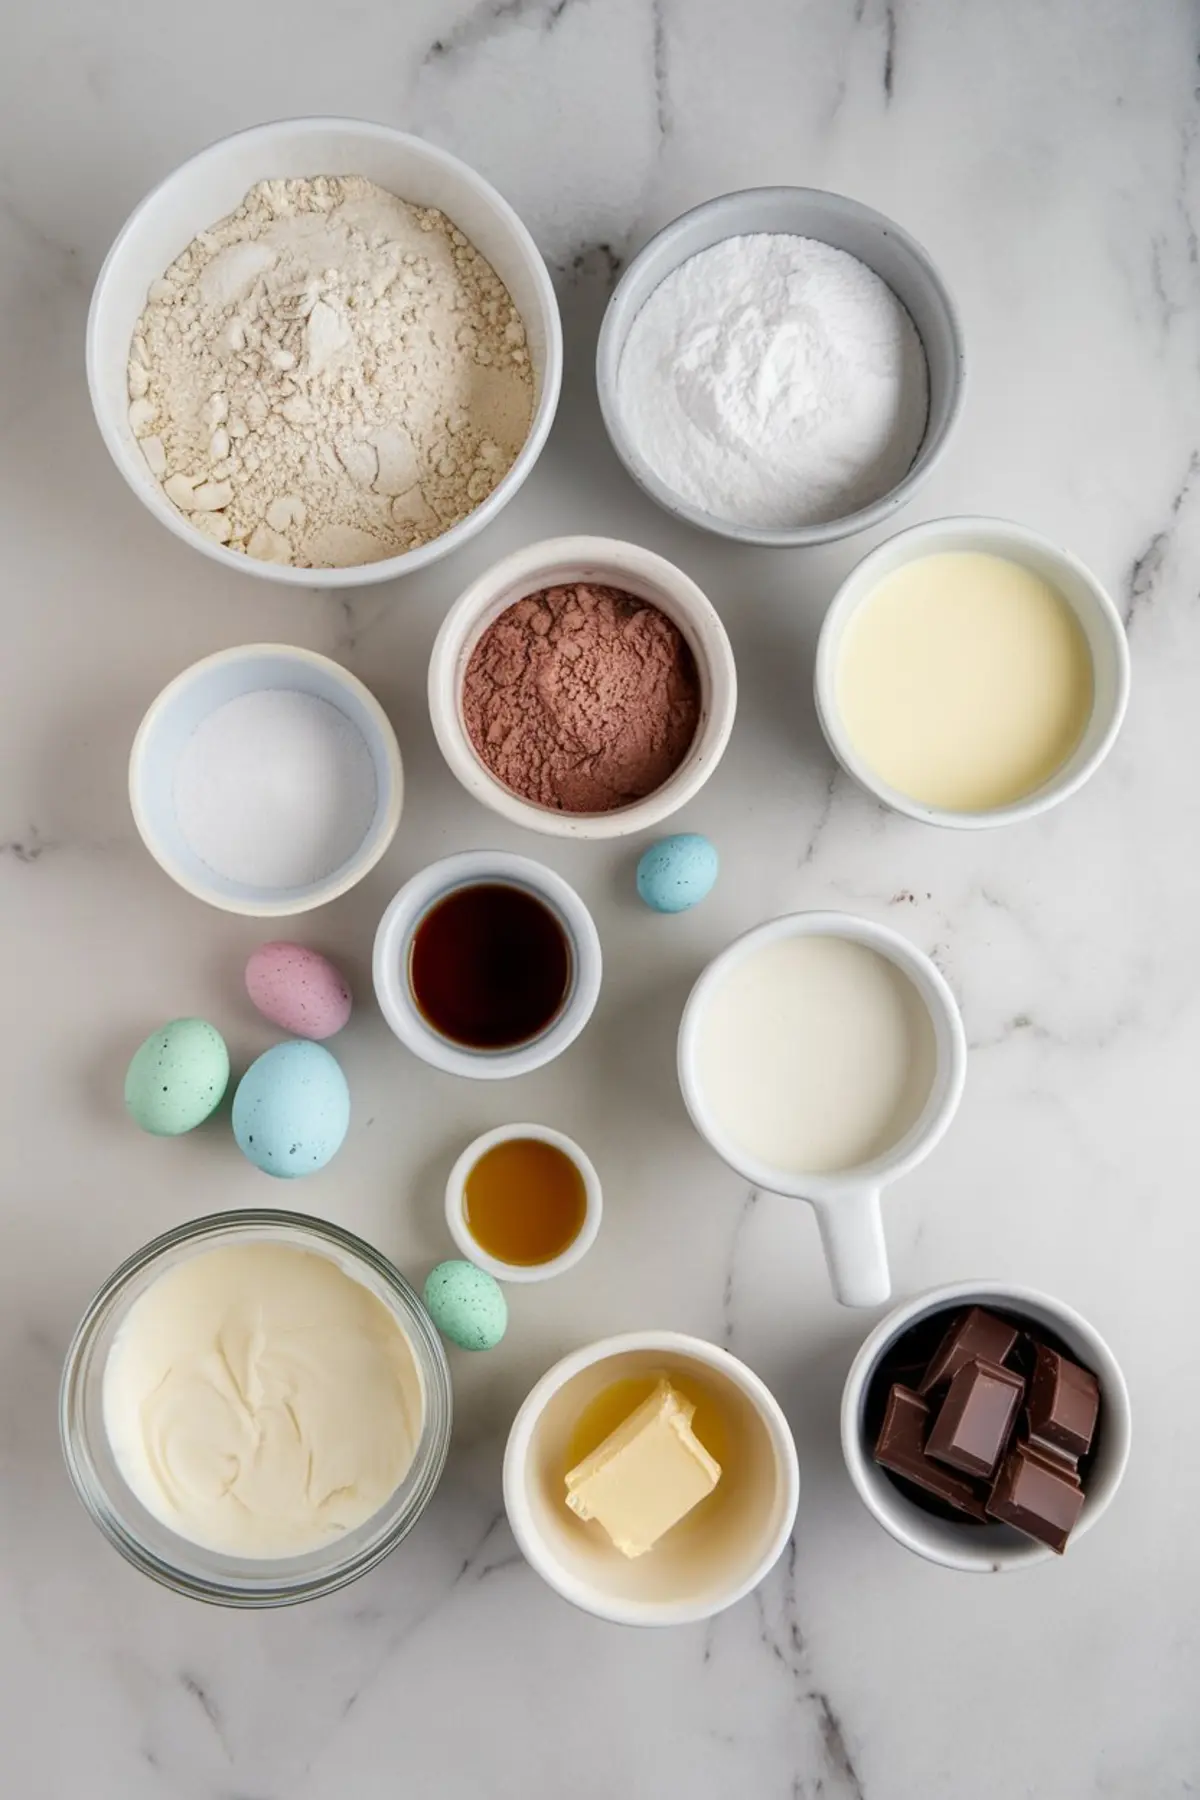
Ingredients
- FOR THE CHOCOLATE CAKE
- 1 ¾ cups (220g) all-purpose flour
- ¾ cup (75g) unsweetened cocoa powder
- 2 cups (400g) granulated sugar
- 2 teaspoons baking powder
- 1 teaspoon baking soda
- ½ teaspoon salt
- 1 cup (240ml) buttermilk
- ½ cup (120ml) vegetable oil
- 2 large eggs
- 2 teaspoons vanilla extract
- 1 cup (240ml) hot water or coffee
- FOR THE CHOCOLATE GANACHE
- 1 cup (240ml) heavy cream
- 8 oz (225g) dark chocolate, chopped
- 1 tablespoon unsalted butter
- FOR THE CHOCOLATE NEST
- 6 oz (170g) dark chocolate, melted
- Parchment paper
- Mini chocolate eggs or candy-coated Easter eggs
Instructions
- PREPARE THE CHOCOLATE CAKE: Preheat the oven to 350°F (175°C). Grease and line a 9-inch round cake pan that is at least 2.5 inches deep with parchment paper. In a large mixing bowl, whisk together the flour, cocoa powder, sugar, baking powder, baking soda, and salt. Add the buttermilk, vegetable oil, eggs, and vanilla extract, then mix until well combined. Slowly stir in the hot water or coffee until fully incorporated; the batter will be thin. Pour the batter into the prepared pan and bake for 30-35 minutes, or until a toothpick inserted in the center comes out clean. Let the cake cool in the pan for 10 minutes, then transfer it to a wire rack to cool completely.
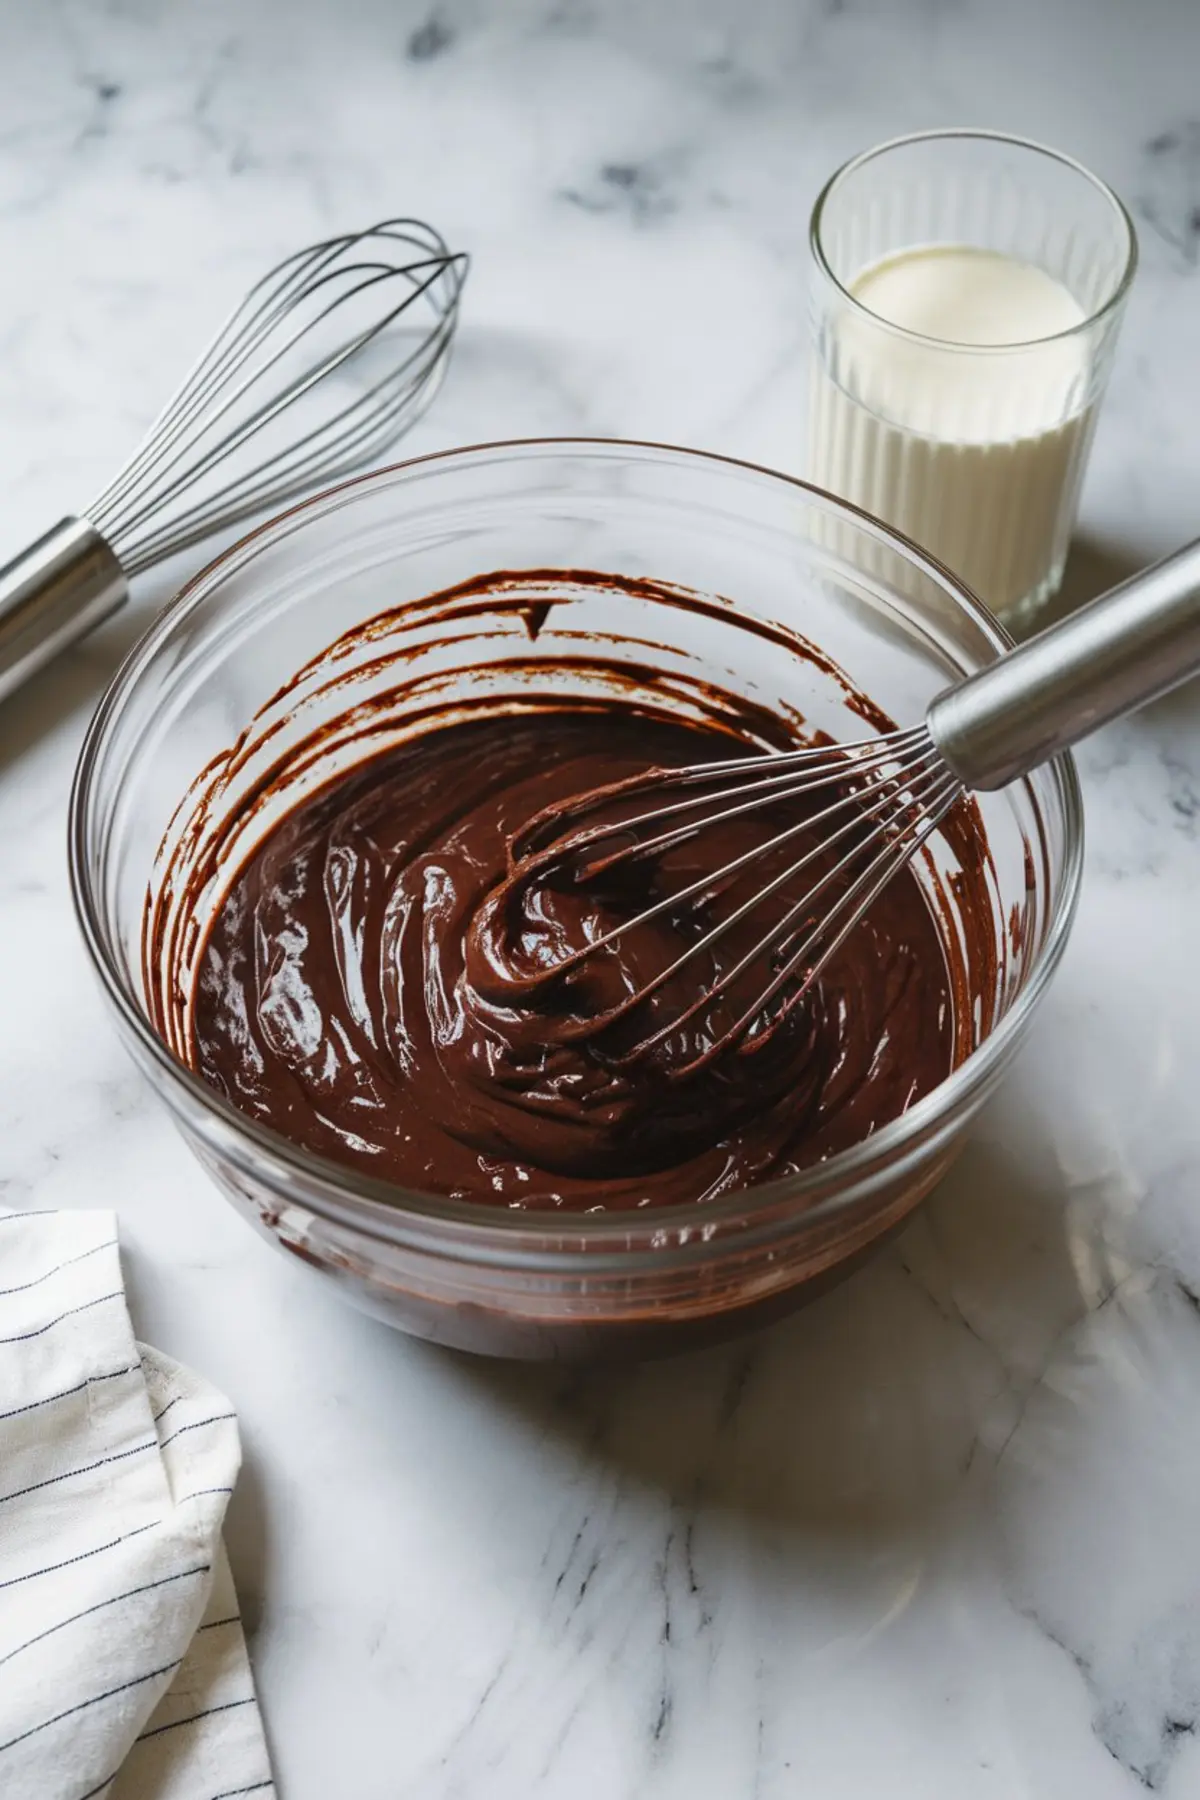
- MAKE THE GANACHE: Heat the heavy cream in a saucepan over medium heat until it starts to simmer, but do not let it boil. Remove from heat and pour over the chopped dark chocolate. Let it sit for 2-3 minutes, then stir until smooth. Add the butter and stir until fully incorporated. Let the ganache cool slightly until it thickens but remains pourable.
- CREATE THE CHOCOLATE NEST: Melt the dark chocolate in a microwave-safe bowl using 30-second intervals, stirring between each, until smooth. Transfer the melted chocolate to a piping bag or a small ziplock bag with the corner snipped off. Lay a sheet of parchment paper on a baking tray, then pipe the chocolate in crisscrossing strands to form a circular nest shape. Place the tray in the refrigerator for 15-20 minutes, or until the chocolate nest is firm.
- ASSEMBLE THE CAKE: Place the cooled cake on a serving platter. Pour the chocolate ganache over the cake, letting it drip down the sides. Carefully peel the chocolate nest from the parchment paper and place it on top of the cake. Fill the nest with mini chocolate eggs before serving.
Notes
Let the cake cool completely before adding the ganache to prevent it from melting too quickly. For a more intense chocolate flavor, use coffee instead of hot water in the cake batter. If the ganache thickens too much before pouring, gently reheat it in short intervals until it reaches a smooth consistency. When making the chocolate nest, work quickly to pipe the chocolate before it starts to set. Store the cake in an airtight container at room temperature for up to two days or refrigerate for longer freshness.
Batter Volume Tip: This is a generous one-layer cake with a loose batter, so make sure to use a deep 9” pan (at least 2.5” tall). If your pan is shallower, fill it no more than ⅔ full and bake the extra as cupcakes. It’ll save your oven and give you a preview bite 😉
Nutrition Information
Yield
12Serving Size
1Amount Per Serving Calories 201Total Fat 8gSaturated Fat 4gTrans Fat 0gUnsaturated Fat 4gCholesterol 56mgSodium 334mgCarbohydrates 26gFiber 1gSugar 10gProtein 5g
Looks great, however my one 9” cake pan oozed batter over the pan and all over the oven. Why do you think this happened? Really just one cake tin ?
Hi Kathleen, yep this cake does call for a single 9” round pan, but I think what happened comes down to pan depth. Some 9” pans are only 2 inches tall, and with this much batter (especially since it’s on the thinner side), that can lead to overflow. I use a 9” pan that’s at least 2.5 inches deep, which gives it enough space to rise without spilling over.
If your pan is shorter, I’d suggest either scaling down the batter slightly (about ¾ of the recipe), or dividing it between two pans. Another trick I’ve used is baking the extra as cupcakes alongside the main cake. That way you don’t lose any batter—and get a little taste test, too 😊
Let me know what kind of pan you used, and I can help tweak it from there.
Please put in your instructions that a standard depth cake pan is too small for this recipe so no-one else has to clean their oven until 2am like myself and the previous person…
Hi Angela, I really appreciate you pointing this out—and I’m so sorry you ended up dealing with that kind of cleanup. You’re absolutely right: a standard 9” cake pan that’s just 2 inches deep is cutting it close for this batter, especially with how much it rises.
I’ll be updating the instructions to recommend using a deeper 9” pan (at least 2.5 inches), or splitting the batter to avoid spills. Thank you for flagging this—not just for yourself, but for others too. I know that 2am oven scrubbing is not what anyone signs up for when baking cake 🫣