
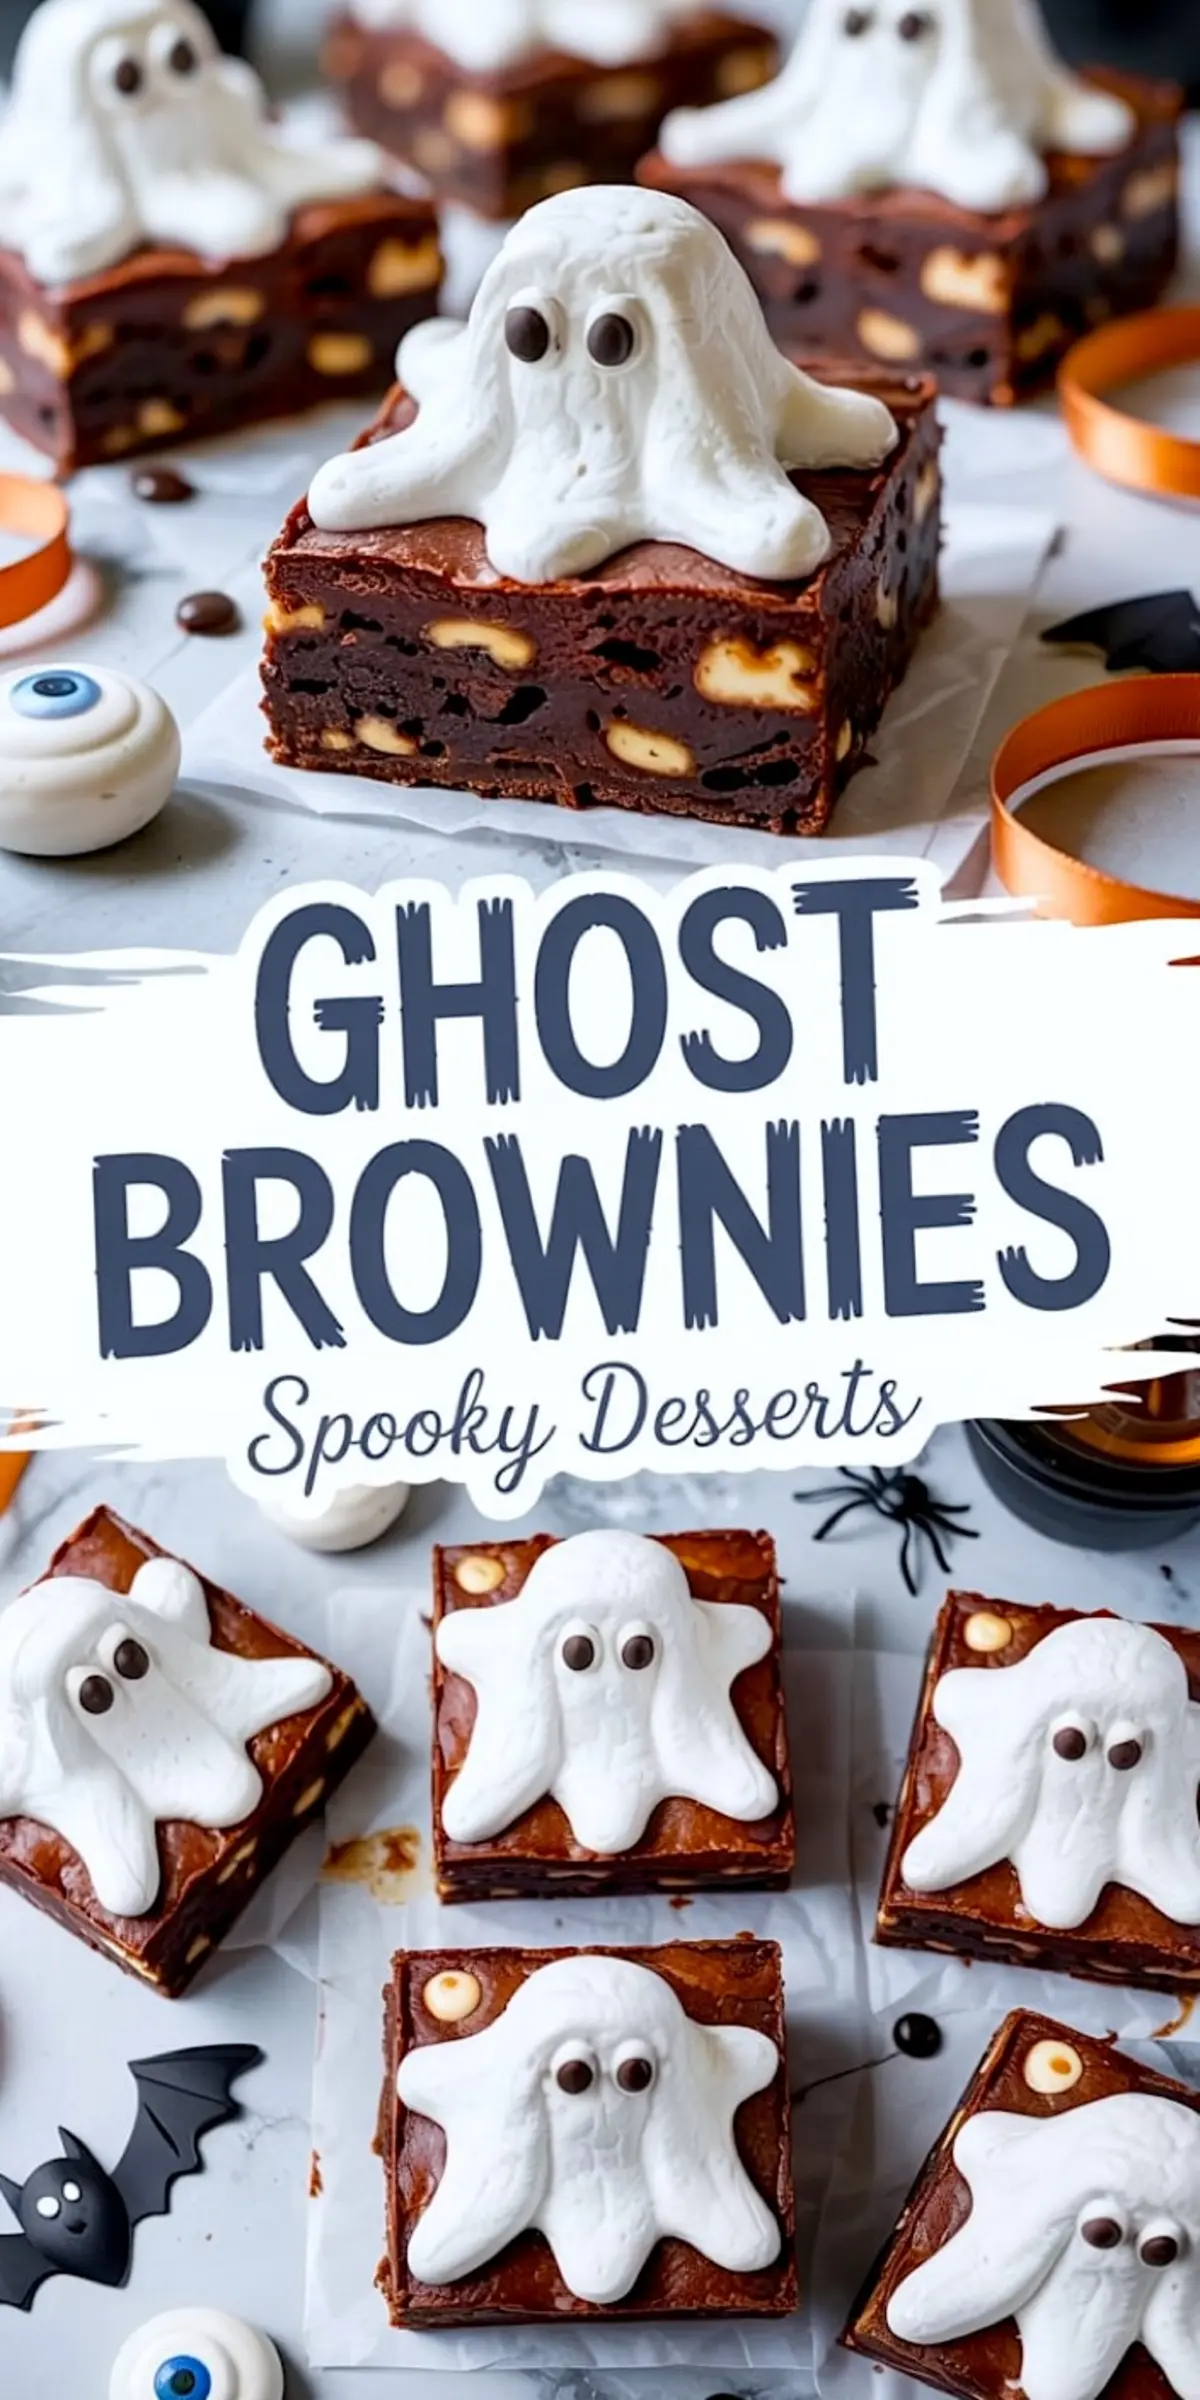
Ghost brownies are a Halloween baking project disguised as dessert. You get that rich, cocoa-packed base of a homemade brownie, then swirl marshmallow frosting into tall, ghostly peaks right on top. These little ghosts don’t ask for much. No fondant, no piping skills. Just a warm brownie, a soft marshmallow, and two chocolate chips for eyes.
This recipe lands right between spooky snacks and cozy fall baking. It looks festive but feels familiar. You’re not dealing with dry cookies or candy overload. These are moist, thick Halloween brownies that happen to look like tiny ghosts.
Following a special diet?
Every recipe on this site can be converted to gluten-free, vegan, dairy-free, keto, nut-free or egg-free with adjusted ratios so nothing falls flat.
Try the Recipe Converter →Why This Recipe Works for Halloween Food Treats
Halloween desserts often end up more about looks than taste. But these deliver both. The brownie base has depth from cocoa and brown sugar, and the marshmallow topping adds a chewy contrast. Kids love the look. Adults usually go back for seconds.
The recipe is practical. The marshmallow topping uses simple ingredients you likely already have. The chocolate eyes? Store-bought chips. There’s room for tweaks, but you don’t need any.
Making the Brownie Base
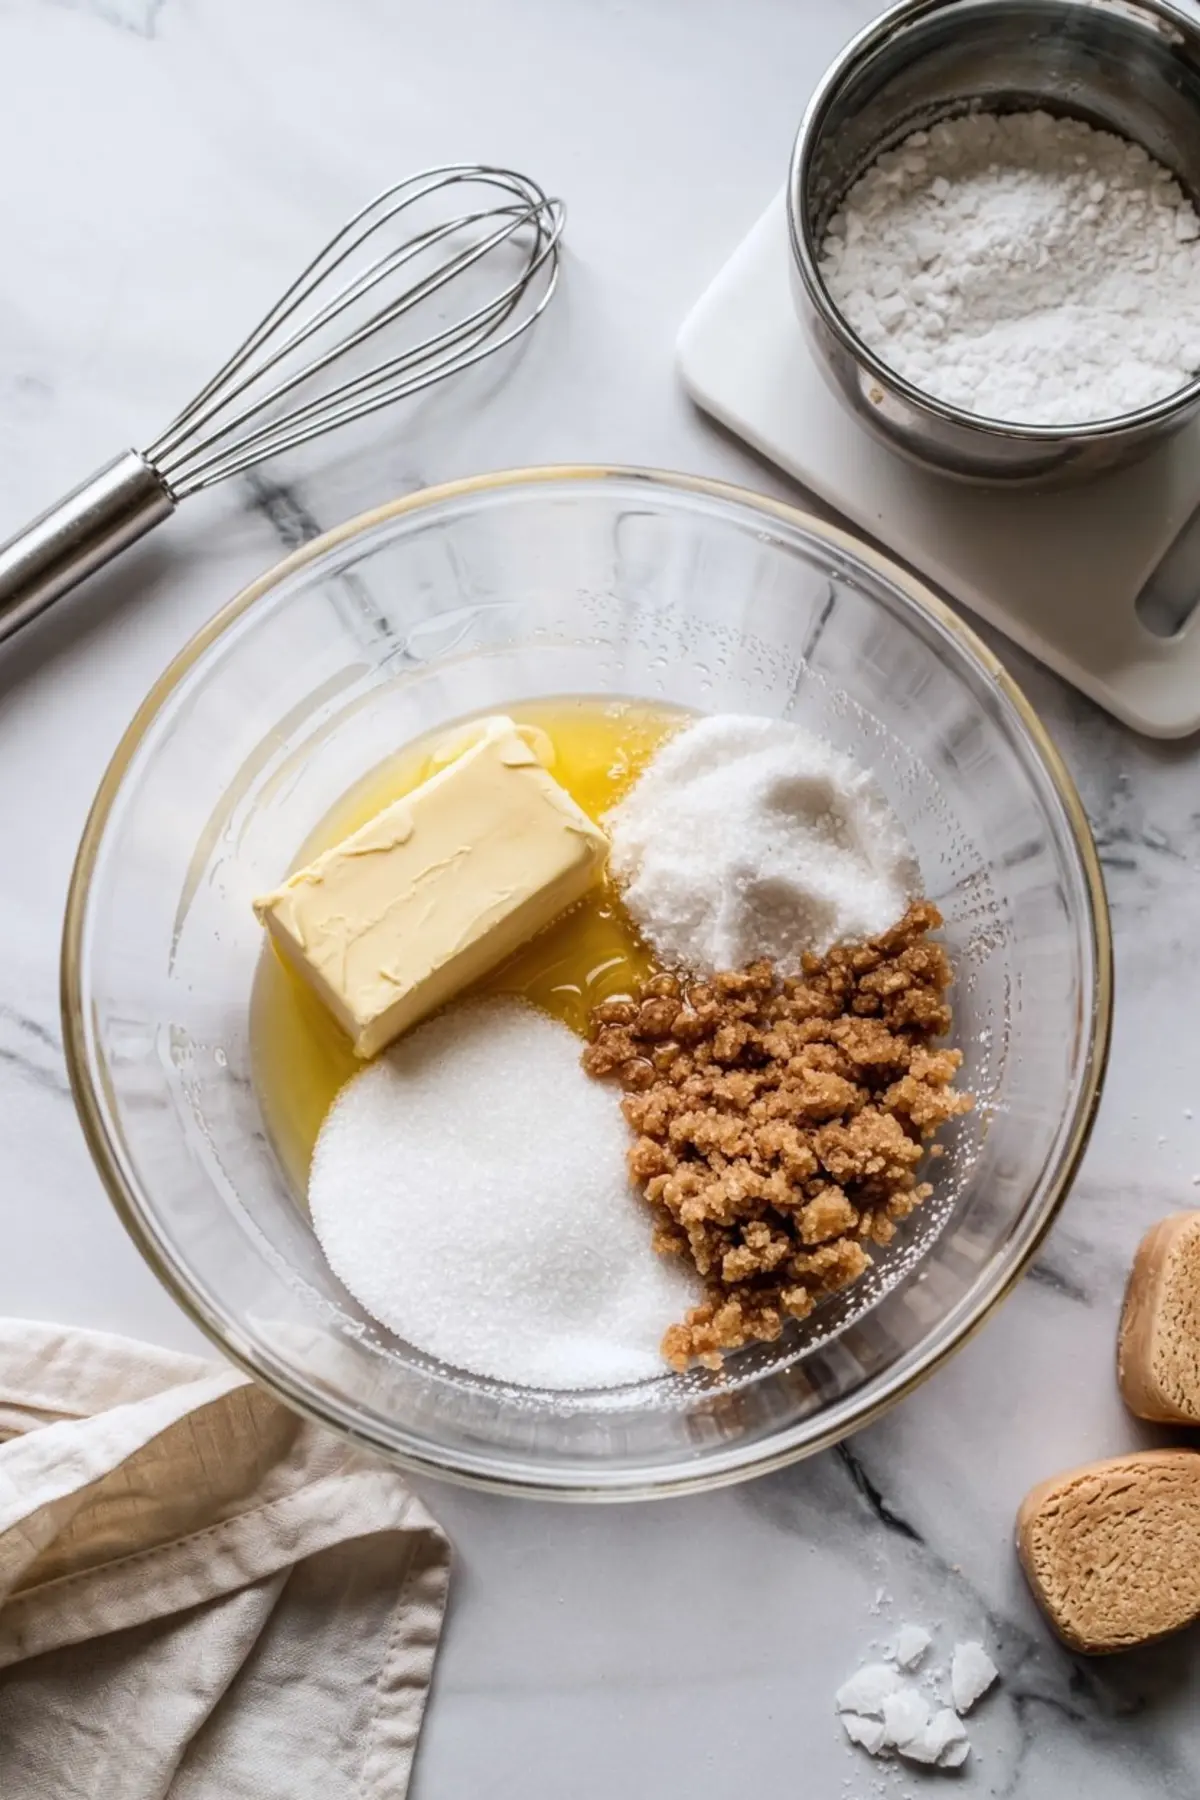
The brownie itself begins with melted butter, sugar, and a touch of vanilla. That gives the base its glossy finish and chewy bite. I use both granulated and light brown sugar to round out the flavor. You want it rich but not cloying.
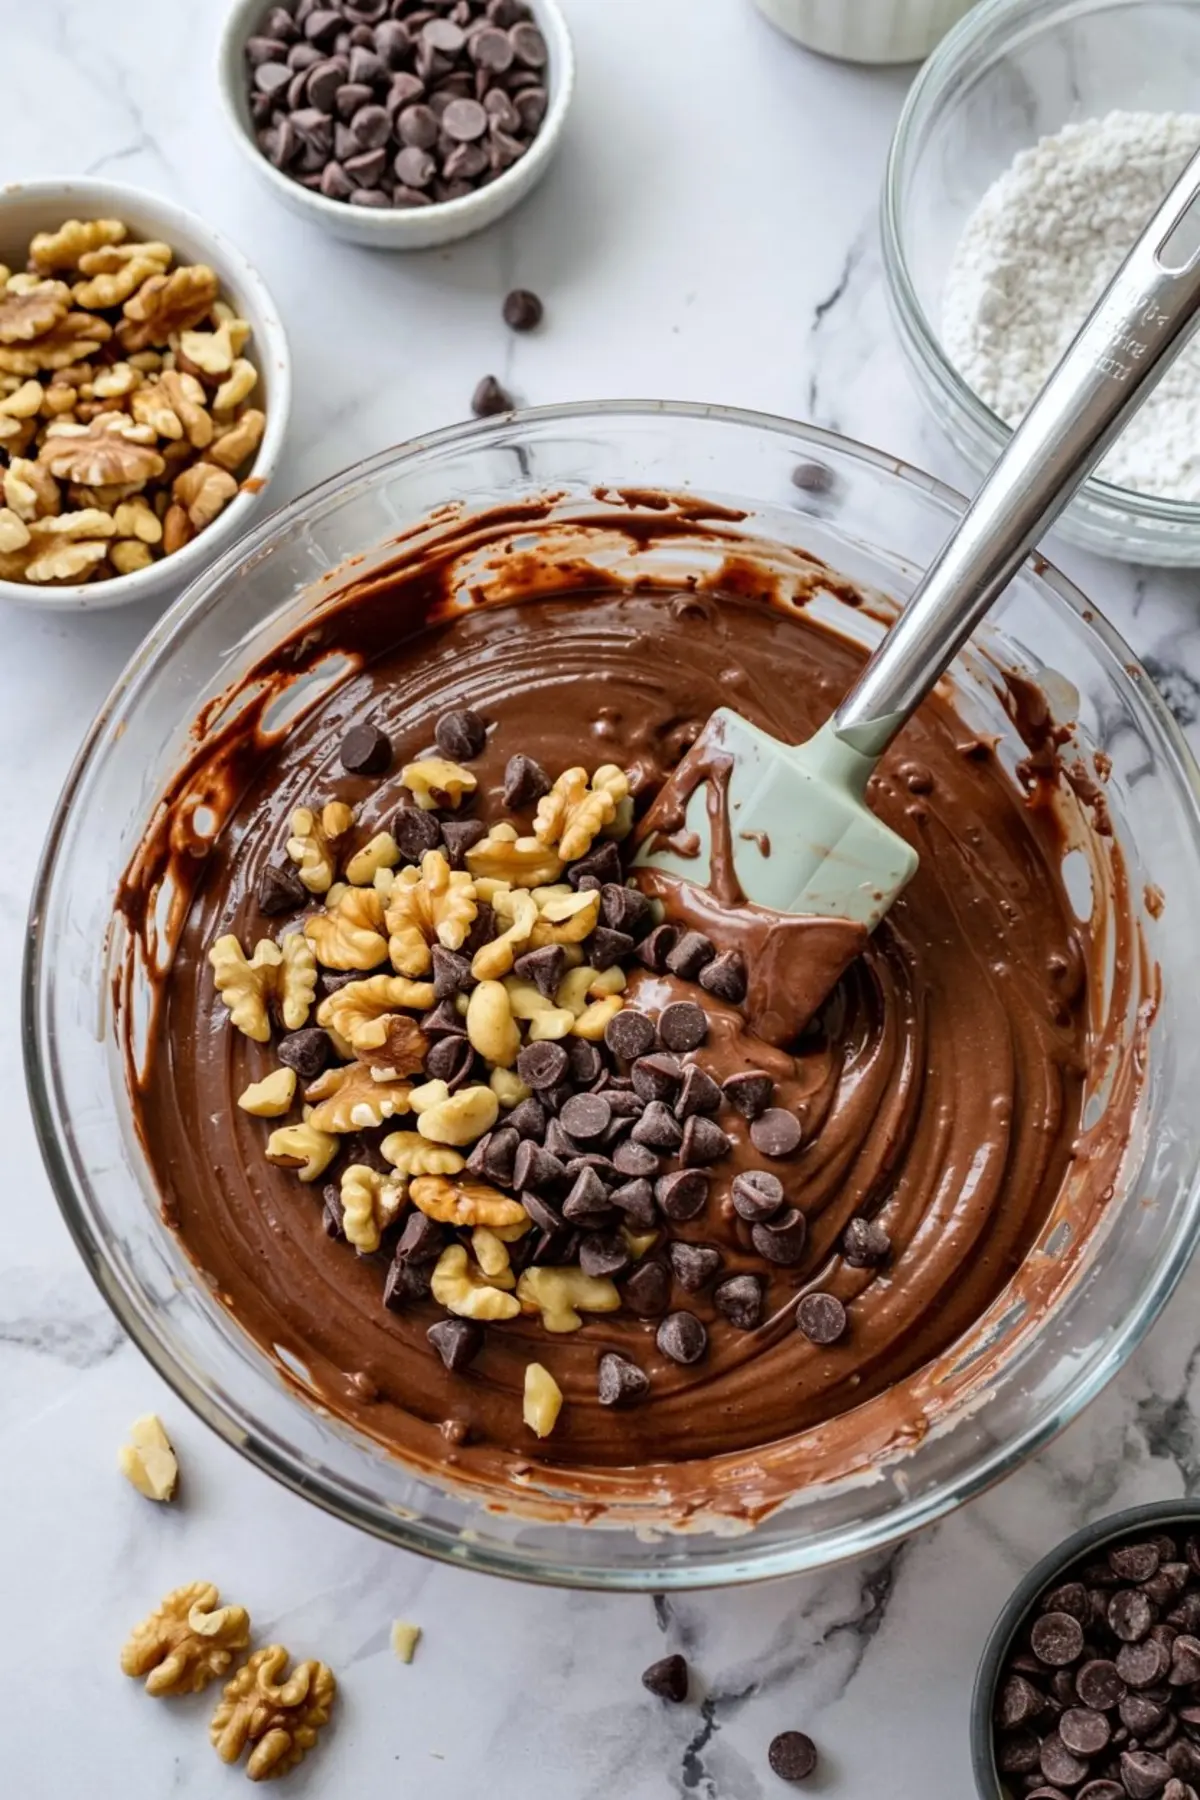
Cocoa powder brings the intensity. Plain flour and a little baking powder keep the structure right where you want it, fudgy, not cakey. If you add walnuts, you’ll get a bit of crunch. I usually toss in some chopped walnuts and a handful of chocolate chips when I want extra texture.
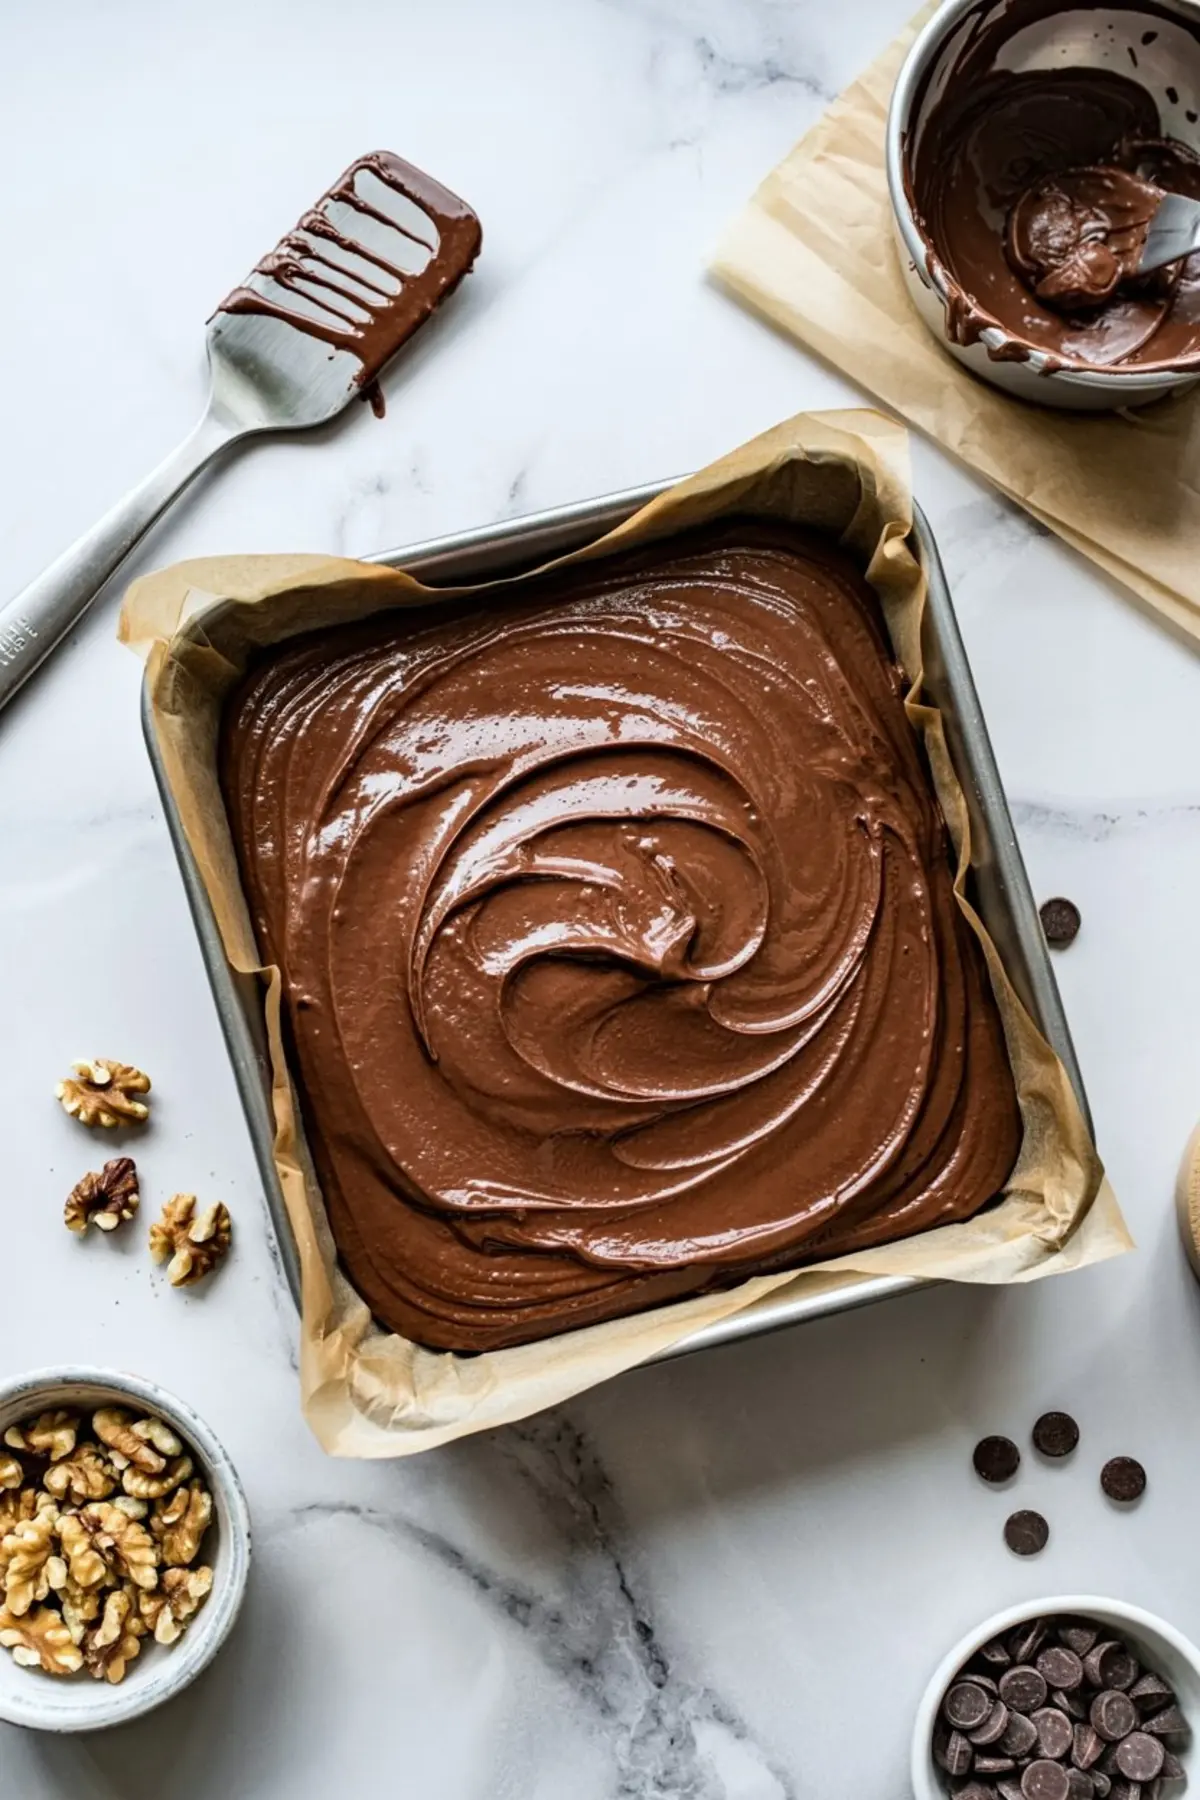
You’ll bake these in a square tin, lined with parchment. Let the edges crack, and don’t worry if the center still looks slightly under. Once cooled, that gooey center firms into the most satisfying bite.
Comparison Note: Cocoa Powder vs Melted Chocolate
I’ve made ghost brownies with both melted chocolate and cocoa powder in the base. Melted chocolate gives you more fat and a denser, truffle-like result. But cocoa powder creates better balance. It blends into the butter quickly and avoids clumping. For this recipe, cocoa powder wins. You want the ghost topping to shine against a structured, but soft, brownie.
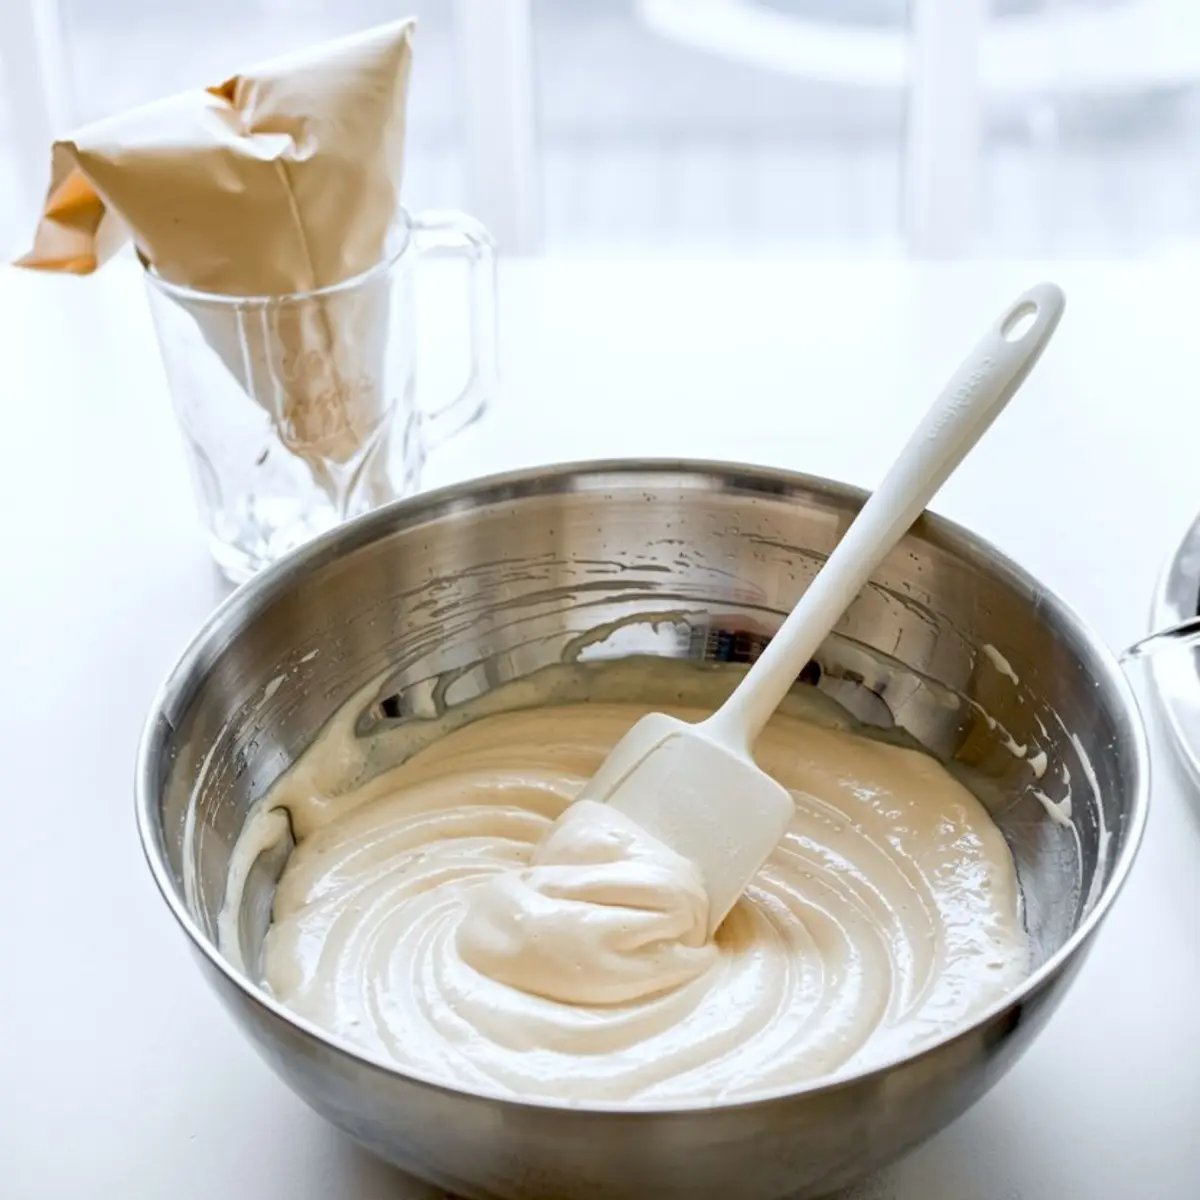
Whipping the Marshmallow Topping

This part feels like magic. You’ll bloom powdered gelatin, then pour in a hot sugar syrup made from sugar, water, and corn syrup. Once combined, the mixture gets whipped into peaks.
The texture shifts fast you’ll go from liquid to glossy marshmallow in under ten minutes. I always lightly grease my piping bag before filling it. It’s a small step that makes a big difference. Without it, the marshmallow sticks and refuses to cooperate.
Piping and Decorating the Ghost Faces
Work quickly. Pipe tall blobs onto each brownie, pulling upward to get that signature ghost tail. Don’t worry if a few lean or droop. That’s part of their charm.
While the topping is still soft, press two chocolate chips or candy eyes into each ghost. It gives them personality. Let the ghosts sit at room temperature until they firm up completely. This usually takes about an hour.
You can make these a few hours in advance, but don’t cover them too tightly or the marshmallow might get sticky. I usually store mine in a shallow container with a loose sheet of parchment over top.
More Halloween Baking Ideas to Try
Pair these ghost brownies with other Halloween desserts for a playful spread. The Ghost Cookie Cake brings the same theme in a larger format.
If you want something richer, the Vampire Brownies use a cherry filling that surprises people on the first bite.
Or go full nostalgic with the Mummy Brownies. Kids love peeling off the candy bandages.
Serving Tips and Storage Advice
Ghost brownies hold their shape best when served the same day. The marshmallow stays light and bouncy. If you want to make them ahead, bake the brownies the night before and add the ghosts the next morning.
For serving, I like to slice them ahead and place each ghost on a cupcake liner. It makes them easier to grab without squishing the topping. These pair well with apple cider, warm or cold. They also go nicely alongside the Ghost Cocktail for the grown-up crowd.
Avoid refrigerating. It changes the texture of the marshmallow and dries the brownie.
Before You Go, Pin and Say Hello
These brownies bring Halloween baking back to what works: simple ingredients, bold visuals, and something everyone wants to eat. Save this ghost brownies recipe to your Halloween Desserts board and make it part of your fall baking plan.
I’d love to know if you gave them googly eyes, sprinkles, or your own twist. Share how they turned out in the comments. Questions welcome too—this is the kind of spooky food that gets better with ideas shared.
Ghost Brownies Recipe
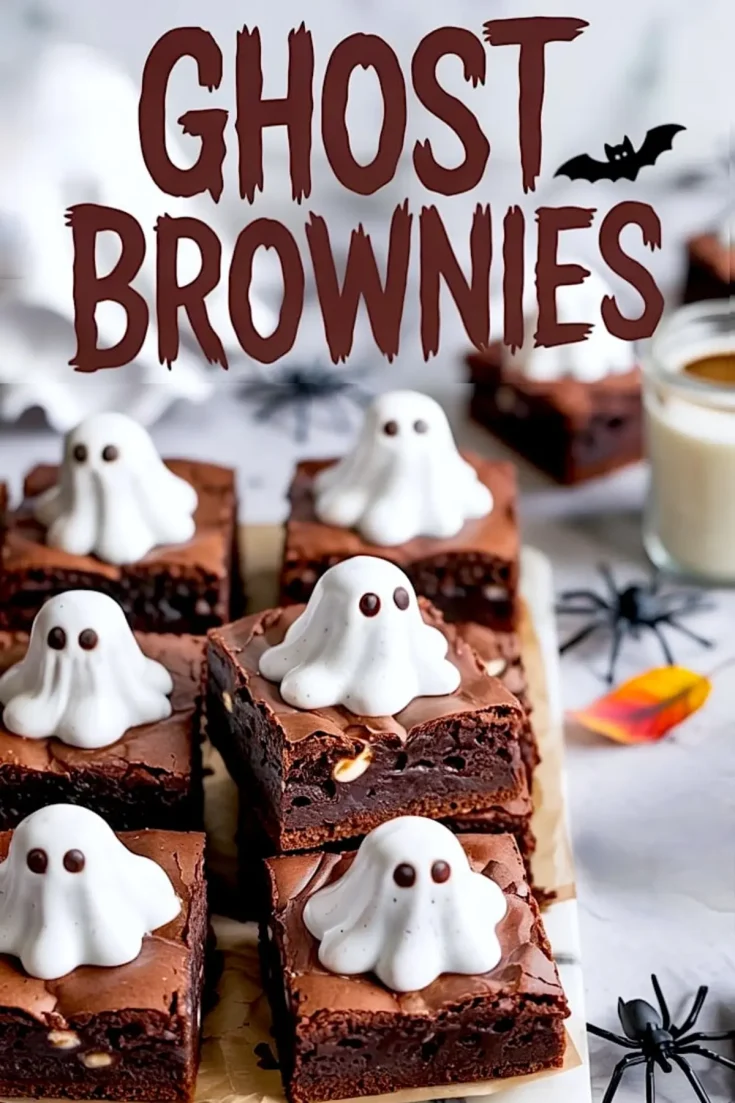
Ghost brownies are one of those Halloween desserts that always get more attention than the candy. Start with a fudgy brownie base, add a swirl of marshmallow frosting, then top with little ghost faces made from melted chocolate. They’re rich, simple to decorate, and always a hit at Halloween parties. I think of them as the easiest kind of spooky food—part Halloween baking, part art project. You don’t need fancy tools, just brownies, frosting, and a steady hand. Serve them with other Halloween food treats or spooky snacks and you’ve got a dessert table everyone will remember. These brownies fit right in with fall baking traditions but with a playful holiday twist. They check every box: Halloween brownies, ghost-shaped, and most importantly, delicious.
Ingredients
- For the Brownies:
- 170g (6 oz) unsalted butter, melted
- 200g (1 cup) granulated sugar
- 100g (½ cup) light brown sugar
- 2 large eggs
- 1 tsp vanilla extract
- 80g (⅔ cup) cocoa powder
- 65g (½ cup) plain flour
- ½ tsp baking powder
- ¼ tsp salt
- 100g (¾ cup) chopped walnuts
- 80g (½ cup) chocolate chips (optional)
- FOR THE PIPEABLE MARSHMALLOW GHOSTS:
- 150g (¾ cup) granulated sugar
- 120ml (½ cup) light corn syrup or glucose
- 2 tbsp water (for syrup)
- 1 ½ tsp powdered gelatin
- 1 tbsp cold water (for blooming)
- 1 tsp vanilla extract
- Chocolate chips or candy eyes (for decorating)
- Neutral oil spray (for greasing piping bag)
Instructions
- PREPARE THE BAKING PAN: Preheat the oven to 175°C (350°F) and line an 8x8 inch (20x20 cm) square baking pan with parchment paper, leaving some overhang for easy removal.
- MIX THE BATTER: In a large mixing bowl, whisk together the melted butter, granulated sugar, and light brown sugar until the mixture looks glossy and smooth.
- ADD EGGS AND VANILLA: Add the eggs and vanilla extract to the bowl and whisk until the mixture becomes thick and cohesive.
- INCORPORATE DRY INGREDIENTS: Sift in the cocoa powder, plain flour, baking powder, and salt. Gently mix just until no dry streaks remain.
- FOLD IN MIX-INS: Stir in the chopped walnuts and, if using, chocolate chips. Do not overmix to avoid tough brownies.
- BAKE THE BROWNIES: Spread the batter evenly into the prepared pan, smoothing the top. Bake for 25–28 minutes or until the top is set and lightly cracked. A toothpick inserted should come out with a few moist crumbs.
- COOL COMPLETELY: Allow the brownies to cool fully in the pan on a wire rack before adding the marshmallow topping.
- BLOOM THE GELATIN: In a small bowl, sprinkle the powdered gelatin over 1 tbsp of cold water. Let it sit and hydrate for 5–10 minutes until fully bloomed.
- COOK THE SUGAR SYRUP: In a small saucepan, combine the granulated sugar, corn syrup, and 2 tbsp water. Stir gently and heat over medium heat until the mixture reaches 115°C (240°F) on a candy thermometer.
- ADD GELATIN TO SYRUP: Remove the syrup from the heat and carefully stir in the bloomed gelatin and vanilla extract. Be cautious as the mixture may foam slightly during this step.
- WHIP THE MARSHMALLOW: Immediately transfer the hot mixture to a stand mixer fitted with the whisk attachment or use a hand mixer. Beat on high speed for 5–7 minutes until the mixture becomes thick, glossy, and forms soft peaks.
- PREPARE THE PIPING BAG: Lightly spray the inside of a piping bag fitted with a large round tip (or snip the end) with neutral oil to prevent sticking. Quickly fill the bag with the warm marshmallow mixture.
- PIPE THE GHOSTS: Pipe the marshmallow onto the fully cooled brownies by starting at the center of each square and applying steady pressure. Pull up slowly to create a tall ghost shape with gentle drips.
- ADD EYES: While the marshmallow is still soft, gently press two chocolate chips or candy eyes into each ghost to form the face.
- LET GHOSTS SET: Allow the brownies to sit at room temperature for 1–2 hours until the marshmallow is firm to the touch and holds its shape completely.
Notes
Use a candy thermometer for accuracy when cooking the syrup. Pipe marshmallows as soon as possible after whipping, as the mixture begins to firm quickly. If desired, omit walnuts or substitute with pecans.
Nutrition Information
Yield
16Serving Size
1Amount Per Serving Calories 86Total Fat 4gSaturated Fat 1gTrans Fat 0gUnsaturated Fat 2gCholesterol 25mgSodium 78mgCarbohydrates 11gFiber 0gSugar 4gProtein 2g