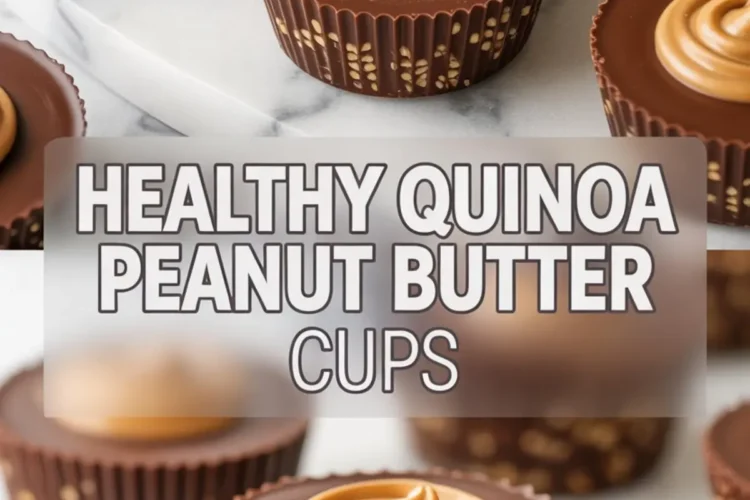
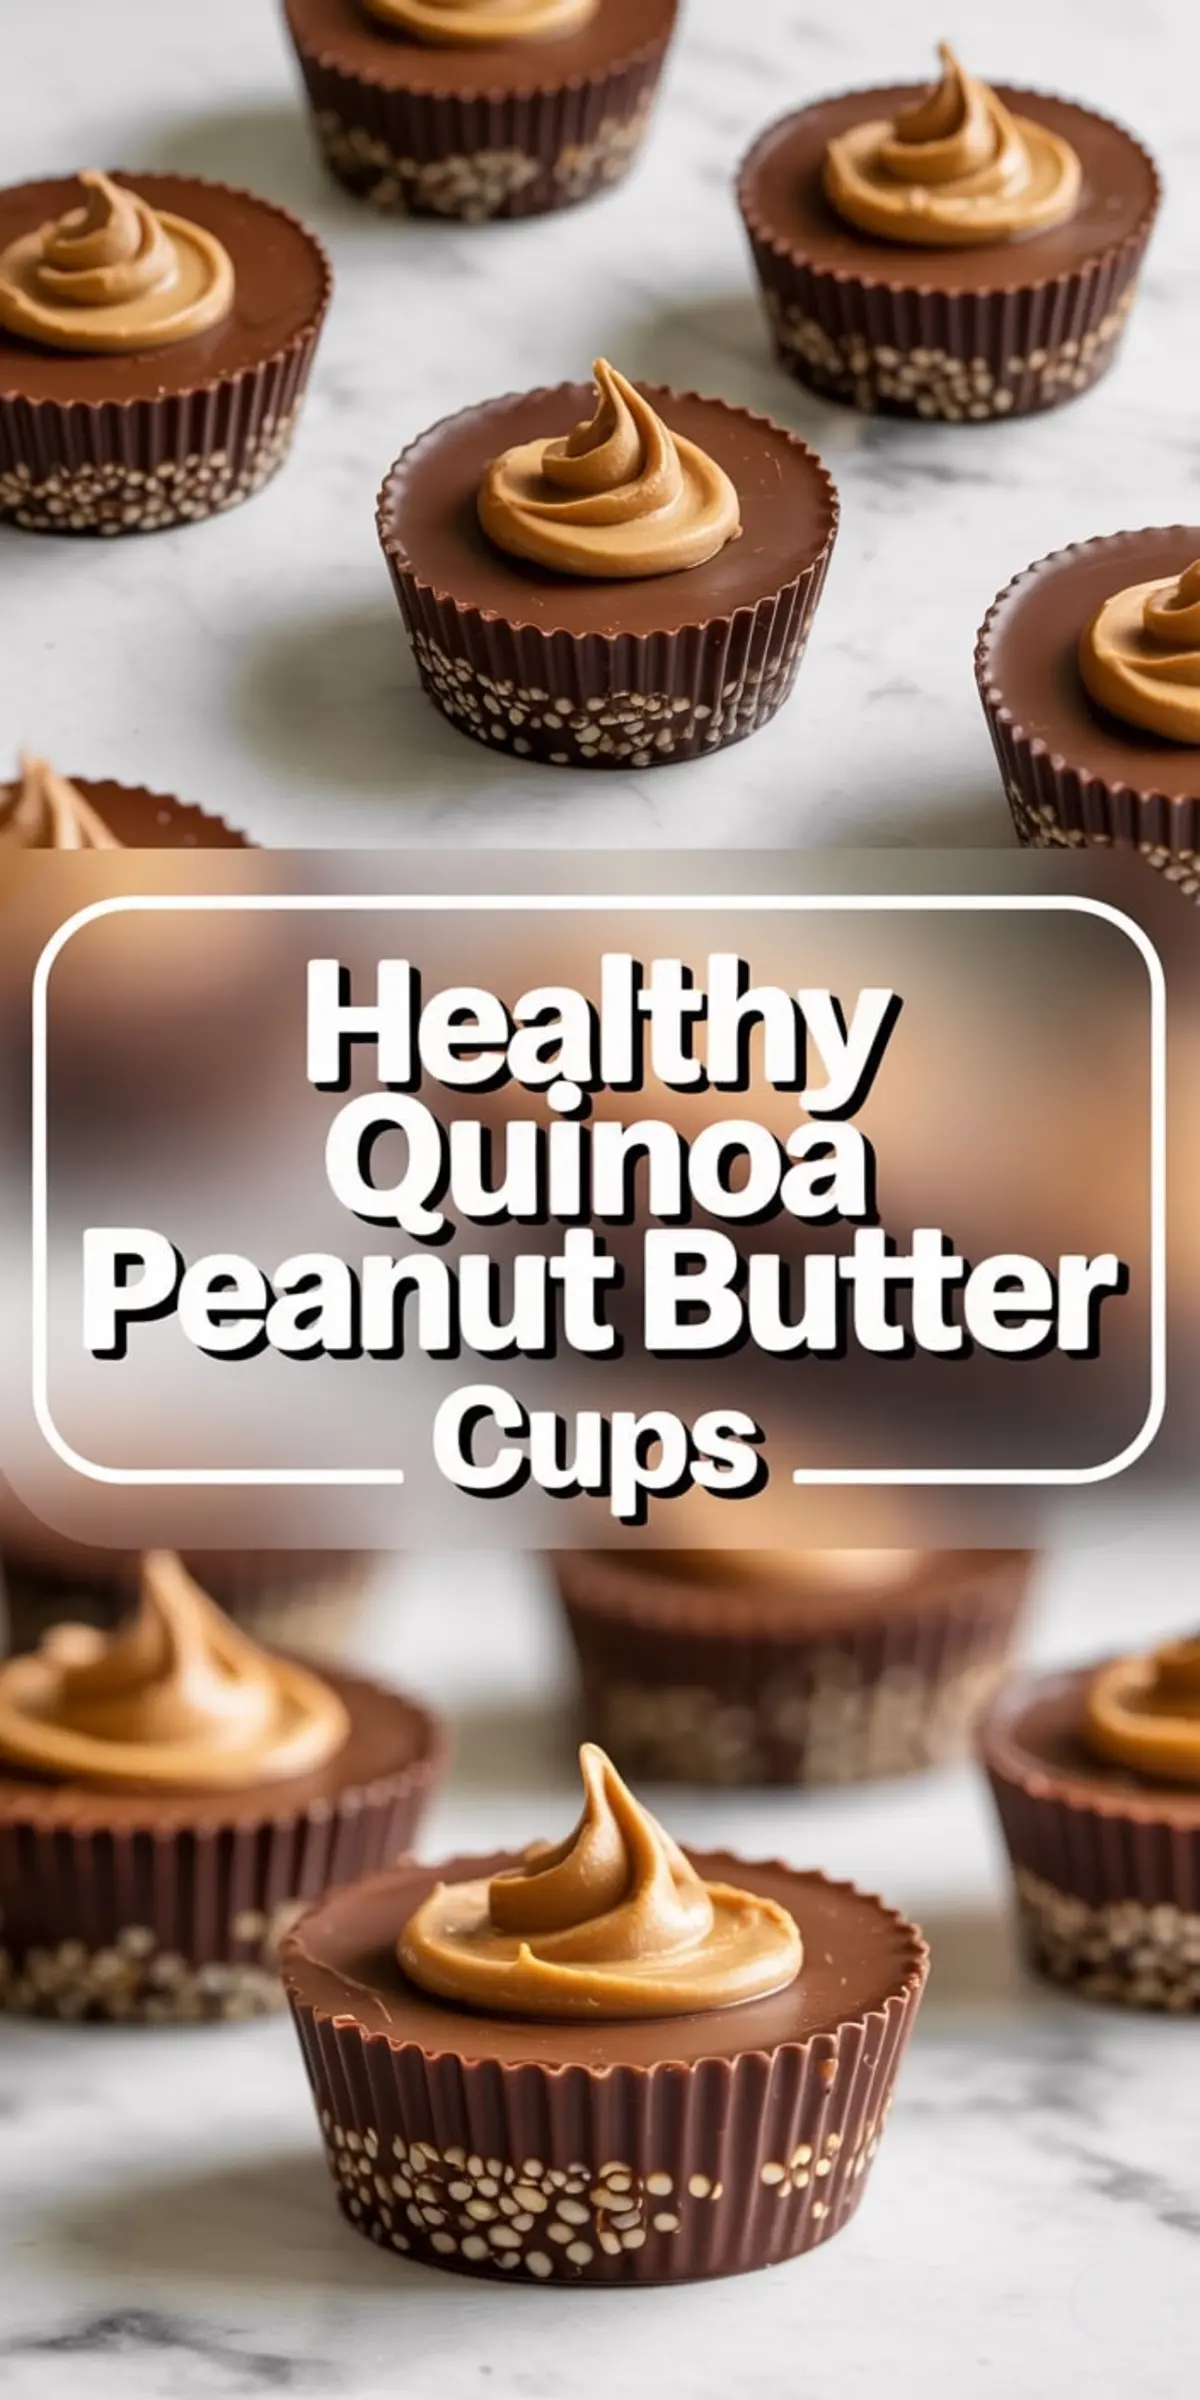
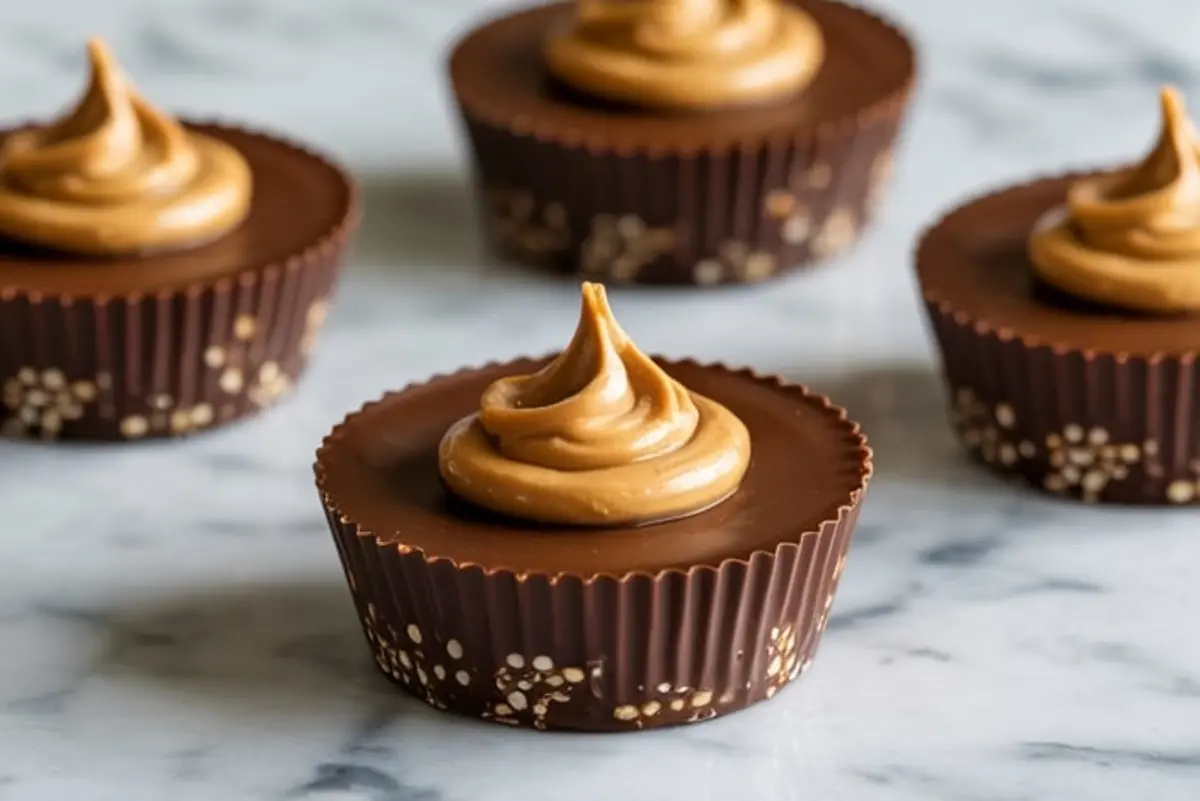
These Healthy Quinoa Peanut Butter Cups combine dark chocolate, puffed quinoa, and natural peanut butte into a no-bake snack that’s rich in flavor and packed with texture. The recipe creates small, satisfying energy bites that double as gluten free snacks and meal prep treats.
Each cup blends nutty creaminess with toasted crunch, and offers a nutritious take on chocolate quinoa peanut butter cups, quinoa treats, or puffed quinoa chocolate cups. Whatever name you call them, the outcome stays the same: balanced, grab-and-go bites with just the right amount of indulgence.
Following a special diet?
Every recipe on this site can be converted to gluten-free, vegan, dairy-free, keto, nut-free or egg-free with adjusted ratios so nothing falls flat.
Try the Recipe Converter →The peanut butter to coconut flour ratio creates structure without refrigeration-dependent firmness. That’s key here.
You want a center that holds its shape, but still stays soft enough to bite without cracking the chocolate shell. Half a cup of peanut butter to one and a half tablespoons of coconut flour strikes that balance. A touch of maple syrup brings moisture and flavor without thinning the mixture.
I’ve used this ratio before in other recipes like my Vanilla Protein Powder Mug Cake, where structure and texture both matter. The same principle applies here.
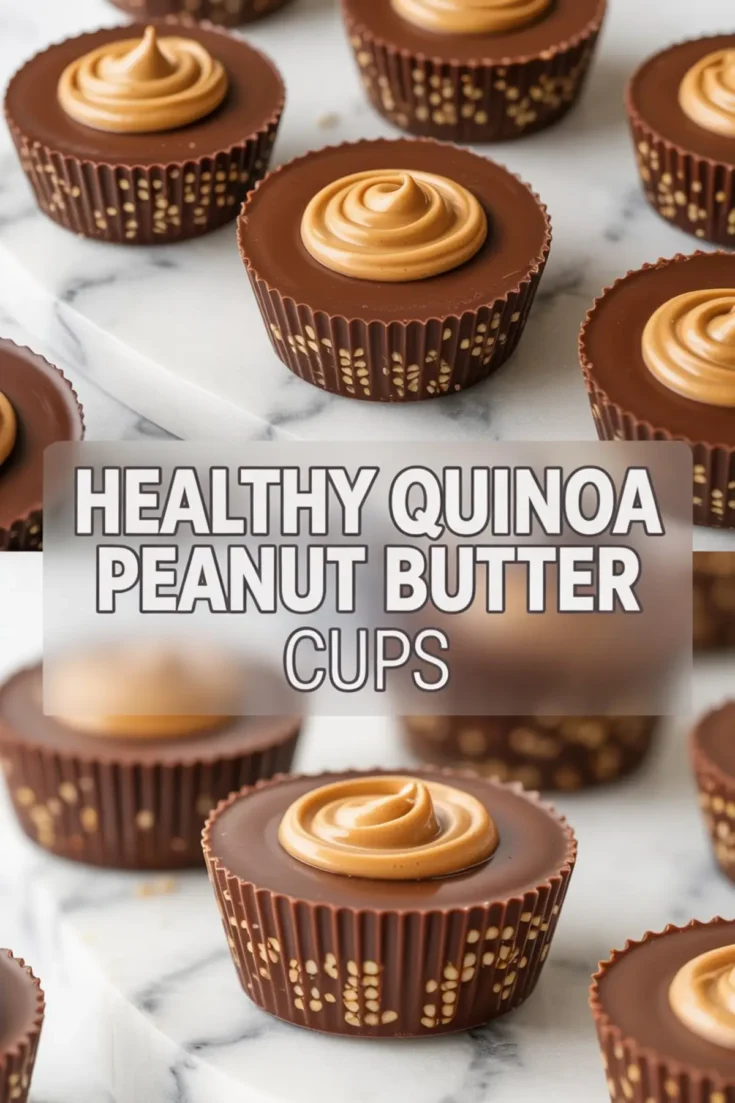
The chocolate shell, lightly softened with coconut oil, coats and seals each cup while the puffed quinoa adds a toasted crunch that cuts through the richness.
Puffed Quinoa: The Ingredient That Transforms the Texture
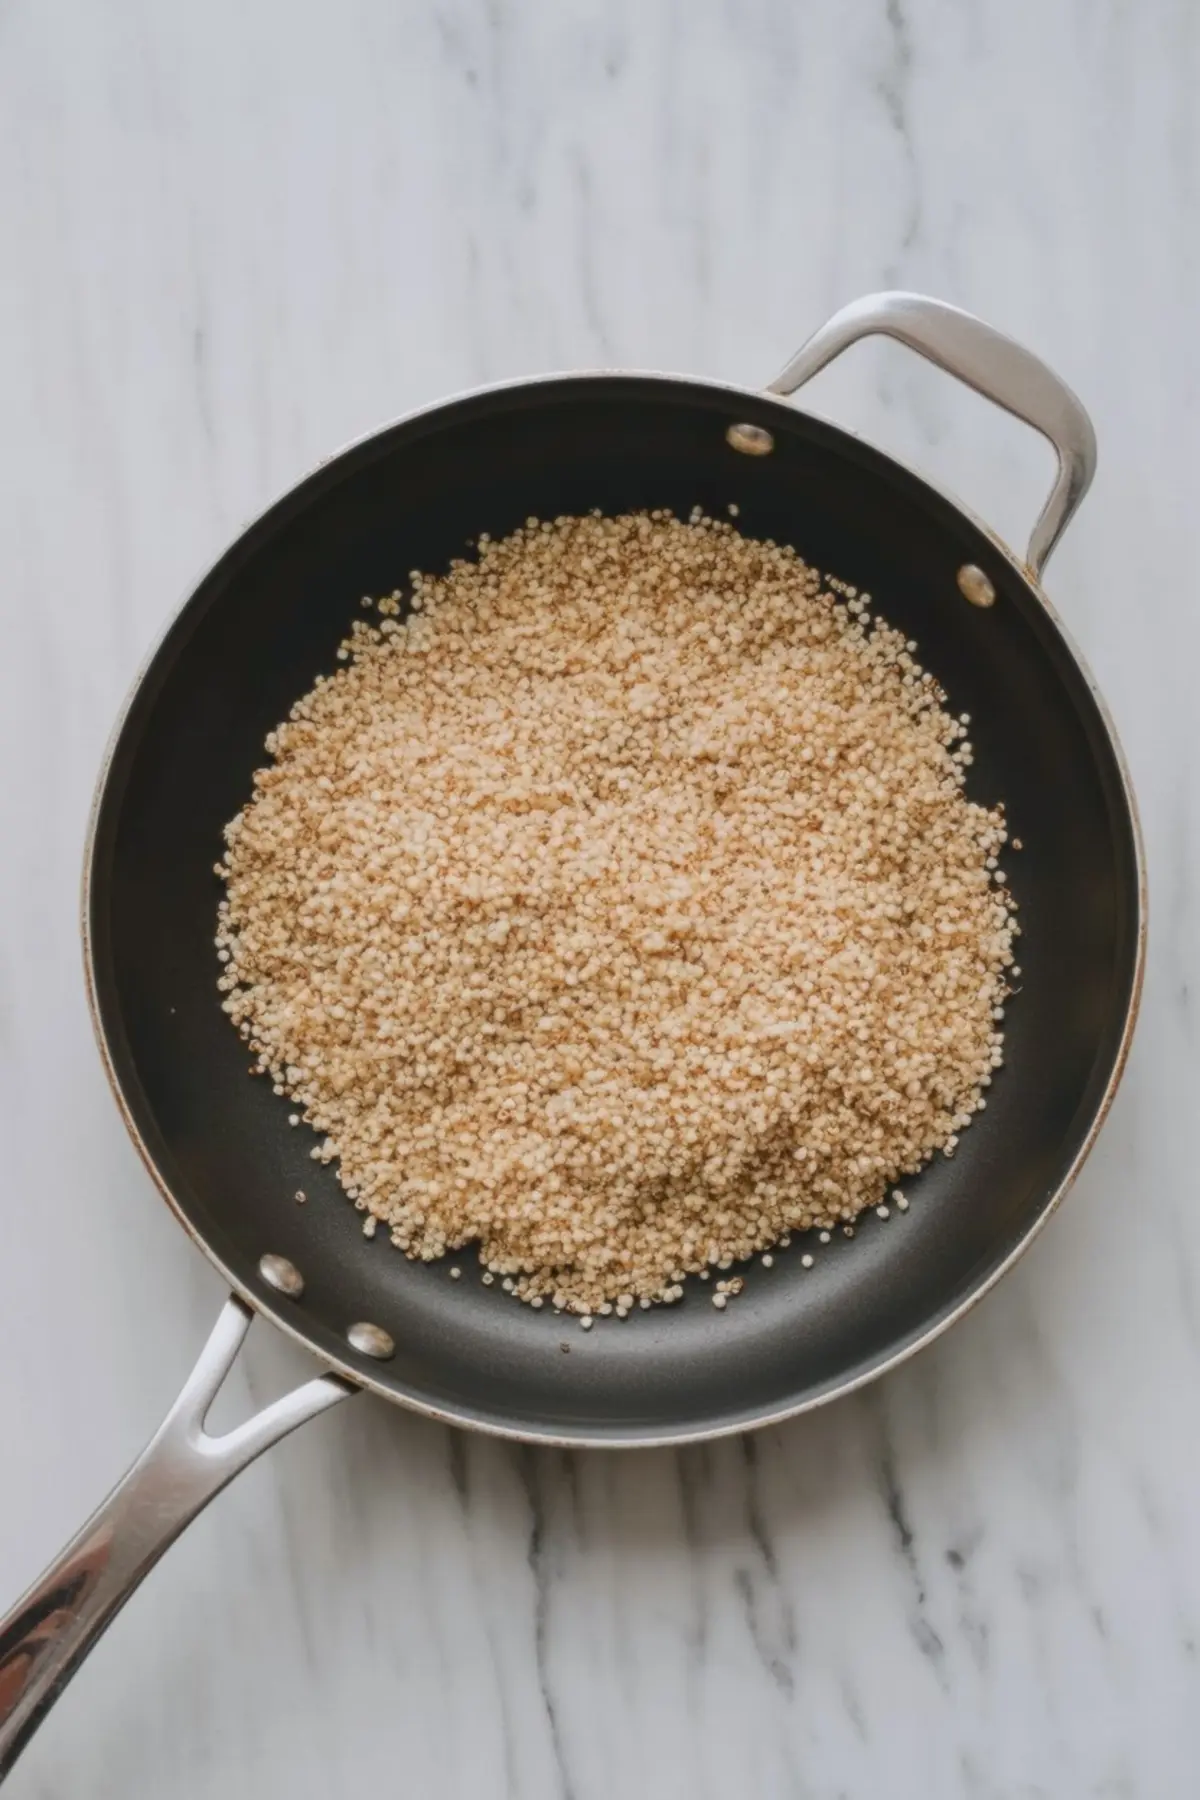
Unflavored puffed quinoa brings structure and crunch. Once toasted, it adds depth and a light golden aroma that makes the chocolate taste fuller.
This isn’t the kind of quinoa you cook with water. This is pre-puffed, usually sold in bags or bulk. Toasting it for 2 to 3 minutes changes everything. The flavor sharpens slightly, the texture turns crisp, and the final bite becomes more layered.
If you skip toasting, the recipe still works. But the final product will feel more neutral and slightly chewier. Toasted quinoa, even in small amounts, adds a depth that reminds me of my Protein Cottage Cheese Brownies, where texture layering made the biggest difference.
About Each Ingredient
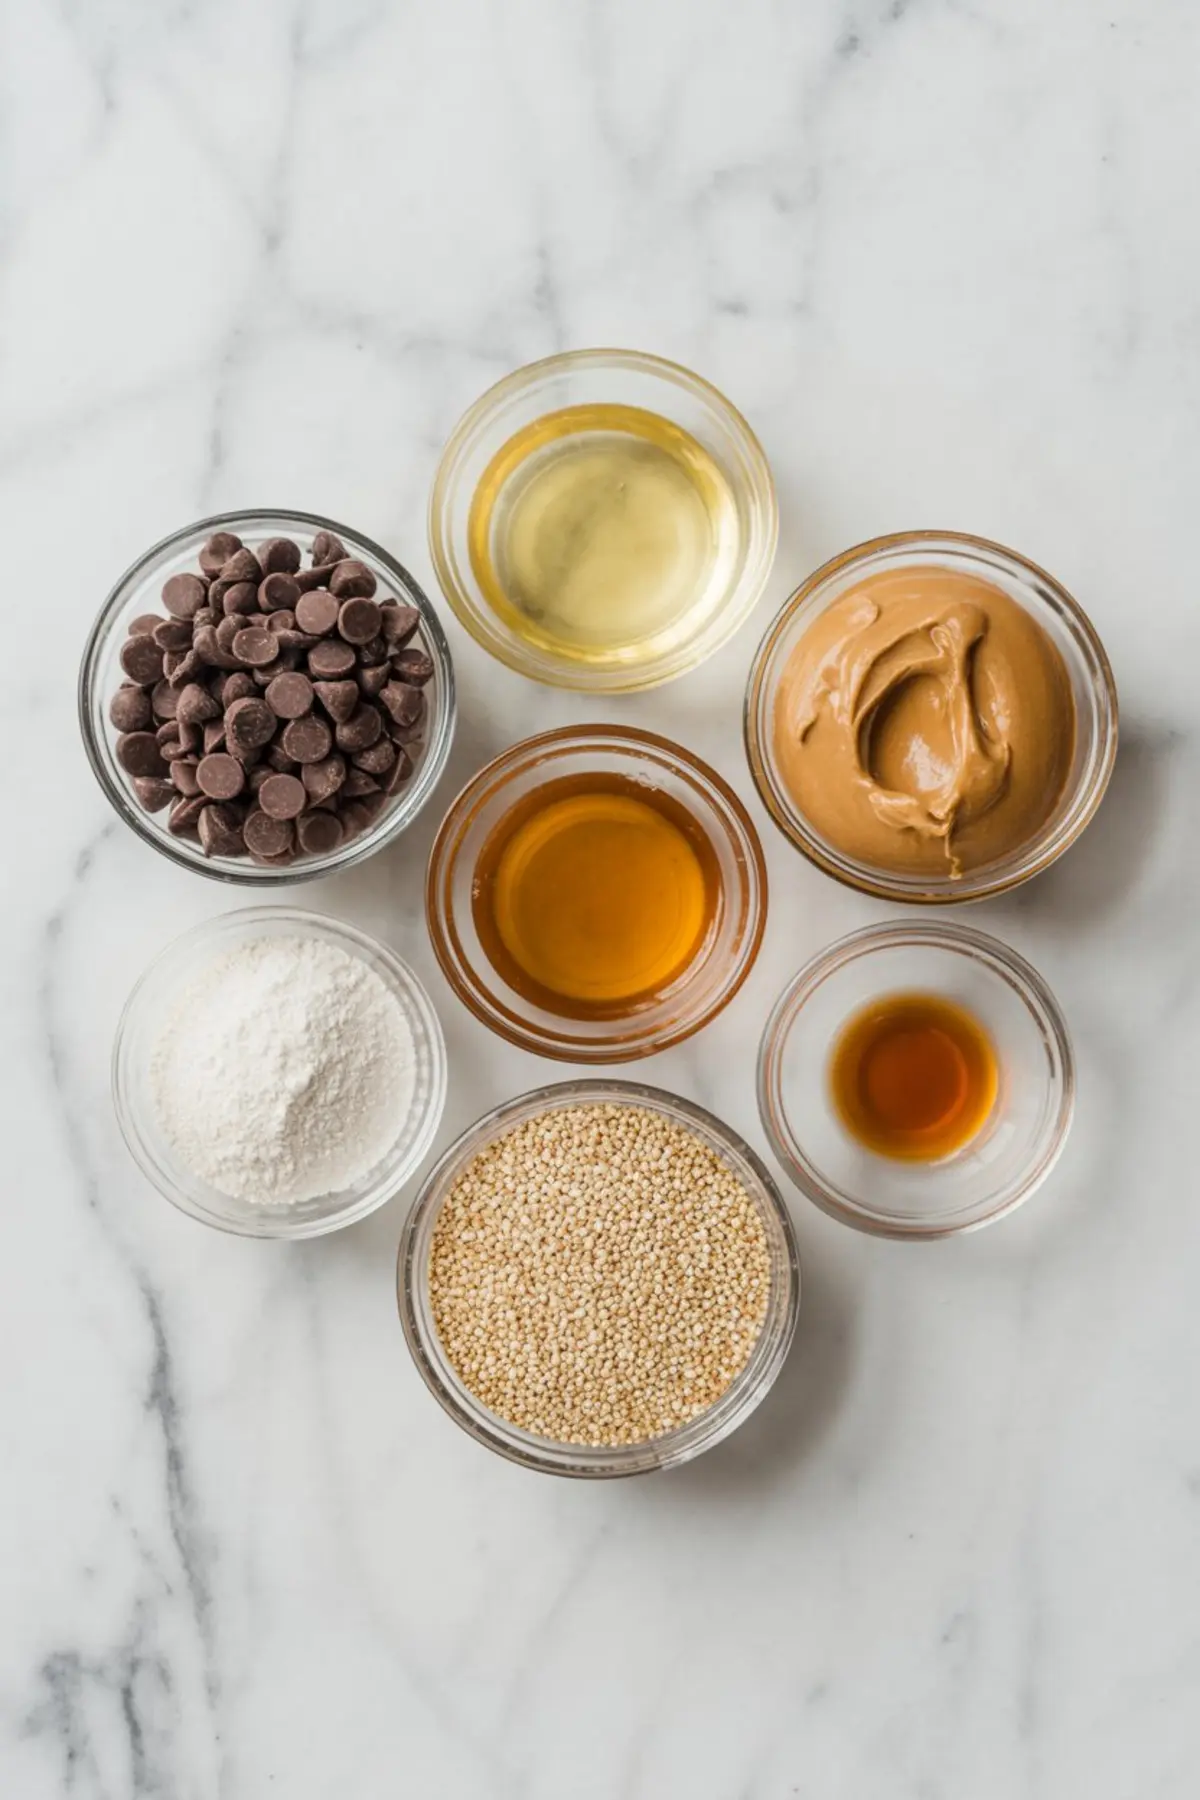
Natural peanut butter acts as the glue. I use one without added sugar or oil, so the mixture stays clean and consistent.
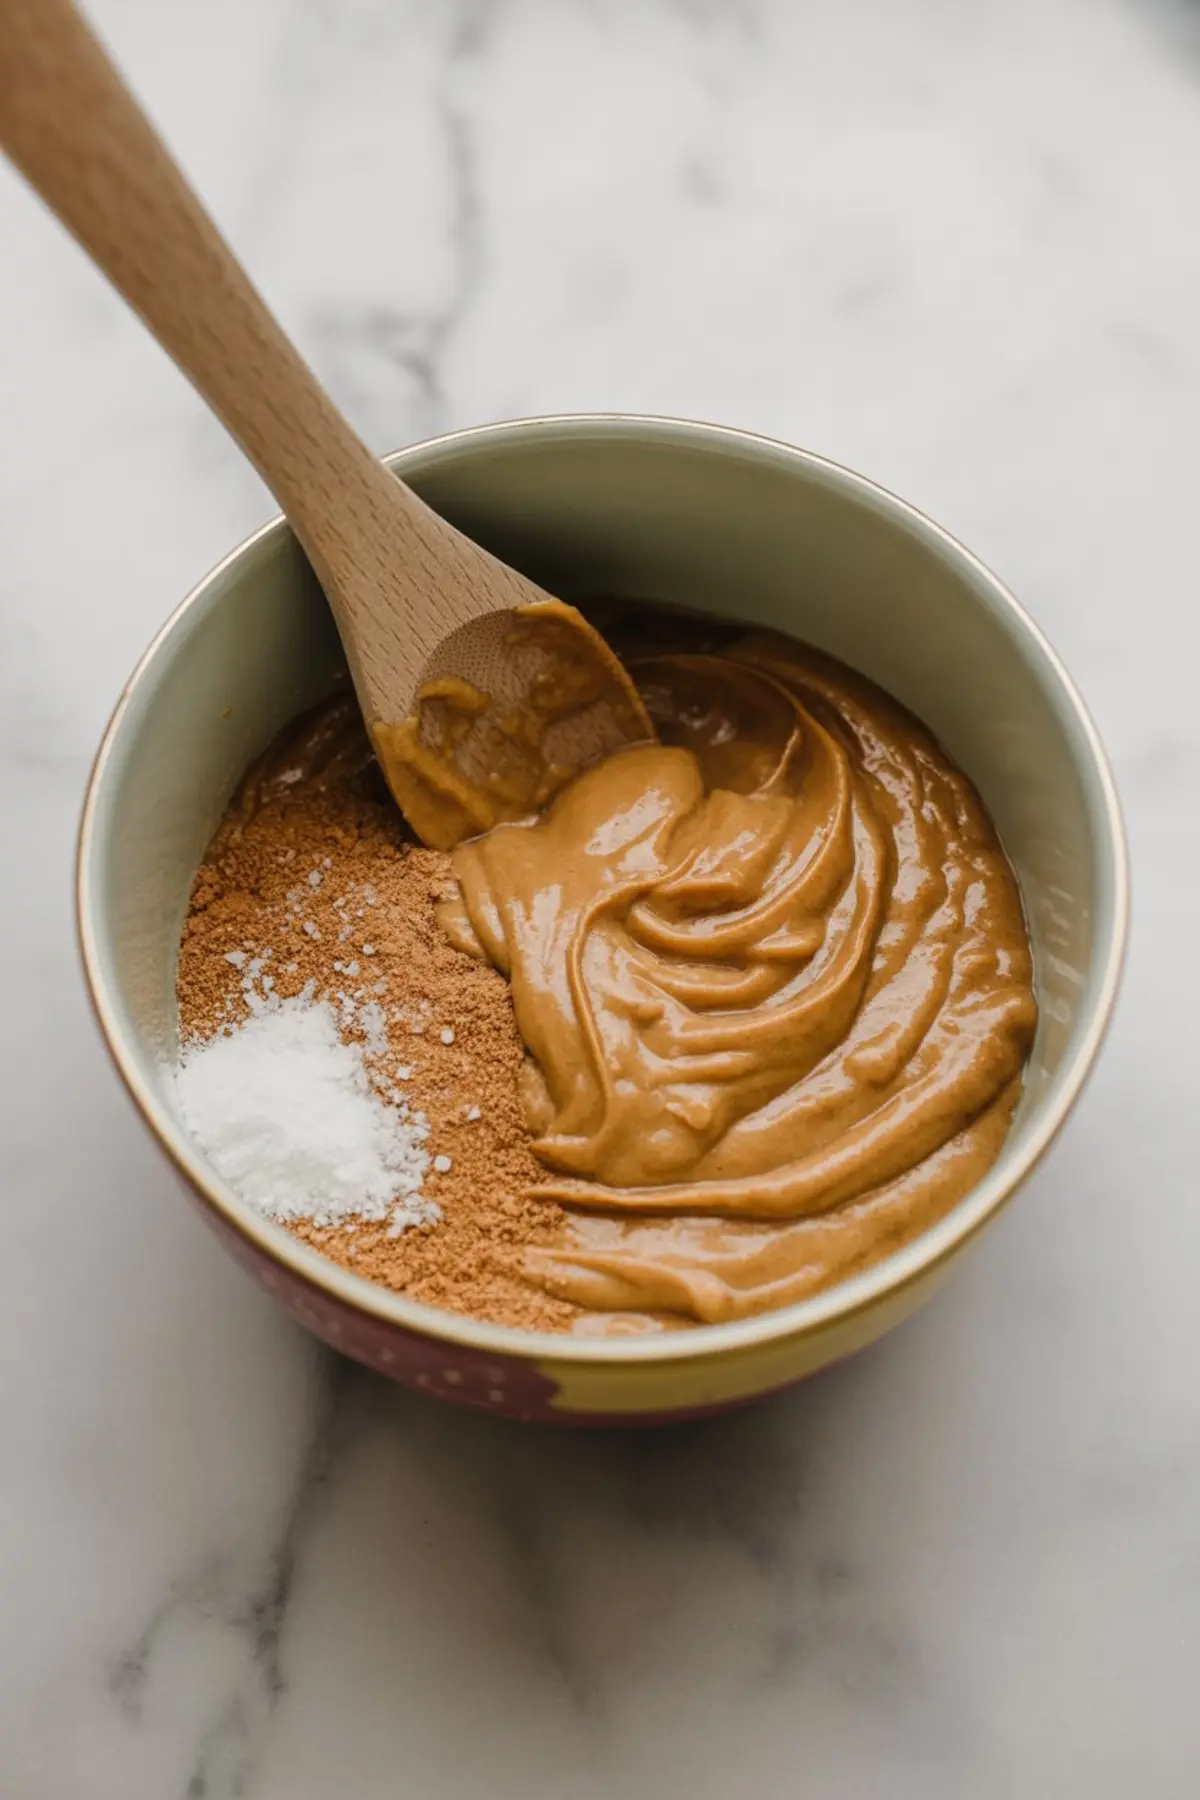
Coconut flour thickens without drying out the filling. You only need a little. It absorbs moisture fast, so don’t add more unless absolutely needed.
Maple syrup adds mild sweetness and moisture. I prefer it over honey here because the flavor is softer, but both work.
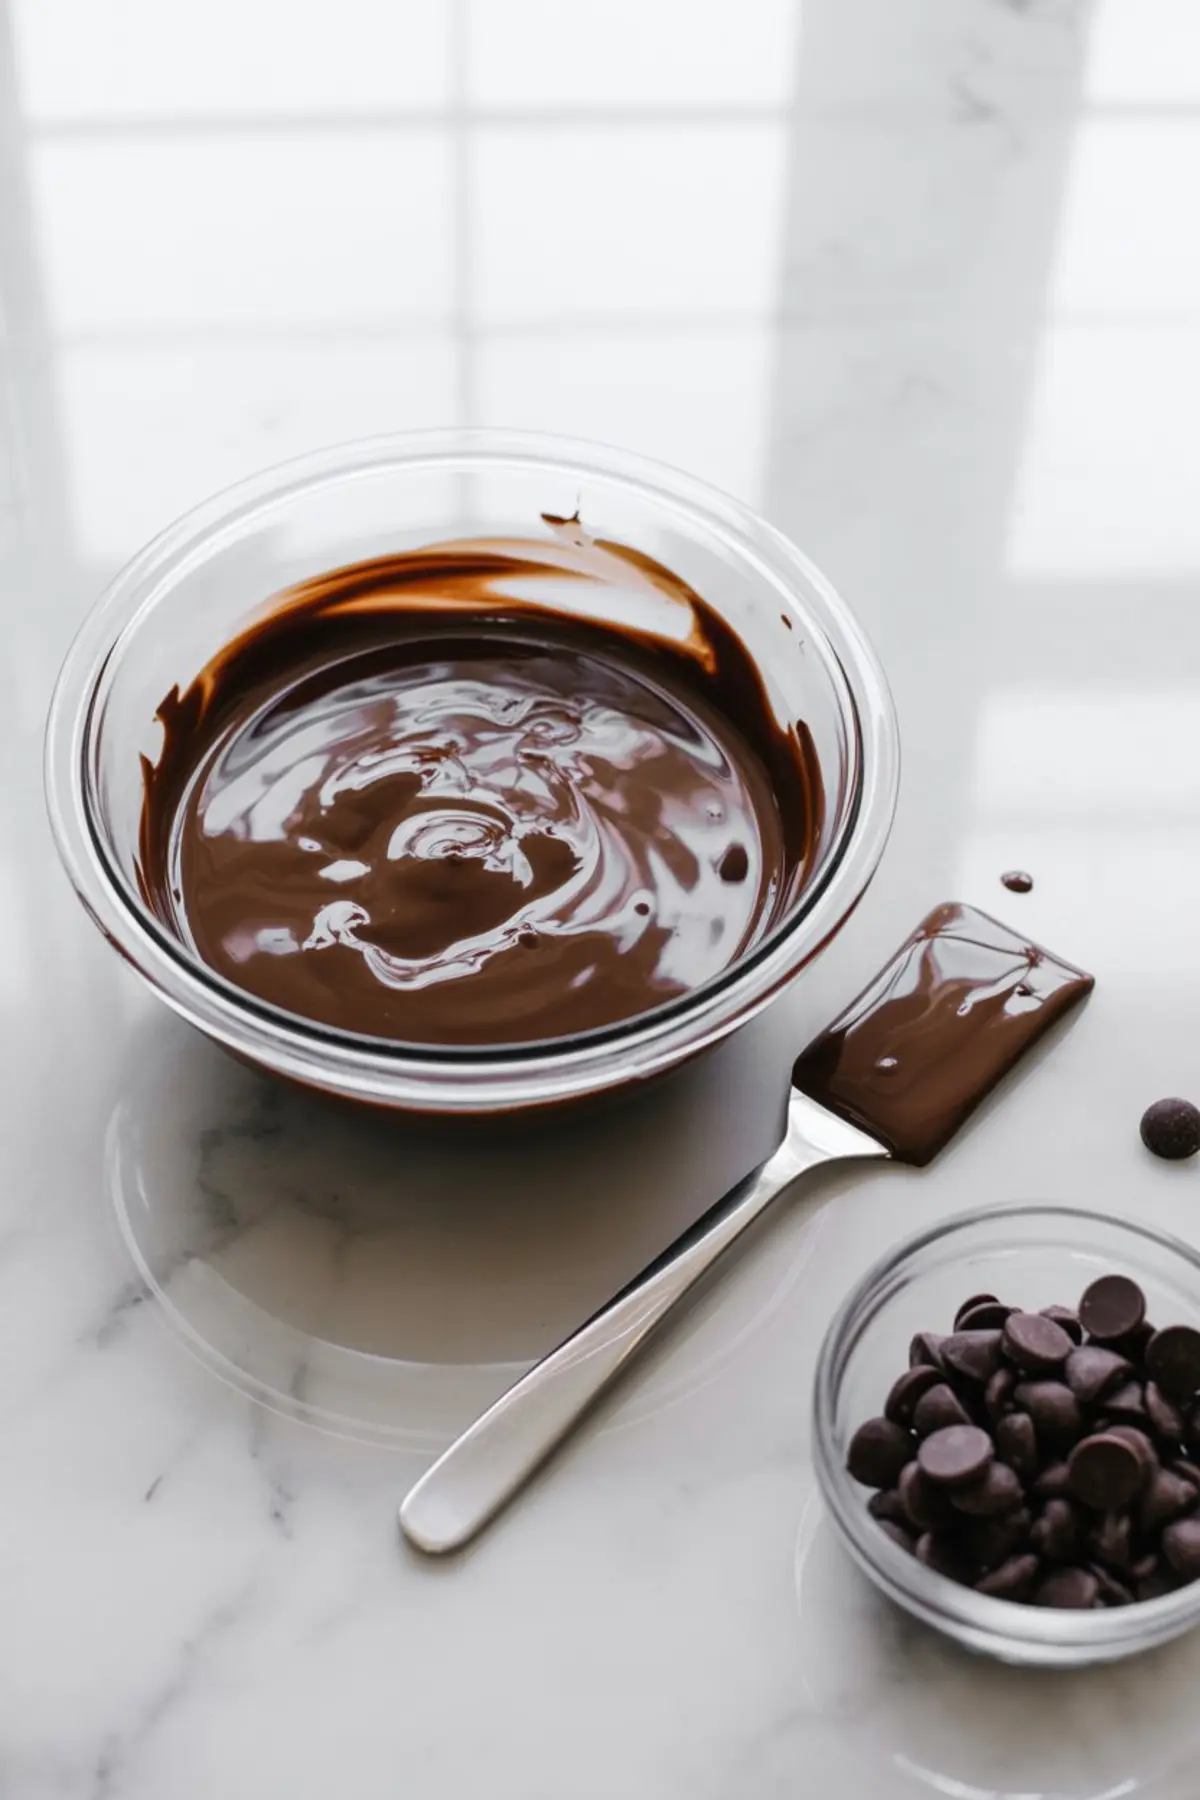
Coconut oil helps the chocolate melt smoother. It’s optional, but I find it makes layering easier and sets the texture faster once chilled.
Dark chocolate at least 70% cacao gives these a deep, slightly bitter base that balances the peanut butter. It’s meant to taste full-bodied, almost like the finish of my Almond Flour Cookies, where the sweetness comes with depth.
And sea salt? Always. A pinch sharpens the entire filling.
Step-by-Step: How the Process Unfolds
Start by toasting the puffed quinoa. You’ll smell it change. It starts quiet, then takes on a nutty edge. Once you see a few pieces lightly golden, pull the pan off the heat.
Then melt the chocolate. I use the microwave in short bursts to avoid seizing. Stir in the coconut oil if using. The result should pour slowly from a spoon, not clump.
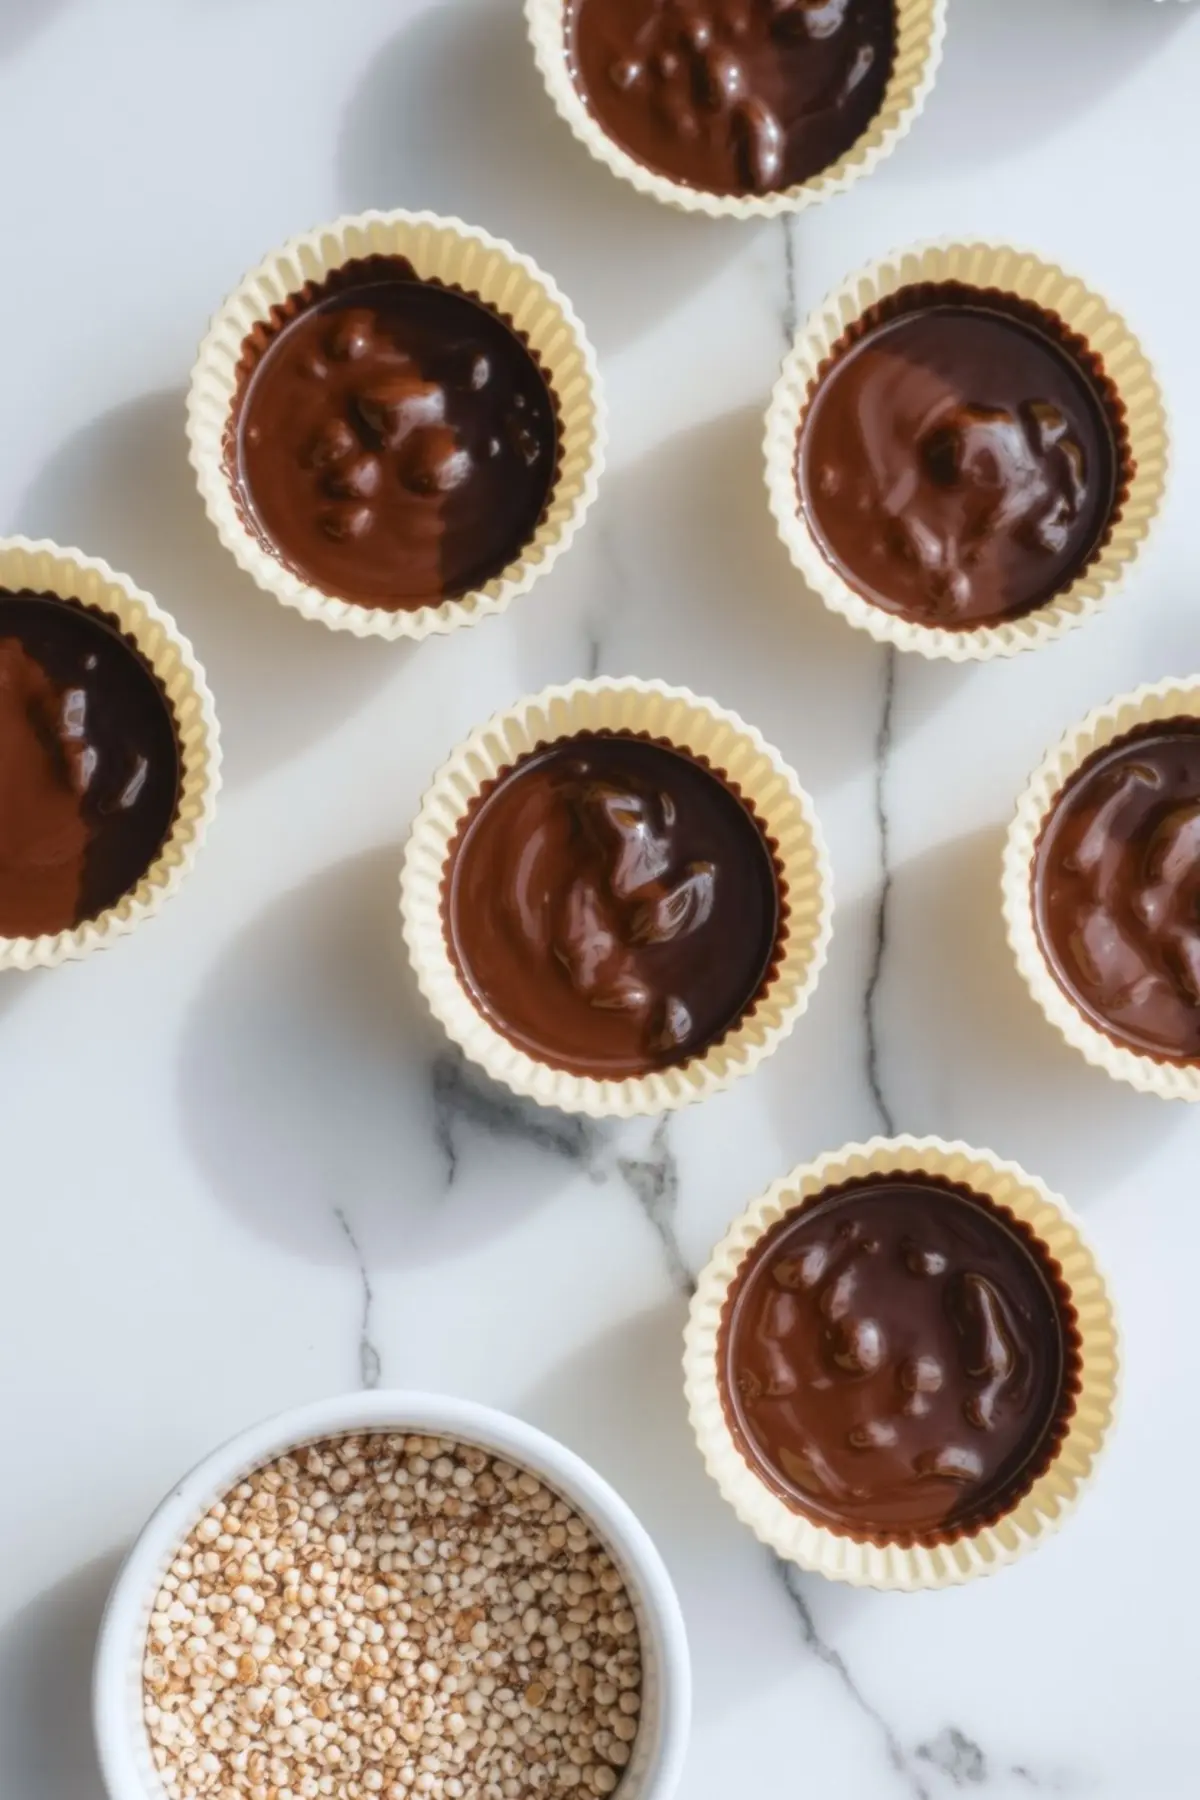
Add a layer of chocolate to mini muffin cups. Tap to settle, sprinkle in toasted quinoa, and freeze. This sets the base for the filling to sit properly.
Mix the peanut butter filling in a separate bowl. It should be scoopable but not runny. Drop a spoonful over the set base, flatten gently, then cover with another layer of chocolate. Sprinkle more quinoa on top if you want contrast.
Chill until set. That’s it.
Common Problems and Easy Fixes
If the filling turns greasy, your peanut butter was likely too oily. Stir it well before measuring. If the cups crack when bitten, the chocolate layer was too thick or not tempered enough. Use less or melt more gently.
If the filling separates, your sweetener may not have blended in completely. Whisk longer, or warm slightly to emulsify. Soft bottom layer? The base chocolate wasn’t fully frozen. Give it time.
Smart Ways to Change It
Swap peanut butter with almond butter for a lighter profile. Use white chocolate instead of dark for a milder taste. Just reduce the maple syrup slightly.
Add 2 teaspoons of chia seeds to the filling for more fiber and texture. Mix in 1 tablespoon of finely chopped dried cherries for a tangy pop.
If you’re into baked variations, try the concept in mini molds and bake gently, though I still prefer it chilled, like my Quinoa Protein Muffins.
Storage and Prep Notes
Store these in the fridge in an airtight container for up to 10 days. I recommend layering parchment between them to prevent sticking.
They freeze well too. Freeze in a single layer, then transfer to a bag. Use within 1 month for best texture.
You don’t need to thaw completely. Just let them sit at room temp for 5 minutes.
Save This Recipe and Share Below
Save this recipe to your favorite Pinterest board so you have it ready anytime you need quick energy bites or gluten free snacks.
Have you tried it? Drop a comment below if you made changes, have questions, or want to swap ideas with others!
Healthy Quinoa Peanut Butter Cups
These Healthy Quinoa Peanut Butter Cups are crunchy, chocolatey, and satisfying without the guilt. Made with quinoa peanut butter, puffed quinoa, and dark chocolate, they’re the ultimate no-bake snack. Each bite of these chocolate quinoa peanut butter cups packs in flavor and texture while staying wholesome. Ideal for meal prep or grab-and-go gluten free snacks, these quinoa treats also double as simple energy bites. Try these puffed quinoa chocolate cups for a nutritious twist on a classic favorite.
Ingredients
- 1 cup dark chocolate chips (at least 70% cacao)
- 1 tbsp coconut oil (optional)
- ½ cup natural peanut butter (unsweetened)
- 2 tbsp maple syrup or honey
- 1½ tbsp coconut flour
- ½ tsp vanilla extract
- ¼ tsp sea salt
- ¼ cup puffed quinoa
Instructions
- TOAST THE QUINOA: If using plain puffed quinoa, place it in a dry skillet over medium heat and toast for 2 to 3 minutes, stirring frequently. Remove from heat once it becomes fragrant and slightly golden. Set aside to cool.
- MELT THE CHOCOLATE: Combine the chocolate chips and coconut oil in a heatproof bowl. Melt over a double boiler or in the microwave in 20-second intervals, stirring between each round until completely smooth.
- MAKE THE CHOCOLATE BASE: Line a mini muffin tin with paper or silicone liners. Spoon 1 teaspoon of melted chocolate into each cup. Tap the tin lightly on the counter to even out the chocolate. Sprinkle a small pinch of puffed quinoa on top. Freeze for 10 minutes to set.
- MIX THE PEANUT BUTTER FILLING: In a small bowl, stir together the peanut butter, maple syrup or honey, coconut flour, vanilla extract, and sea salt until well combined. The mixture should be thick but scoopable.
- ASSEMBLE THE CUPS: Remove the tin from the freezer. Add 1 to 1½ teaspoons of the peanut butter filling over the set chocolate layer and press gently to flatten. Spoon another teaspoon of melted chocolate over the filling and smooth the tops with the back of a spoon. Optionally, sprinkle more puffed quinoa on top.
- CHILL AND SET: Return the tray to the freezer for 20 to 30 minutes, or until fully set. Once firm, transfer the peanut butter cups to an airtight container and store in the refrigerator.
Notes
Use silicone liners for easiest removal. You can substitute almond butter or sunflower seed butter if needed. Toasting the quinoa adds extra crunch and flavor but is optional.
Nutrition Information
Yield
12Serving Size
1Amount Per Serving Calories 209Total Fat 13gSaturated Fat 4gUnsaturated Fat 9gCholesterol 5mgSodium 128mgCarbohydrates 18gFiber 2gSugar 13gProtein 5g