
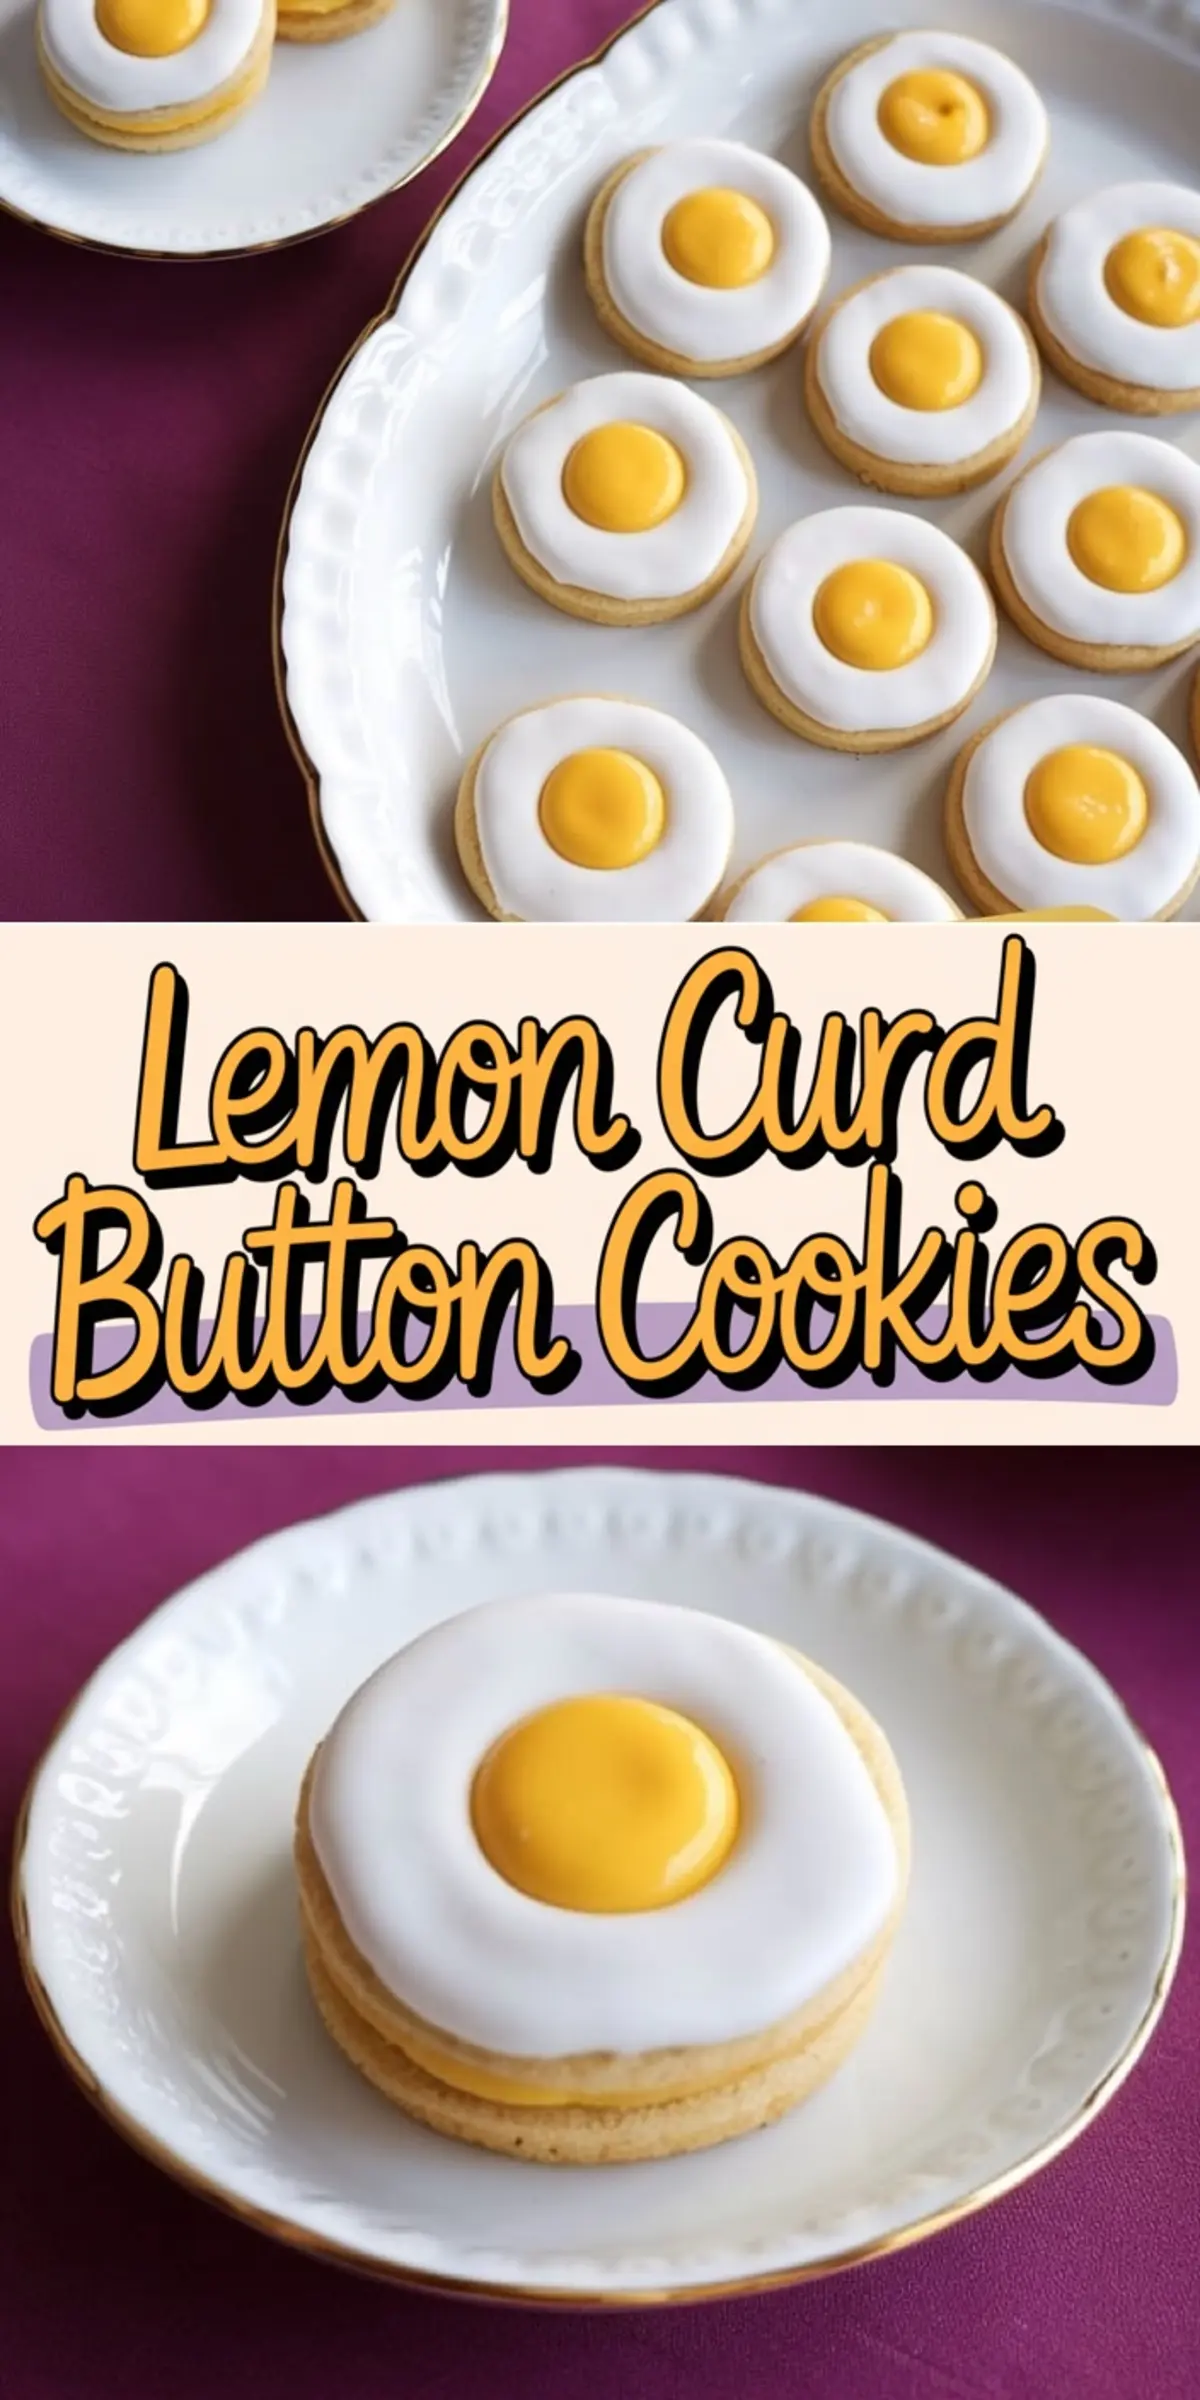
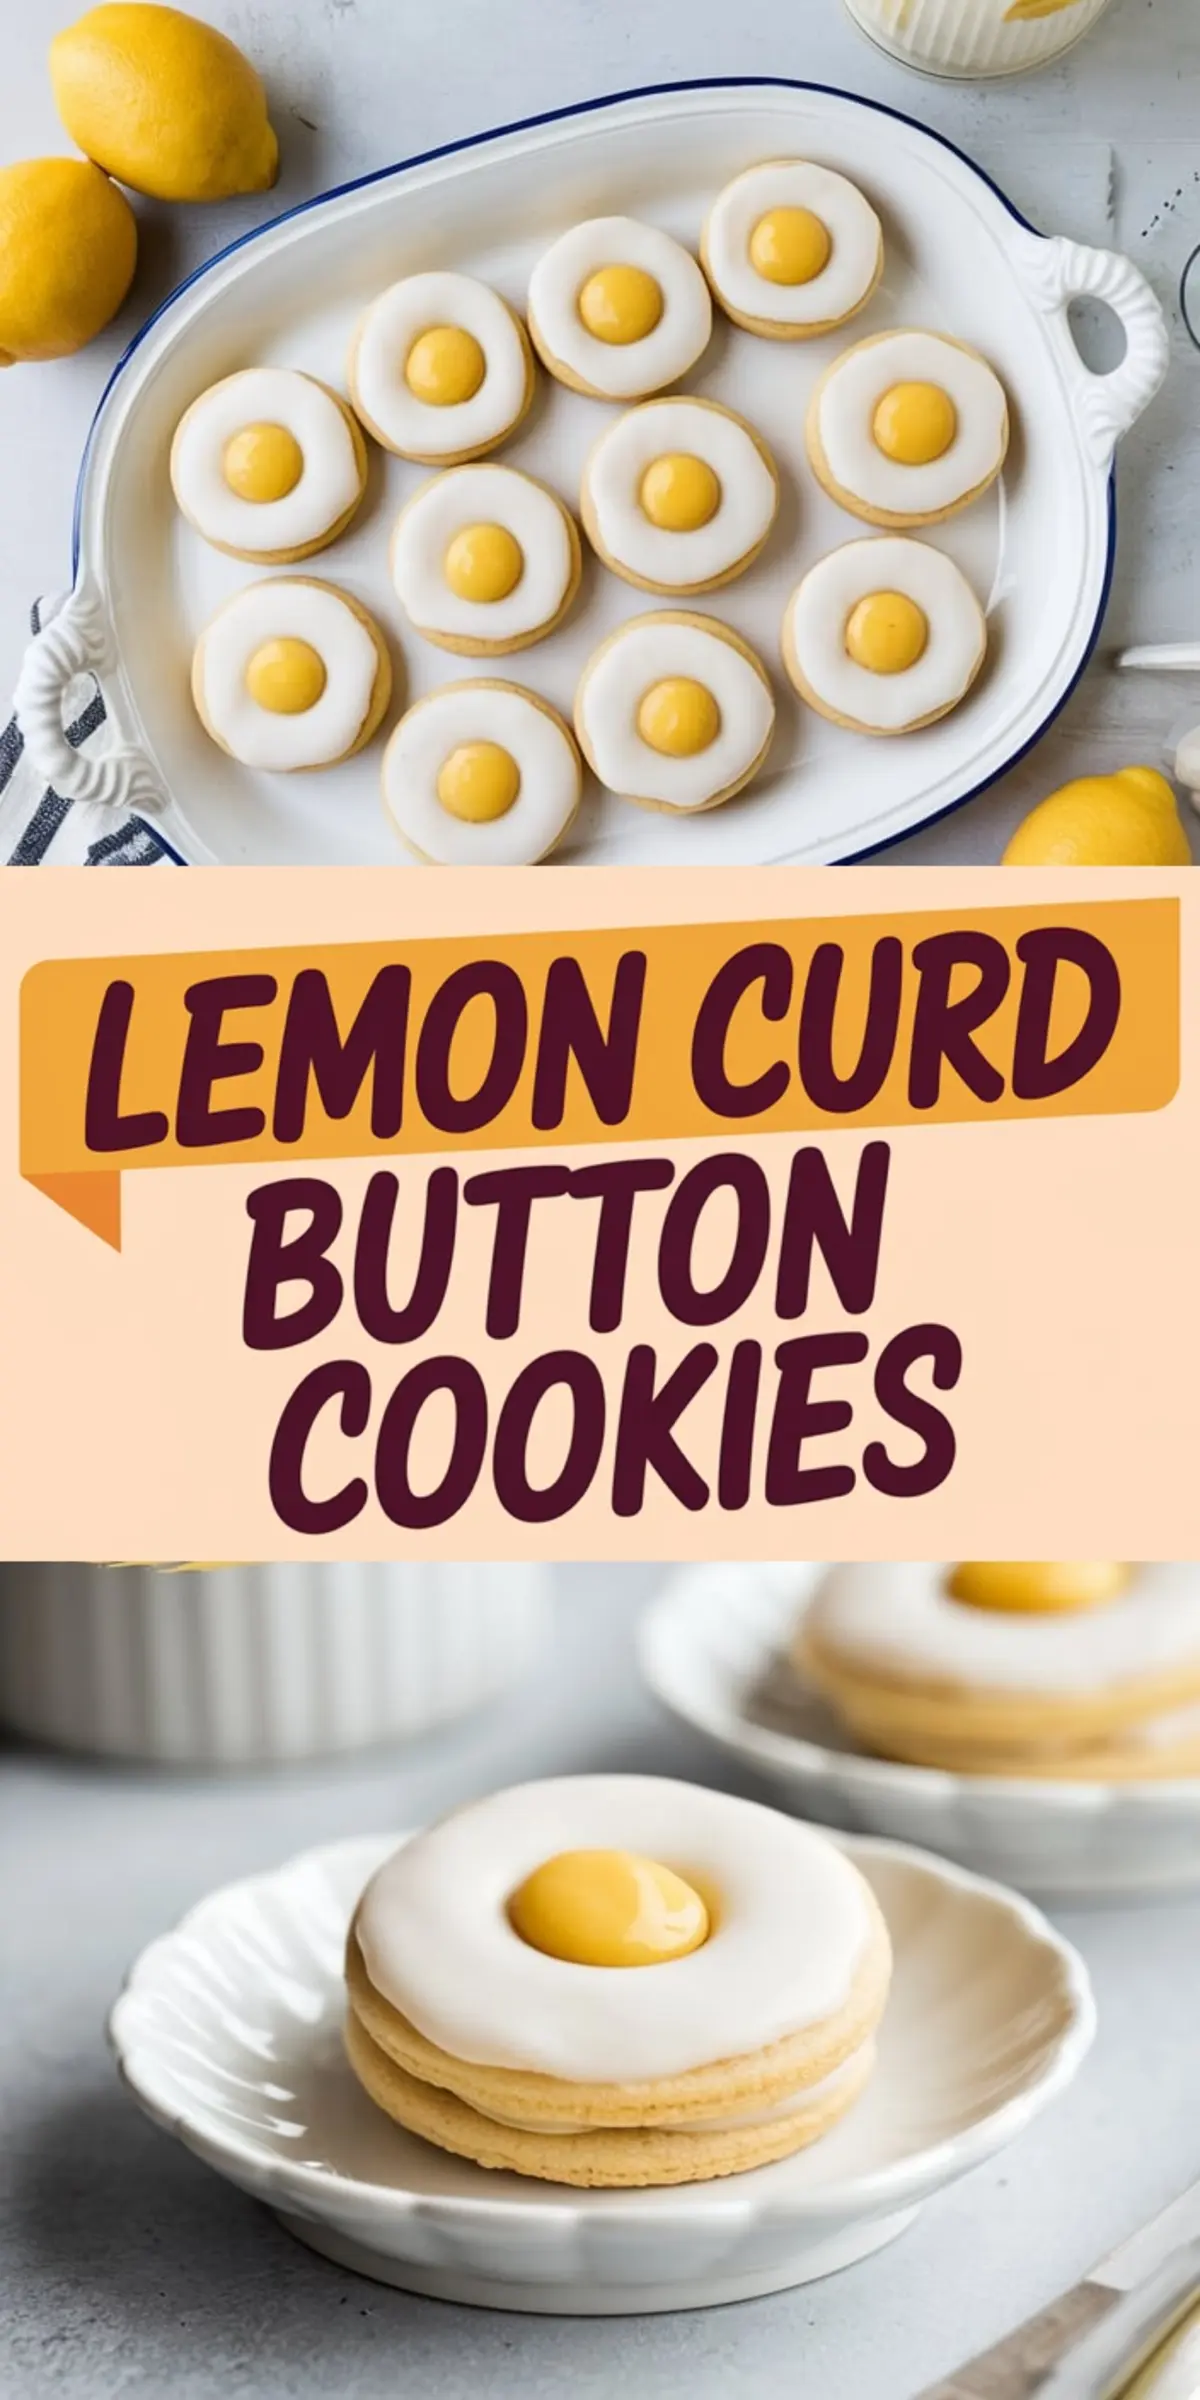
Lemon curd cookies don’t need to be messy or overly sweet. When you chill the dough not once but twice, you control the shape, texture, and finish. That’s what gives these lemon button cookies their clean edges, soft bite, and a tidy center that actually holds the curd.
You’ll learn how to make these soft vanilla butter cookies with a sharp lemon center, how to glaze without drips, and why chilling the dough twice matters more than most realize.
I’ve baked these cookies for spring teas, summer dessert boards, and once on a dare for a construction site lunch break. They held up through it all.
Following a special diet?
Every recipe on this site can be converted to gluten-free, vegan, dairy-free, keto, nut-free or egg-free with adjusted ratios so nothing falls flat.
Try the Recipe Converter →Lemon Curd Cookies for a Soft Bite and Tangy Center
Most recipes skip what matters: structure. You want the edges to stay round, the top to hold its shape after glazing, and the inside to stay soft even after chilling.
That doesn’t happen by accident.
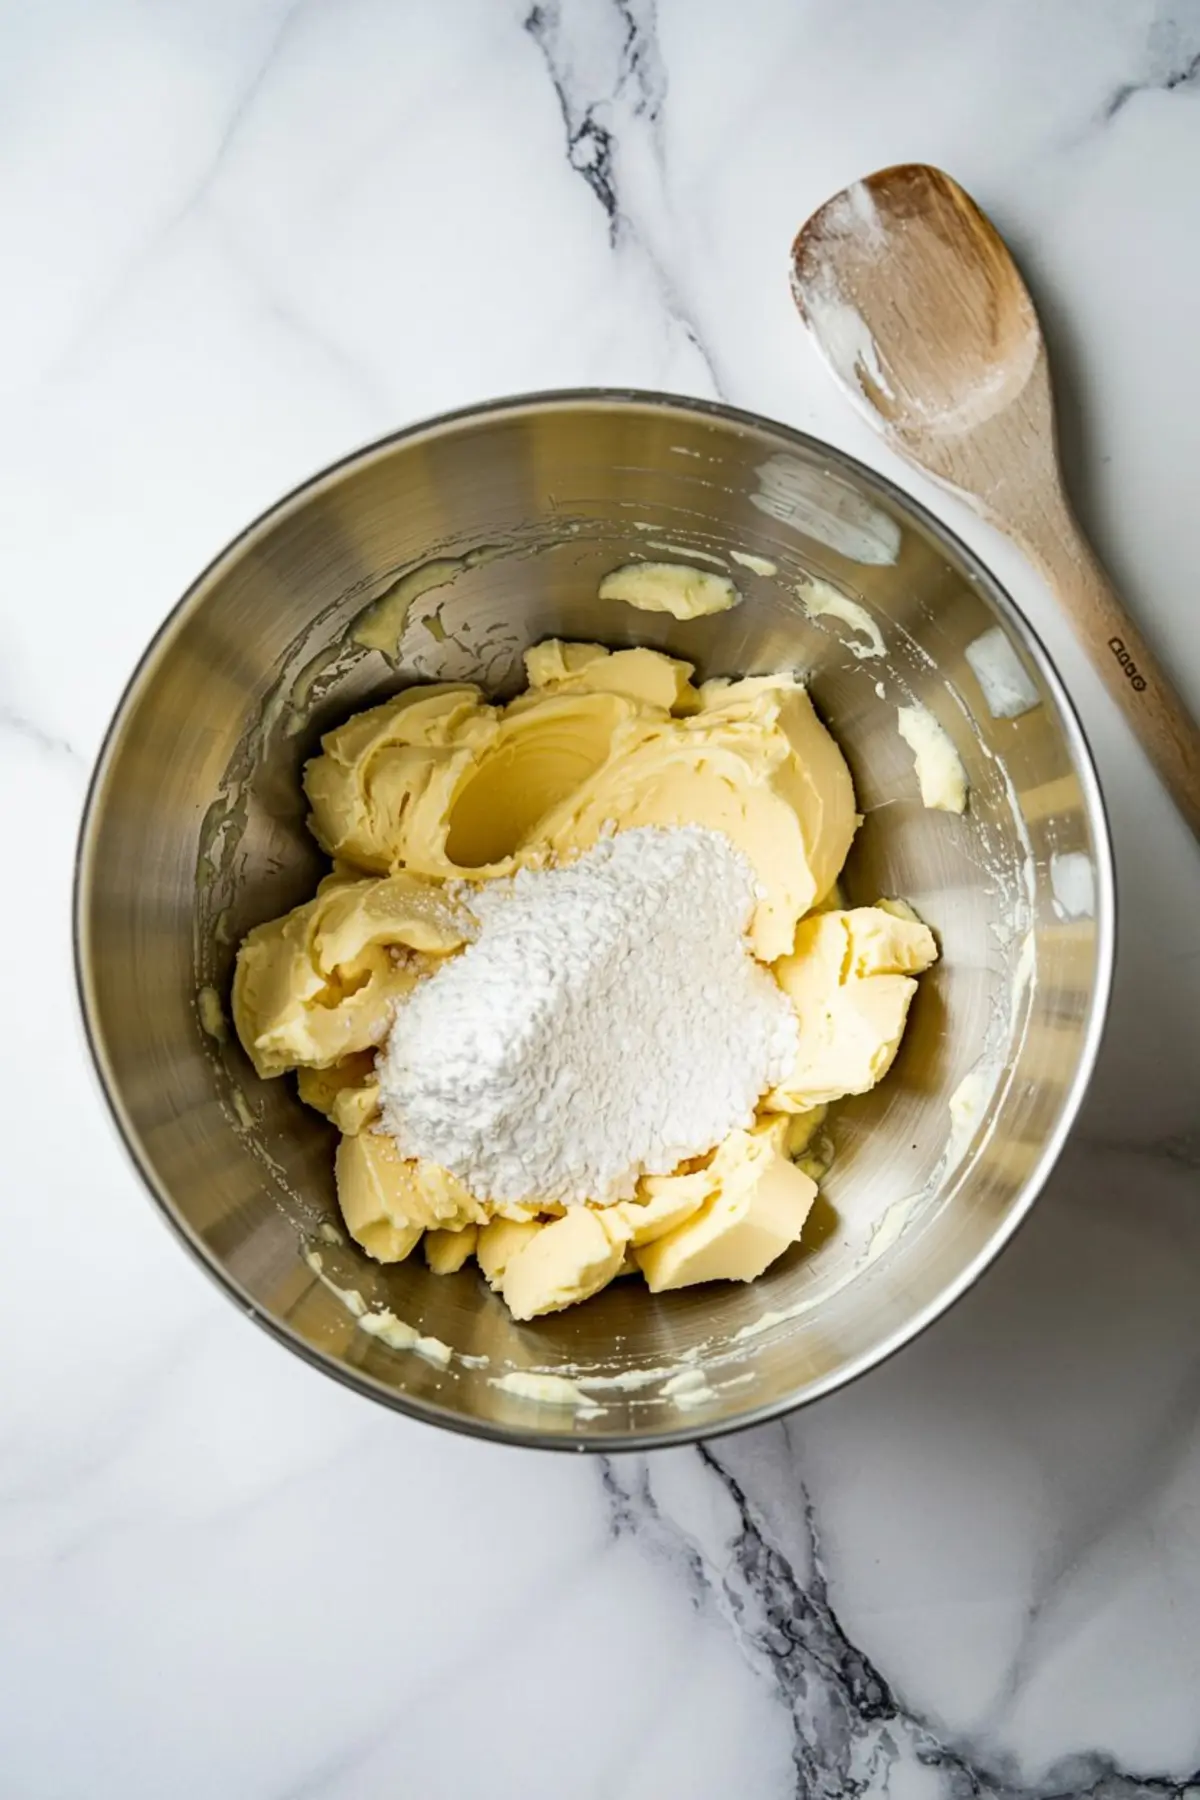
It starts with softened butter. Room temperature butter blends into the powdered sugar without air pockets. The creamed base feels like spreadable frosting when it’s right—light but not greasy.
Egg and vanilla go in next. No substitutions here. You need the egg for binding and richness. Vanilla adds dimension under the lemon.
Once the flour and salt are sifted in, stop mixing as soon as the dough forms. Overworking at this stage gives you tough cookies.
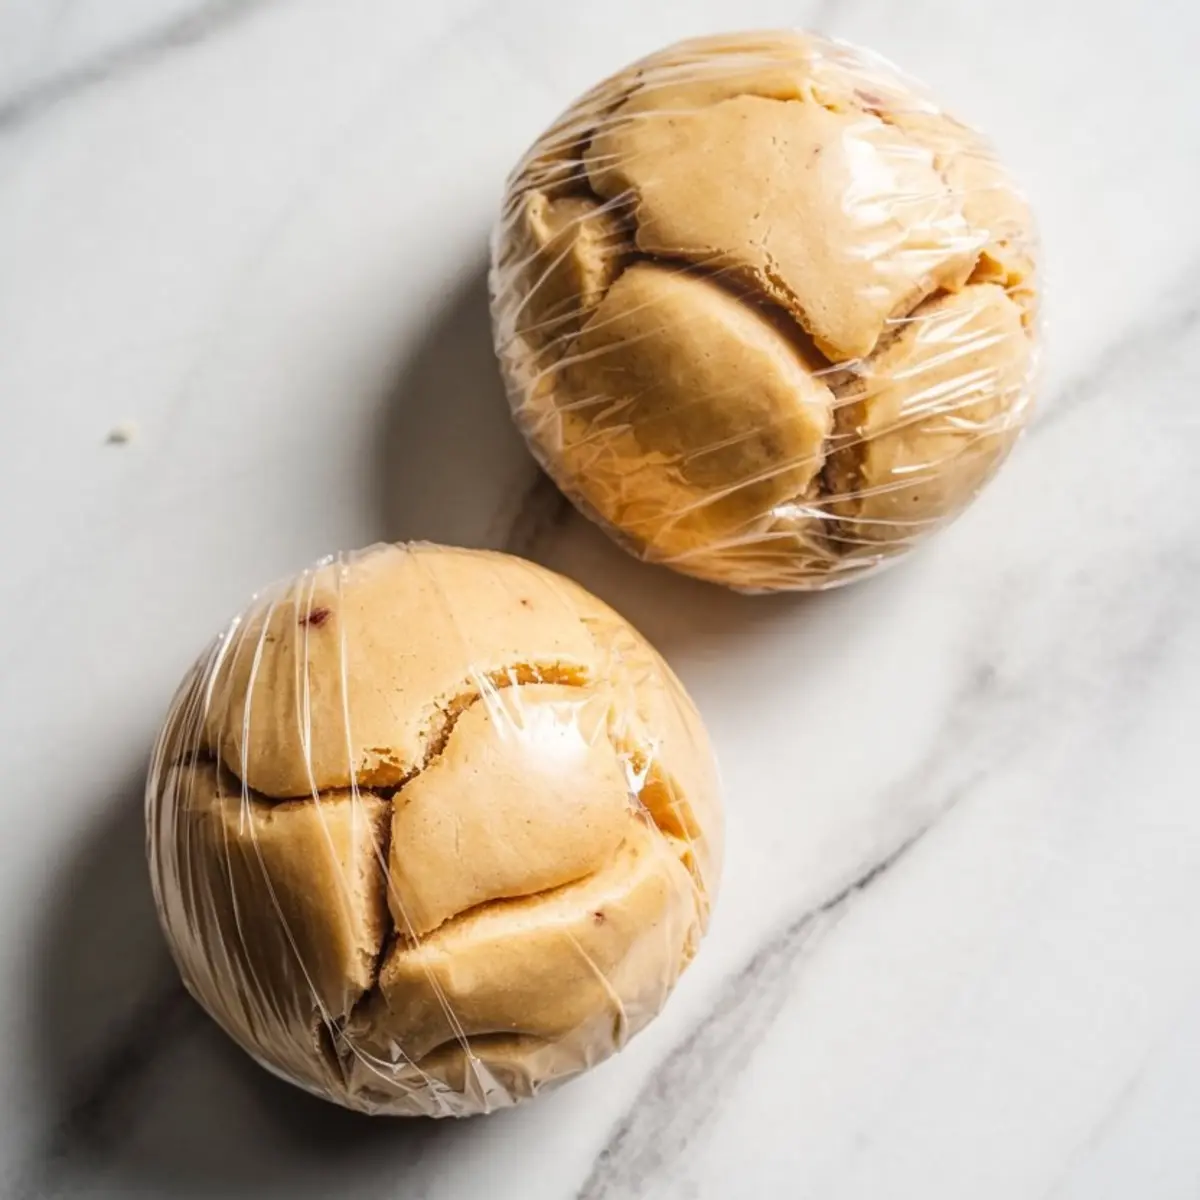
Split and wrap the dough. Refrigerate for one hour. That first chill lets the flour hydrate and the butter solidify.
Cutting and Chilling Again Prevents Spread
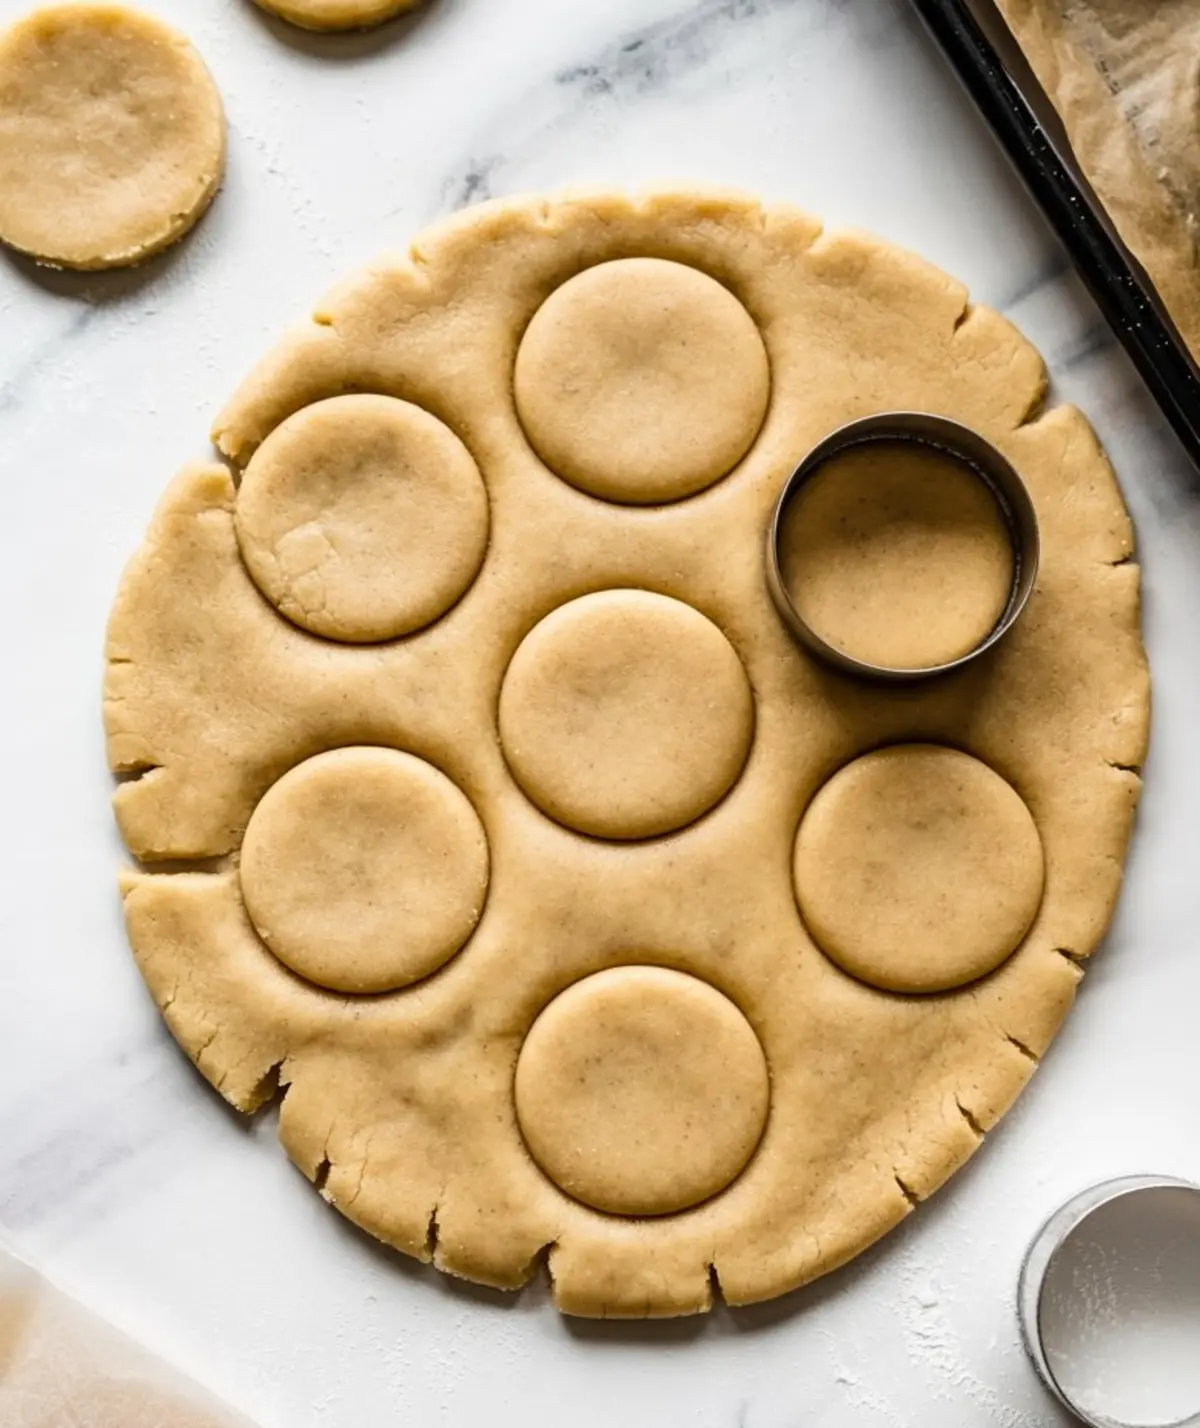
Roll out one disc of dough at a time. Keep the other in the fridge. On warm days, I roll dough between sheets of parchment. No sticking, and cleanup’s easier.
A 2-inch round cutter gives you a generous base. For the tops, cut a small circle or use a large piping tip to make the signature “button” shape. That hole? It’s not just for looks. It keeps the glaze from pooling and gives the curd a proper place to shine.
Now here’s the part most skip: refrigerate the cut cookies again before baking. Just 10 minutes. This second chill sets the shape. No bloated cookies. No sad blobs.
Bake them until the edges just begin to color. That pale golden edge is your cue.
Glazing Tips: Don’t Skip the Dry Time
Your glaze should coat but not run. I prefer a mix of powdered sugar and milk, but I add just enough milk to make it spreadable, not drippy.
A spoon works fine, but a toothpick gives more control around the edges. Keep that center hole open. It’s not decoration, it’s functional.
Let the glaze dry for an hour. Yes, a full hour. If you stack or fill too soon, it smears. If it’s dry to the touch, you’re good to go.
Fresh Lemon Curd vs. Store-Bought: What I’ve Learned
I’ve used both dozens of times. If I’m baking for myself or friends, I often use homemade lemon curd I’ve made the night before. It’s smoother, brighter, and I control the tartness.
For larger batches or casual gatherings, store-bought works. Just choose one without added starch or artificial flavor. You want that clean lemon bite.
Both versions hold up well. But for color and texture? Homemade wins.
You can also explore this Lemon Curd Cake if you’re thinking of other ways to use leftover curd.
How to Assemble Without Mess
Use the solid cookie as your base. Spoon just half a teaspoon of lemon curd in the center. If you overfill, the top will slide.
Press the glazed top gently into place. You don’t want the curd to spill out the sides.
If needed, add a little extra curd right in the thumbprint center. That final touch makes the cookie look finished—bright, glossy, and cheerful.
How Long These Store and How to Serve Them
Assembled cookies keep well in the fridge for up to five days. I stack them between parchment sheets in a lidded container.
Before serving, let them sit out for 10–15 minutes. That brings back the soft texture.
For parties, I often serve these alongside Mini Flower Lemon Tarts for contrast—crisp tart shells vs. soft cookies. It’s a good mix.
For something chilled and creamy, North Carolina Lemon Pie makes a fine companion.
A Practical Takeaway for Bakers
Double chilling makes these cookies clean and soft. Homemade curd brings better color. Glazing before assembling gives a neater finish.
If you’ve made thumbprint cookies that lost their shape, this method fixes that. If you’ve struggled with runny glaze, try the toothpick trick.
I’ve kept these notes in my binder for years. Every time I make them, I learn something new.
Pin This Lemon Curd Button Cookie Recipe for Later
These cookies are bright, easy to serve, and hold their shape beautifully. Save them to your cookie board or spring baking collection.
Leave a comment if you baked these, or have a question. I read every one. Let’s keep the conversation going.
Lemon Curd Cookies Recipe
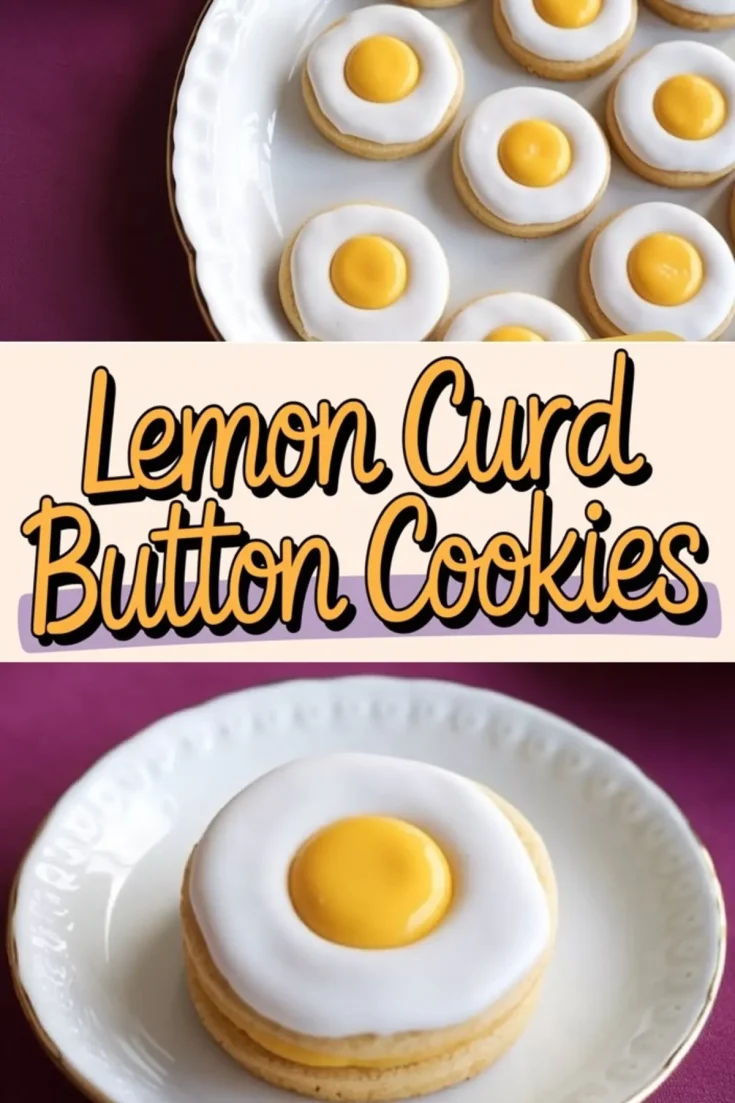
These Lemon Curd Button Cookies balance sweet and tart flavors with soft vanilla butter cookies sandwiched together, finished with a smooth white glaze and a bright lemon curd center. They bring a cheerful touch to any table with their sunny appearance and satisfying texture contrast.
Ingredients
- FOR THE COOKIES
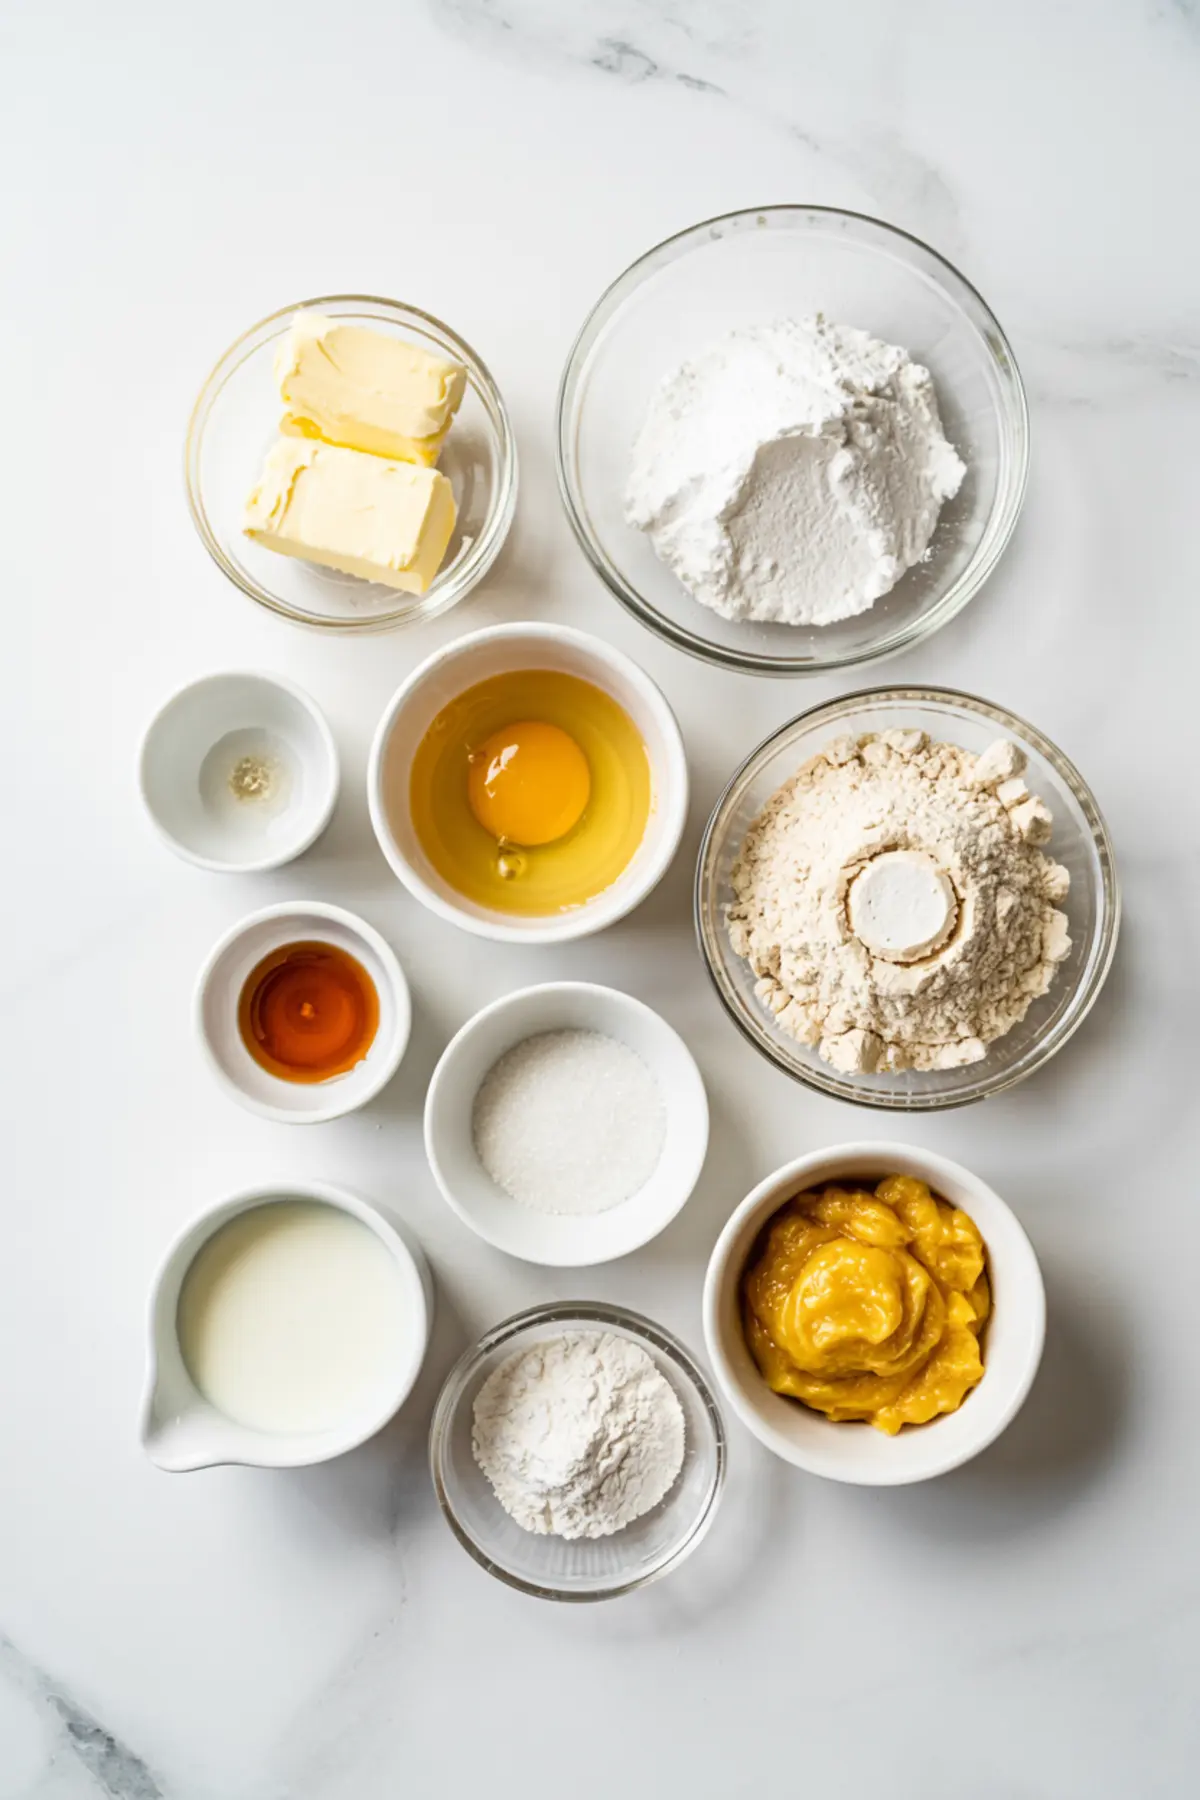
- 1 cup (227g) unsalted butter, softened
- 2/3 cup (80g) powdered sugar
- 1 large egg
- 1 teaspoon vanilla extract
- 2¼ cups (280g) all-purpose flour
- 1/4 teaspoon salt
- FOR THE GLAZE
- 1 cup (120g) powdered sugar
- 2–3 tablespoons milk (adjust for consistency)
- 1/2 teaspoon vanilla extract (optional)
- FOR THE FILLING
- 1/2 cup lemon curd (store-bought or homemade)
Instructions
- MAKE THE COOKIE DOUGH: In a large bowl, cream the softened butter and powdered sugar together until the mixture is light and fluffy, about 2–3 minutes of mixing. Add the egg and vanilla extract and mix until well combined. Sift in the flour and salt, then mix just until the dough forms and no streaks of flour remain. Divide the dough into two equal portions, flatten each into a disc, wrap tightly in plastic wrap, and refrigerate for 1 hour until firm.
- ROLL, CUT, AND BAKE: Preheat the oven to 350°F (175°C) and line baking sheets with parchment paper. On a lightly floured surface, roll out one disc of dough at a time to about 1/4 inch thickness. Use a 2-inch round cookie cutter to cut as many rounds as possible. For half of the rounds, use a smaller cutter or piping tip to cut out a center hole to create the tops. Transfer all cookies to prepared baking sheets and chill again for 10 minutes before baking. Bake for 9–11 minutes until the edges are just barely golden. Let cookies cool completely on a wire rack.
- GLAZE THE TOPS: In a small bowl, mix the powdered sugar, milk, and optional vanilla extract until smooth and slightly thick but spreadable. Spoon a small amount of glaze onto each cookie with a center hole and use a spoon or toothpick to gently spread the glaze toward the edges while keeping the center open. Allow the glazed cookies to dry completely at room temperature for about 1 hour until the glaze is firm to the touch.
- ASSEMBLE THE COOKIES: Place a solid cookie bottom side up and spoon about 1/2 teaspoon of lemon curd onto the center. Gently place a glazed cookie top over it and press lightly to adhere without squeezing the curd out. If necessary, add a small additional dollop of lemon curd into the open thumbprint center to fill the space neatly. Repeat with the remaining cookies.
Notes
You can use either homemade or store-bought lemon curd. If making homemade, prepare it the day before to allow it to chill fully. Store assembled cookies in an airtight container in the refrigerator for up to 5 days. Let them sit at room temperature for a few minutes before serving for the best texture.
Nutrition Information
Yield
24Serving Size
1Amount Per Serving Calories 86Total Fat 2gSaturated Fat 1gTrans Fat 0gUnsaturated Fat 1gCholesterol 17mgSodium 49mgCarbohydrates 14gFiber 0gSugar 5gProtein 2g