Every baker needs a few no-fail recipes that work in any season. This No-Bake Peanut Butter Pie with Chocolate Cookie Crust has become that for me. No oven. No complicated steps. Just real ingredients that come together into a dessert that feels both rich and light at the same time.
You will learn exactly how to make a peanut butter mousse filling that stays creamy without turning dense. You will see how the cookie crust holds together without falling apart. I want you to feel confident serving this to your family or guests, knowing you nailed it.
Following a special diet?
Every recipe on this site can be converted to gluten-free, vegan, dairy-free, keto, nut-free or egg-free with adjusted ratios so nothing falls flat.
Try the Recipe Converter →Why This No-Bake Peanut Butter Pie Works Every Time
I’ve made my share of no-bake pies. Some turned out too heavy. Some never fully set. Over the years, I kept notes. The winning version always started with stabilized whipped cream folded into the peanut butter mixture. That gives the filling its mousse-like texture instead of becoming overly thick.
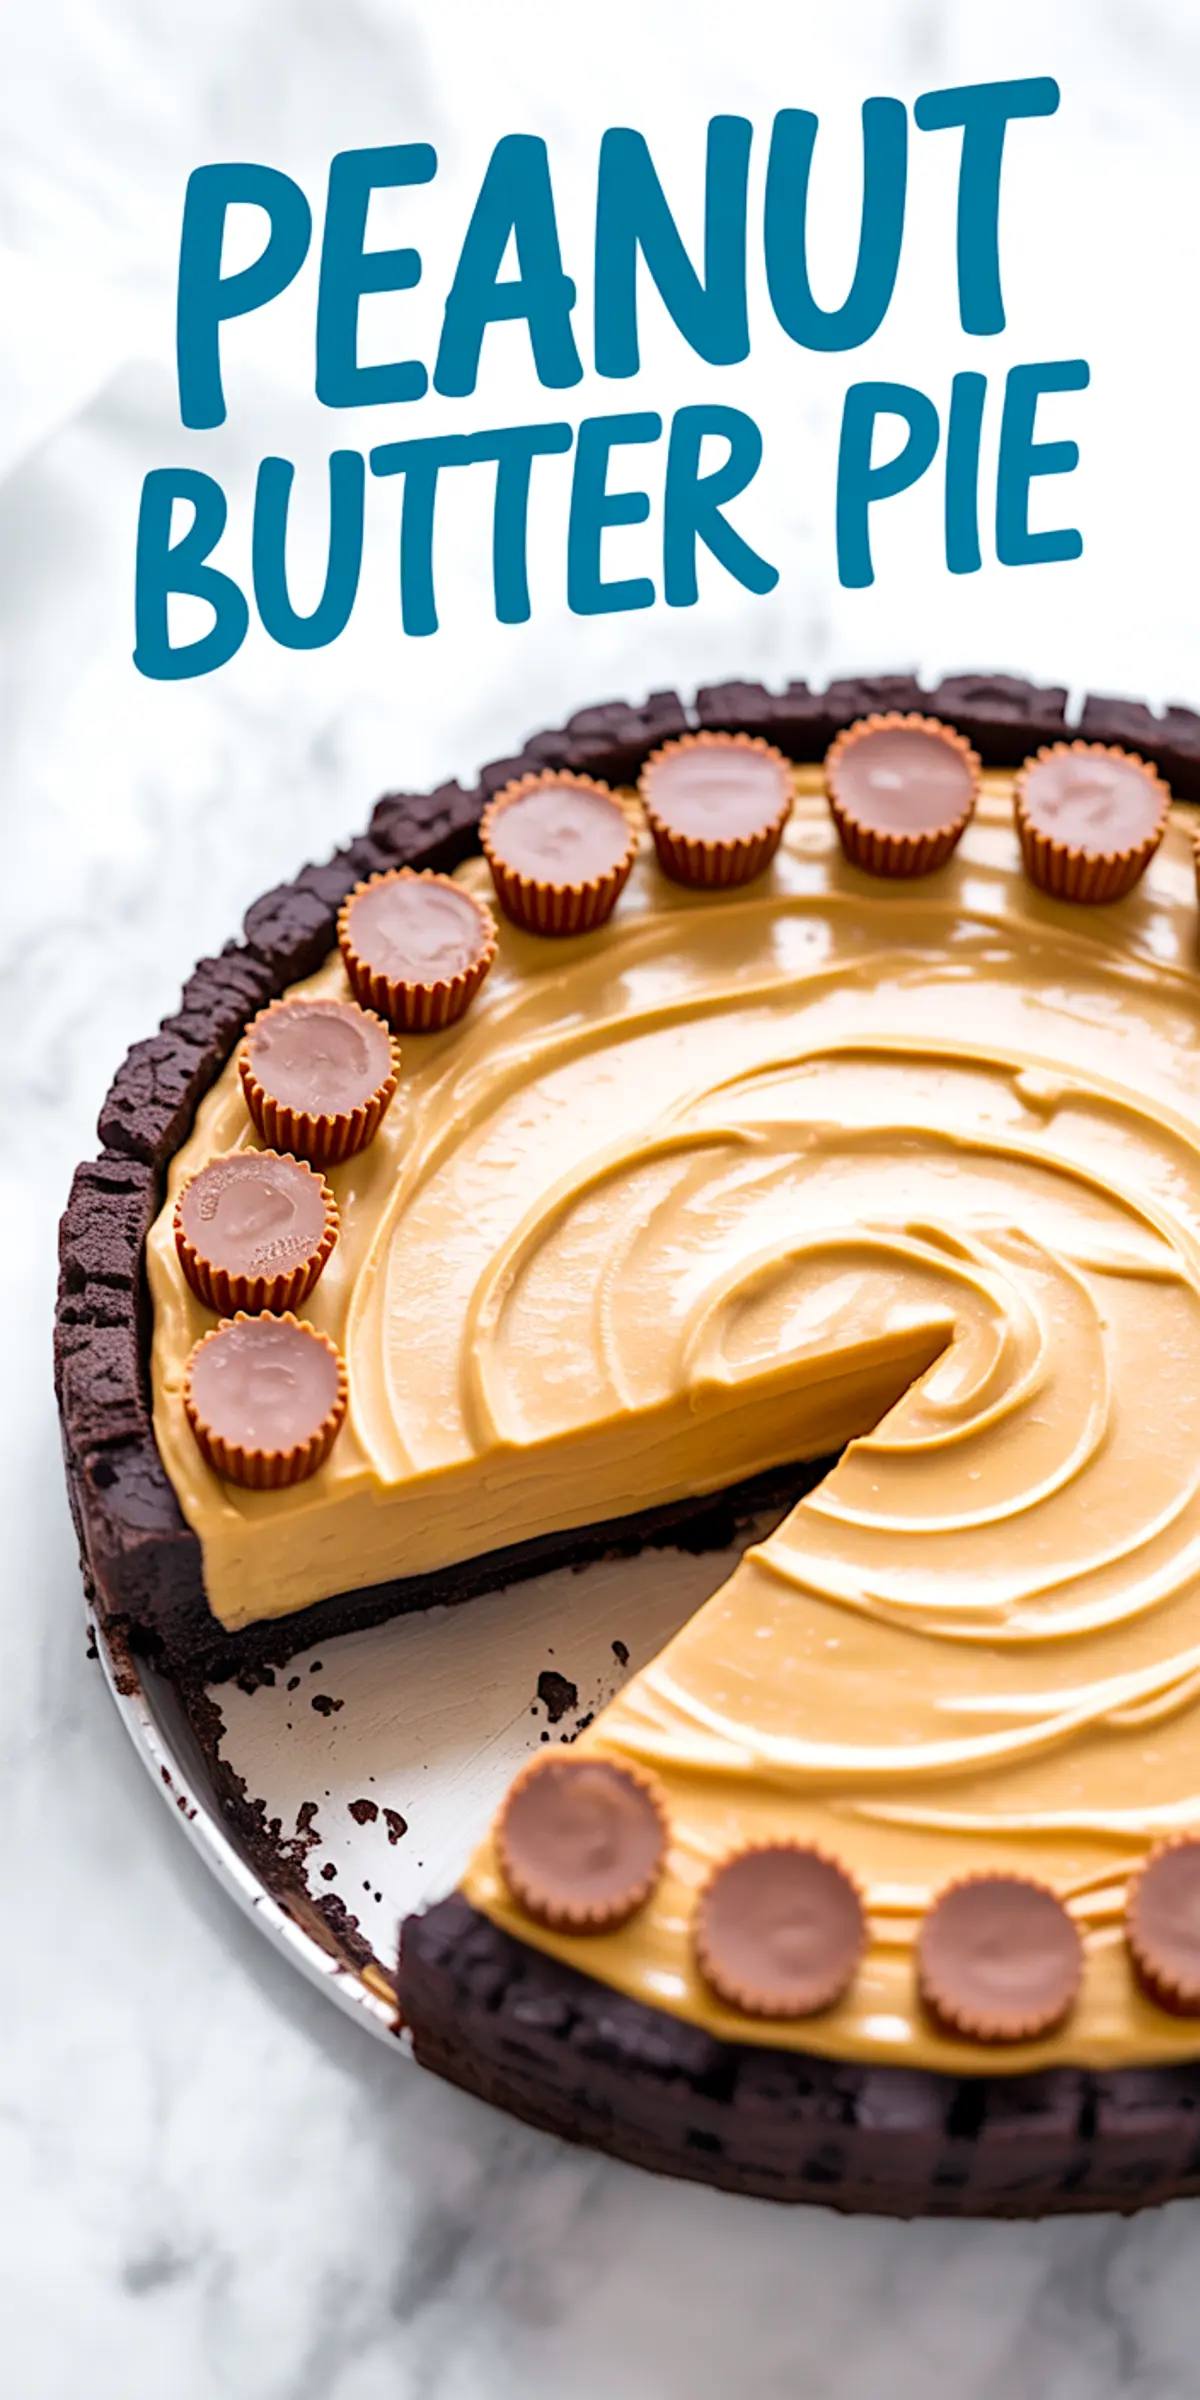
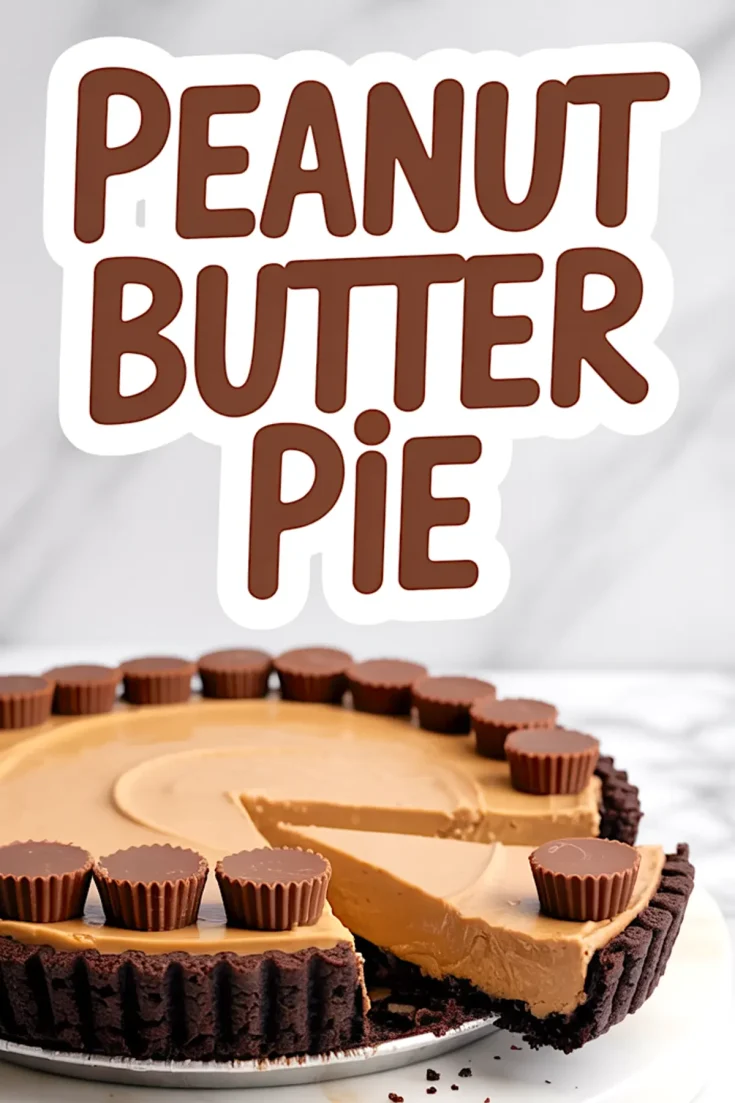
The crust uses chocolate sandwich cookies, like Oreos. The melted butter binds the crumbs, creating a crust that stays firm even after slicing. There’s no need for baking or worrying about it crumbling apart.
Ingredient Choices That Matter
For the peanut butter, I always use a commercial creamy variety. Natural peanut butters with oil separation don’t give the same stable structure. Brands like Jif or Skippy work well.
The cream cheese must be fully softened before mixing. Cold cream cheese leads to lumps. I usually leave mine on the counter for an hour beforehand.
The Chocolate Cookie Crust Foundation
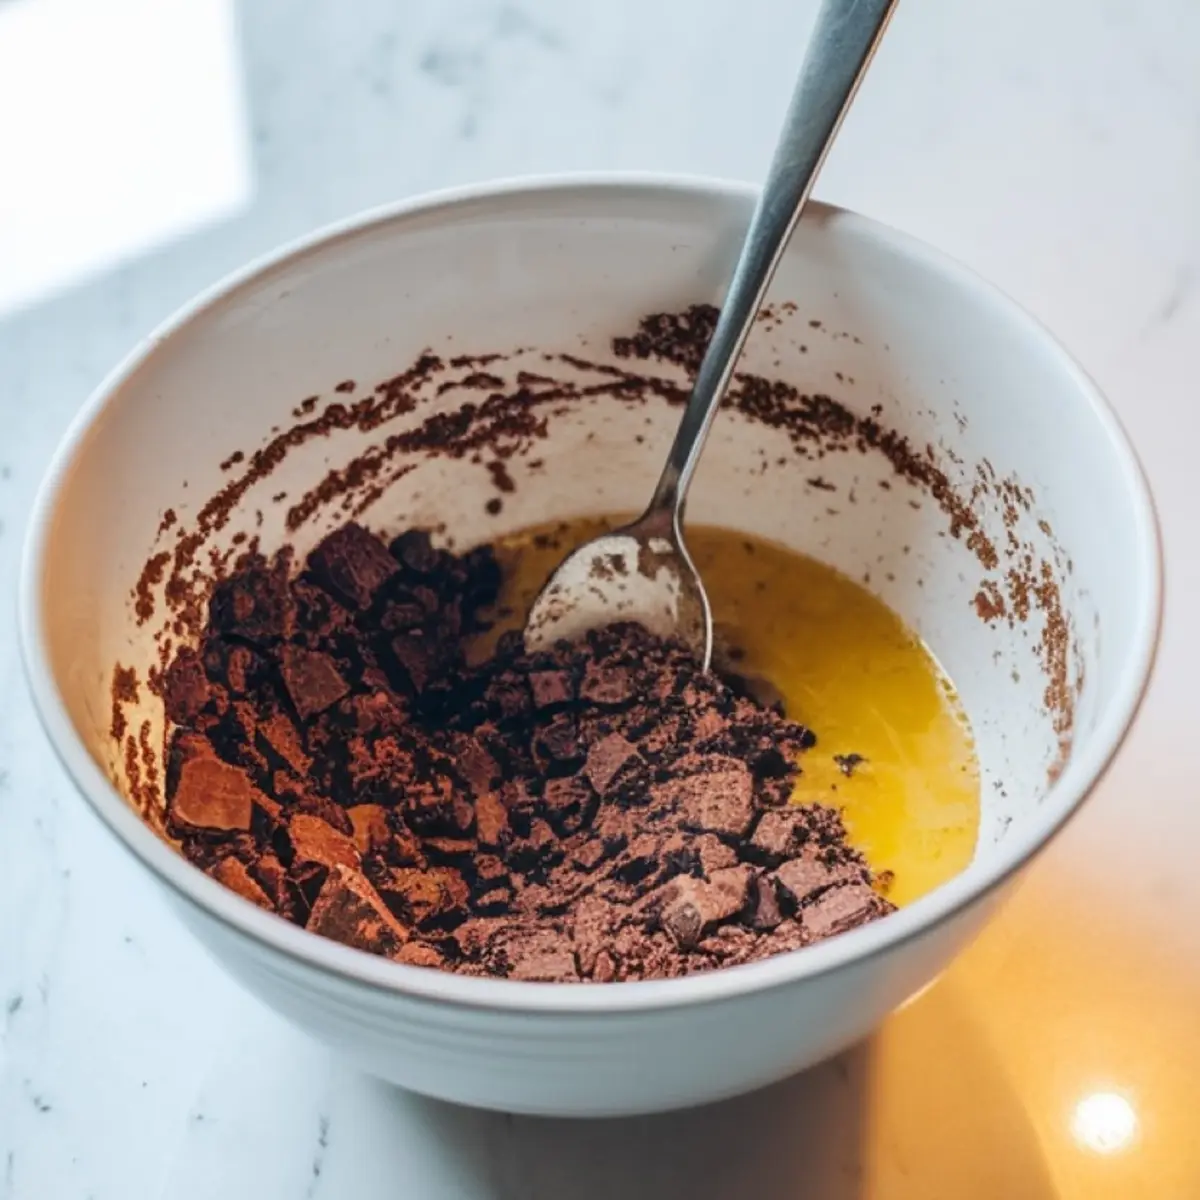
Start by crushing the cookies into fine crumbs. I use a food processor to get an even texture. The melted unsalted butter mixes in easily, creating a damp, sandy consistency.
When pressing the crust into the pan, I use the flat bottom of a measuring cup. This step matters. A compact crust holds its shape and slices cleanly. After shaping, place it in the refrigerator while preparing the filling.
Creating the Peanut Butter Mousse Filling
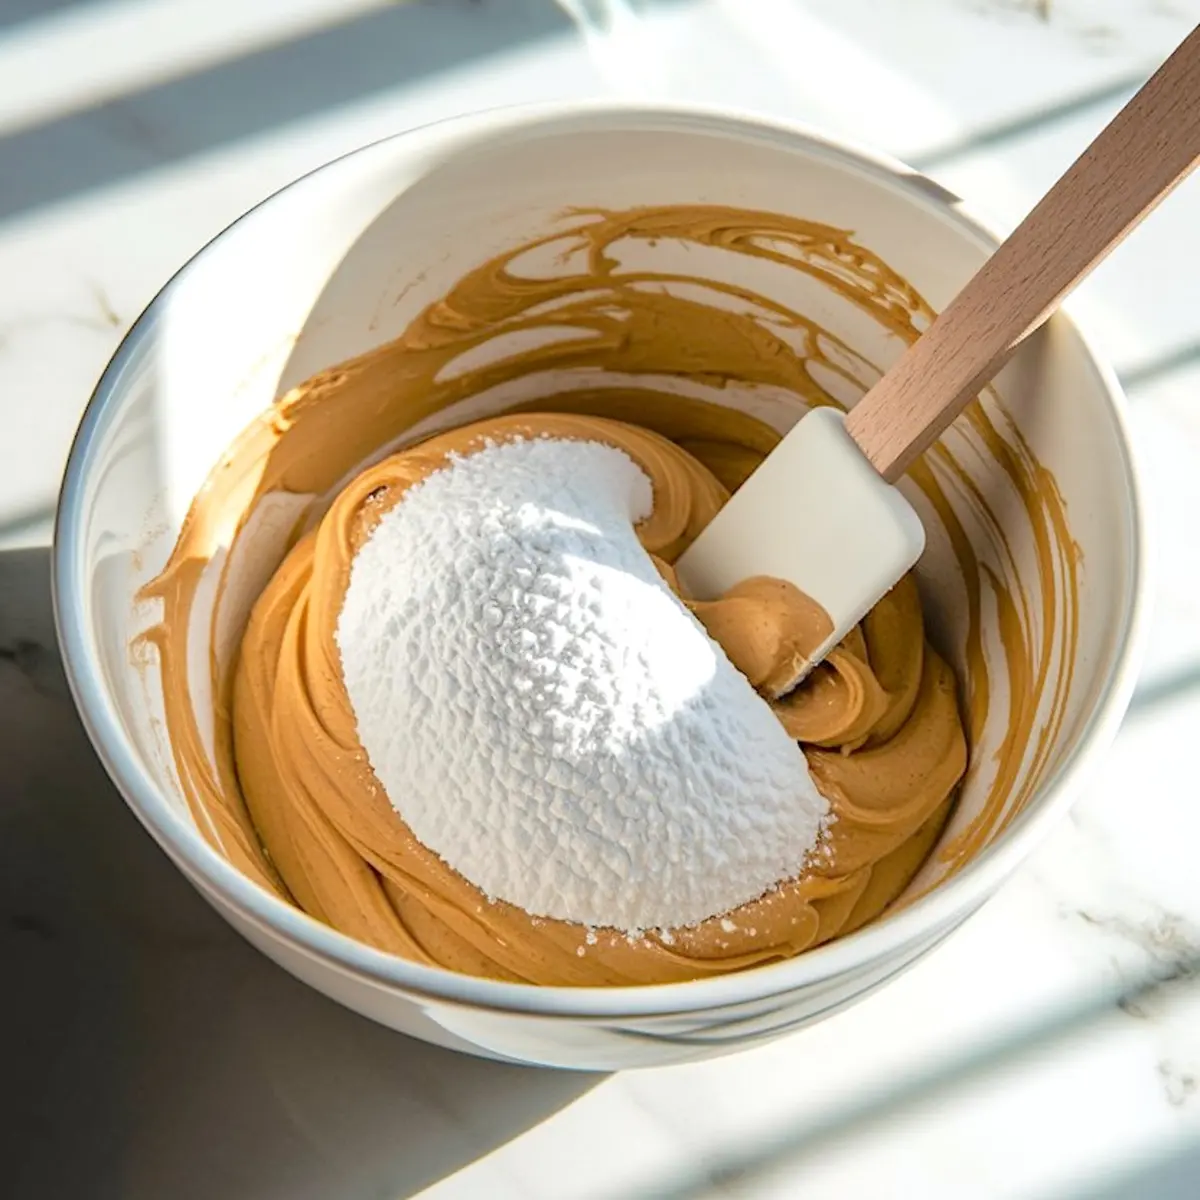
The filling starts by blending softened cream cheese and creamy peanut butter. This mixture must turn smooth before adding the sugar. The powdered sugar blends without grittiness and sweetens the filling evenly.
Vanilla extract adds a gentle background note. Use pure vanilla for the cleanest flavor.
Whipping and Folding for the Right Texture
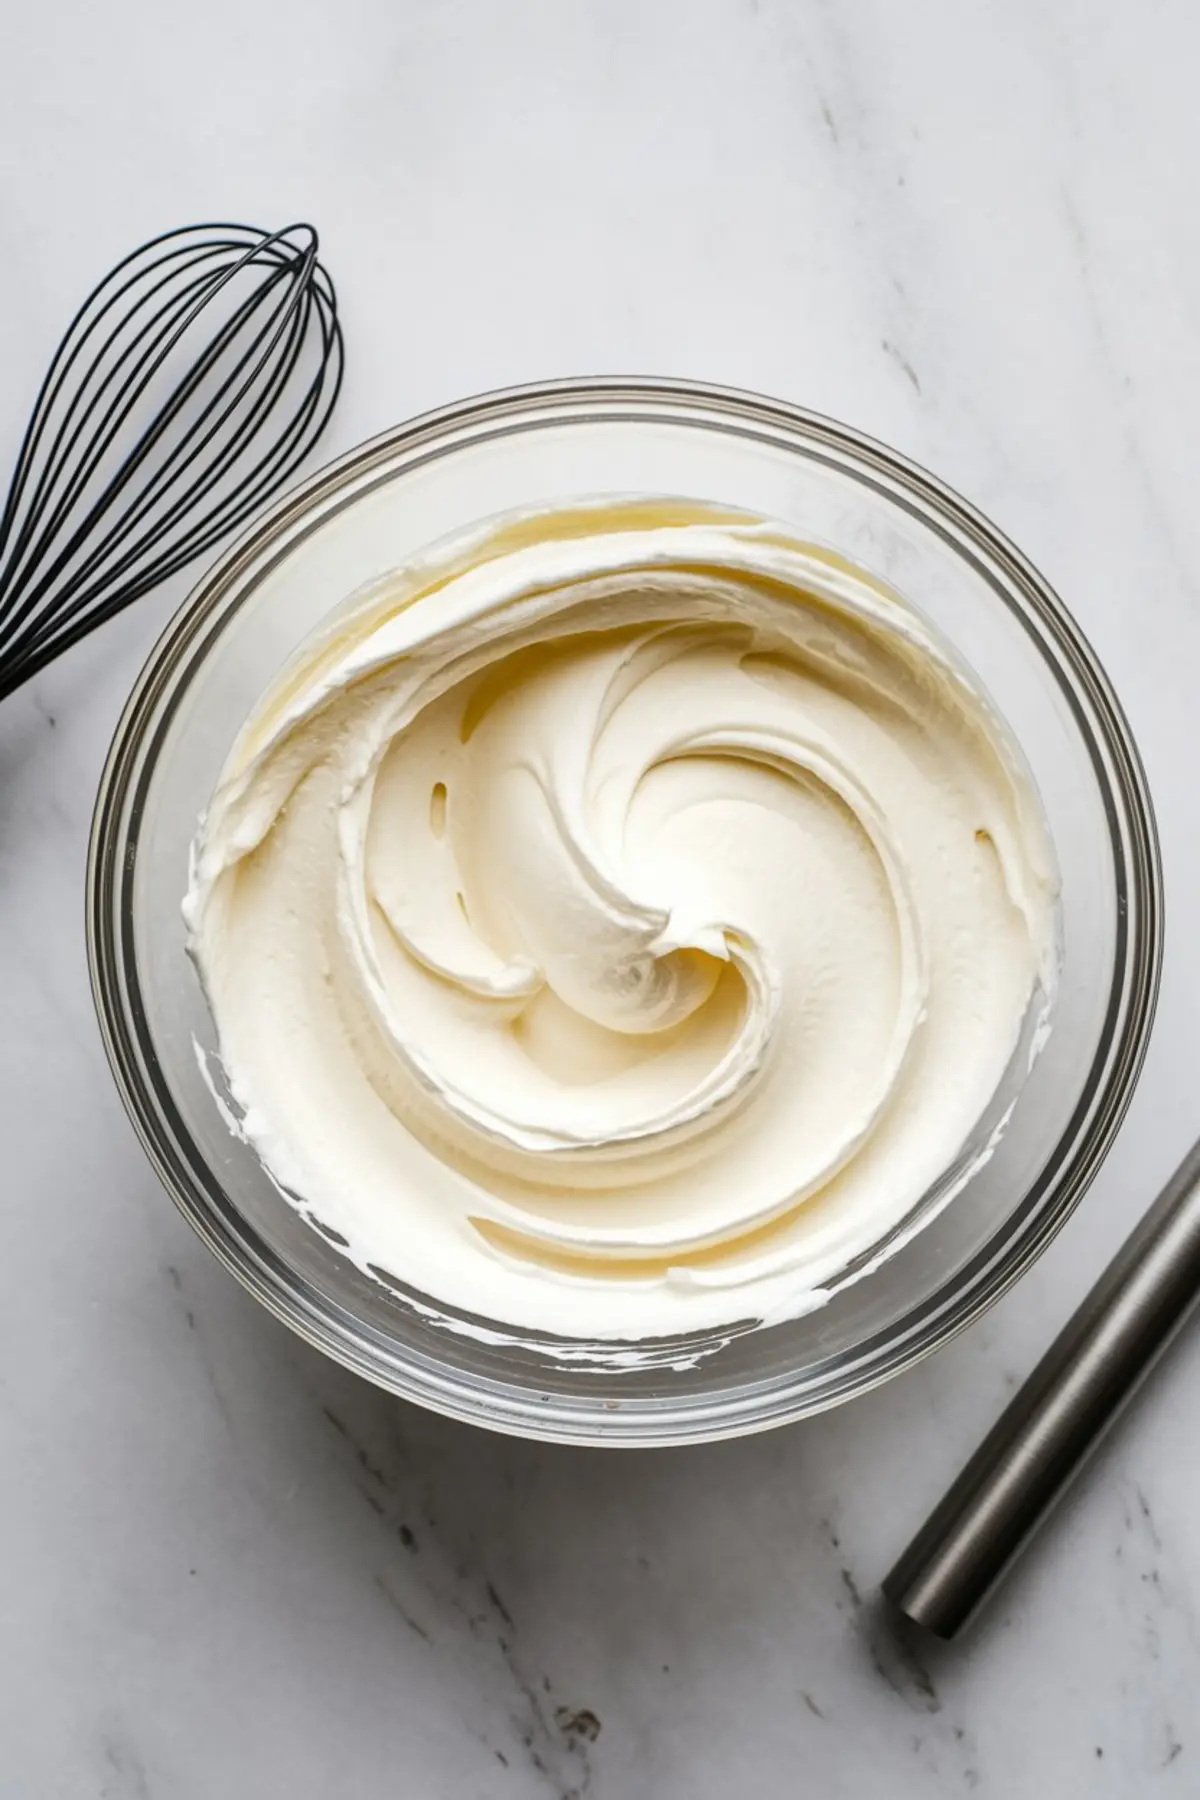
In a separate bowl, I whip heavy cream until stiff peaks form. This whipped cream gives the filling its light texture. I’ve tested both hand and stand mixers for this step. The stand mixer provides better control and prevents over-whipping.
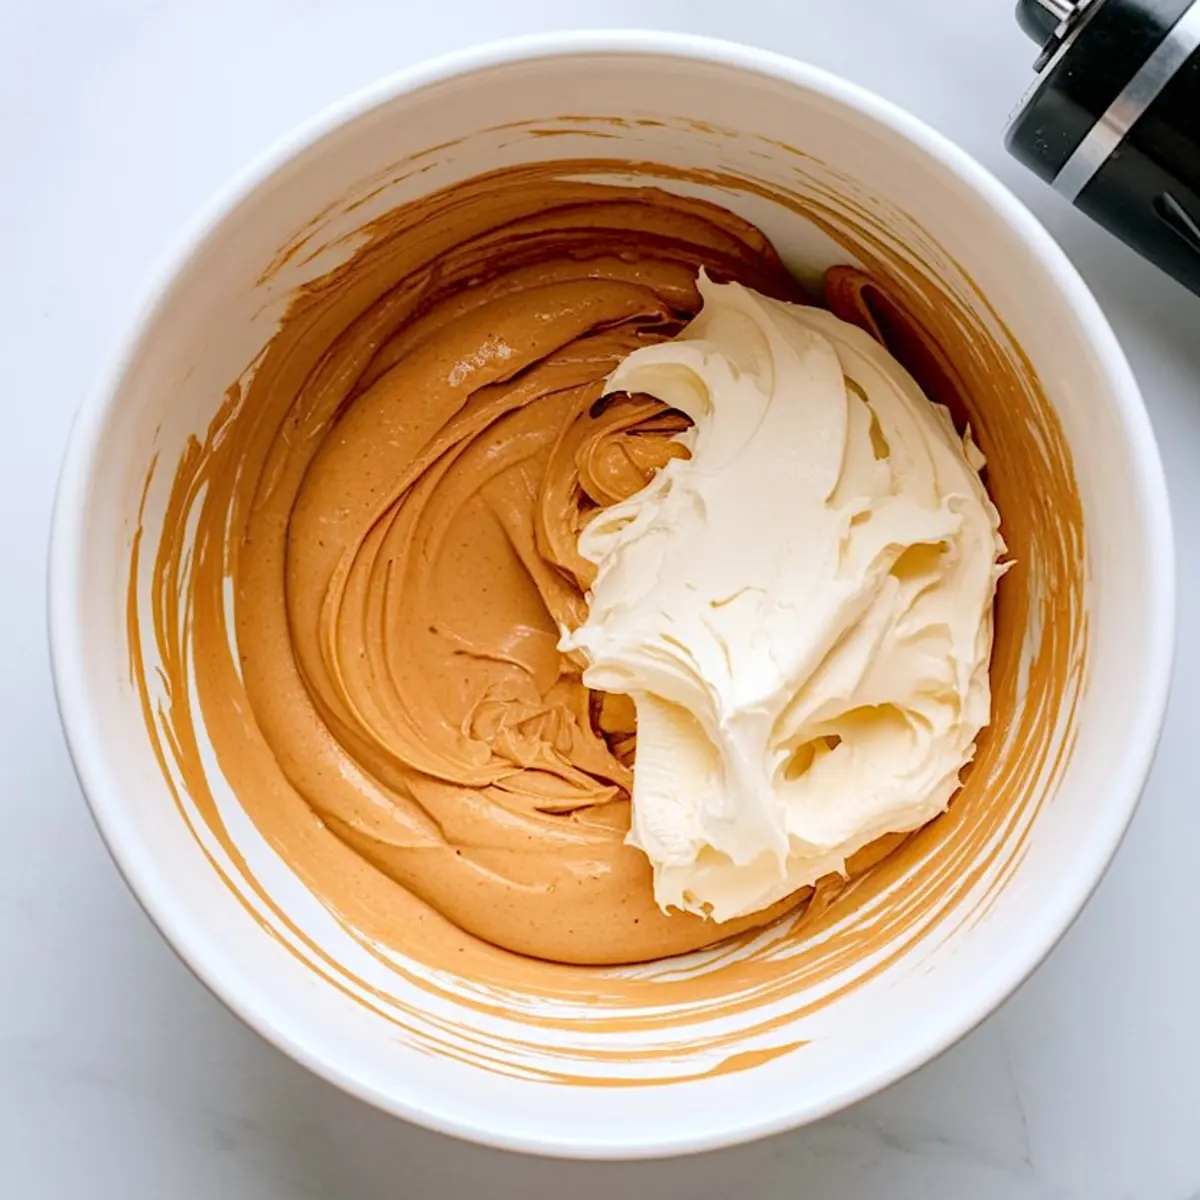
Folding the whipped cream into the peanut butter mixture requires care. I do it in three stages. Rushing this step knocks out the air and leaves the filling too heavy.
Stand Mixer vs Hand Mixer: My Experience
I’ve tried both. The stand mixer offers better control over speed and volume when whipping cream. It prevents accidental over-whipping, which can quickly happen with a hand mixer. However, for the peanut butter and cream cheese blend, a hand mixer works perfectly fine.
Filling and Decorating the Pie
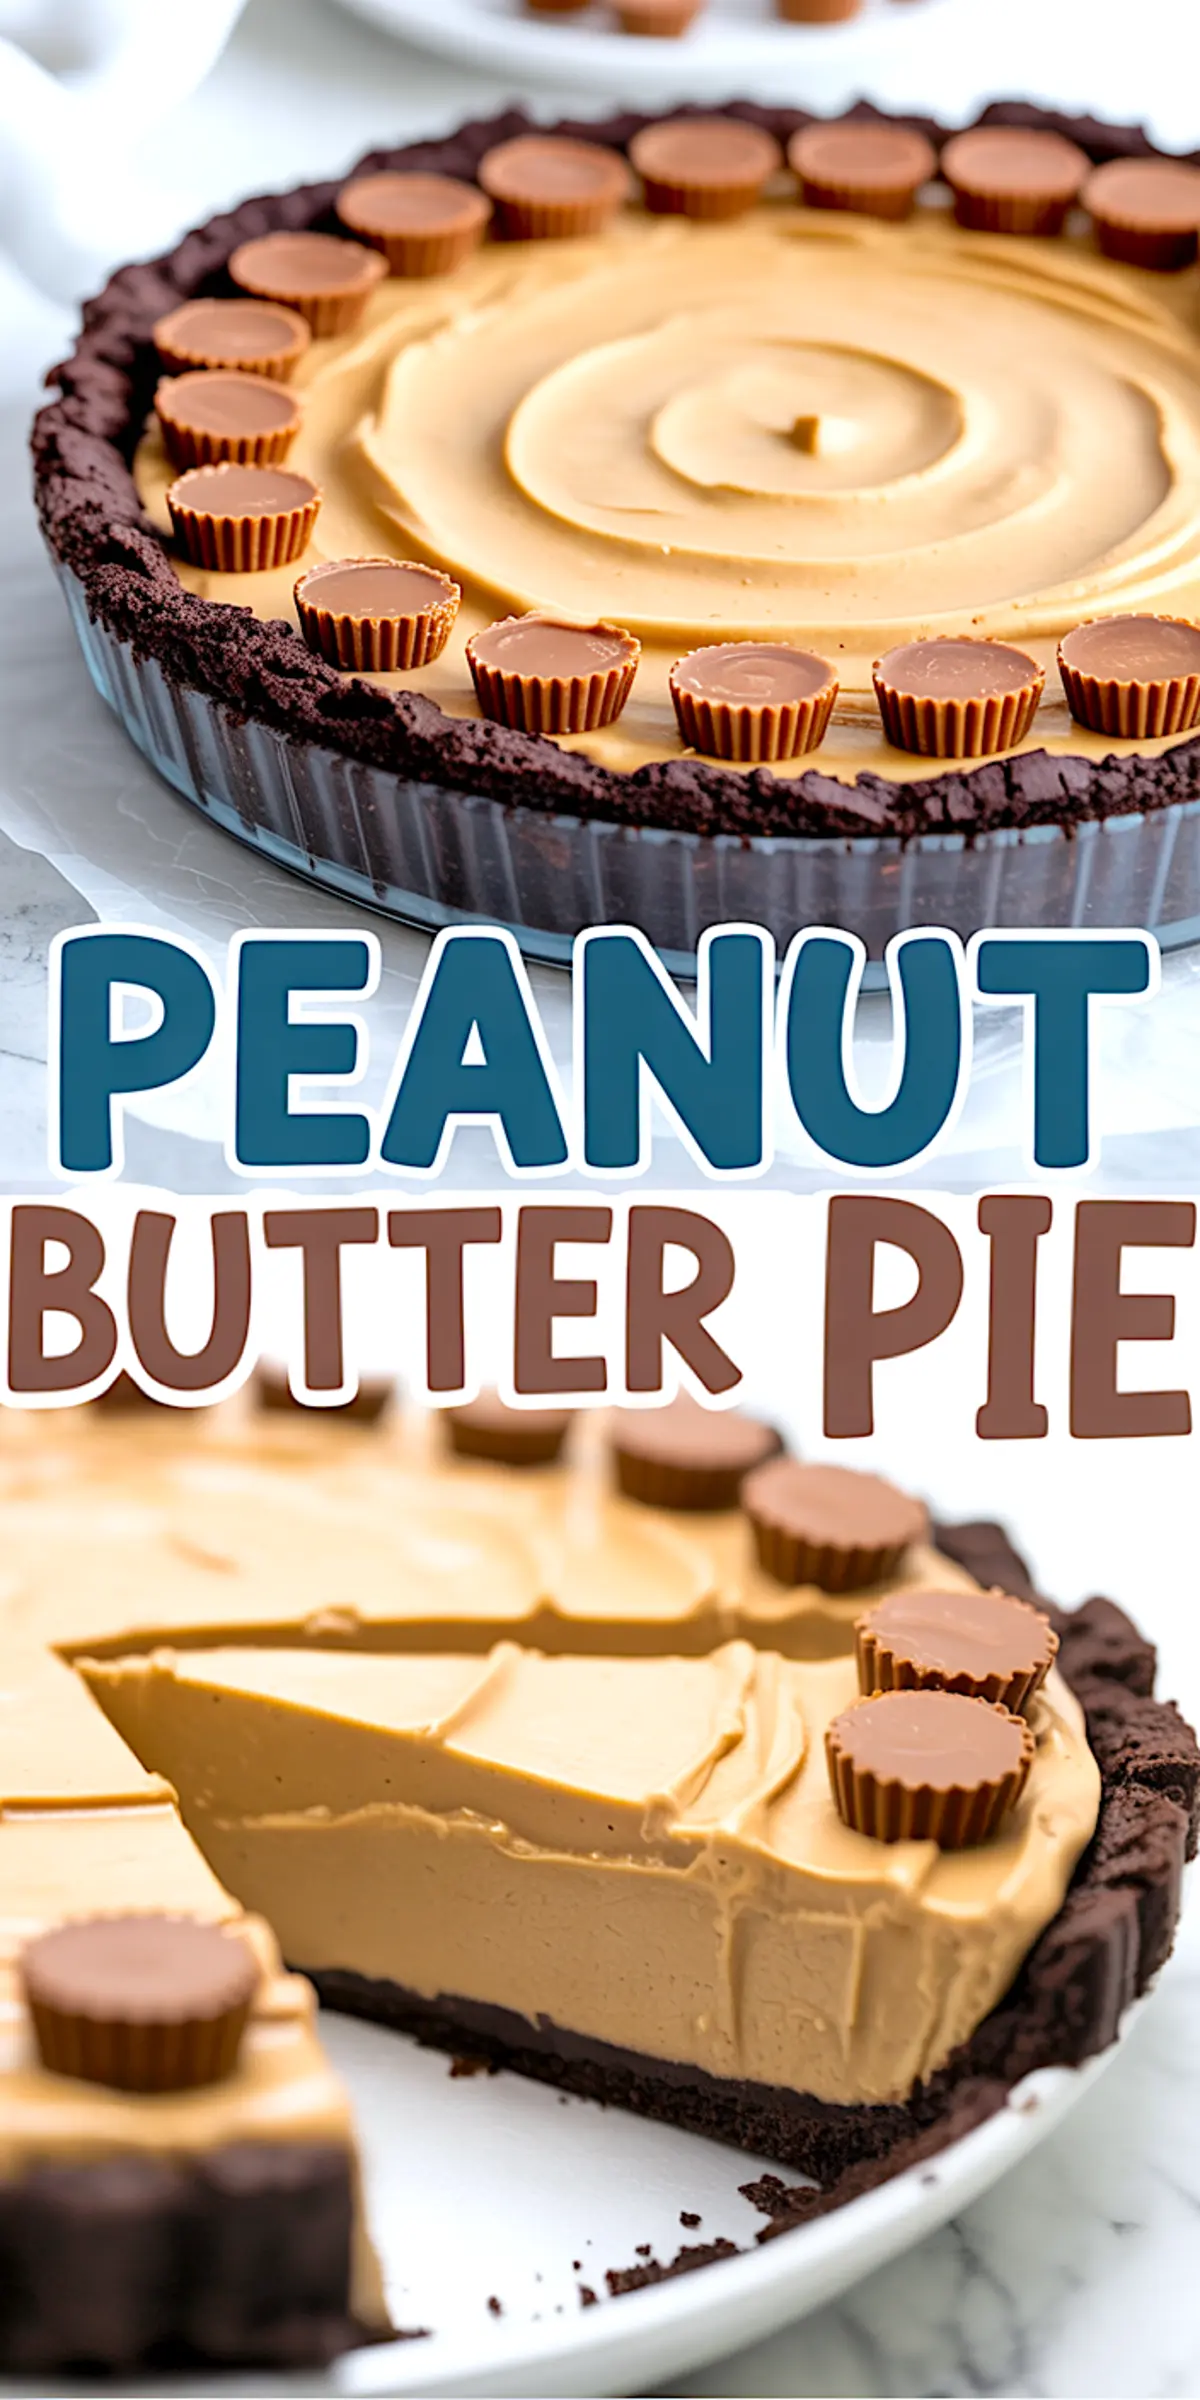
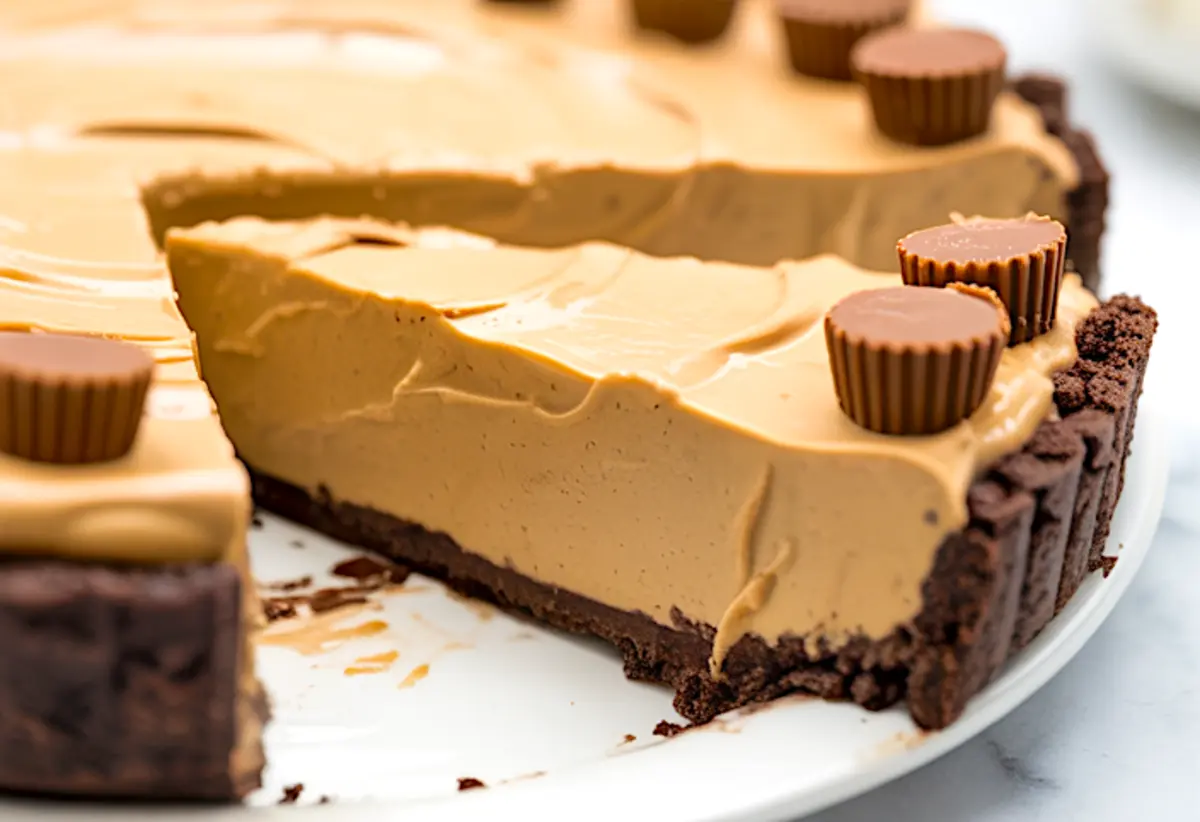
Once combined, the filling goes into the chilled crust. I smooth the surface with an offset spatula. Sometimes I create simple decorative swirls using the back of a spoon.
For decoration, mini peanut butter cups create a playful look. I arrange them around the edge. A drizzle of melted chocolate adds both shine and extra richness.
Chilling and Serving the Pie
The pie needs at least 4 hours to set fully. I usually make it the day before serving and refrigerate overnight. The filling stays stable, and the flavors meld together beautifully.
When slicing, use a sharp knife dipped in hot water for clean cuts. Wipe the blade between slices.
Serving and Storage Tips
Serve the pie chilled. The texture holds best when cold, especially in warmer months.
Store leftovers covered in the refrigerator for up to 3 days. I avoid freezing this pie, as freezing can alter the texture of the whipped cream filling.
More Peanut Butter Desserts You Might Love
If you enjoy this no-bake peanut butter pie, you may also like my Peanut Butter Cheesecake which uses a slightly denser filling.
For a fun breakfast option, try Peanut Butter Overnight Oats that keep mornings simple yet satisfying.
Or explore something crunchy like my Peanut Butter Rice Krispie Treats.
If you want a show-stopper, my Reese’s Peanut Butter Cake brings together peanut butter and chocolate into towering layers.
Save This Recipe for Later and Share Your Thoughts
If this No-Bake Peanut Butter Pie with Chocolate Cookie Crust found a place at your table, save it on your Pinterest board so you can return to it anytime.
Leave a comment and share how your pie turned out. I always enjoy hearing your tweaks and questions. Let’s build this baking community together.
No-Bake Peanut Butter Pie with Chocolate Cookie Crust
A creamy peanut butter mousse fills a buttery chocolate cookie crust in this no-bake pie. Whipped cream gives the filling a light texture, while the topping of mini peanut butter cups adds extra flavor and crunch. Serve it cold for a rich, satisfying dessert that requires no baking.
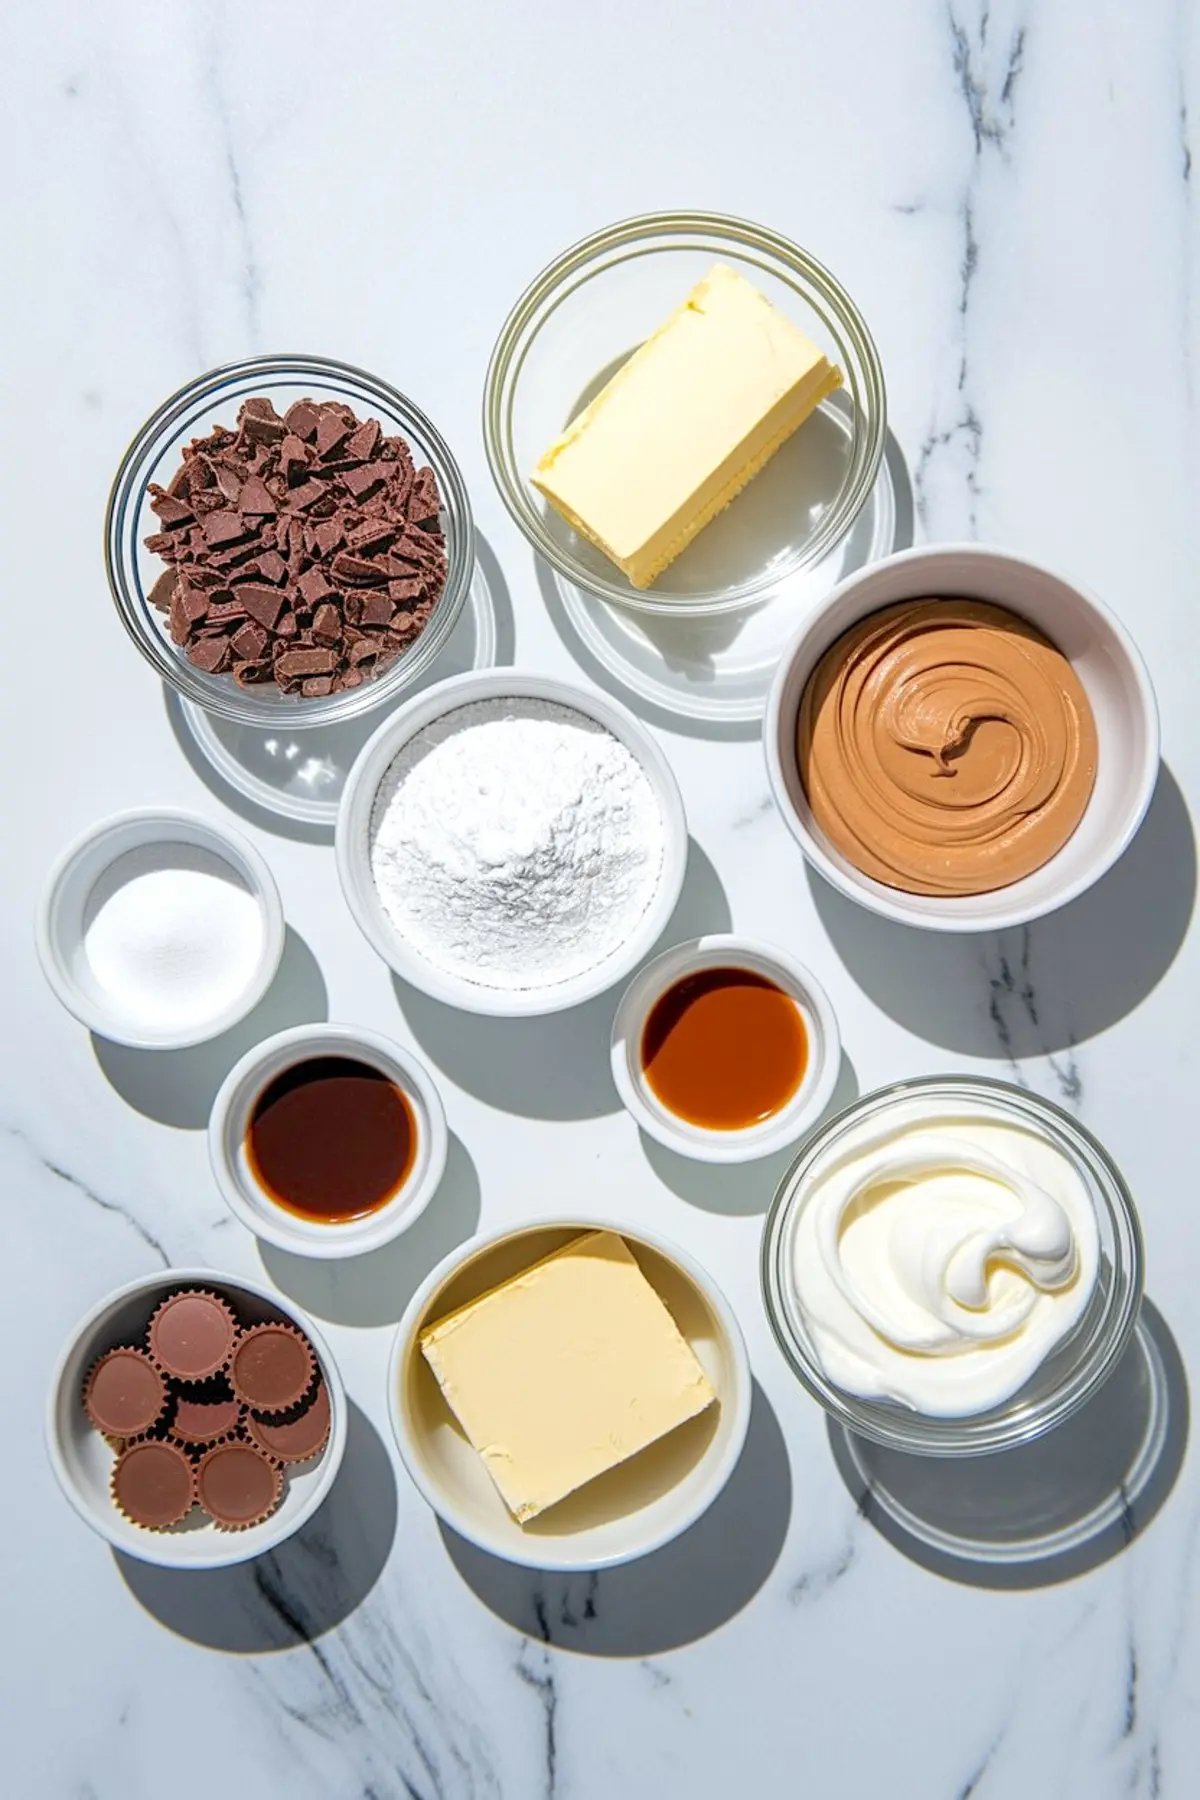
Ingredients
- FOR THE CHOCOLATE COOKIE CRUST
- 24 chocolate sandwich cookies (like Oreos)
- 5 tablespoons unsalted butter, melted
- FOR THE PEANUT BUTTER FILLING
- 1 cup creamy peanut butter (not natural-style)
- 8 oz cream cheese, softened
- 1 cup powdered sugar
- 1 teaspoon vanilla extract
- 1½ cups heavy whipping cream
- OPTIONAL TOPPING
- 12–15 mini peanut butter cups
- Melted chocolate drizzle (optional)
Instructions
- MAKE THE CRUST: Place the chocolate sandwich cookies in a food processor and pulse until they form fine crumbs. Add the melted butter and blend again until the mixture is evenly combined and resembles wet sand.
- FORM THE CRUST: Press the cookie mixture firmly into the bottom and up the sides of a 9-inch pie dish or tart pan. Use the bottom of a flat measuring cup to help compact the crust evenly. Place the crust in the refrigerator to chill for at least 20 minutes while preparing the filling.
- MAKE THE FILLING: In a large mixing bowl, beat the cream cheese and peanut butter together using a hand mixer or stand mixer until smooth and creamy. Add the powdered sugar and vanilla extract, then beat until fully incorporated and smooth.
- WHIP THE CREAM: In a separate bowl, whip the heavy whipping cream with a mixer on high speed until stiff peaks form. Be careful not to overwhip.
- COMBINE THE MIXTURES: Gently fold the whipped cream into the peanut butter mixture in three additions. Use a rubber spatula and fold carefully to maintain the airiness of the whipped cream and create a light, mousse-like texture.
- FILL THE PIE: Spoon the filling into the chilled crust and spread it out evenly. Smooth the top with a spatula or create a decorative swirl using the back of a spoon.
- DECORATE: Arrange the mini peanut butter cups around the edge of the pie. If using, drizzle melted chocolate over the top in a zigzag pattern for added texture and flavor.
- CHILL AND SERVE: Cover the pie with plastic wrap or foil and refrigerate for at least 4 hours, or overnight, until fully set. Slice and serve chilled.
Notes
Use regular peanut butter (not natural or oily types) for best consistency. Pie can be made 1 day in advance and stored in the refrigerator.
Nutrition Information
Yield
10Serving Size
1Amount Per Serving Calories 2795Total Fat 178gSaturated Fat 69gTrans Fat 0gUnsaturated Fat 99gCholesterol 111mgSodium 1802mgCarbohydrates 272gFiber 18gSugar 227gProtein 55g