
There’s something about a peanut butter and jelly sandwich that holds still in memory. The kind of lunch that waited quietly in a paper bag, soft at the edges, sweet in the center. But toast it, and everything changes.
A toasted PBJ sandwich sharpens the contrast. It brings crisp edges, warm middles, and a sense that someone took a moment to care. This isn’t just a childhood snack. It’s comfort sharpened by heat and softened by nostalgia.
In this article, you’ll learn how to make a toasted peanut butter and jelly sandwich with texture, balance, and flavor. You’ll also get a few serving suggestions, smart ingredient swaps, and storage tips if you plan ahead. This version brings familiarity with a subtle upgrade and once you try it warm, you may never go back.
Following a special diet?
Every recipe on this site can be converted to gluten-free, vegan, dairy-free, keto, nut-free or egg-free with adjusted ratios so nothing falls flat.
Try the Recipe Converter →Why Toasting Makes a PBJ Sandwich Better
Soft bread and cool spreads have their place. But heat turns this sandwich into something that feels more deliberate. The peanut butter melts slightly, pulling the jelly with it. The crust takes on a buttery crackle, while the inside stays tender.
I started making it this way when my youngest asked for a “grown-up PBJ.” That small request reminded me that warmth often deepens simple things.
A quick toast transforms the sandwich from a casual filler to something worth sitting down with. It also pairs surprisingly well with soups, especially tomato or creamy squash.
Ingredients: Keep It Simple, but Use What Works
A standard sandwich loaf gives the most familiar texture, but sturdy white or whole wheat both hold up well to toasting. I use creamy peanut butter for spreadability, though crunchy adds more structure and surprise.
You can go with grape or strawberry jelly, but raspberry or apricot jam works just as well. I’ve used my own freezer jam when I had it, but store-bought options work just fine too.
One tablespoon of butter is just enough to coat the outer sides of the bread. Don’t skip this part. It’s the difference between a sandwich that browns and one that burns.
If you’re curious about peanut butter variations, my Peanut Butter and Jelly Cookies also capture the same spirit in dessert form.
A Personal Note on Peanut Butter: Natural vs. Processed
I’ve tested both natural peanut butter and the smoother, stabilized versions. Natural peanut butter, while flavorful, can cause the sandwich to leak oil when heated.

For a consistent texture, I lean toward the classic processed type in this sandwich. It holds its shape better and spreads without tearing the bread.
That said, if you’re after strong roasted flavor and plan to eat it immediately, natural peanut butter brings a richer depth. I’ve made it both ways and always go back to processed for this specific recipe. My notes always circle back to one word: control.
Toasting the Sandwich: Pan vs. Press
Use a non-stick skillet or griddle. I warm mine to medium and let it sit for about a minute. Too hot, and the bread burns before the inside softens. Too cold, and the butter just soaks in.
Press the sandwich gently with a spatula while it cooks. That slight pressure helps the edges seal and toast evenly. After two to three minutes, flip and repeat.
The goal is even color, golden and crisp, without dark spots or soggy centers.
For those curious about similar no-bake comfort options, my Peanut Butter No Bake Cookies follow the same pantry-staple logic—quick, simple, and dependable.
Serving Tips: Make It Your Own

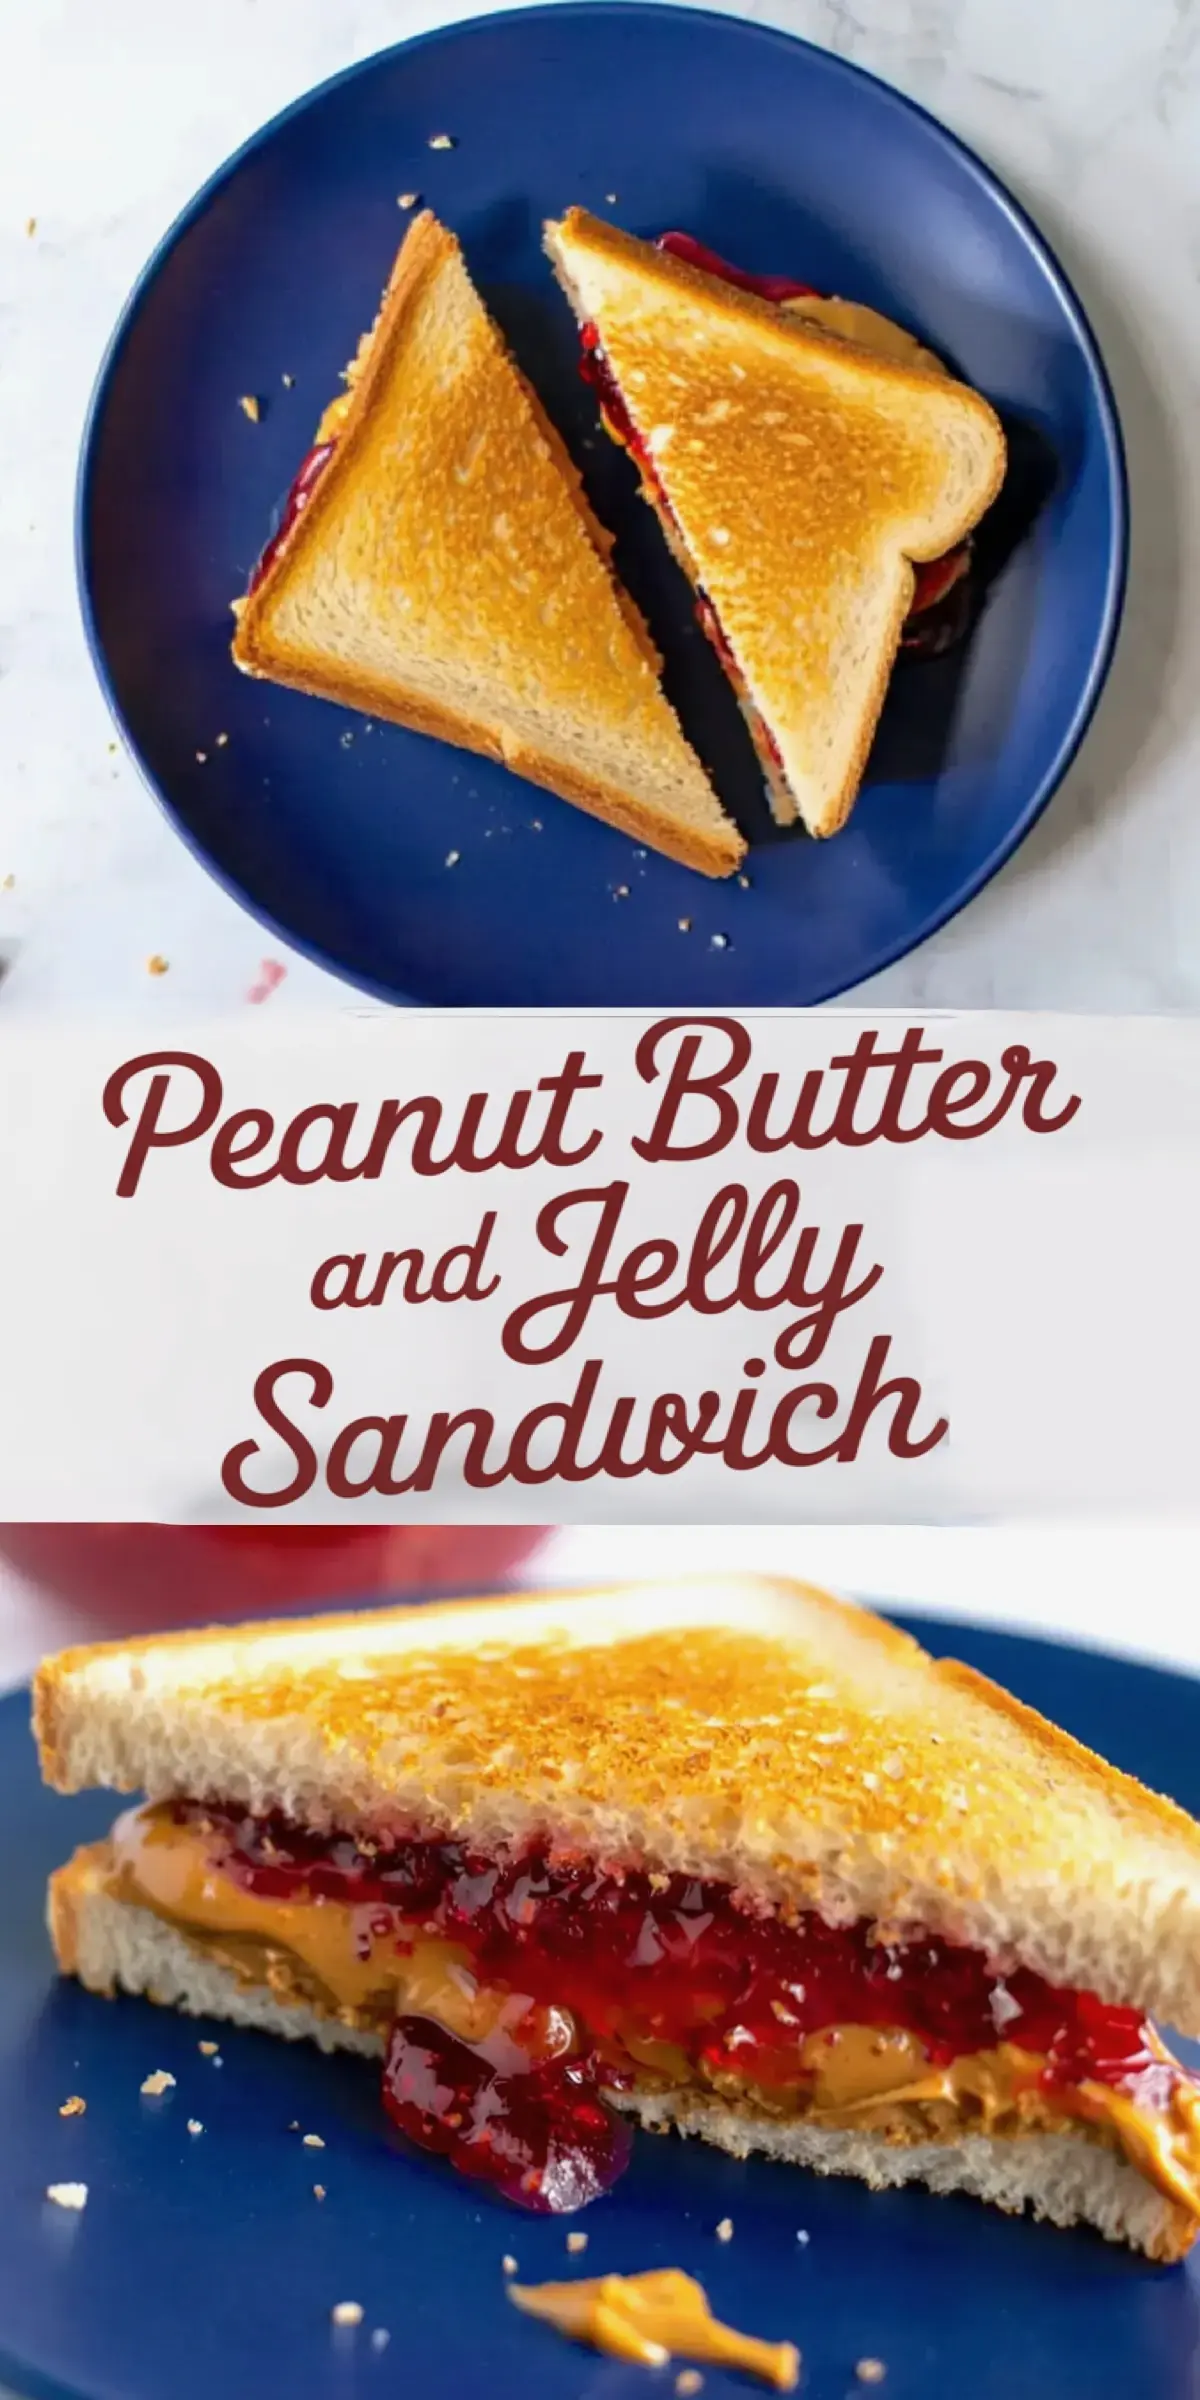
Slice the sandwich diagonally for easy handling and a satisfying visual. That little triangle feels more intentional, like someone took the time to do it right.
Some days, I serve mine alongside a bowl of warm soup or sliced bananas with a dusting of cinnamon. Other times, it’s a solo act—just the sandwich, a napkin, and five quiet minutes.
For a fun twist, try adding thin slices of banana before you toast. It echoes the feel of a [Peanut Butter and Banana Sandwich] and adds natural sweetness with minimal effort.
Sprinkling a pinch of flaky sea salt on the peanut butter before assembling brings contrast, especially if the jam runs sweet. It’s a small step with a noticeable payoff.
If you’re curious about desserts that feel like upgraded sandwiches, try the No Bake Peanut Butter Bars as a next step. They travel well and hold up beautifully in warm weather.
Storage and Make-Ahead Advice
This sandwich tastes best hot off the skillet, but you can prep components in advance. Assemble the sandwich and butter the outside, then wrap tightly and refrigerate. When ready, toast directly from the fridge.
Avoid microwaving leftovers. It softens the bread without bringing back the crisp exterior. A quick pan reheat works better.
I’ve never had one last long enough to freeze, but if you’re experimenting with make-ahead lunches, consider freezing just the peanut butter side. Add jelly fresh before cooking.
If you love peanut butter-forward desserts, save the Peanut Butter Pie recipe. It’s another chilled favorite that shares this one’s pantry-friendly nature.
Related Recipes for PBJ Lovers
Try these next if you want more inspiration from the same flavor palette:
Each one leans into that nostalgic blend of salty and sweet, using pantry staples with minimal prep.
Save and Share This PBJ Sandwich Recipe
Pin this post if you want to come back to it later, especially if you’re gathering Peanut Butter Sandwich Ideas or exploring PBJ Sandwich variations.
And if you try it, let me know in the comments how it went for you. Did you use grape or strawberry? Creamy or crunchy? Everyone has a favorite, and I’d love to hear yours.
Sometimes it’s the simplest recipes that bring the most comfort. This one has never let me down.
Peanut Butter and Jelly Sandwich Recipe

A toasted peanut butter and jelly sandwich brings extra texture and warmth to a familiar favorite. Buttery golden bread, slightly crisp on the outside, surrounds a soft and melty center of peanut butter and jelly. This simple variation uses just a skillet and pantry staples to create a comforting, satisfying meal or snack.
Ingredients
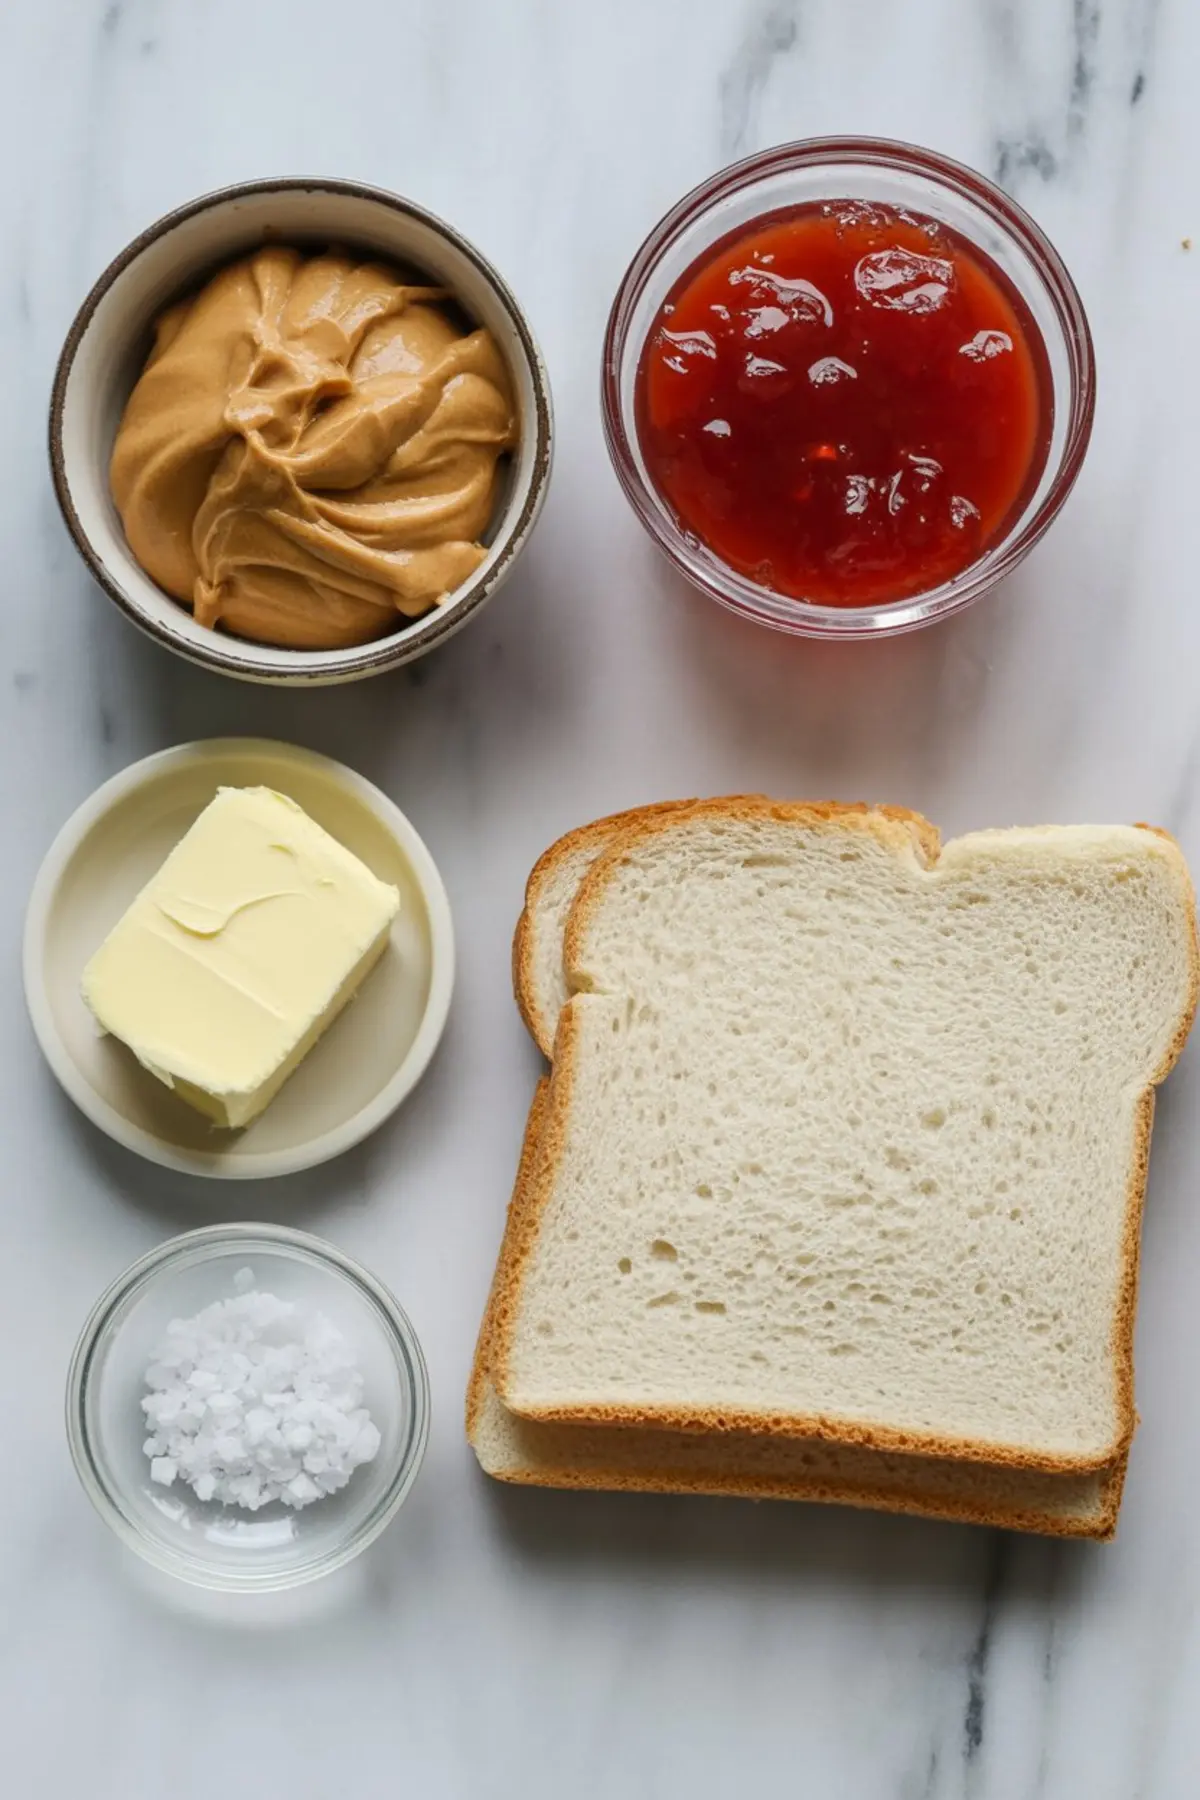
- 2 slices sandwich bread (white or whole wheat)
- 2 tablespoons creamy or crunchy peanut butter
- 2 tablespoons strawberry or grape jelly or jam
- 1 tablespoon softened unsalted butter
- Optional: small pinch of flaky sea salt
Instructions
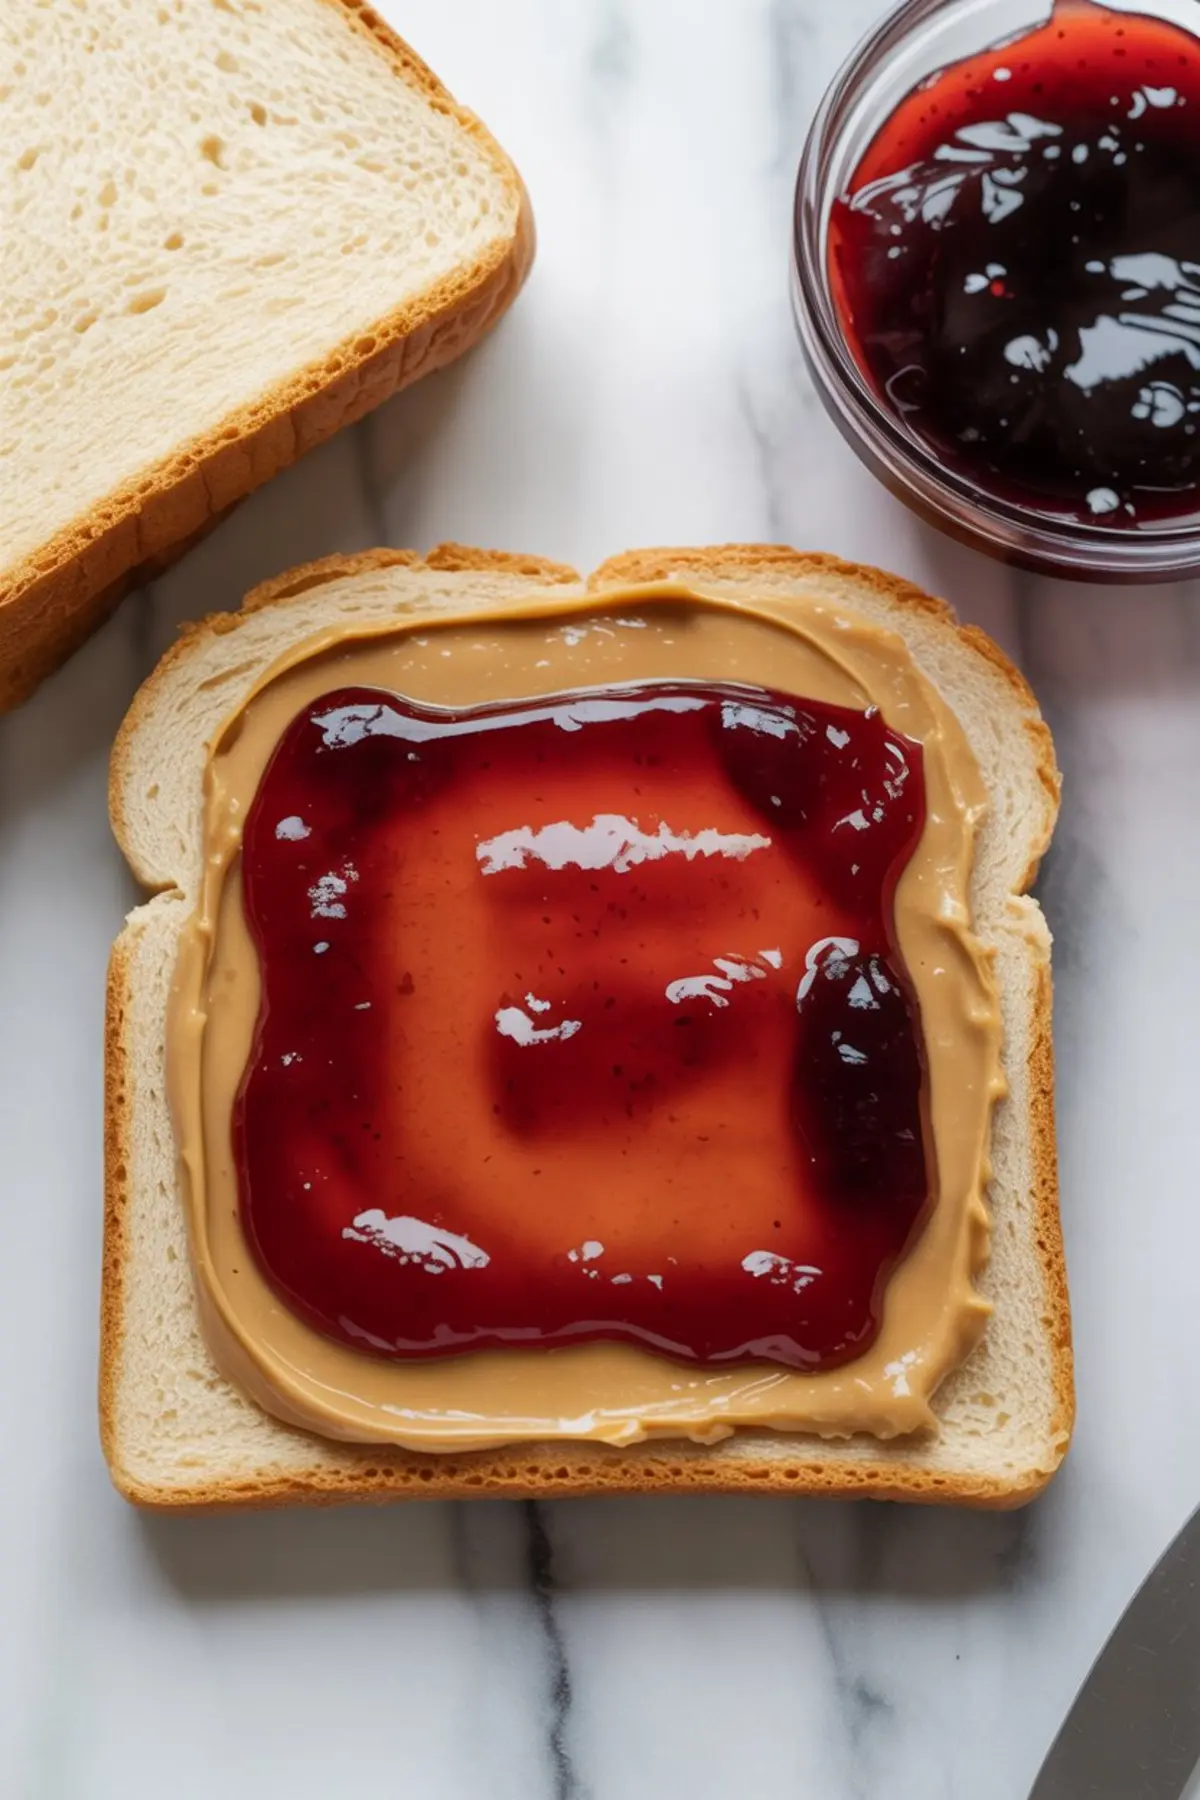
- SPREAD THE PEANUT BUTTER: Place one slice of bread on a clean surface and spread the peanut butter evenly across the entire surface, making sure to reach the edges for consistent flavor in every bite.
- SPREAD THE JELLY: Take the second slice of bread and spread the jelly or jam evenly from corner to corner, ensuring full coverage.
- ASSEMBLE THE SANDWICH: Press the two slices together with the peanut butter and jelly sides facing each other. Press lightly to help them stick together.
- BUTTER THE OUTSIDE: Spread the softened butter on the outside of both slices of bread using a butter knife or the back of a spoon. Cover the full surface to promote even browning.
- HEAT THE PAN: Warm a non-stick skillet or griddle over medium heat. Give it a minute or two to reach temperature to ensure a good sear without burning the bread.
- TOAST THE SANDWICH: Place the sandwich in the skillet and cook for 2 to 3 minutes, or until the bottom is golden brown and crisp. Flip carefully and toast the other side for another 2 to 3 minutes. Use a spatula to press down gently for even contact with the heat.
- COOL AND SLICE: Remove the sandwich from the pan and let it rest for 30 seconds. Slice diagonally and serve warm.
Notes
For added contrast, sprinkle a pinch of flaky sea salt on the peanut butter before assembling. Use classic spreads for a nostalgic flavor, or experiment with small-batch jam for variety.
Nutrition Information
Yield
1Serving Size
1Amount Per Serving Calories 575Total Fat 30gSaturated Fat 10gTrans Fat 0gUnsaturated Fat 17gCholesterol 31mgSodium 607mgCarbohydrates 68gFiber 5gSugar 28gProtein 14g