There’s something reassuring about a dessert that doesn’t ask too much of you.
No stand mixers. No bake. No stress.
Just five ingredients, a saucepan, and a square pan.
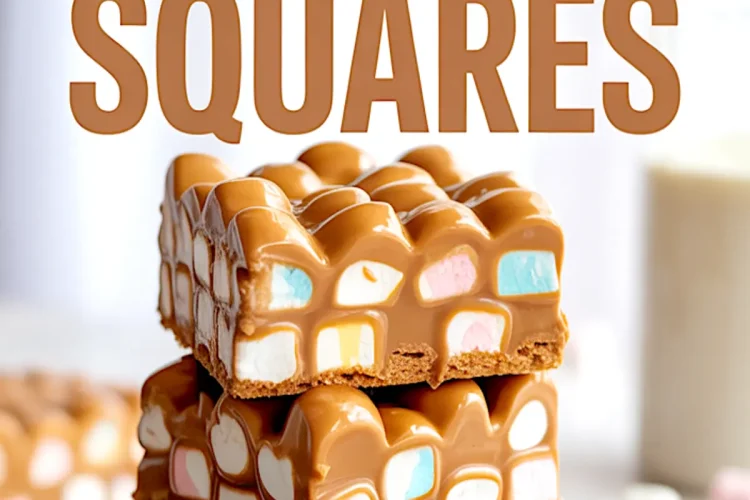
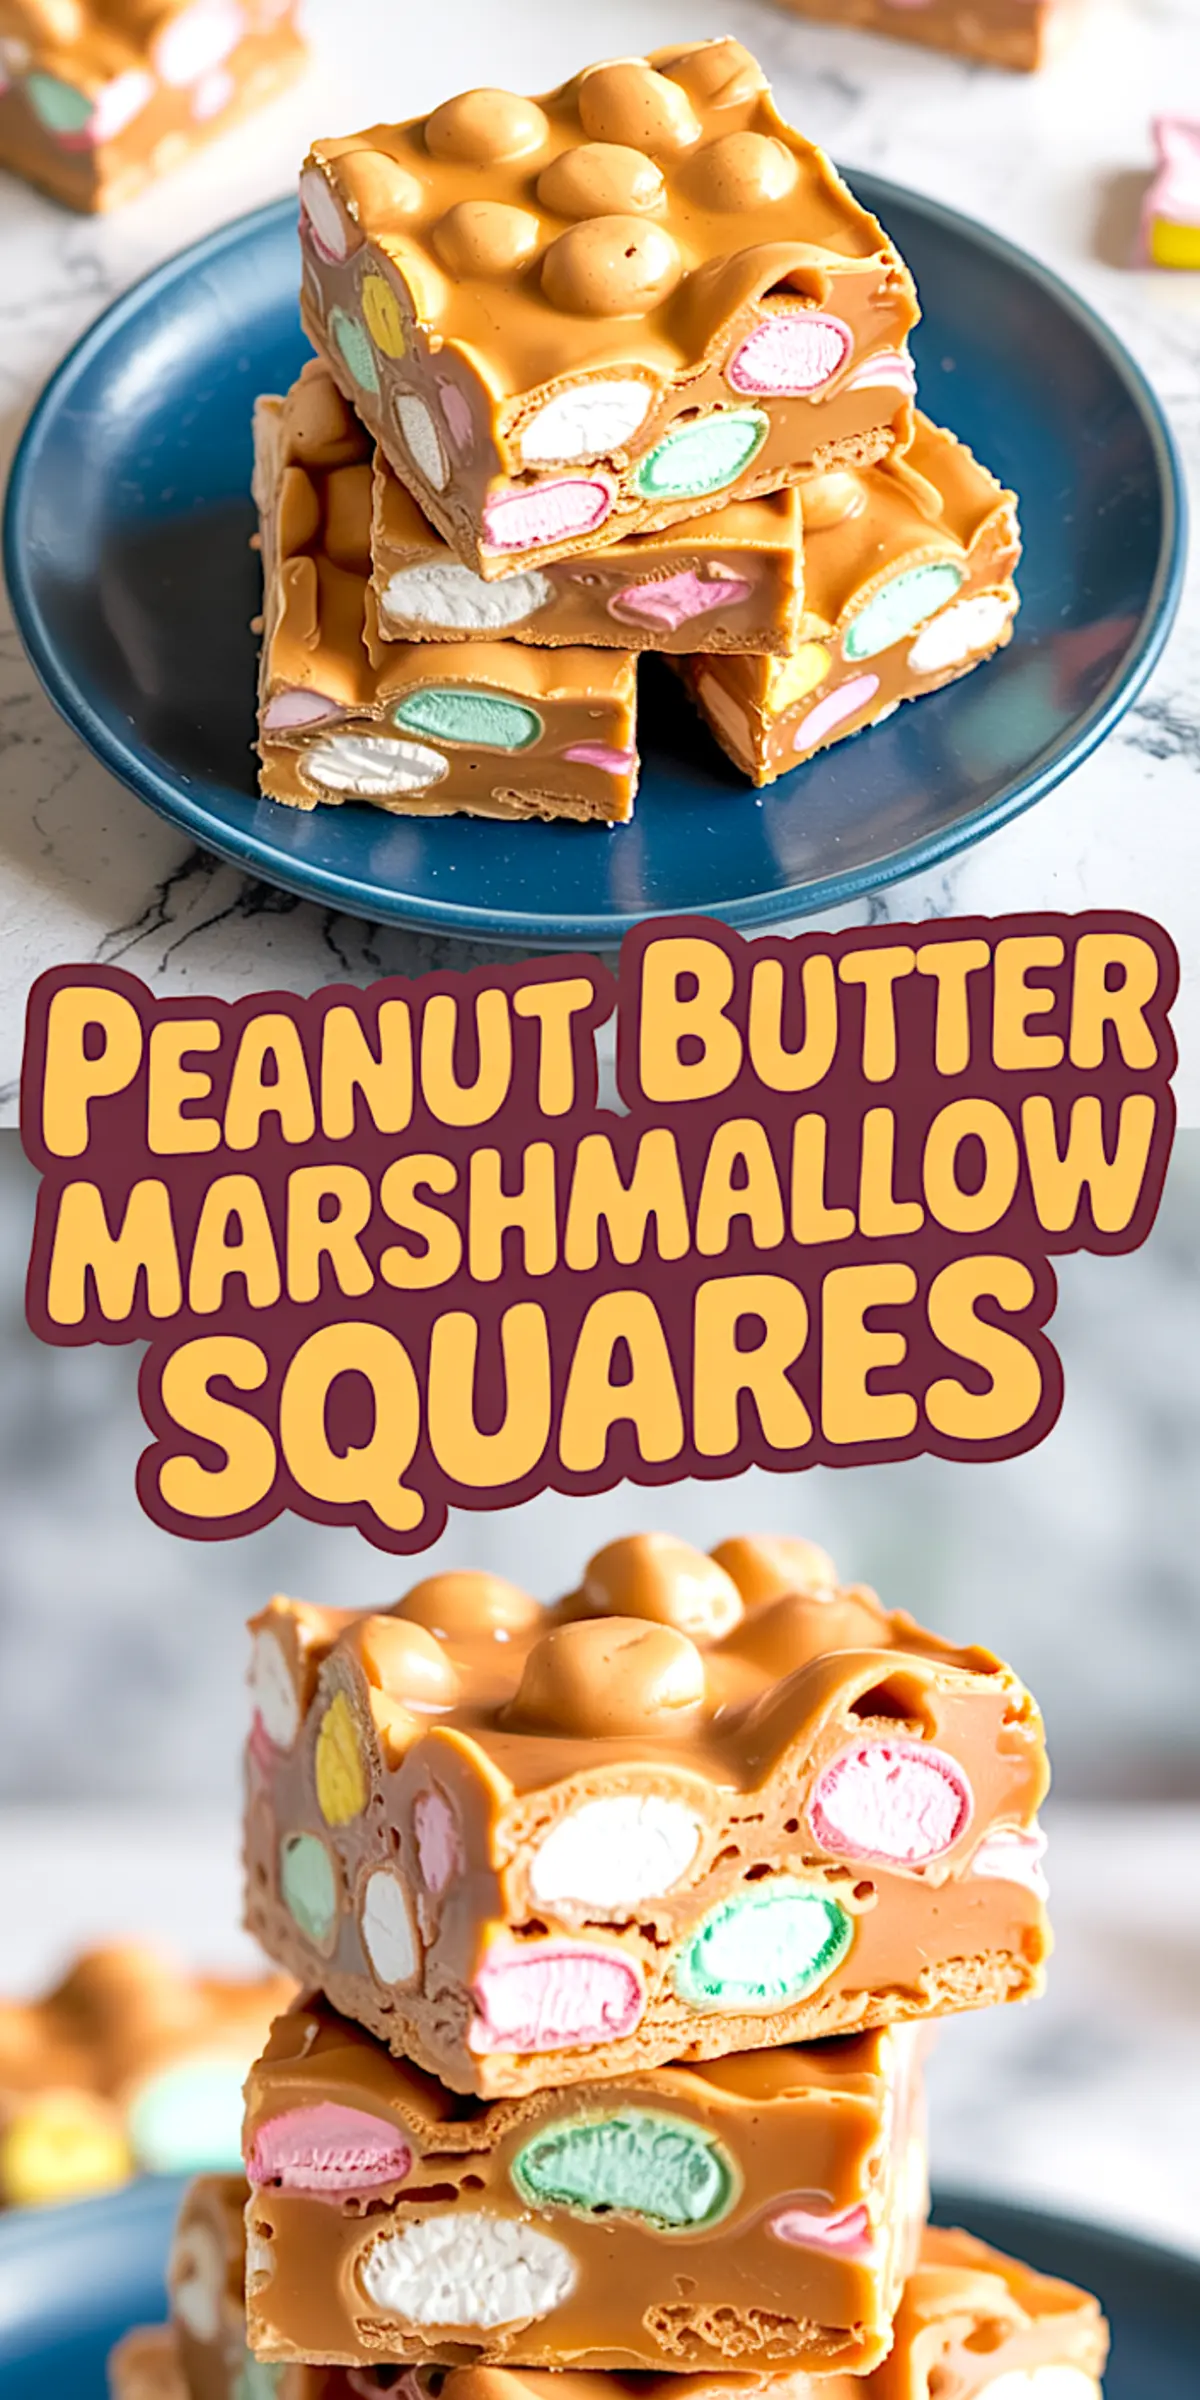
These Peanut Butter Marshmallow Squares deliver more than sweetness. They’re a memory. A flashback to school bake sales, potlucks, and the auntie who always showed up with foil-wrapped bars you couldn’t stop eating.
This article shows you exactly how to make them. You’ll learn the right peanut butter to use, how to avoid melting the marshmallows, and why these Butterscotch Marshmallow Squares are back in every retro recipe collection.
Let’s get into the method. I’ll guide you through it, clearly and confidently, with notes based on my own kitchen experience.
Following a special diet?
Every recipe on this site can be converted to gluten-free, vegan, dairy-free, keto, nut-free or egg-free with adjusted ratios so nothing falls flat.
Try the Recipe Converter →CHOOSE THE RIGHT PAN AND LINE IT WELL
An 8×8 or 9×9-inch square pan works here. You need parchment paper, not foil or wax paper.
Leave a generous overhang on two sides. This creates handles that make lifting the chilled bars easy.
If the paper shifts while you press in the mixture, clip the edges with binder clips until the dessert sets.
MELT THE BASE MIXTURE SLOWLY AND SMOOTHLY
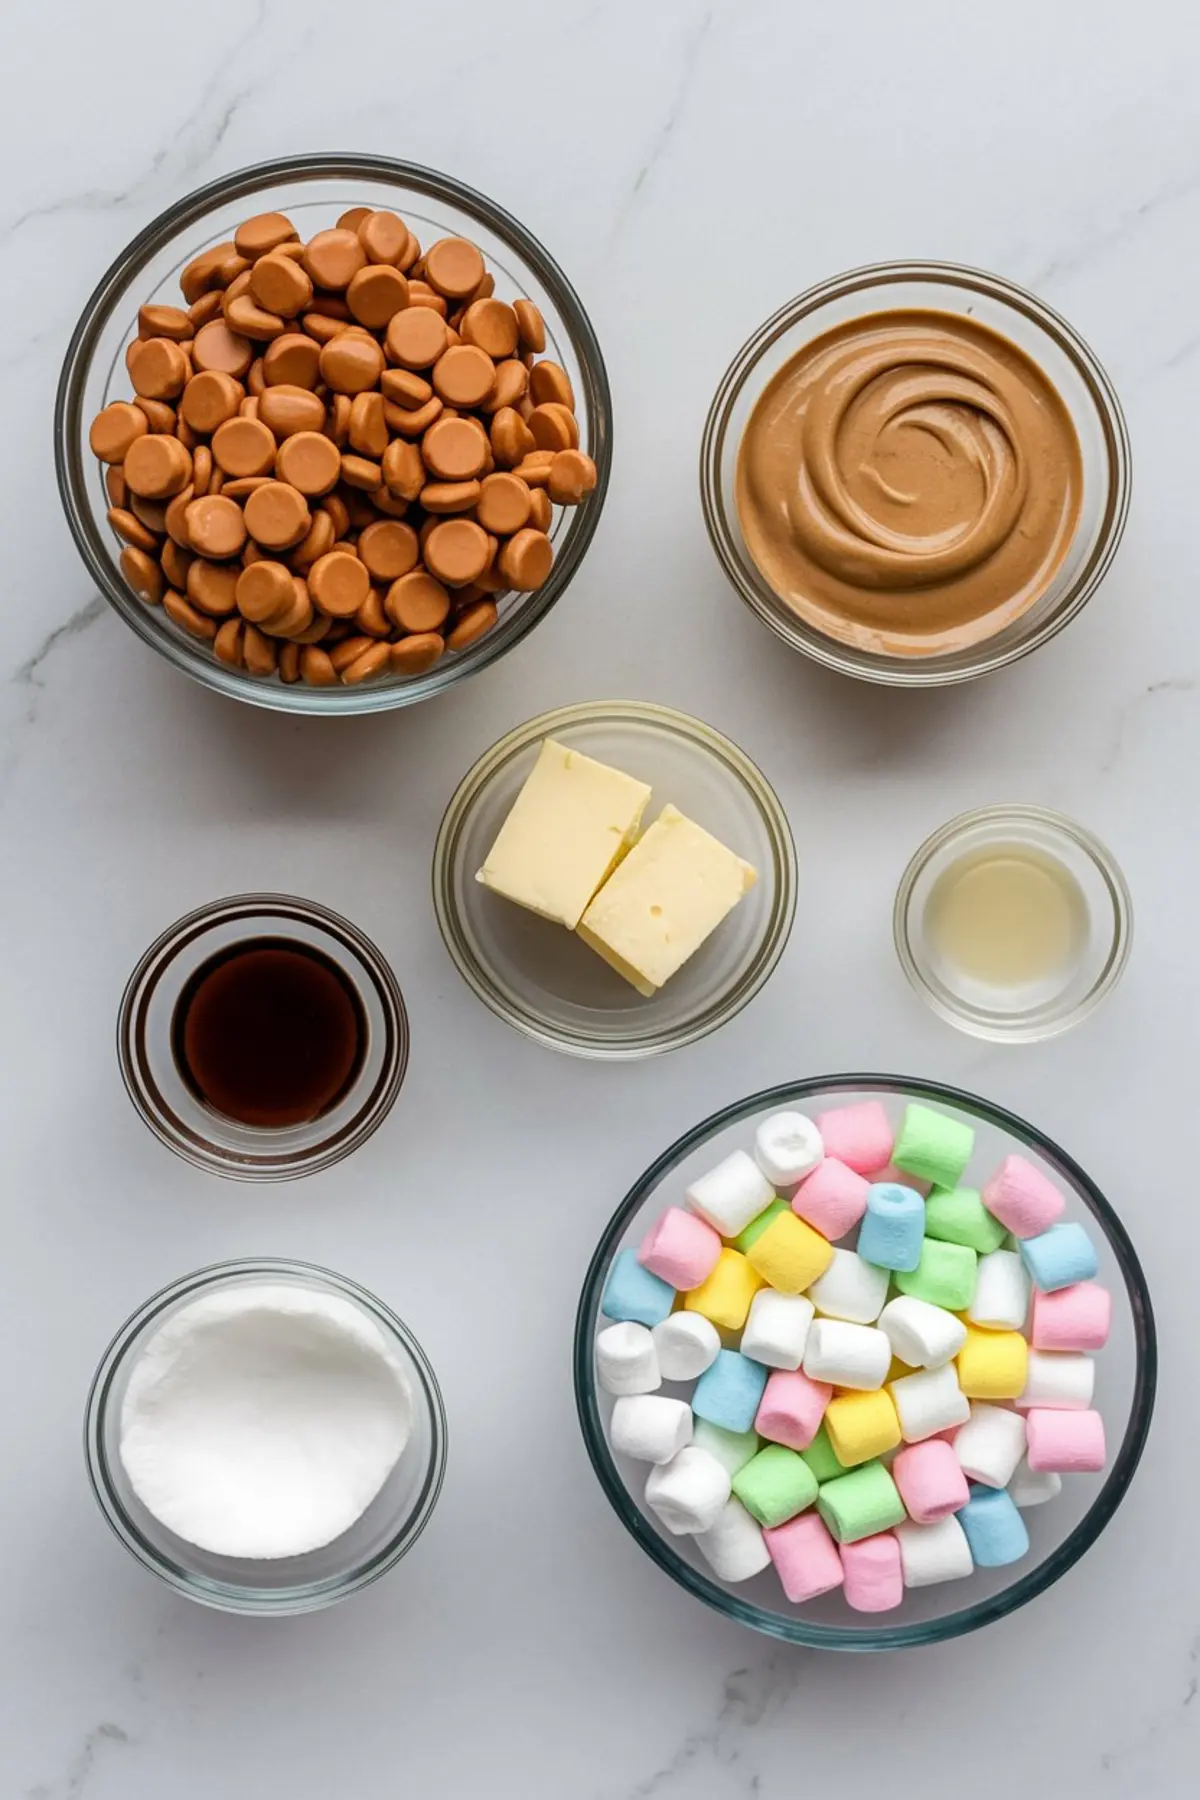
Use a medium saucepan on low heat. Combine two cups of butterscotch chips, half a cup of smooth (not natural) peanut butter, and a quarter cup of unsalted butter.
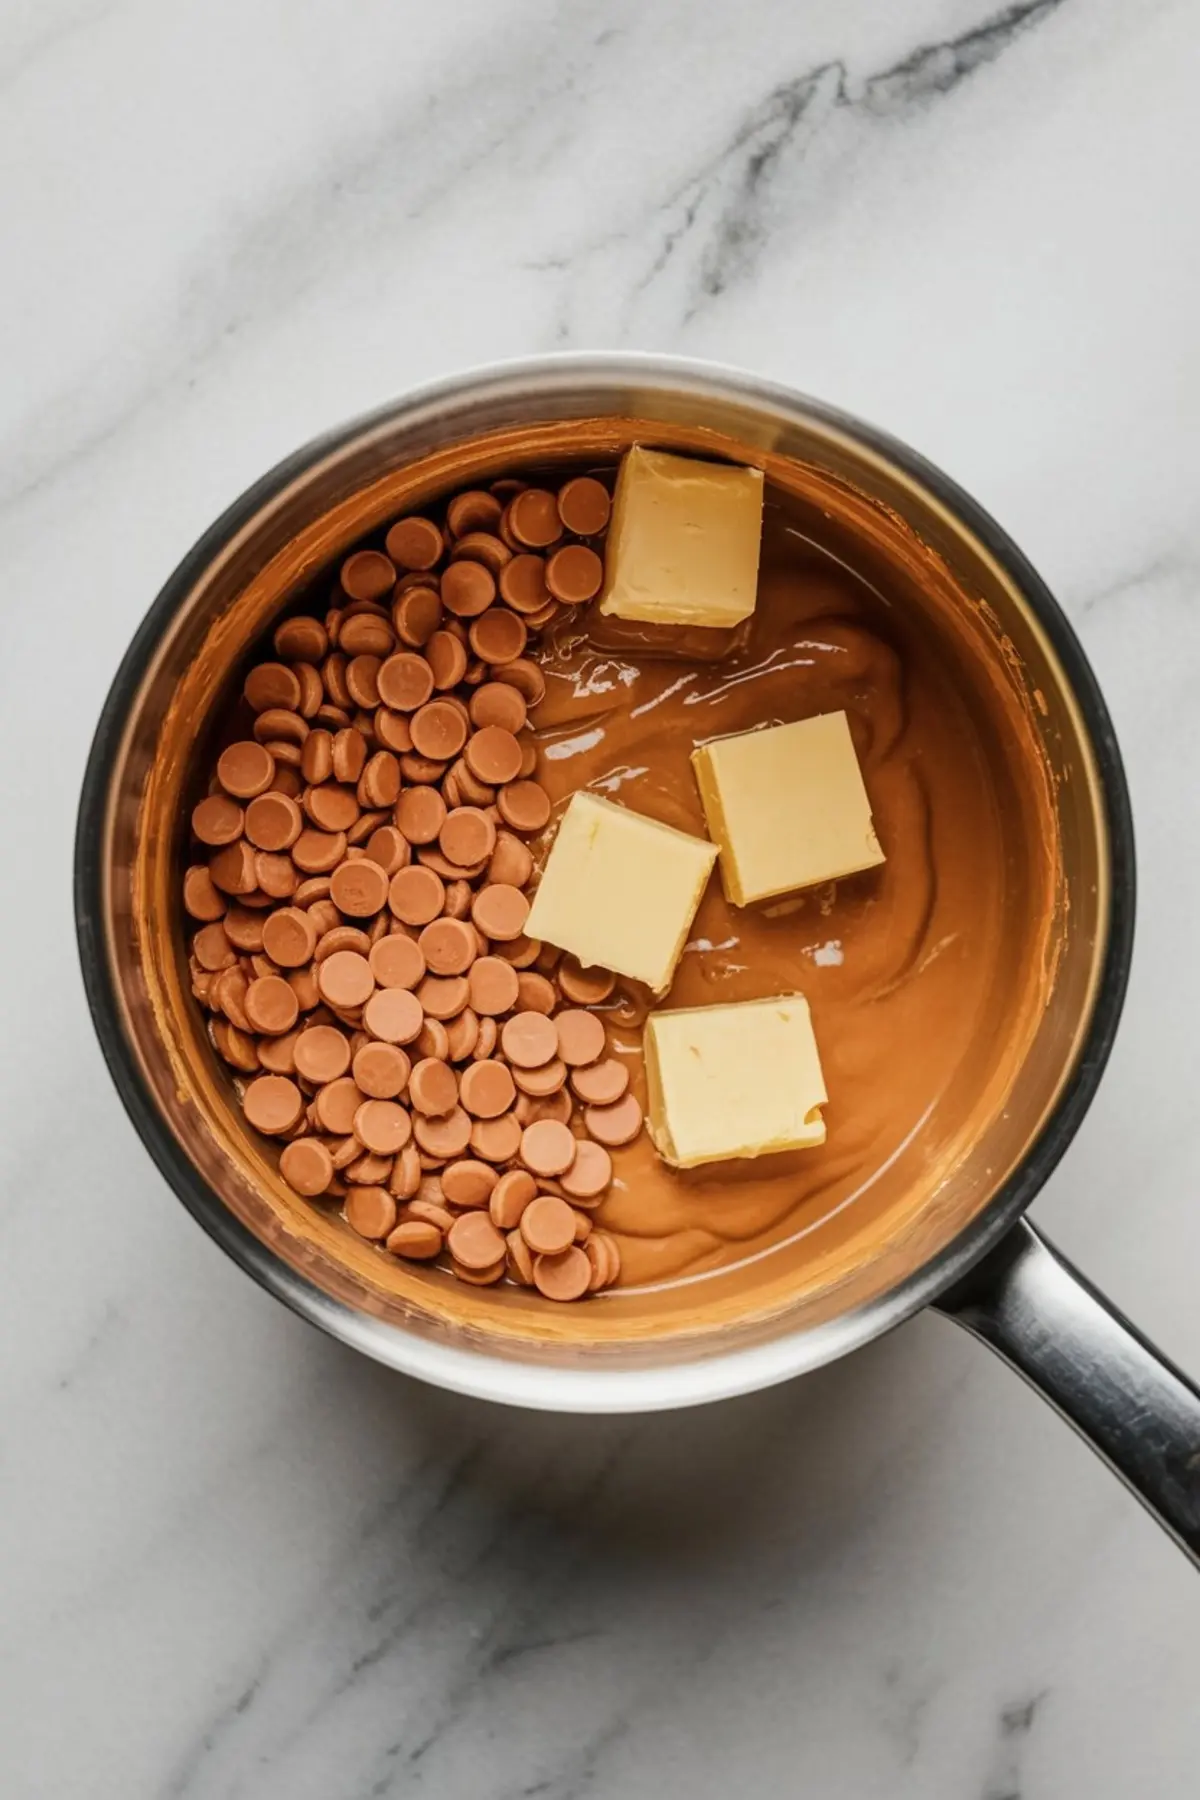
Stir constantly. The moment the mixture looks glossy and smooth, remove it from the heat. Don’t keep cooking it—it doesn’t need to bubble.
I’ve made the mistake of letting it simmer. That led to a greasy texture and a dull finish. Stop once it’s melted. That’s the secret.
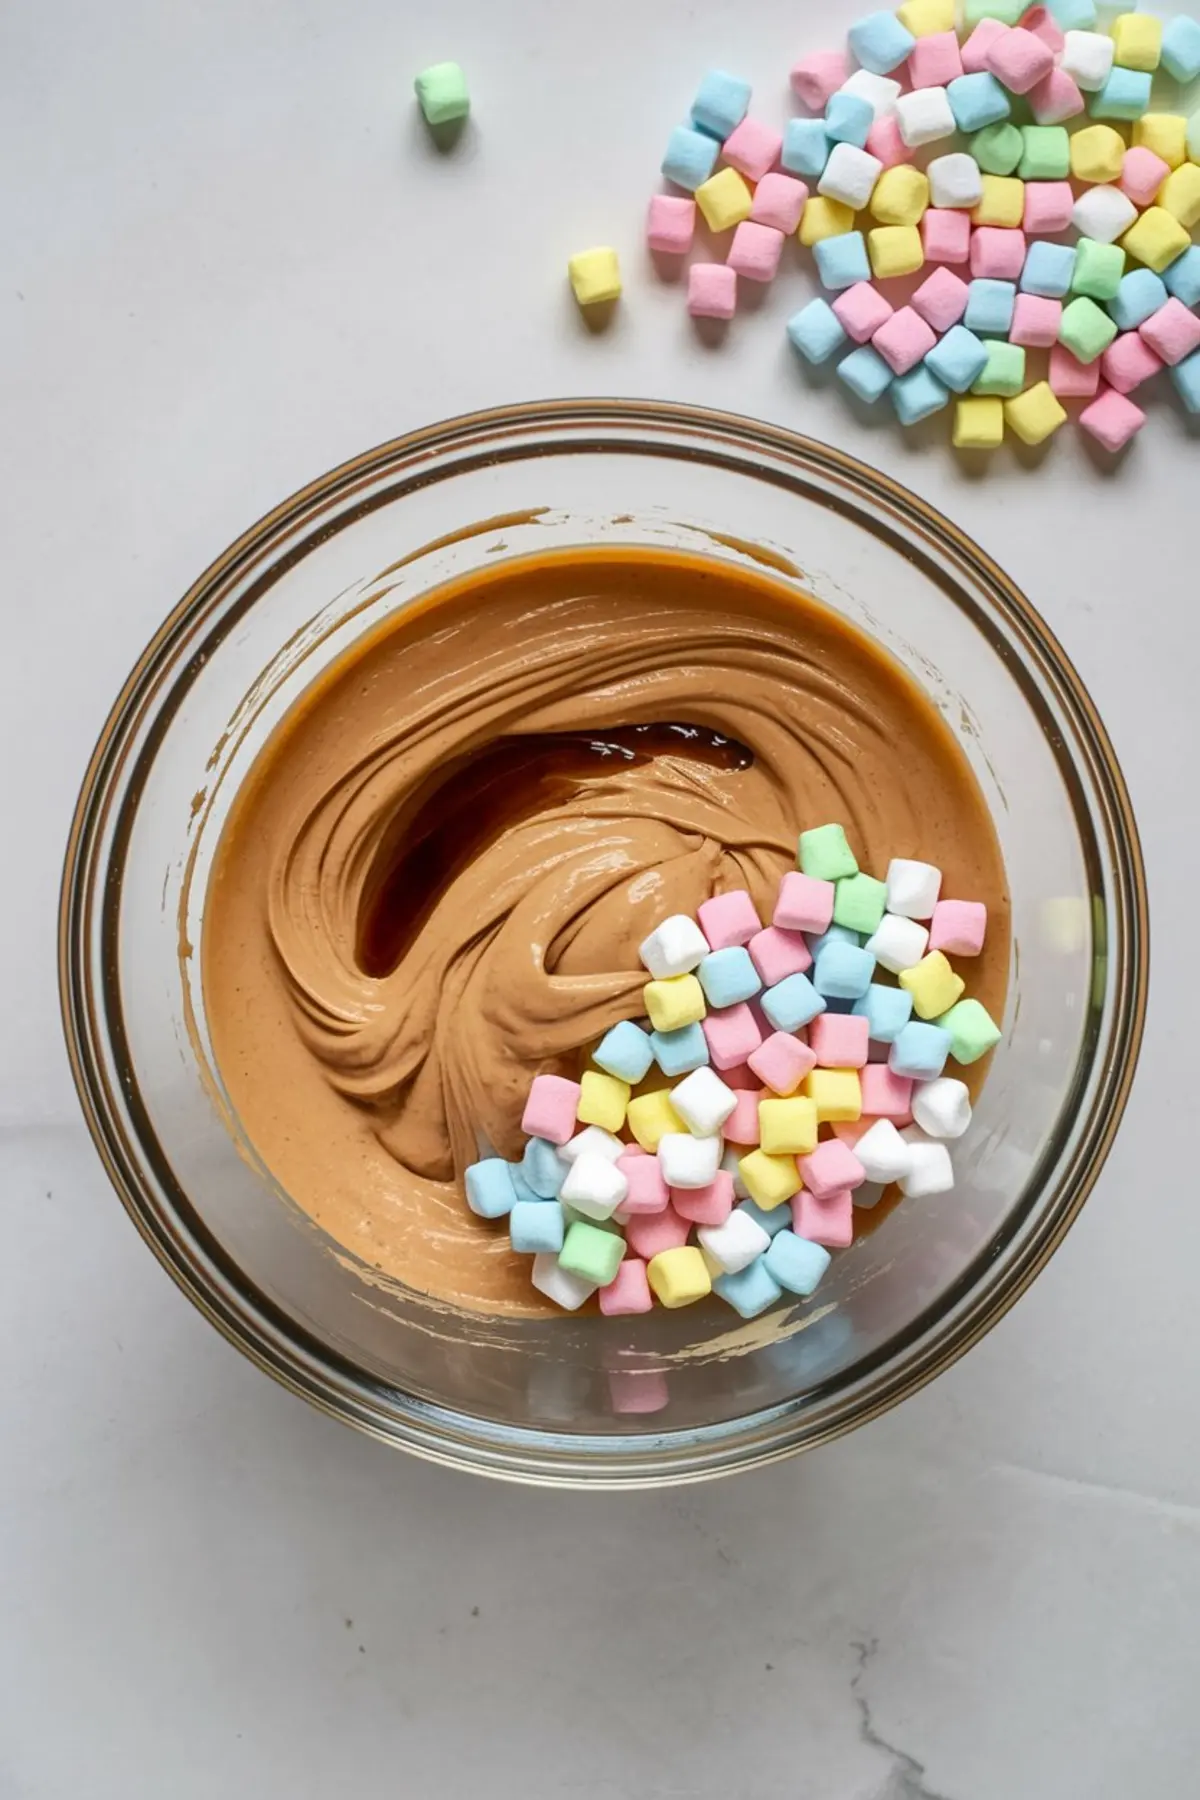
LET THE MIXTURE COOL BEFORE ADDING MARSHMALLOWS
Wait about ten minutes.
You want the base to feel warm but not hot. If you add marshmallows too early, they’ll melt, and you’ll end up with a muddy, sticky mess instead of distinct, colorful Confetti Squares Butterscotch style.
I touch the side of the pan with my knuckle. If it feels like bathwater, it’s safe to stir in the vanilla and fold the marshmallows.
FRESH VS. OLD MARSHMALLOWS: ONE MAKES OR BREAKS IT
I’ve tested this recipe with marshmallows from a bag I forgot in the back of the pantry.
They were dry, slightly stale, and clumped together. The result? A lumpy texture and uneven color.
Use soft, fresh mini rainbow marshmallows. They distribute better, absorb the flavor, and give that bright pastel look that makes these Marshmallow Butterscotch Squares stand out.
ADD THE MARSHMALLOWS GENTLY
After folding in the vanilla, pour in four cups of marshmallows.
Use a silicone spatula. Work in slow, wide strokes. The idea is to coat the marshmallows, not crush them.
They should stay whole. That’s what gives the squares their chewy bite and clean cut edges.
PRESS INTO PAN AND CHILL TO SET
Spoon the mixture into your lined pan.
Use the back of a spoon or offset spatula to press it gently, without packing it down too much.
You want the squares to hold shape but still feel soft when you bite through. That light touch makes a big difference.
Chill for at least 90 minutes. Two hours is safer, especially if your kitchen runs warm.
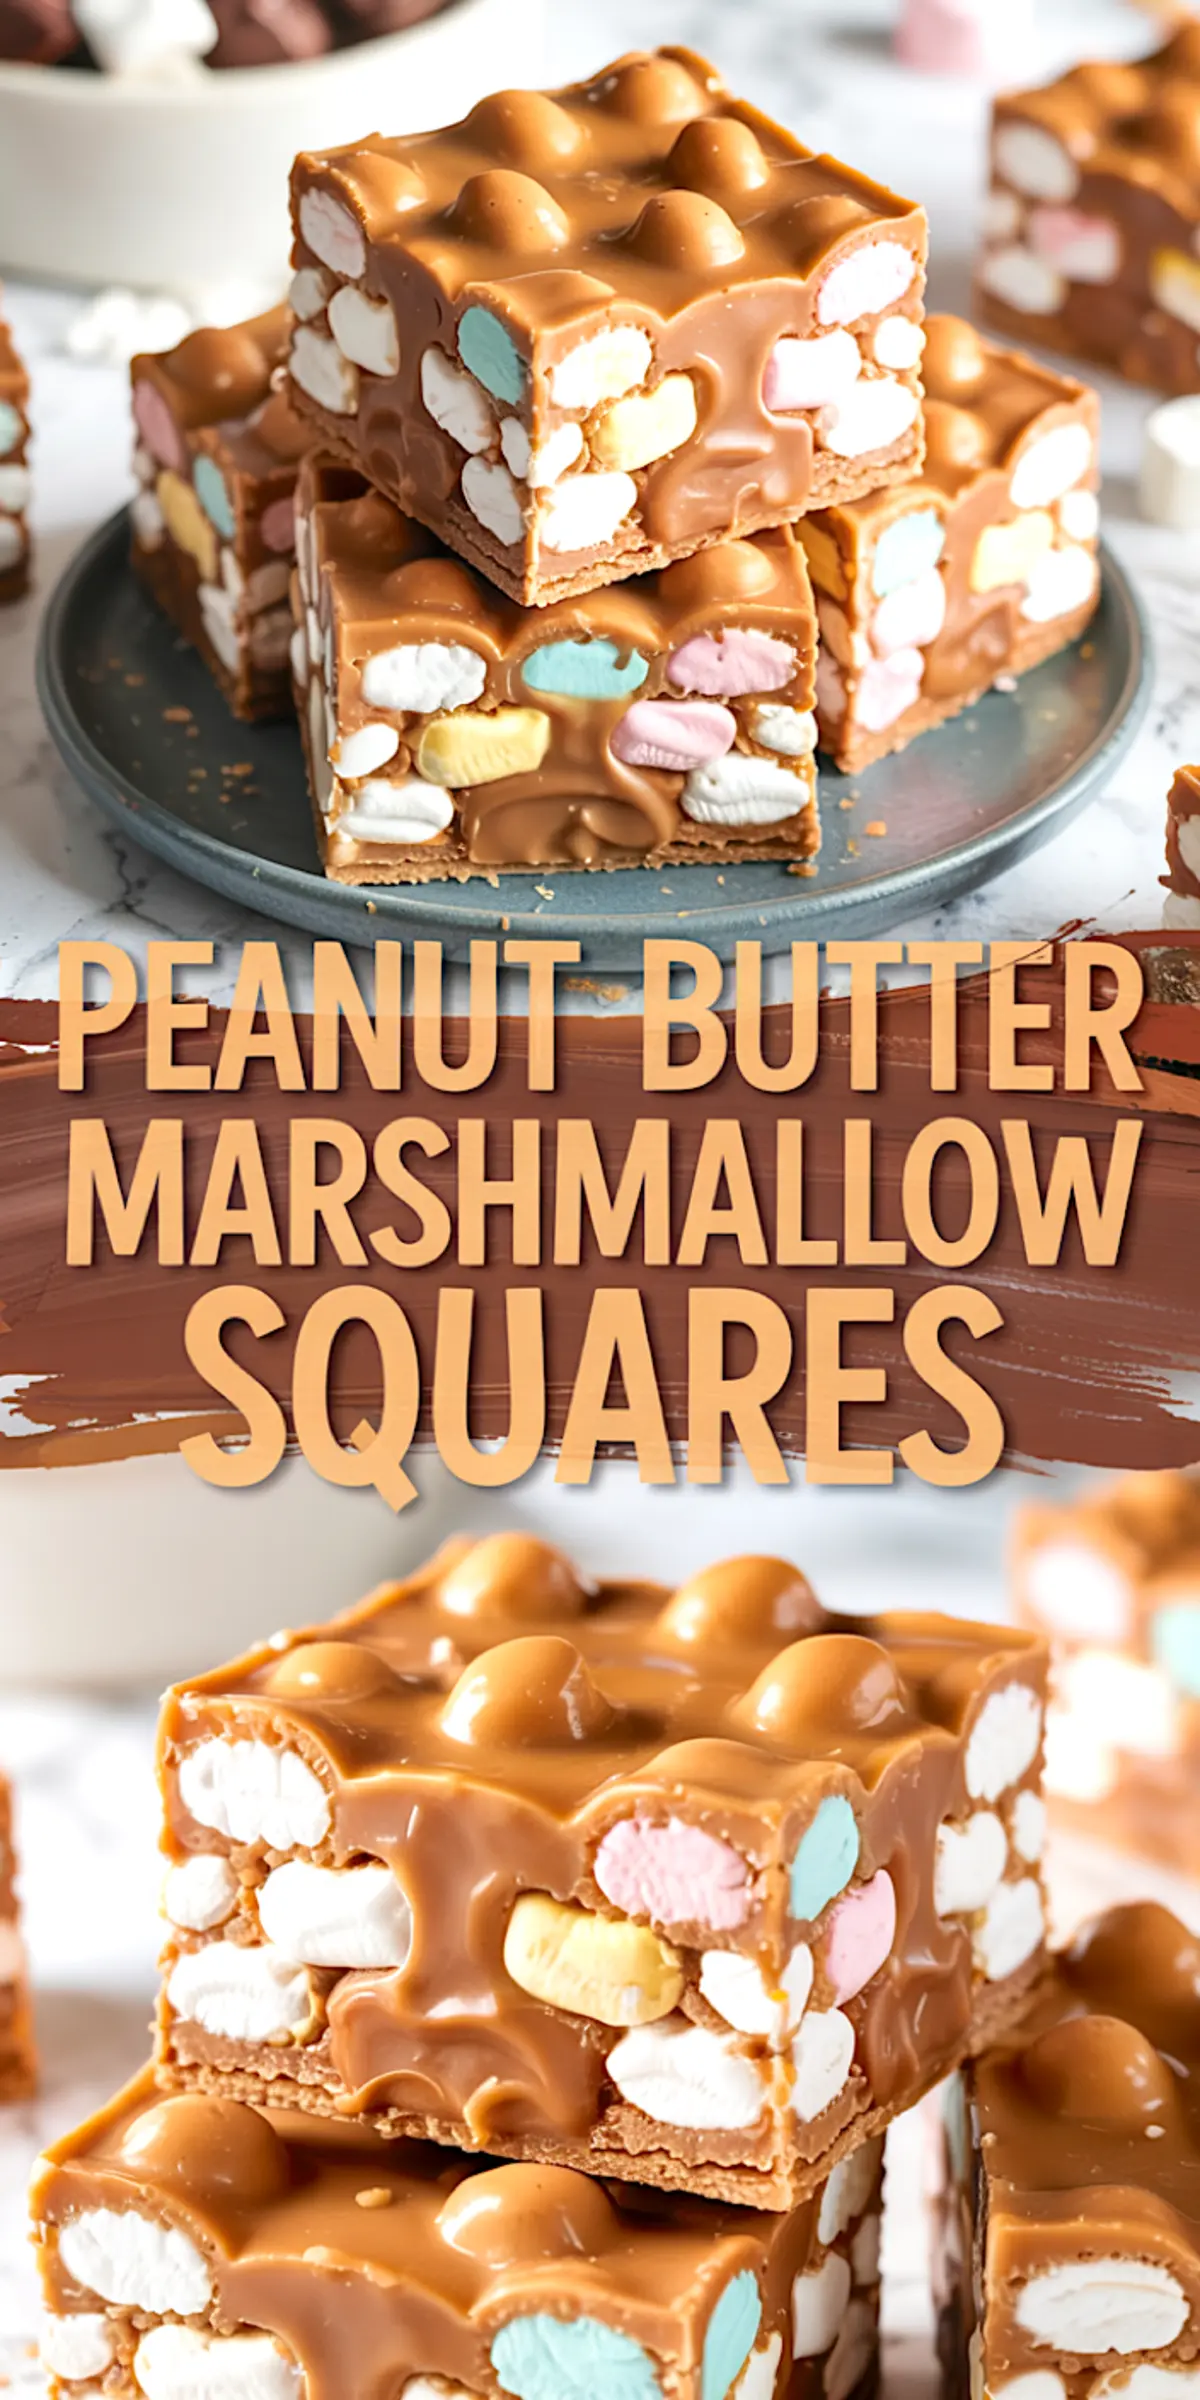
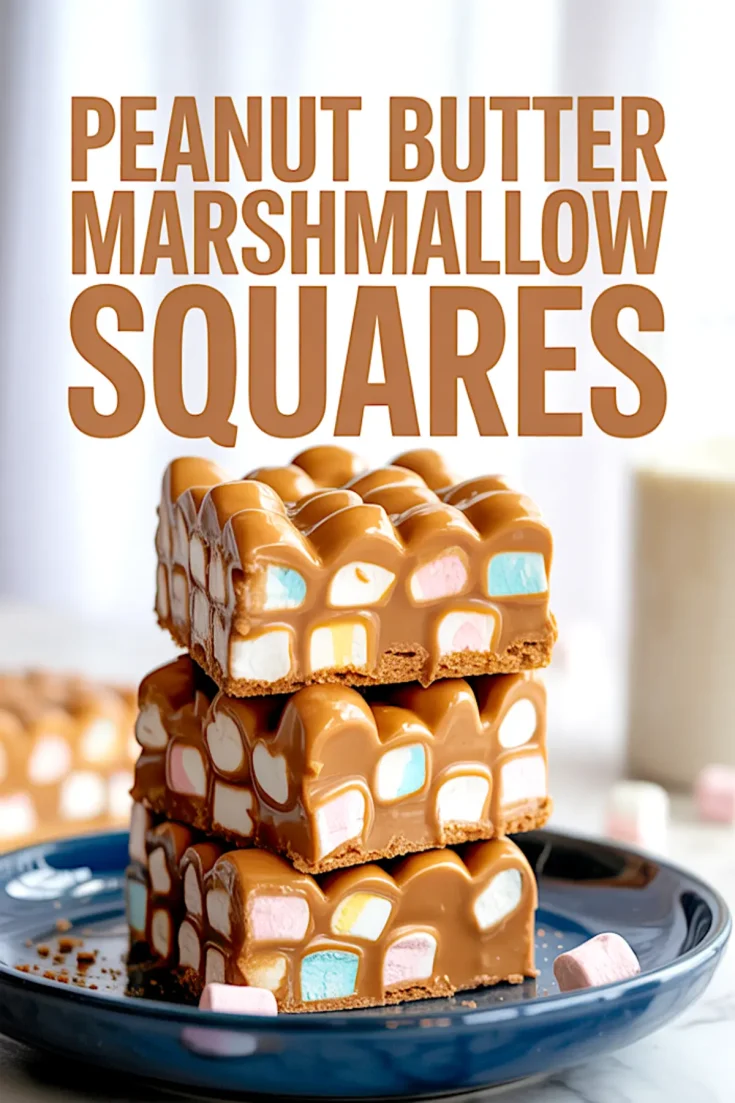
CUT WITH CARE FOR CLEAN EDGES
Once the bars are fully firm, lift them from the pan using the parchment paper.
Use a sharp knife and wipe it clean between each cut. This step matters. It keeps your Chocolate Marshmallow Squares looking neat, not smeared.
I cut them into 16 small squares. They’re rich. One piece is usually enough—unless you’re me, testing “just one more” for quality control.
SERVING SUGGESTIONS AND STORAGE NOTES
These bars hold up well at room temperature, but I prefer serving them slightly chilled.
They go fast at bake sales and parties. Pack them in parchment squares for easy sharing.
Store in an airtight container in the fridge for up to a week. You can freeze them, too. Just wrap each bar tightly and thaw in the fridge before serving.
Compared to heavier treats like Peanut Butter Cornflake Bars or Mars Bar Squares, these feel lighter and chewier.
They’re a middle ground—firm but not dense, sweet but with enough peanut butter salt to keep them balanced.
A FEW MORE IDEAS TO TRY NEXT
If you love these Marshmallow Peanutbutter Squares, you’ll probably enjoy my Reese’s Peanut Butter Cake. It’s another no-fuss, high-flavor dessert.
For something quicker, try the Peanut Butter No Bake Cookies or Peanut Butter Rice Krispie Squares.
If you want a softer bite, the Peanut Butter Cheesecake is a chilled option with a creamy center.
SAVE THIS RECIPE FOR LATER + SHARE YOUR THOUGHTS
Pin this to your dessert or no-bake boards so it’s easy to find the next time you need a five-ingredient crowd-pleaser.
If you’ve made these Peanut Butter Marshmallow Squares—or put your own spin on them—tell me how it went. I’d love to hear your tips, your swaps, or even the stories behind your batch.
Drop a comment below. Let’s make this a space to swap notes.
Peanut Butter Marshmallow Squares
These no-bake peanut butter marshmallow squares are a classic treat made with just five ingredients. They combine creamy peanut butter, sweet butterscotch chips, and soft, colorful mini marshmallows for a chewy and satisfying texture. Quick to prepare and always a crowd-pleaser, they are perfect for parties, potlucks, or a simple dessert at home.
Ingredients
- 2 cups butterscotch chips
- 1/2 cup smooth peanut butter (not natural)
- 1/4 cup unsalted butter
- 1/2 teaspoon pure vanilla extract
- 4 cups mini rainbow marshmallows
Instructions
- PREPARE THE PAN: Line an 8x8-inch or 9x9-inch square baking pan with parchment paper, allowing extra on the sides to lift the bars out easily once set.
- MELT THE BASE MIXTURE: In a medium saucepan over low heat, combine the butterscotch chips, peanut butter, and butter. Stir constantly until the mixture is completely melted and smooth. Remove from heat as soon as the mixture is uniform and glossy.
- COOL SLIGHTLY: Allow the mixture to cool for 8 to 10 minutes. It should remain pourable but not be hot to the touch. This prevents the marshmallows from melting when added.
- ADD VANILLA AND MARSHMALLOWS: Stir in the vanilla extract. Gently fold in the mini rainbow marshmallows using a spatula, being careful not to crush them.
- PRESS INTO PAN: Transfer the mixture to the prepared pan. Press it evenly into the pan with a spatula or the back of a spoon, spreading it to the corners without compressing the marshmallows too much.
- CHILL AND SET: Refrigerate the pan for 1 to 2 hours until the bars are firm and set all the way through.
- CUT AND SERVE: Lift the set mixture out of the pan using the parchment overhang. Use a sharp knife to cut into 16 squares, cleaning the knife between cuts for neat edges.
Notes
Use pastel mini marshmallows for the best color and texture. Avoid using regular-sized marshmallows as they are too bulky and won’t distribute evenly.
Nutrition Information
Yield
24Serving Size
1Amount Per Serving Calories 152Total Fat 9gSaturated Fat 5gTrans Fat 0gUnsaturated Fat 3gCholesterol 5mgSodium 45mgCarbohydrates 18gFiber 0gSugar 15gProtein 2g