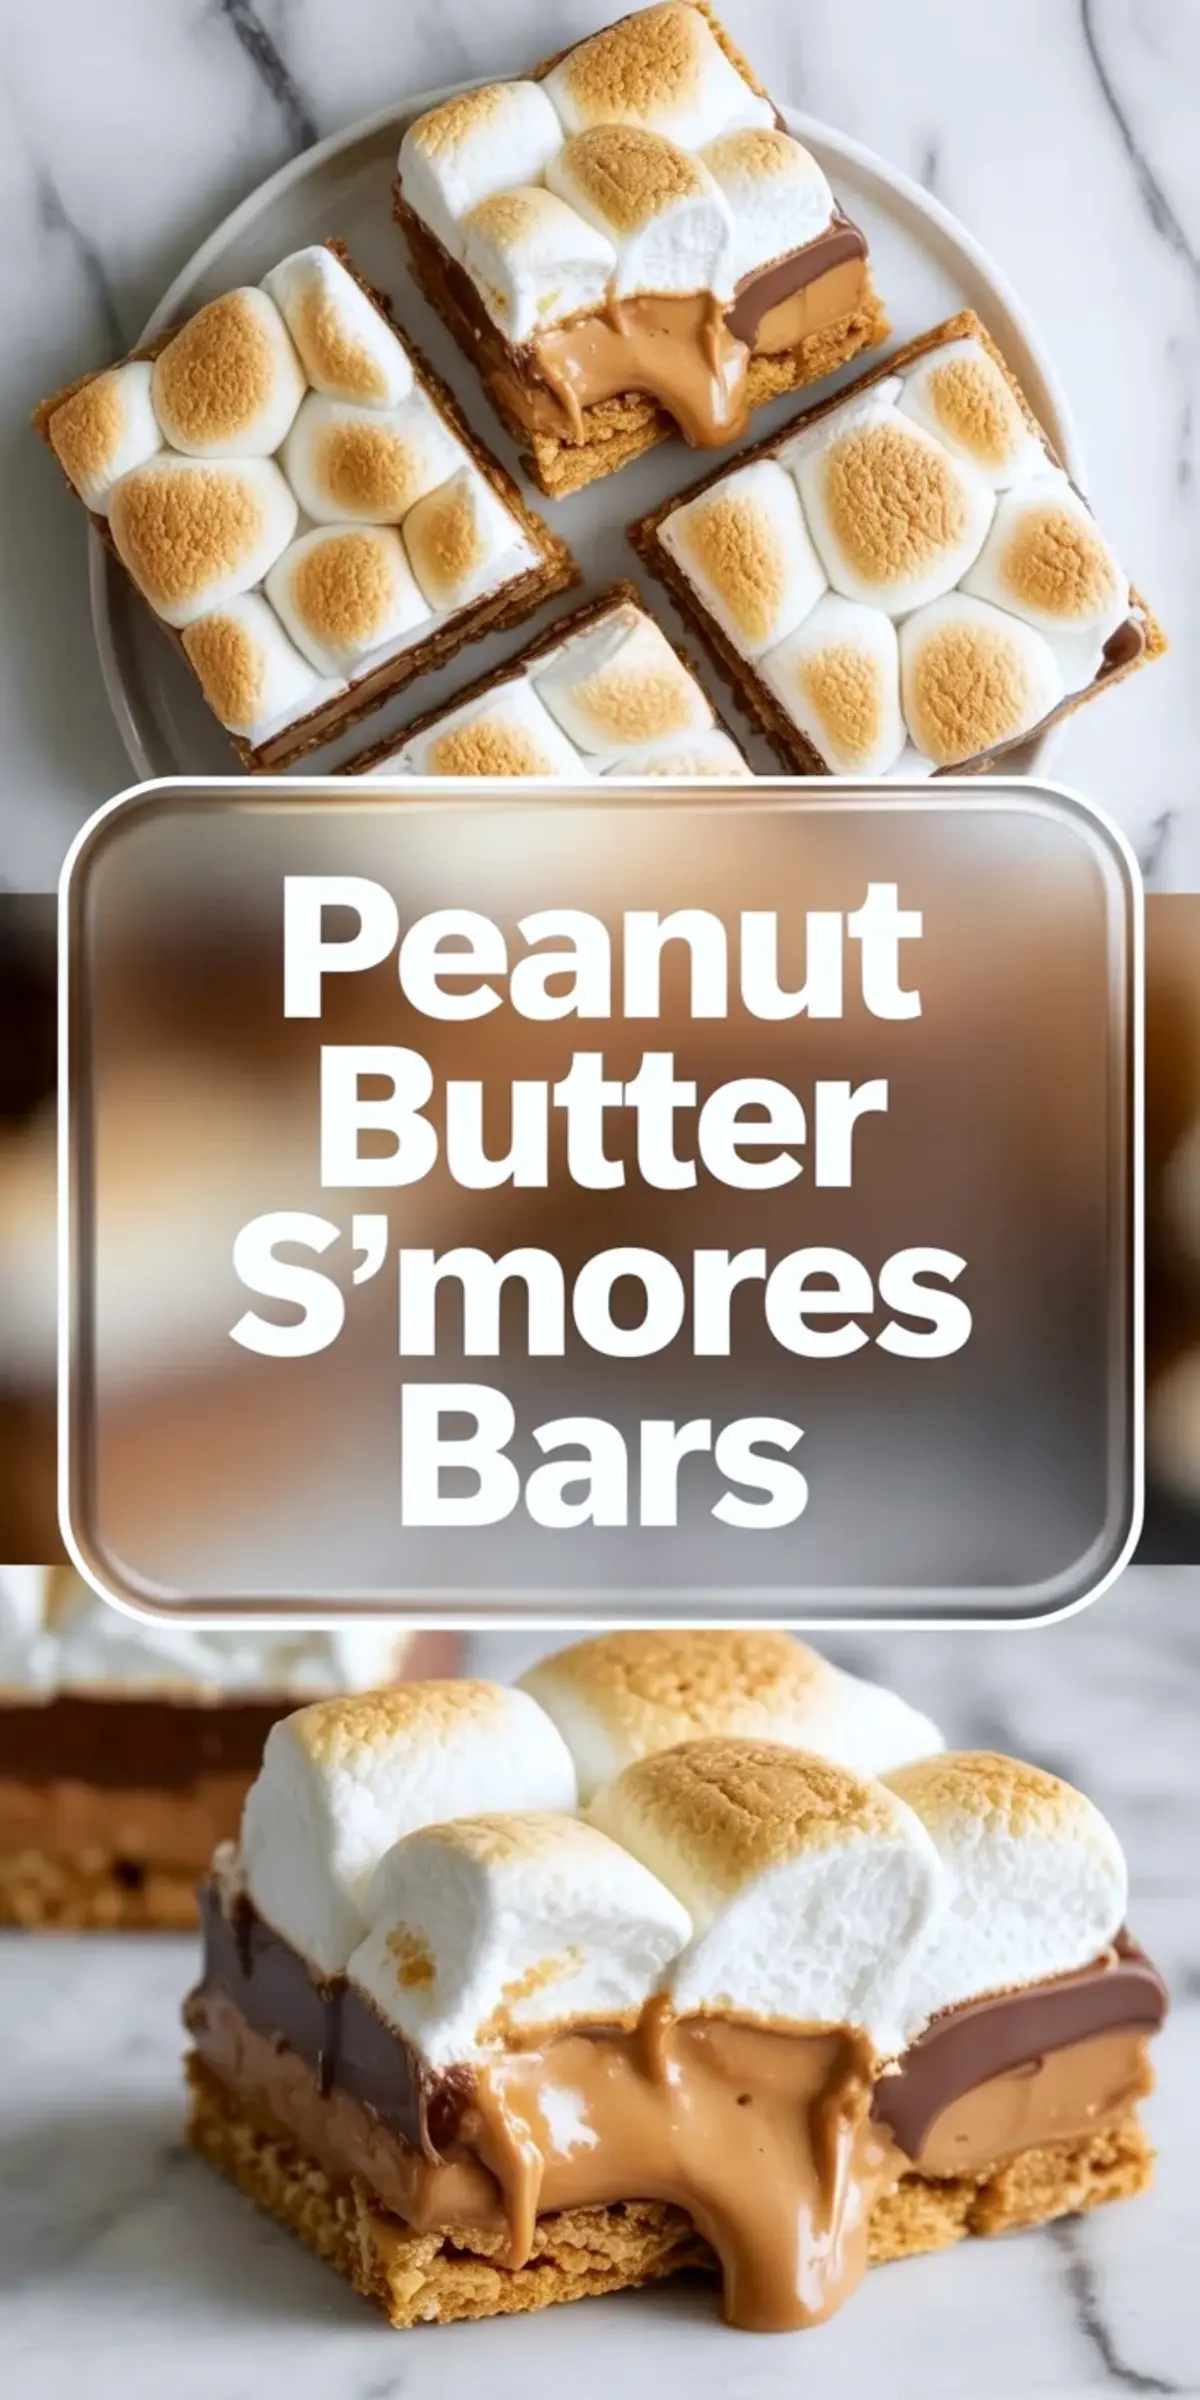
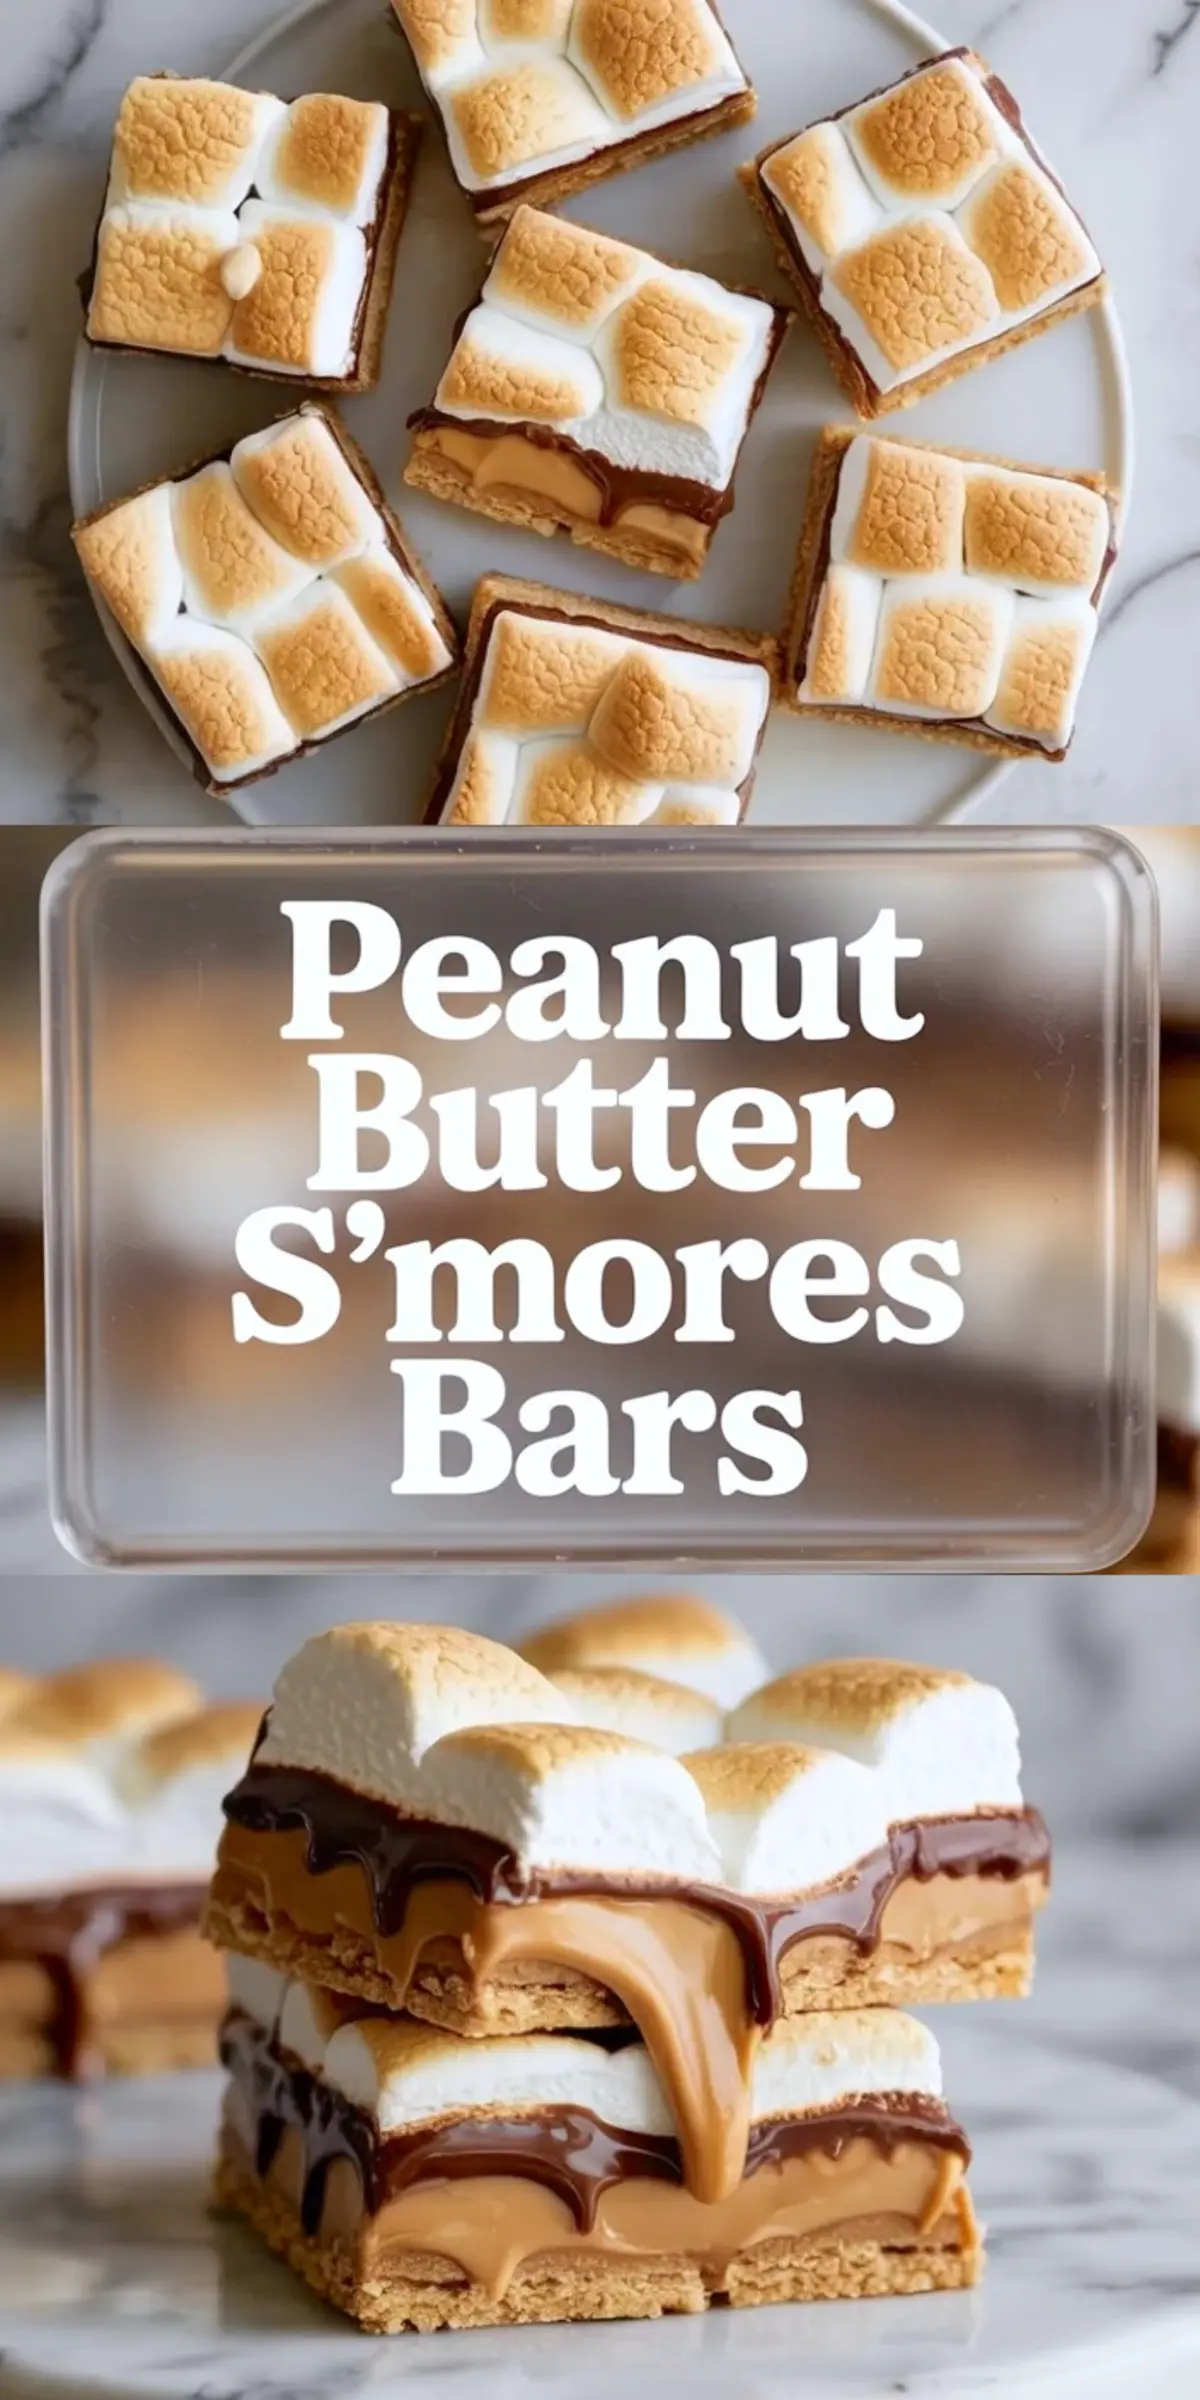
Peanut butter s’mores bars take everything people love about classic s’mores and turn it into a layered dessert that is easier to bake for a group. Instead of juggling graham crackers over a fire, you get a buttery graham crust, a thick peanut butter layer, melted chocolate, and a full marshmallow topping baked into one pan. The result is gooey, rich, and a little more substantial than the usual campfire version.
What makes these bars especially good is the way peanut butter changes the balance. It adds creaminess, a little salt, and enough depth to keep the marshmallow and chocolate from tasting one-note sweet. If you already like crowd-friendly tray bakes such as chocolate cookie dough cheesecake bars, these peanut butter smores bars belong in the same keep close dessert file.
Following a special diet?
Every recipe on this site can be converted to gluten-free, vegan, dairy-free, keto, nut-free or egg-free with adjusted ratios so nothing falls flat.
Try the Recipe Converter →Why Peanut Butter Works So Well in S’mores Bars
Classic s’mores are all about contrast between crisp graham crackers, melted chocolate, and sticky marshmallow. Peanut butter fits that structure naturally because it brings a creamy middle layer that melts just enough without disappearing. It also adds a roasted flavor that makes the chocolate taste deeper and the marshmallow topping feel less sugary on the palate.
That is why peanut butter s’mores bars usually feel more finished than a basic s’mores bar. The extra layer gives each bite more body, and it helps the bars slice into defined squares once cooled. You still get the nostalgic flavor people expect, just in a richer bar dessert that feels made for sharing.
Ingredients That Matter Most
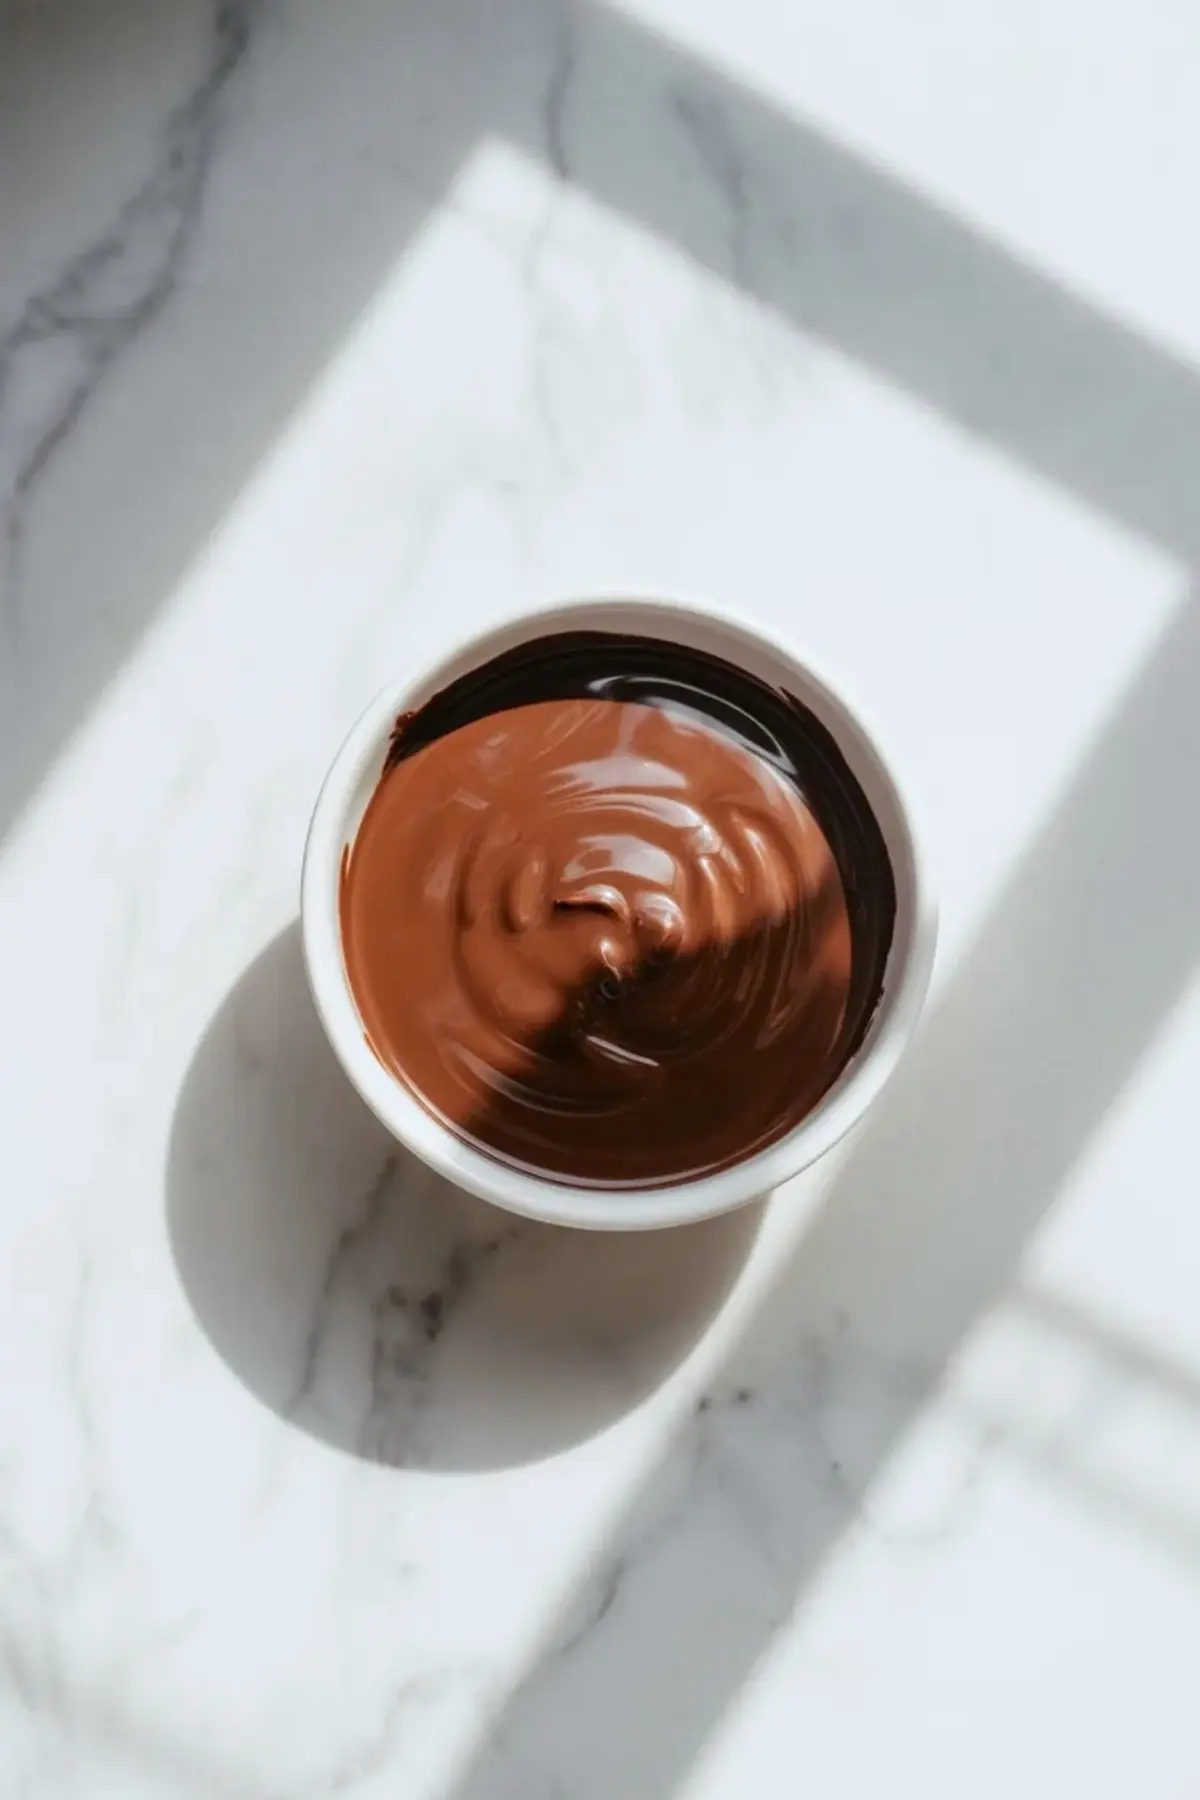
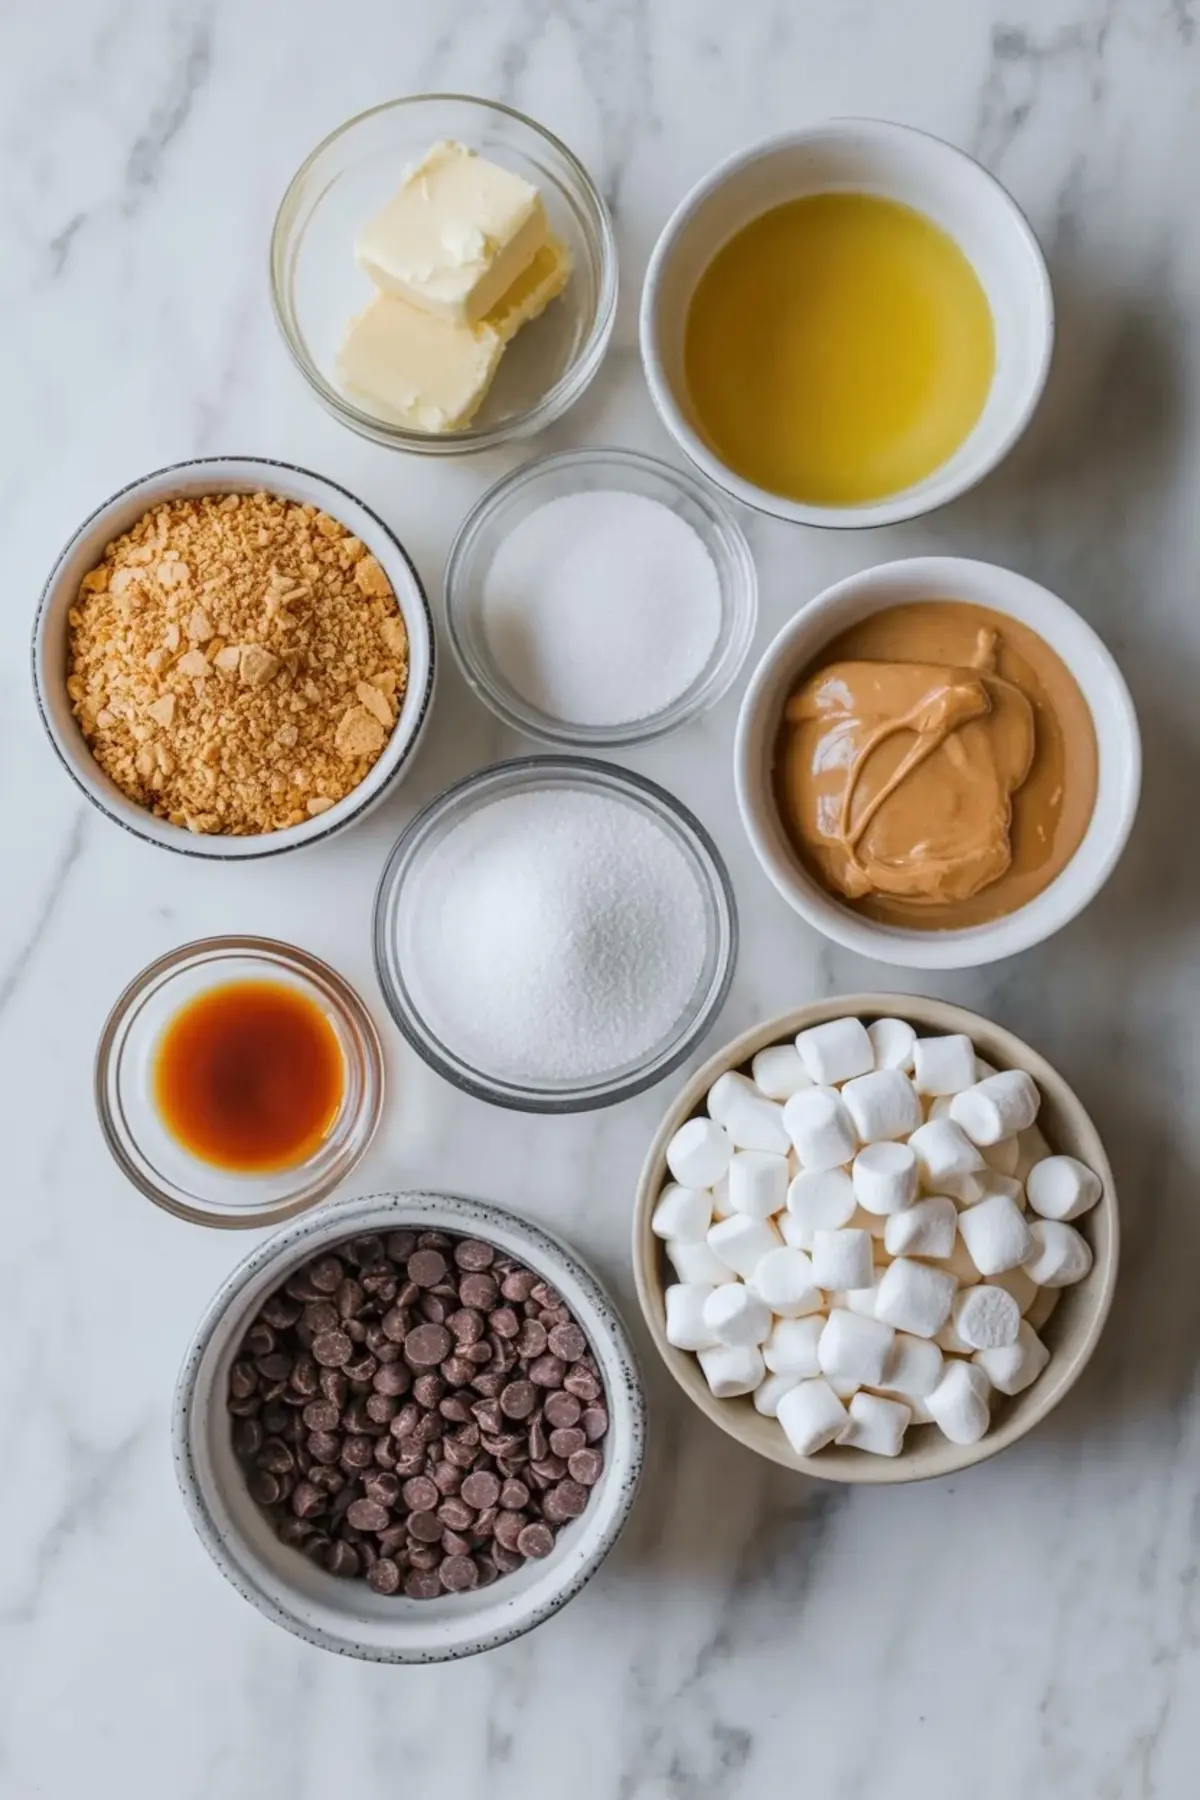
The graham cracker crust needs enough butter to hold together cleanly and enough sugar to bake up lightly crisp instead of dry. Creamy peanut butter works best for the middle layer because it spreads more evenly and gives the bars that smooth soft center. For the chocolate layer, milk chocolate keeps the bars closer to classic s’mores flavor, though semisweet can work if you want a little less sweetness overall.
Mini marshmallows give you the most even coverage across the top and toast more reliably than larger ones in this format. Vanilla helps round out the peanut butter layer, and a little powdered sugar gives that middle section more structure. If you like marshmallow-heavy desserts too, marshmallow brownies are another strong save.
Building the Layers Without a Messy Pan
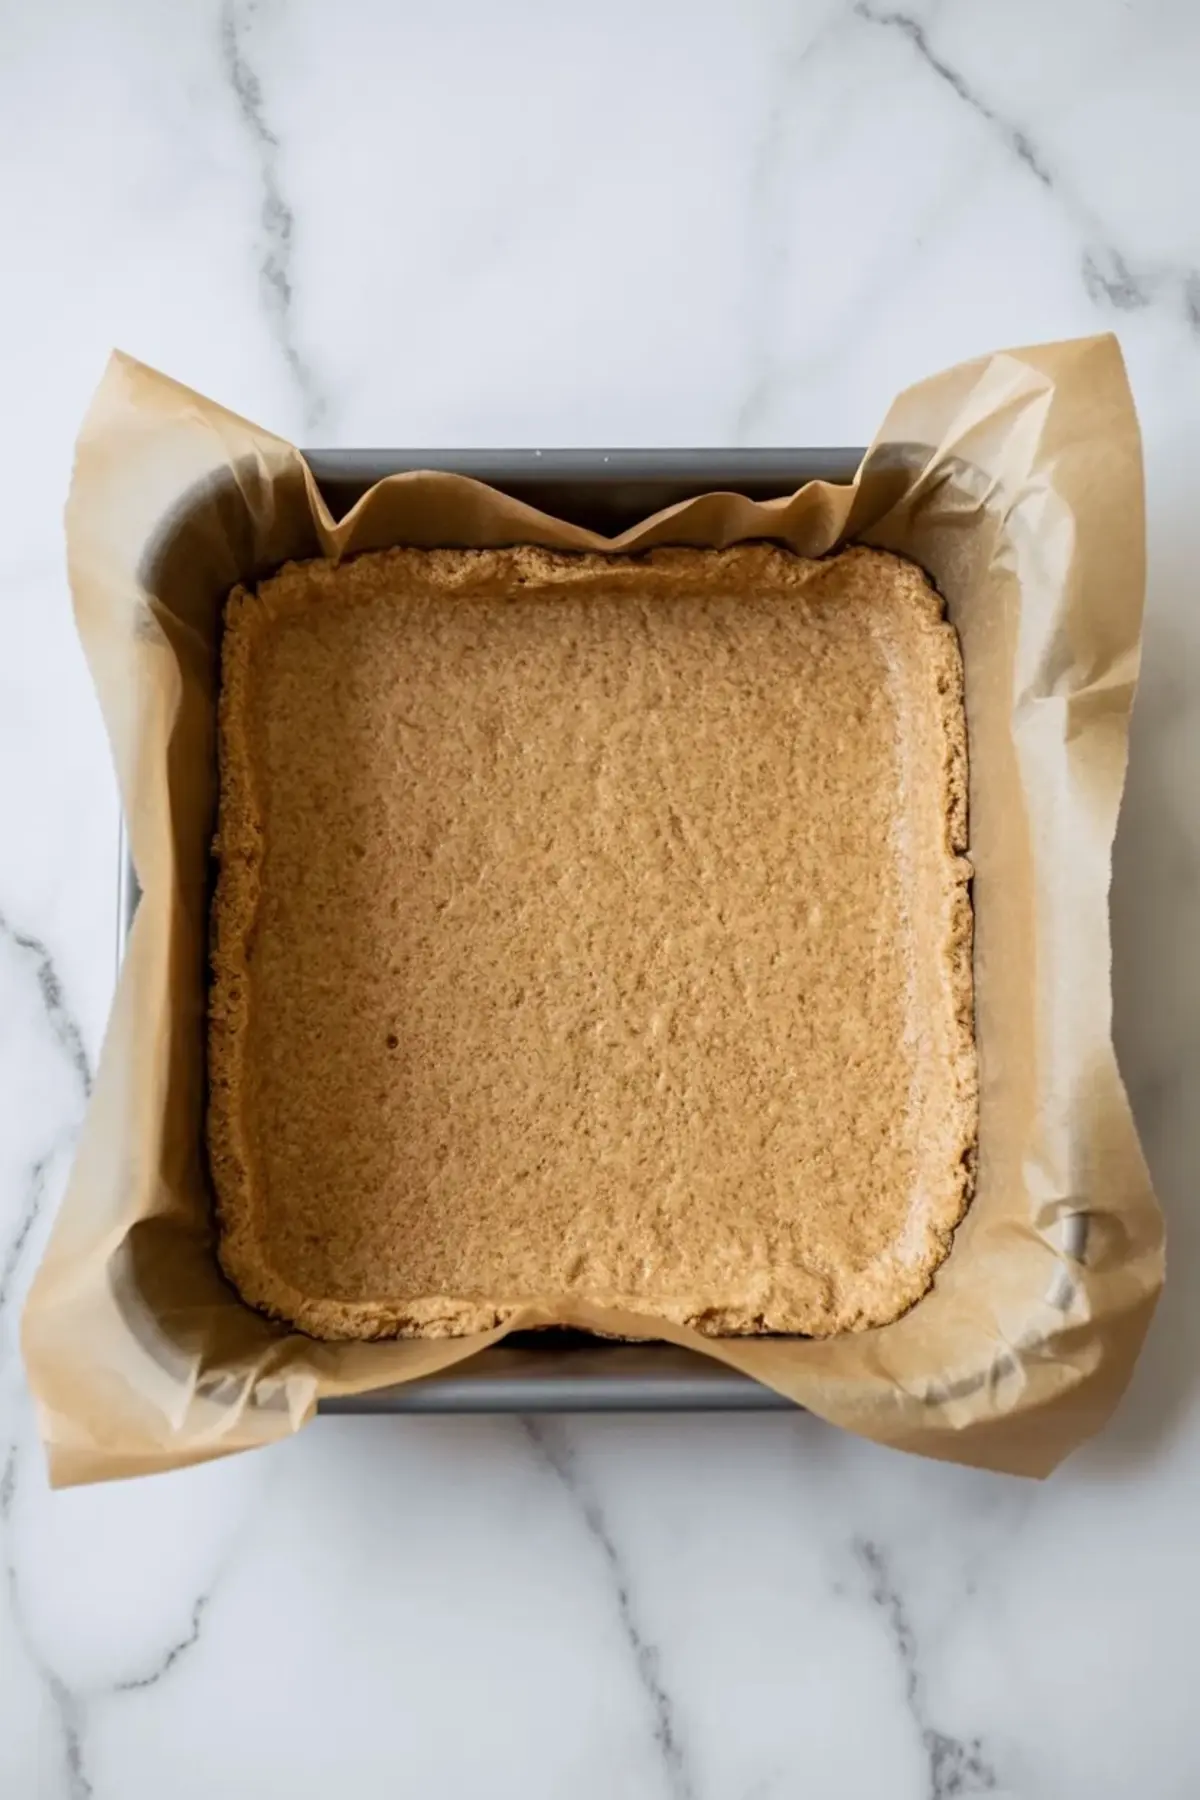
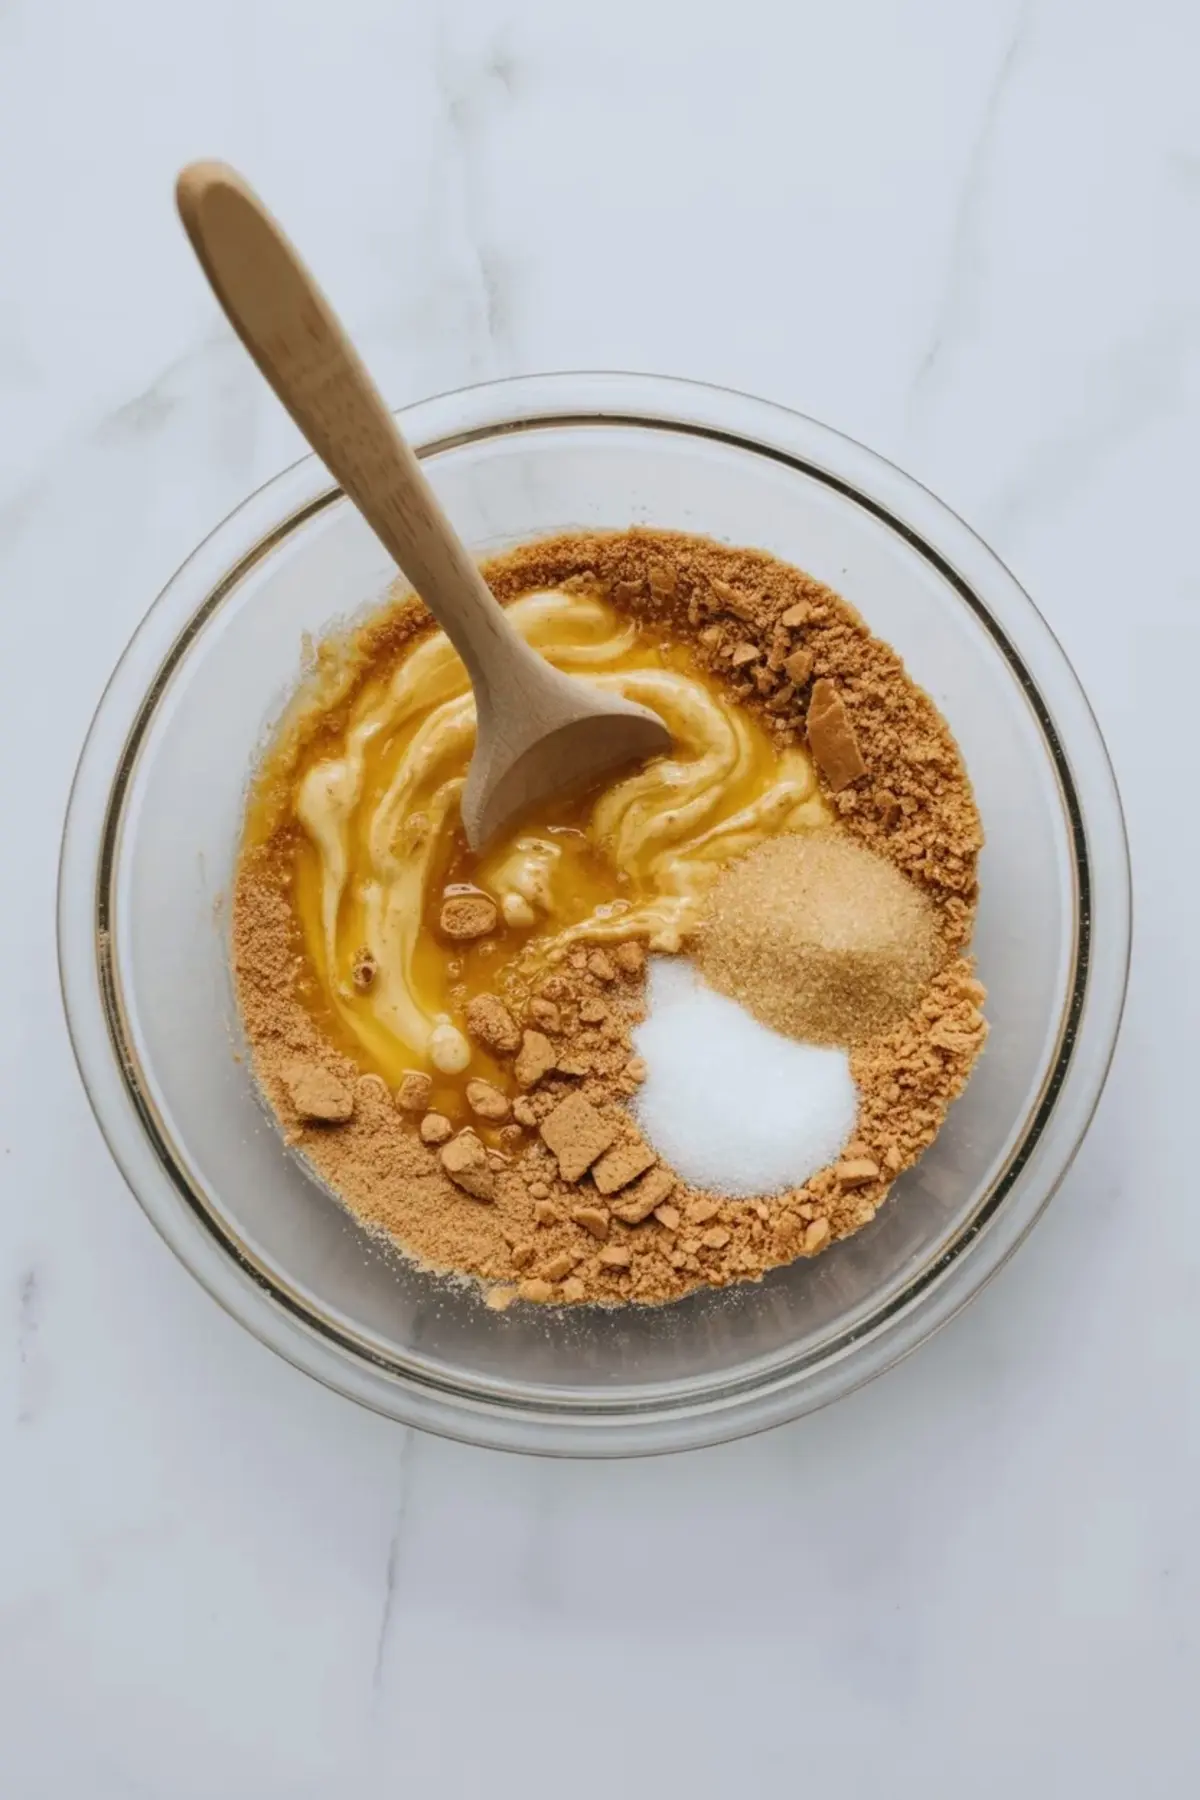
Start by pressing the graham crust firmly into the lined pan so it has an even base before baking. A short bake helps set that layer and keeps it from crumbling once the softer fillings go on top. Let it cool just enough that the peanut butter layer can spread without dragging up the crust underneath.
The peanut butter mixture should be thick but spreadable, so use gentle pressure and work slowly to keep the layers neat. Once the melted chocolate goes over the top, scatter the marshmallows evenly so the bars brown in a balanced way instead of leaving bare patches. That even coverage is what gives the finished bars their classic s’mores look.
How to Get the Marshmallow Topping Right
The marshmallows need enough oven time to puff and soften, but not so much that they collapse into a sticky flat sheet. Bake just until they are lightly golden, then use the broiler briefly only if you want deeper color. That last step works fast, so it is worth staying close to the oven instead of treating it like a hands-off finish.
Let the bars cool fully before slicing, especially if you want cleaner squares. Straight from the oven they will be delicious but too loose to cut neatly. A short chill after cooling can make the layers even easier to portion for parties, bake sales, or stacking on a dessert tray.
Serving and Storage Tips
These peanut butter smores bars are best the day they are made, when the marshmallow top still feels soft and the layers have the best contrast. That said, they keep well for a couple of days in an airtight container, and a brief rest at room temperature helps if they have been chilled. They are rich enough to cut into smaller squares if you are serving them alongside other desserts.
If you want a bar recipe that hits both nostalgic and crowd-pleasing, this is an easy one to repeat. Save it for summer parties, weekend baking, or any time you want a baked s’mores dessert without the campfire setup. If you make them, save the recipe and come back with questions about swapping in semisweet chocolate or adjusting the marshmallow topping.
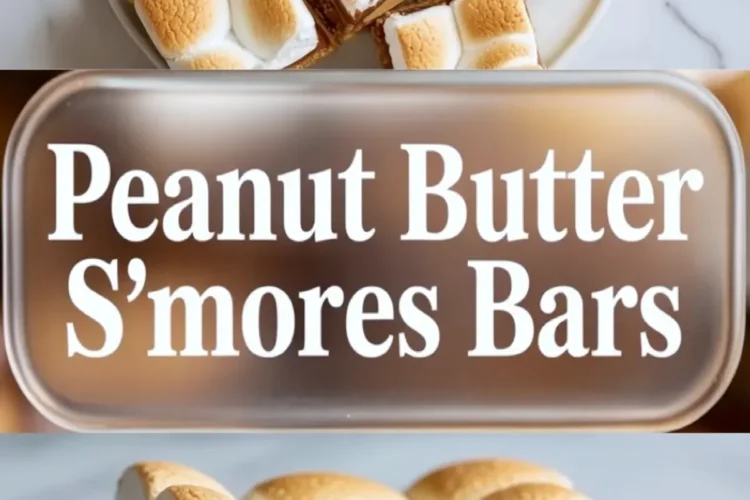
Peanut Butter S’mores Bars
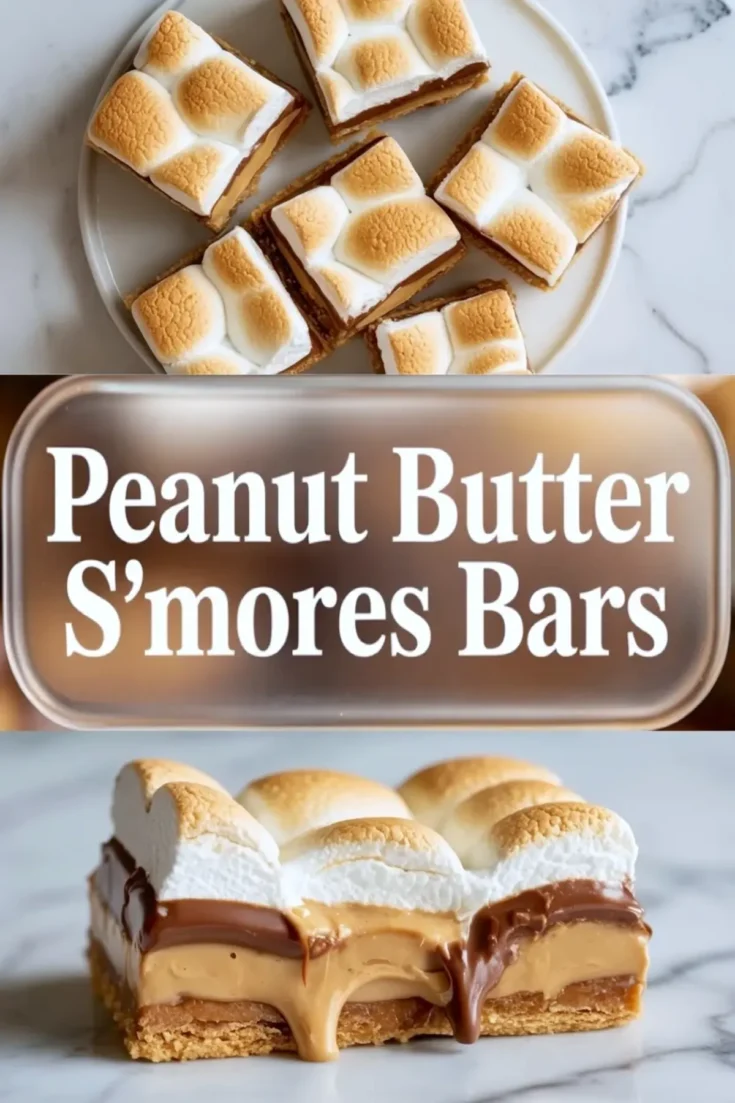
Save these peanut butter smores bars when you want a gooey layered dessert that feels richer than classic campfire s’mores. They start with a buttery graham cracker crust, then add a smooth peanut butter layer, melted chocolate, and a thick marshmallow topping that turns golden and soft in the oven. The peanut butter makes the bars creamier and more satisfying, while the chocolate and toasted marshmallow keep that familiar s’mores flavor in every bite. They slice well once cooled, travel easily for parties and bake sales, and always feel like a fun twist on a nostalgic favorite. If you want an easy peanut butter smores bars recipe for casual weekend baking, this is a crowd pleasing one to keep on hand.
Ingredients
- FOR THE CRUST
- 2 cups graham cracker crumbs
- 1/2 cup unsalted butter, melted
- 1/4 cup granulated sugar
- FOR THE PEANUT BUTTER LAYER
- 1 cup creamy peanut butter
- 1/2 cup powdered sugar
- 1/2 teaspoon vanilla extract
- FOR THE CHOCOLATE LAYER
- 1 1/2 cups milk chocolate chips
- 1 tablespoon butter
- FOR THE TOPPING
- 2 to 3 cups mini marshmallows
Instructions
PREHEAT OVEN: Preheat oven to 350°F (175°C) and line an 8×8-inch baking pan with parchment paper, leaving overhang for easy removal.
MIX CRUST: Combine graham cracker crumbs, melted butter, and granulated sugar in a bowl and stir until the mixture resembles wet sand.
PRESS CRUST: Press the mixture firmly into the bottom of the prepared pan using the back of a spoon or flat glass to create an even layer.
BAKE CRUST: Bake for 8 to 10 minutes until lightly set, then remove from oven and allow to cool slightly.
PREPARE PEANUT BUTTER LAYER: Mix peanut butter, powdered sugar, and vanilla extract in a bowl until smooth and thick.
SPREAD PEANUT BUTTER: Spread the peanut butter mixture evenly over the slightly cooled crust, using gentle pressure to avoid disturbing the base.
MELT CHOCOLATE: Combine chocolate chips and butter in a microwave-safe bowl and heat in 20-second intervals, stirring between each, until fully melted and smooth.
ADD CHOCOLATE LAYER: Pour melted chocolate over the peanut butter layer and spread evenly to cover the surface.
ADD MARSHMALLOWS: Sprinkle mini marshmallows evenly across the chocolate layer, creating a full, even topping.
BAKE TOPPING: Return the pan to the oven and bake for 5 to 7 minutes until marshmallows are puffed and lightly golden.
OPTIONAL BROIL: Place under broiler for 1 to 2 minutes for deeper golden color, watching closely to prevent burning.
COOL BARS: Remove from oven and let bars cool completely at room temperature, then chill if needed to fully set layers.
SLICE AND SERVE: Lift bars from pan using parchment overhang and slice into 12 even squares before serving.
Notes
For cleaner slices, chill the bars in the refrigerator for about 30 minutes before cutting.
Semi-sweet chocolate chips can be used for a less sweet flavor.
Store bars in an airtight container at room temperature for up to 3 days or refrigerate for longer storage.