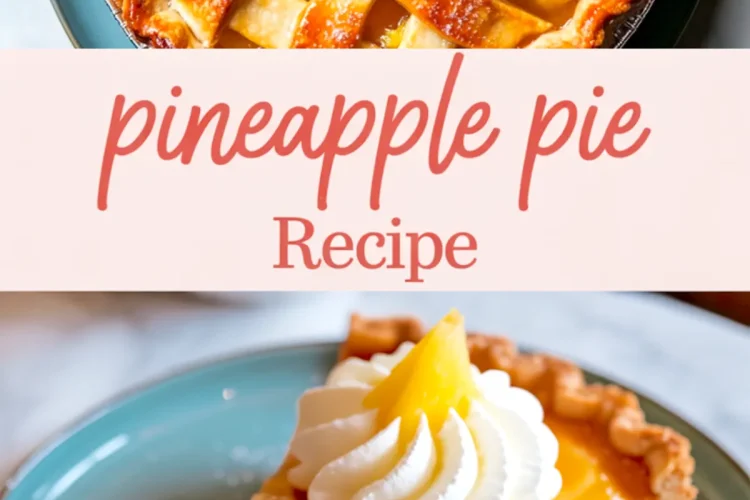
Pineapple pie doesn’t usually make the shortlist when people think of classic desserts. But that’s exactly why it deserves a place in your kitchen. This recipe gives you something memorable: a thick, jammy pineapple filling wrapped in a buttery homemade crust. It doesn’t hide behind cream or crumble. It leads with fruit.
You’ll learn how to make a pineapple pie that works with either fresh or canned fruit, how to get that glossy, sliceable filling, and how to build a lattice crust that holds its shape. I’ve made this pie on warm days with a chilled mixer bowl and once in the middle of a July storm, elbow-deep in dough. Every time, the result has been worth it.
Following a special diet?
Every recipe on this site can be converted to gluten-free, vegan, dairy-free, keto, nut-free or egg-free with adjusted ratios so nothing falls flat.
Try the Recipe Converter →Why This Pineapple Pie Works
This filling strikes the right balance between sweet and tart. The pineapple doesn’t get lost in sugar. Instead, lemon juice and a touch of vanilla bring out the sharpness and make it sing.
The crust here is all about texture. Cold butter and ice water are key to flaky layers. I don’t skip the chill time. Neither should you. It gives the dough strength and makes lattice weaving simpler.
For anyone who’s scrolled past pineapple dessert recipes thinking they’re too sweet or messy, this one proves otherwise. It cuts cleanly, holds up under a fork, and looks beautiful enough for holidays or casual weekends.
Making the Pie Crust for a Golden Finish
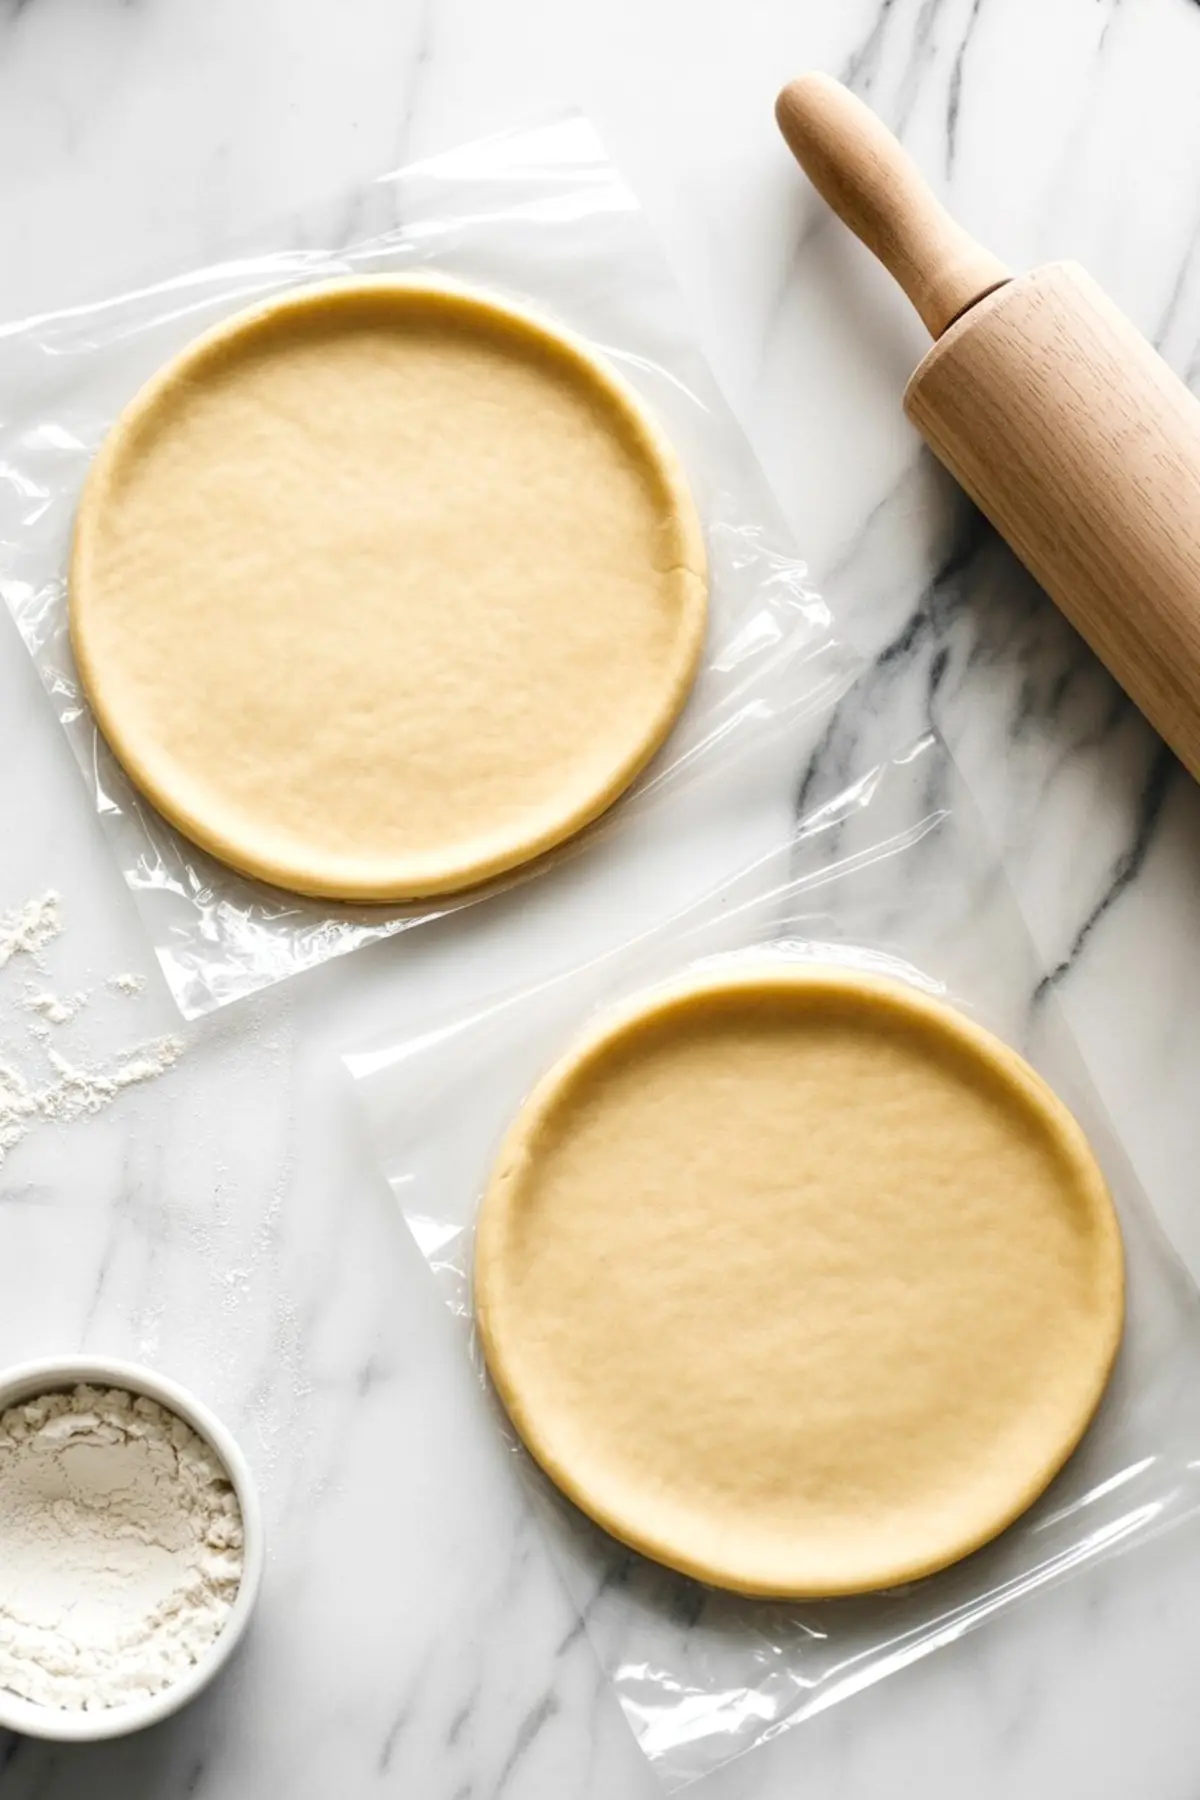
You’ll start by mixing flour, sugar, and salt, then cutting in cold butter until it forms a crumbly mix. I’ve tried both hand-cutting and food processor methods. I prefer using my hands. It gives better control, and you can feel when the butter pieces are just the right size.
When adding the ice water, go slow. Add a spoonful at a time, mixing gently. The dough should hold when pressed, not feel sticky. Once you’ve got two discs wrapped and chilled, you’re on track.
Tip: If you’re new to pie dough, my lemon pie recipe has a similar crust method. That one’s citrus-forward and works as good practice.
Thick, Glossy Pineapple Pie Filling That Holds Together
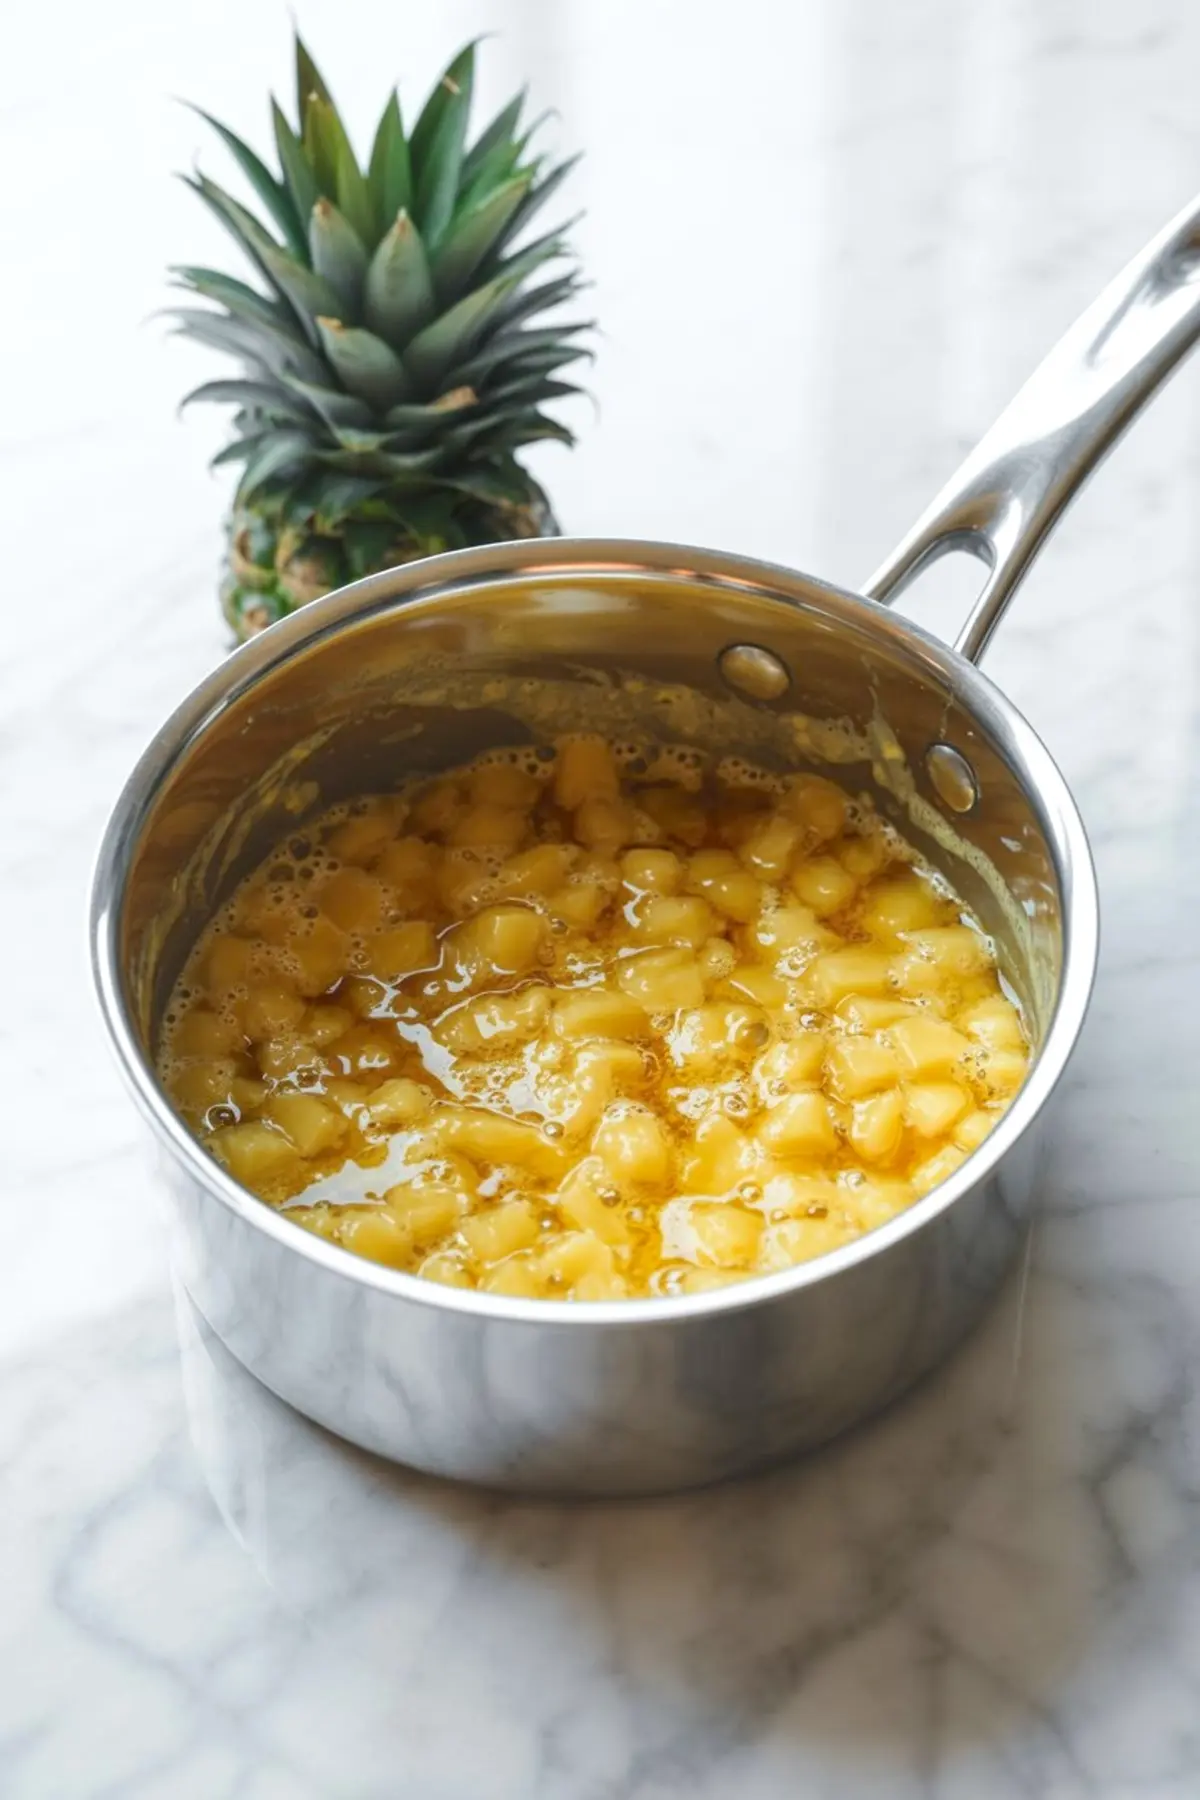
Start your filling by whisking together sugar, cornstarch, and salt in a saucepan. Then stir in pineapple juice and lemon juice. I keep whisking as it heats. You want it smooth and thick before adding the pineapple chunks. This step gives you a pudding-like base that sets firmly once cooled.
Fresh pineapple adds brightness, while canned works just as well if drained properly. I’ve tested both. Fresh has a bit more tang and texture. But for speed or winter baking, canned pineapple keeps things simple.
For more ideas using tropical fruit, take a look at this peach pie recipe. It has a softer filling but a similar fruit-first approach.
Rolling and Filling Your Pie Base
Once the dough is chilled, roll out the bottom crust and press it into your pan. I dust the surface with flour and work quickly to avoid softening the dough. If it tears, patch it. This isn’t about perfection. It’s about structure.
Spoon in the cooled pineapple filling. Spread it to the edges so the top sits flat. That makes lattice assembly easier and more even.
Building the Lattice Top Without Breaking Strips
Cut the second dough disc into strips. If they feel too soft to handle, refrigerate them for five minutes. That short chill helps them lift cleanly and weave without sagging.
Lay strips one way, then weave the others through, lifting and tucking as needed. It doesn’t need to be intricate. It just needs to hold.
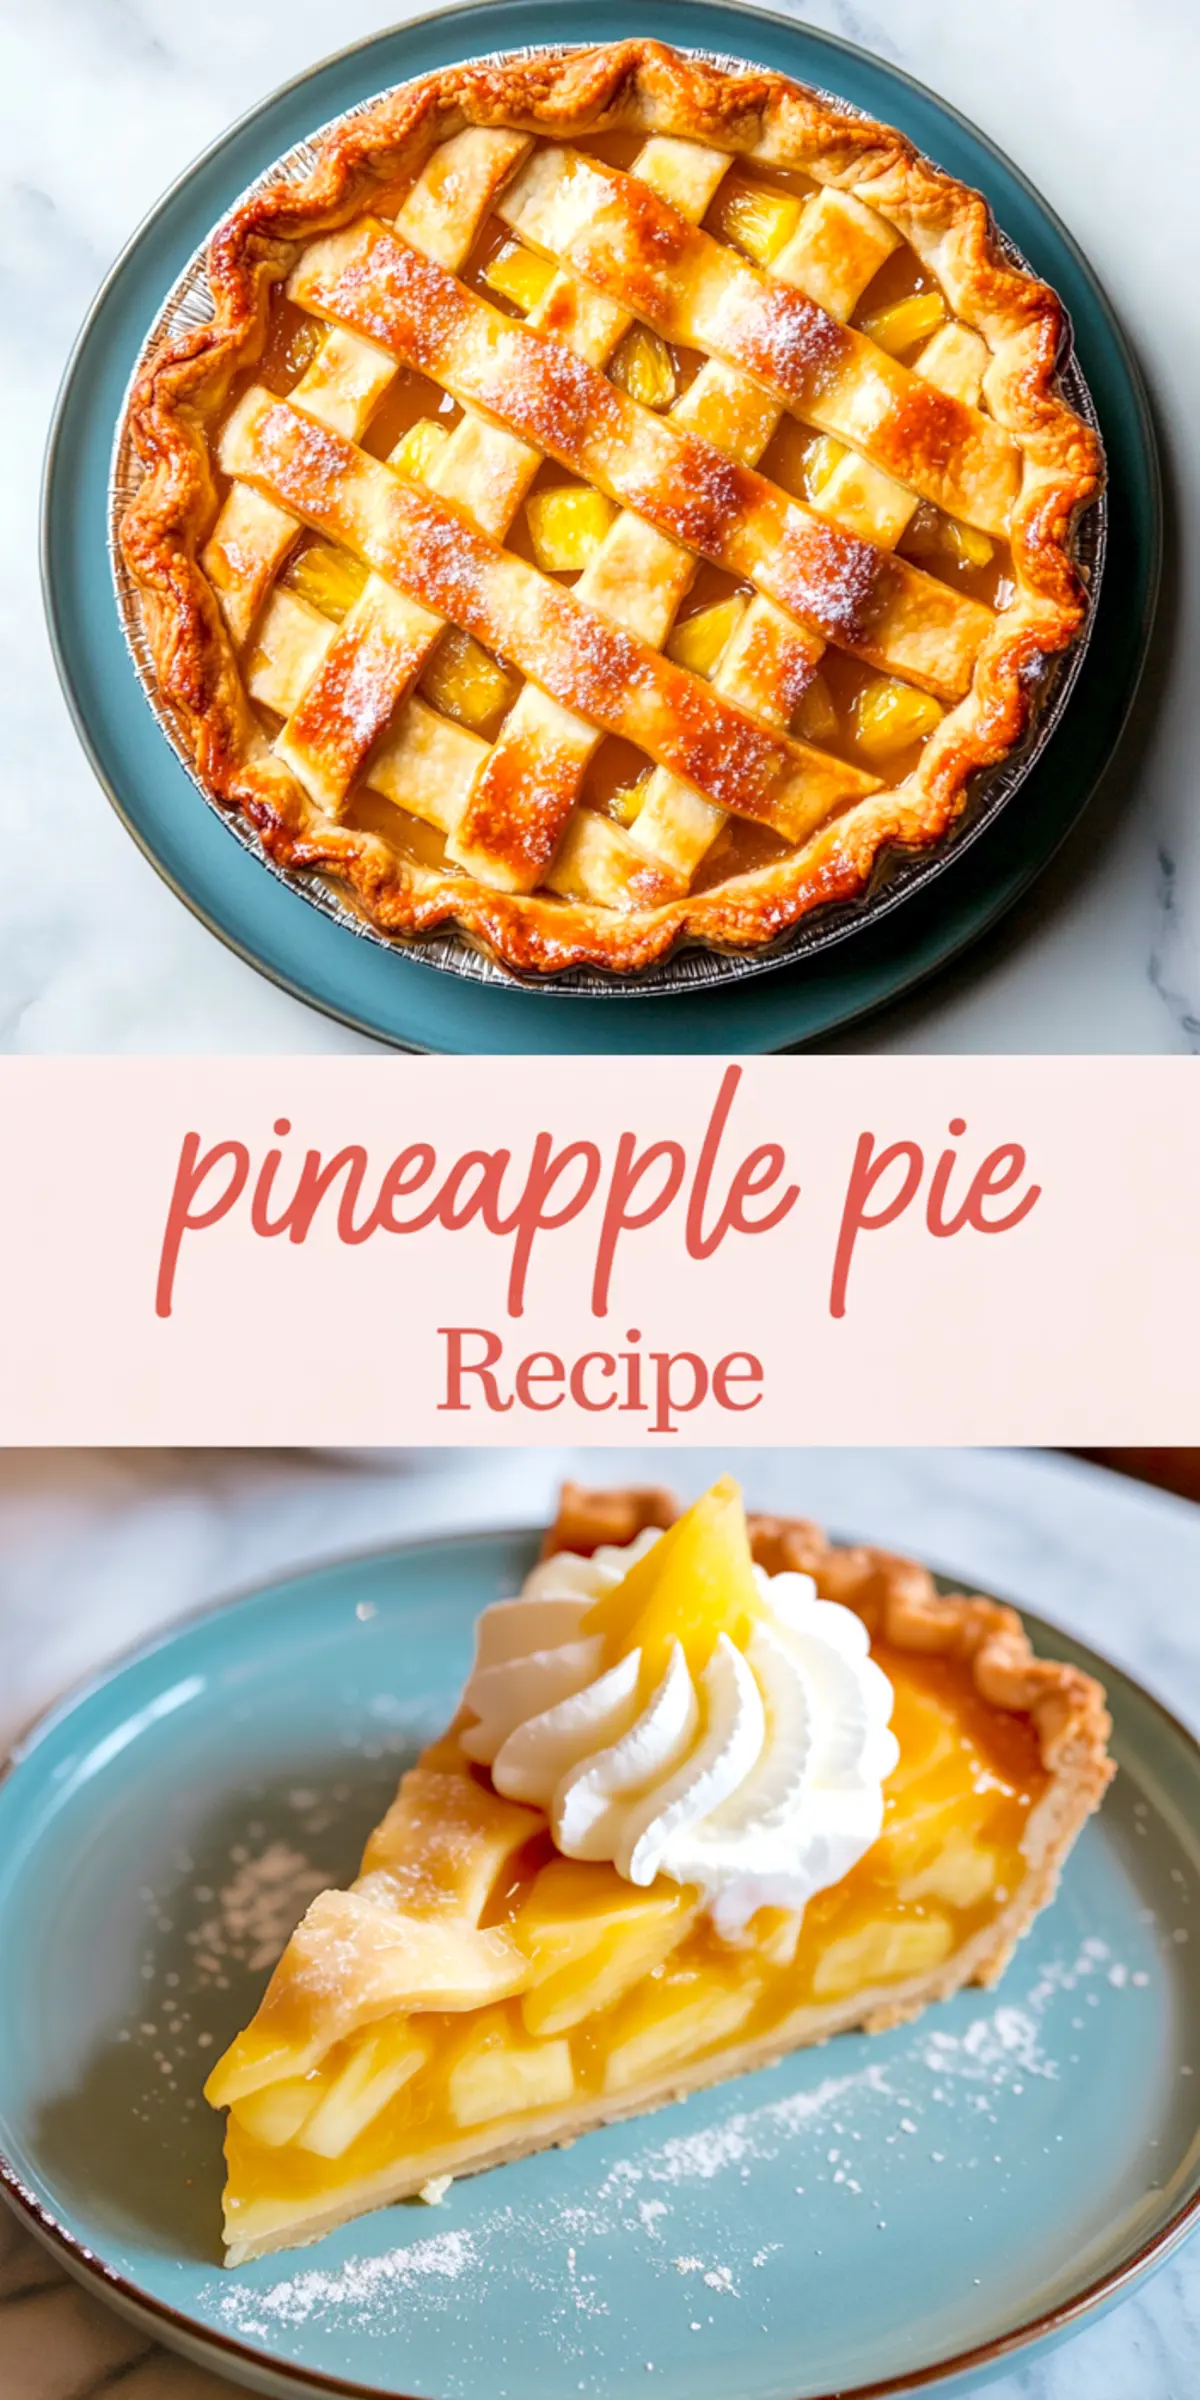
Comparison Tip: I’ve made this pie with a full top crust and a lattice. The lattice lets the filling thicken in the oven without bubbling over. It also adds visual appeal. Go with lattice if you want cleaner slices and a more even bake.
Baking the Pineapple Pie to Golden and Bubbling
Brush the lattice with an egg and milk mixture for shine and color. Then bake at 400°F until the top turns golden and the filling starts to bubble through the gaps.
Keep an eye on the edges. I use strips of foil or a crust shield if they brown too quickly. You’ll get a crisp outer edge and a fully set center this way.
Cooling, Serving, and Storing This Pie
Let the pie cool completely before slicing. That’s the key to clean cuts. If you serve it warm, the filling might slide a bit. Chilled slices hold their shape and taste bright.
I like mine with a dusting of powdered sugar and a dollop of whipped cream. For a richer finish, vanilla ice cream adds contrast without overpowering the pineapple.
Store leftovers covered in the fridge. The crust softens slightly after a day but still tastes excellent. You can also warm individual slices in the oven if you prefer a softer texture.
Related Recipes You Might Like
Try my banoffee pie if you like creamy, fruit-based desserts. Or explore more fruit pies that use seasonal produce and straightforward techniques.
Save This for Later and Share Your Bake
If you’re planning to try this soon or want to come back to it later, save this post to your pie board on Pinterest.
And let me know how it turns out. I read every comment. If you made adjustments or have questions, I’d love to hear about them below.
Pineapple Pie Recipe
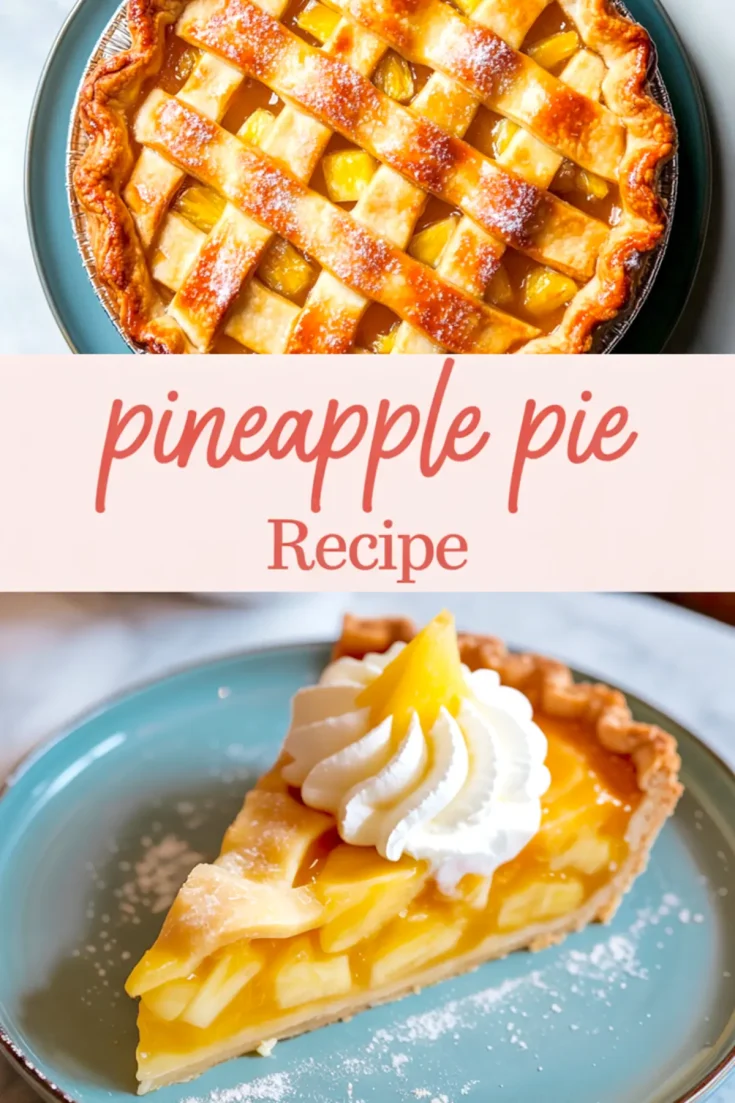
A buttery, flaky crust holds a thick, jammy pineapple filling that balances tart and sweet in every bite. You can use fresh or canned pineapple, and the golden lattice top makes the pie as beautiful as it is flavorful. Serve it chilled or slightly warm with whipped cream or vanilla ice cream.
Ingredients
- FOR THE PIE FILLING
- 2 cups chopped pineapple (fresh or canned, drained)
- 1/2 cup pineapple juice (from the can or fresh)
- 3/4 cup granulated sugar
- 1/4 cup cornstarch
- 1 tablespoon lemon juice
- 1/2 teaspoon vanilla extract
- Pinch of salt
- FOR THE PIE CRUST
- 2 1/2 cups all-purpose flour
- 1 tablespoon sugar
- 1 teaspoon salt
- 1 cup unsalted butter, cold and cubed
- 6 tablespoons ice water (plus more if needed)
- FOR ASSEMBLY
- 1 egg
- 1 tablespoon milk
- Powdered sugar (optional, for dusting)
- Whipped cream or vanilla ice cream (for serving)
Instructions
- MAKE THE PIE CRUST: In a large bowl, stir together flour, sugar, and salt. Add cold cubed butter and cut it into the flour using a pastry cutter or your fingers until the mixture forms coarse crumbs. Gradually drizzle in ice water, mixing just until the dough holds together. Divide the dough into two discs, wrap each in plastic wrap, and refrigerate for at least 1 hour.
- PREPARE THE PINEAPPLE FILLING: In a medium saucepan, whisk together sugar, cornstarch, and salt. Add pineapple juice and lemon juice, whisking until smooth. Cook over medium heat, whisking constantly, until the mixture boils and thickens into a glossy, pudding-like texture. Remove from heat, stir in vanilla extract and chopped pineapple, and let the filling cool completely.
- ROLL OUT THE DOUGH: On a lightly floured surface, roll out one chilled dough disc into a 12-inch round. Transfer it to a 9-inch pie pan and press it gently into the bottom and sides. Trim the edges if needed. Pour the cooled pineapple filling into the crust and spread evenly.
- MAKE THE LATTICE TOP: Roll out the second dough disc and cut it into 1-inch wide strips. Lay half of the strips horizontally over the filling, spacing them evenly. Weave the remaining strips vertically to create a lattice pattern. Trim excess dough and crimp the edges to seal.
- BAKE THE PIE: Preheat the oven to 400°F (200°C). In a small bowl, whisk the egg and milk together to make an egg wash. Brush it over the lattice and edges of the crust. Bake the pie for 35–40 minutes, or until the crust is golden and the filling is bubbling. If the edges brown too quickly, cover them loosely with foil.
- COOL AND SERVE: Allow the pie to cool at room temperature for at least 2 hours so the filling can fully set. Serve with a dusting of powdered sugar, whipped cream, or a scoop of vanilla ice cream if desired.
Notes
You can substitute canned pineapple chunks for fresh if desired—just make sure they are well-drained. For easier lattice weaving, chill the dough strips for a few minutes before placing them on the pie.