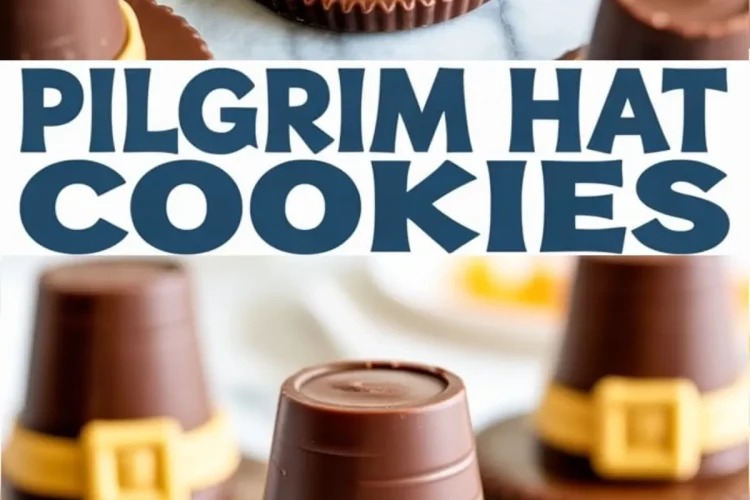
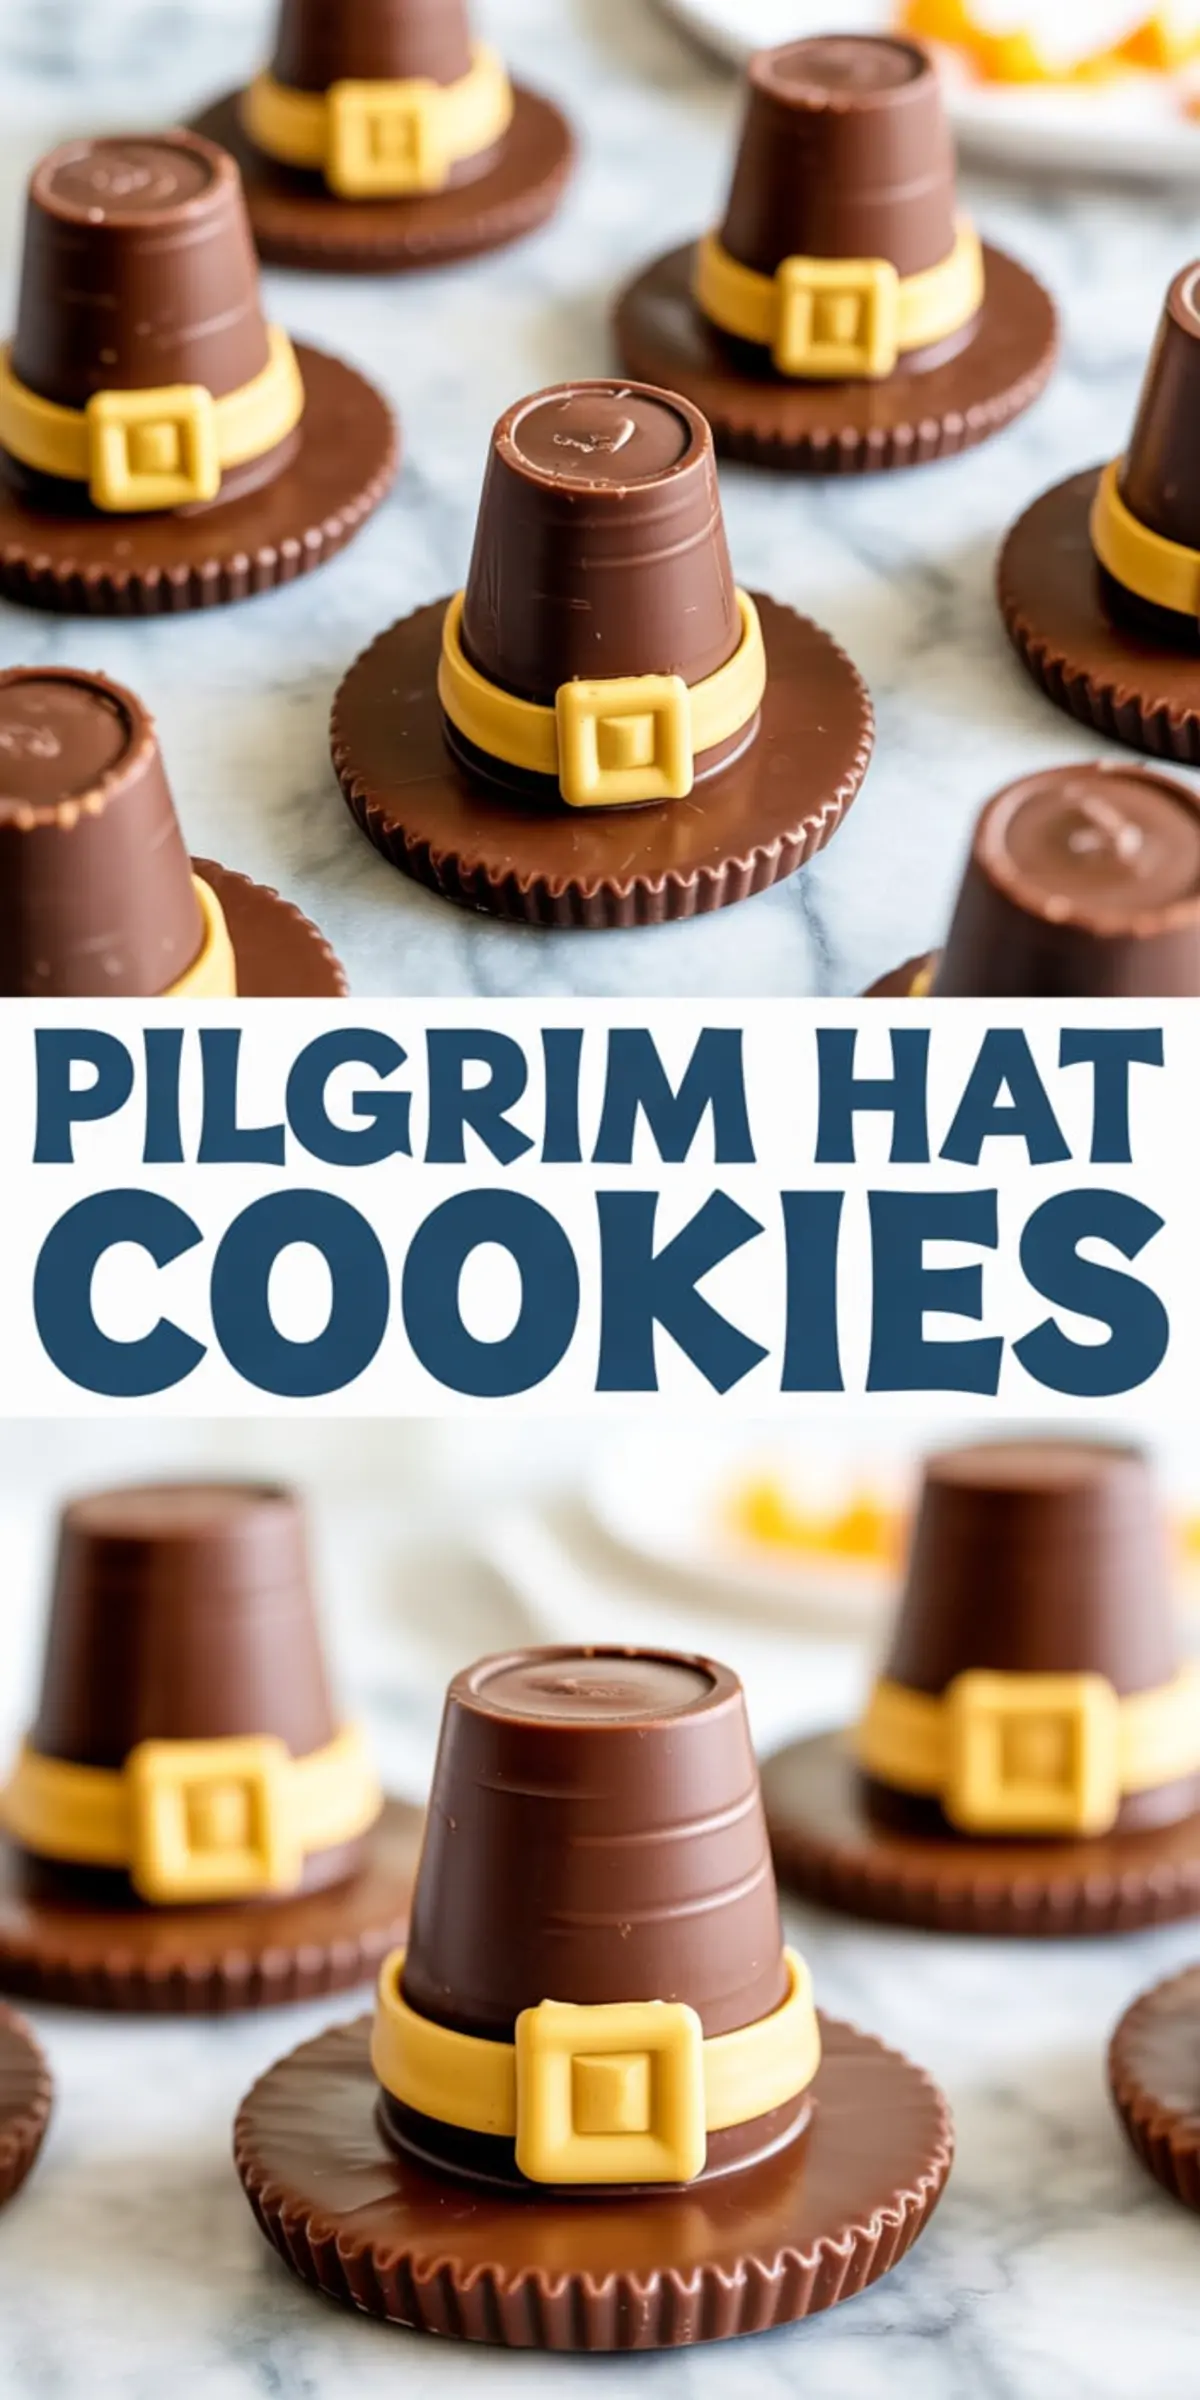
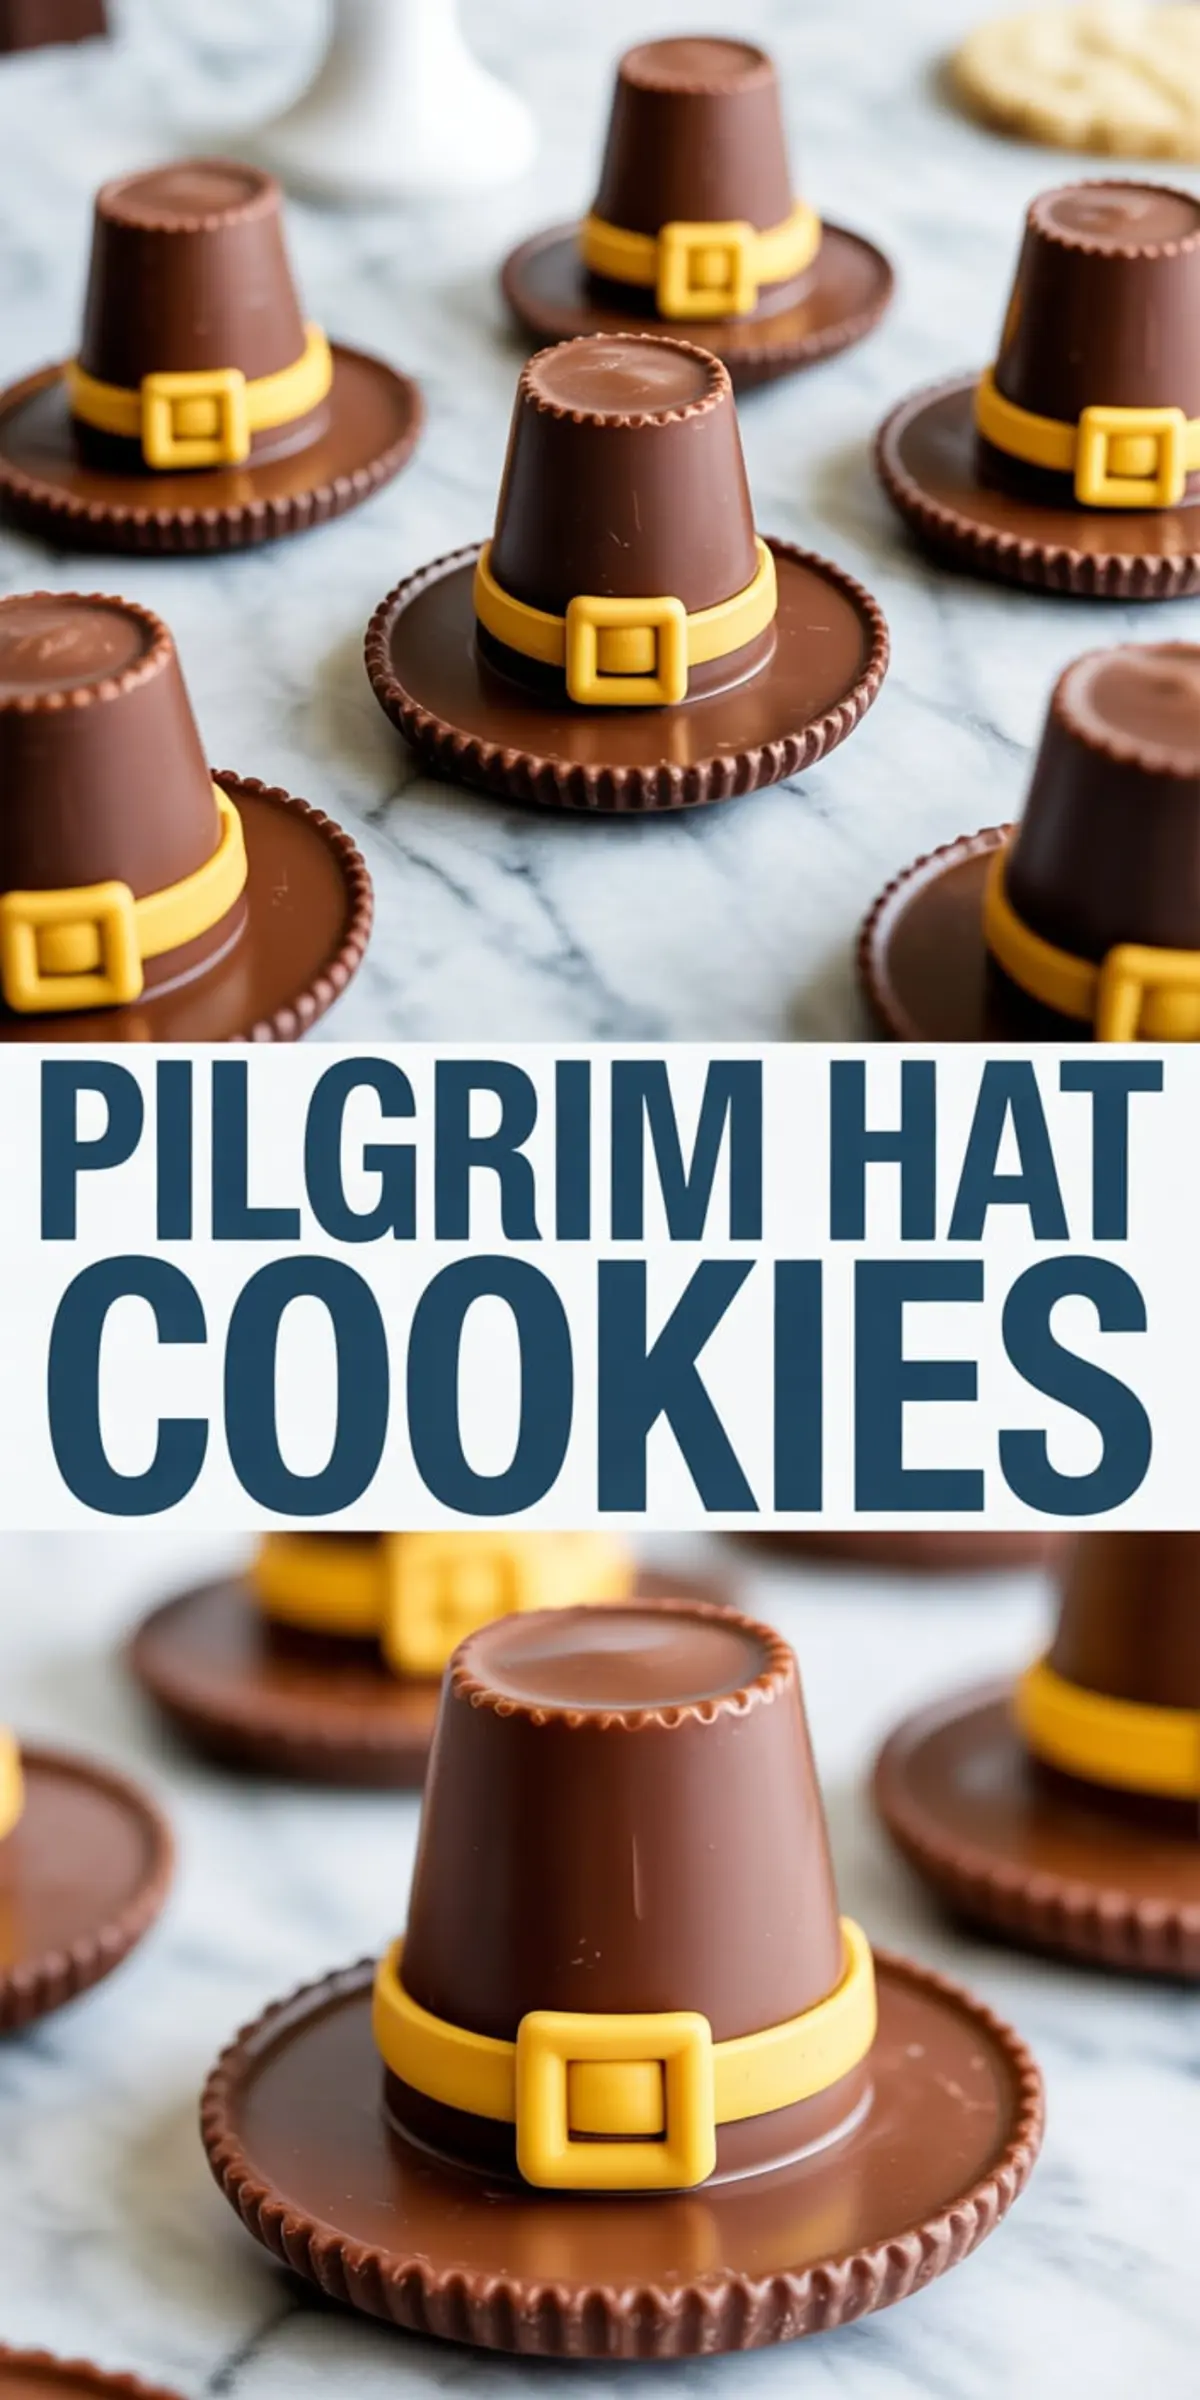
Thanksgiving desserts don’t need to be complicated to feel complete. These Chocolate Pilgrim Hat Cookies are no-bake treats built on fudge-striped cookies and molded chocolate “hats,” dressed with yellow fondant buckles.
You’ll learn how to build each component simply, how to make the chocolate hats set with clean edges, and how to get the fondant details right without stressing.
The method is straightforward. The result adds charm to any Thanksgiving table.
People often search for ghost-themed party drinks or Halloween-themed cocktail drinks, but once Halloween passes, this kind of playful creativity shifts into Thanksgiving snacks and festive treats. These cookies meet that same energy—easy to prep, no need for baking, but still fun enough to feel homemade and thoughtful.
Following a special diet?
Every recipe on this site can be converted to gluten-free, vegan, dairy-free, keto, nut-free or egg-free with adjusted ratios so nothing falls flat.
Try the Recipe Converter →Why I Keep This in My Thanksgiving Rotation
I’ve made these year after year, usually the night before Thanksgiving. They’ve helped fill empty corners on the dessert tray or brighten kids’ plates when the pies feel too serious.
I call them “my no-bake fallback,” but they’re more than that. These little hats have saved me time, filled cookie tins for neighbors, and kept little hands busy while waiting for dinner.
They’re quick to assemble, and unlike many Thanksgiving desserts, they don’t demand oven space, which means you can prep them while the pie cools or the turkey roasts.
You might already have most of what you need in the pantry.
Choosing Chocolate: Melting Wafers vs. Chocolate Chips
I’ve used both. Chocolate melting wafers give the smoothest finish and set more cleanly in molds.
If you use regular chocolate chips, stir in a teaspoon of neutral oil or shortening while melting to help it pour more easily and unmold without cracks.
In my notes, I’ve marked wafers as my go-to when I want a polished finish for gifting or displaying. Chips work fine for family trays or casual gatherings.
Building the Chocolate Hat Molds for the Pilgrim Hat Cookies
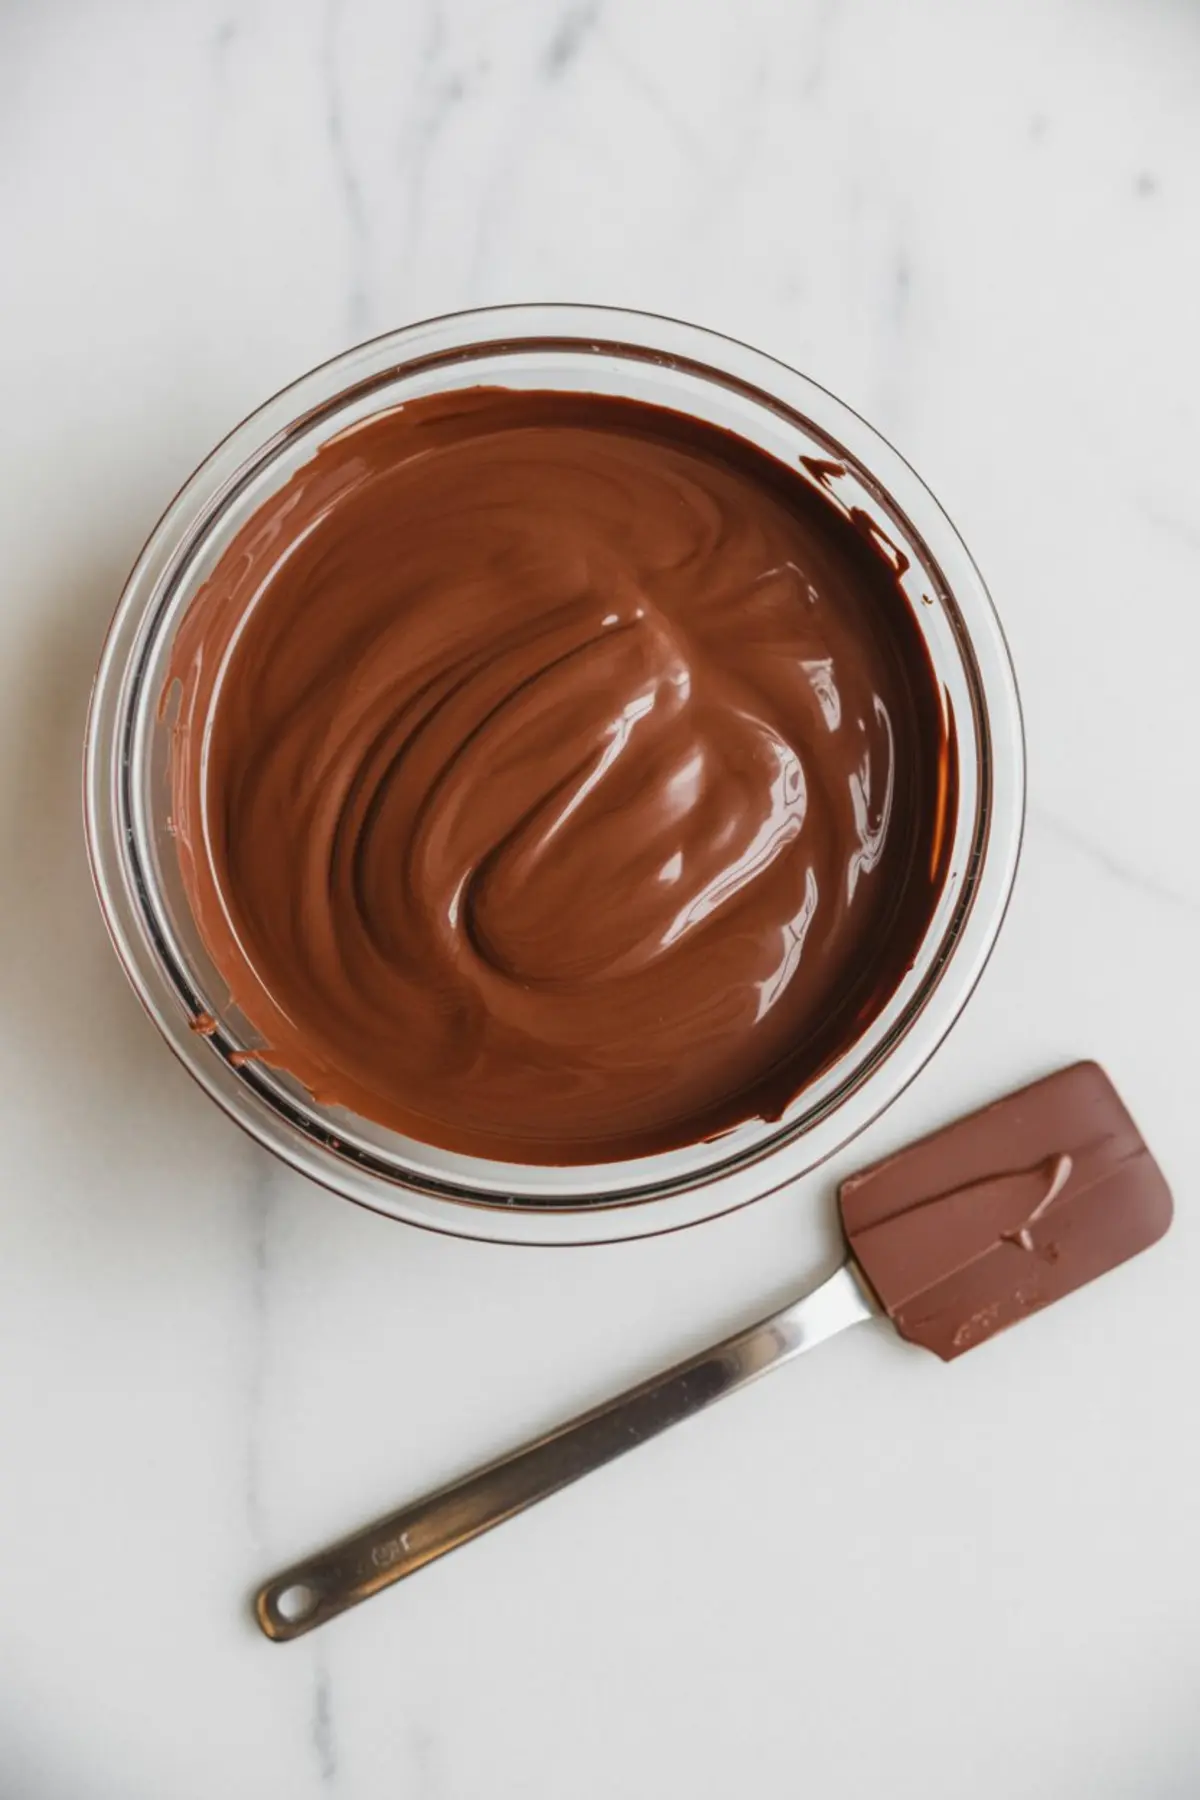
Melt the chocolate slowly using a double boiler or the microwave in short intervals. Stir every 30 seconds. That keeps it from seizing or burning.
Spoon or pipe the melted chocolate into the silicone mini top-hat mold. Tap it gently on the counter. This helps release any trapped air bubbles that can ruin the clean lines.
Use a spatula or the back of a butter knife to smooth off the tops. That gives you a flat bottom once it sets.
Chill the mold in the refrigerator for 15–20 minutes. Once firm, gently pop each chocolate hat out and set them aside.
I’ve also used small dome molds when I couldn’t find top-hat shapes. The effect is close enough, especially once the fondant band wraps around.
Attaching the Hats to the Cookie Bases
Use fudge-striped cookies with the chocolate-side up. That flat surface gives you a better base to attach the chocolate hat.
Add a dot of warm chocolate to the center of each cookie and press the chocolate hat on top. Hold gently for a few seconds.
The key is warmth—if the chocolate is too hot, it’ll melt the hat. If it’s too cool, it won’t hold. Aim for warm but not runny.
You can also check out these Thanksgiving Oreo Turkeys if you’re building a whole dessert tray of themed treats.
Shaping the Fondant Details: Buckles and Bands
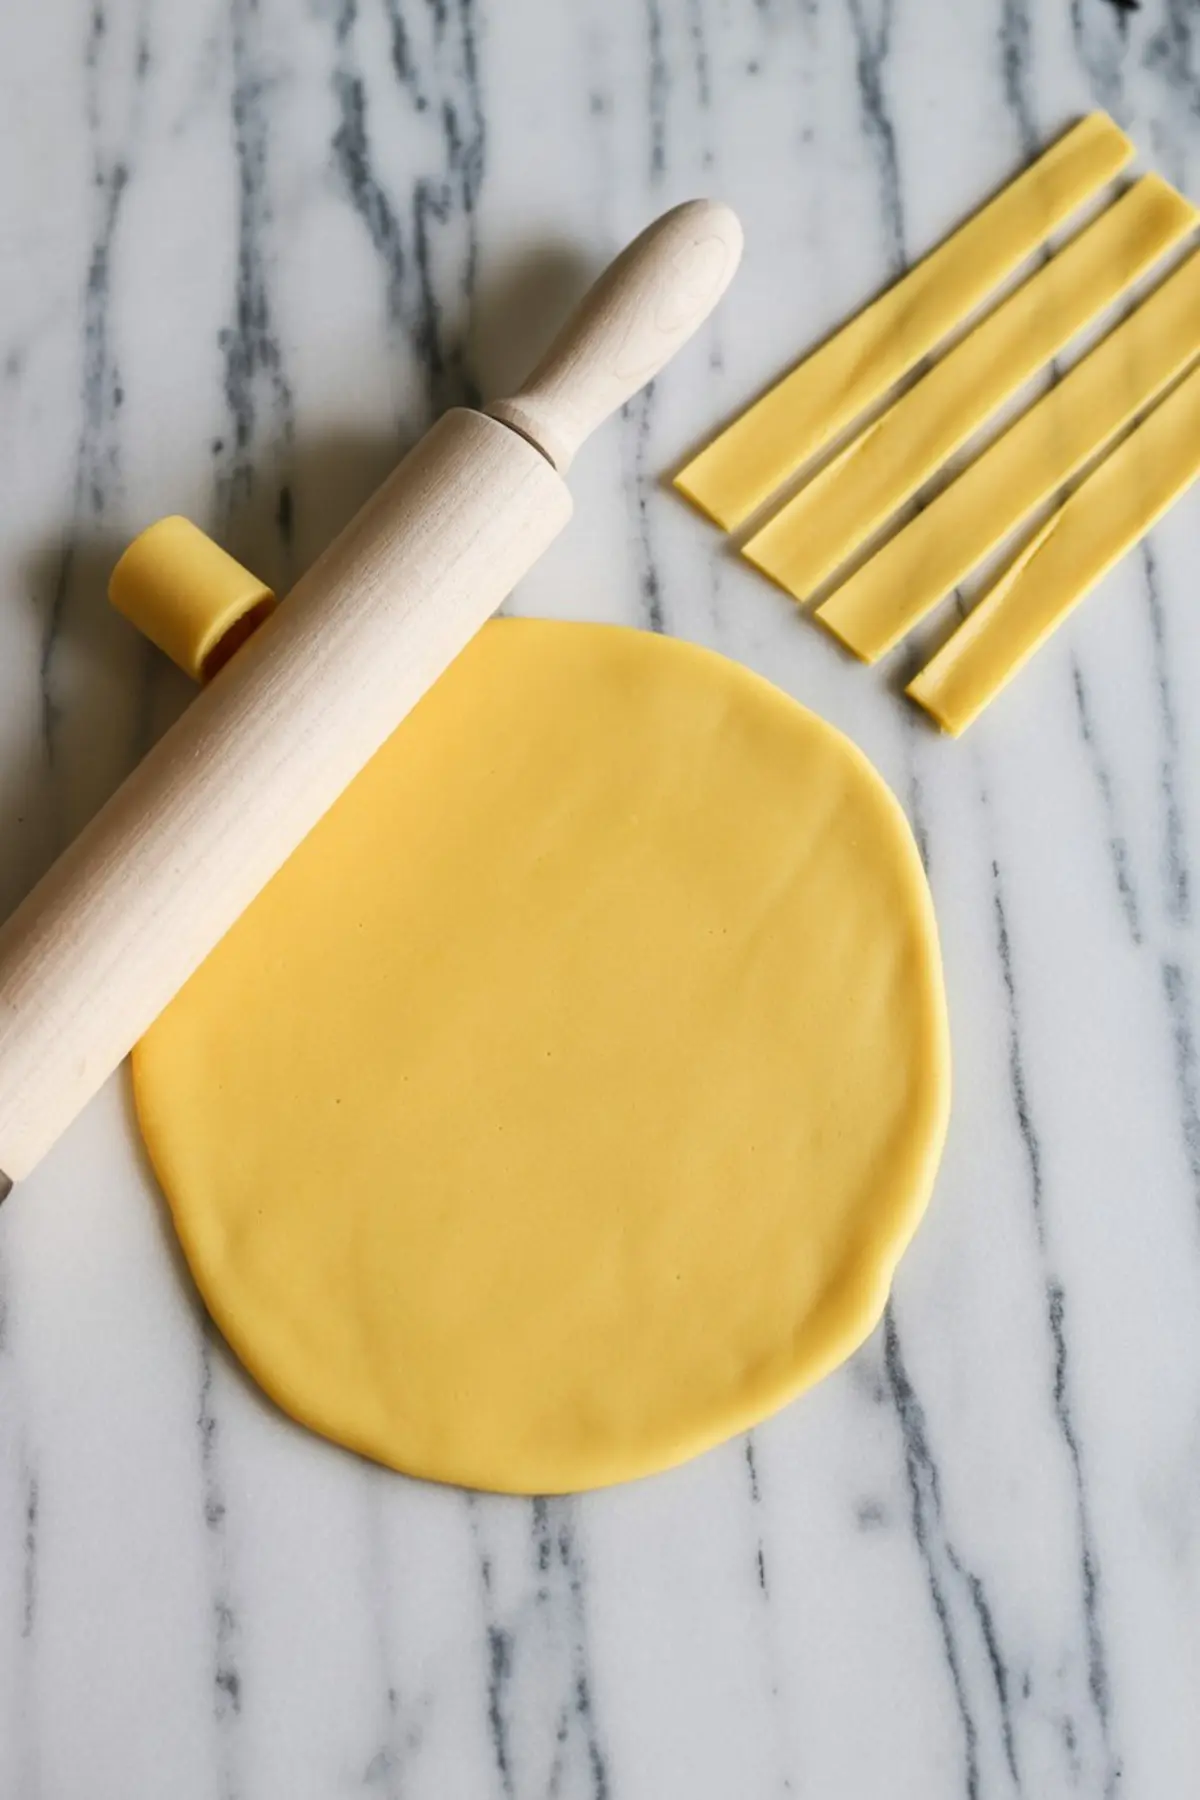
Use yellow fondant, or tint white fondant with a small amount of gel coloring. Roll it out thin and cut narrow strips. These become the bands that wrap around each hat.
Cut small rectangles or squares for the buckles. I’ve used a sharp paring knife, but if you have a fondant cutter, it’s quicker.
Attach the buckle to the strip with a drop of water or edible glue. Wrap the strip around the base of each hat and press gently to seal it.
It’s the little details—like that buckle—that make the whole treat look thoughtful.
If you’re doing a full Thanksgiving dessert table, Turkey Cupcakes pair well visually with these hats.
Serving Tips and Make-Ahead Storage Advice
These cookies hold their shape best in a cool room.
I keep them in an airtight container and store them in the fridge if I make them ahead. Let them sit out for 10 minutes before serving to take the chill off.
If you’re traveling, place parchment between the layers in a container to avoid the fondant sticking. I learned this the hard way on a bumpy drive a few years back.
They also look charming wrapped in clear treat bags with a ribbon—great as party favors or little table gifts.
Want another fun no-bake idea with holiday spirit? These chocolate covered strawberry turkeys always disappear first at our gathering.
Small Batch, Big Impact: Why This Works
These pilgrim hat cookies don’t fight for attention on the table, but they get noticed.
Guests smile when they see them. Kids point at them. And I don’t have to worry about slicing, plating, or reheating.
They’re forgiving and flexible. You can swap the fondant color, adjust the mold size, or scale the batch depending on your crowd.
I’ve made a dozen. I’ve made forty. I’ve even made them late at night when I had no energy left for a full dessert—just enough to bring something thoughtful to the next day’s table.
That’s why they’ve stayed in my binder.
Save This Recipe and Share Your Twist
📌 Pin this Chocolate Pilgrim Hat Cookies recipe for Thanksgiving so you can find it easily next year.
I’d love to hear how you used them—added different colors, made them with kids, or styled them on your dessert tray. Leave a comment below and let’s swap ideas.
We all build holidays one treat at a time.
Chocolate Pilgrim Hat Cookies
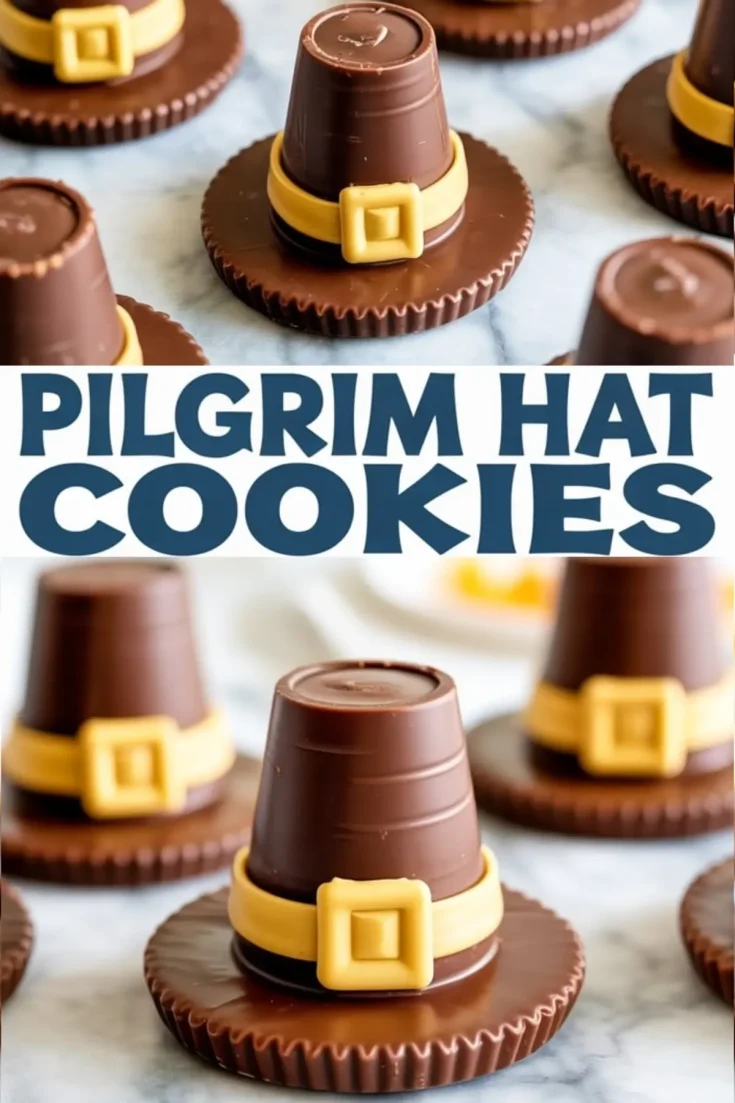
Pilgrim hat cookies are a simple no-bake Thanksgiving dessert that looks festive on any holiday table. I make them by topping fudge stripe cookies with chocolate-dipped marshmallows, then adding a candy buckle to finish the hat design. Some call them pilgrim hat cookies easy, others pilgrim themed treats or just hat cookies, but no matter the name they’re quick to assemble and fun to serve. I’ve set them out as Thanksgiving snacks, added them to dessert trays, and even used them for Thanksgiving desserts easy enough to prep ahead. Among pilgrim hat cookie recipes, this version is my favorite for combining creativity with convenience—perfect for making the holiday table feel complete.
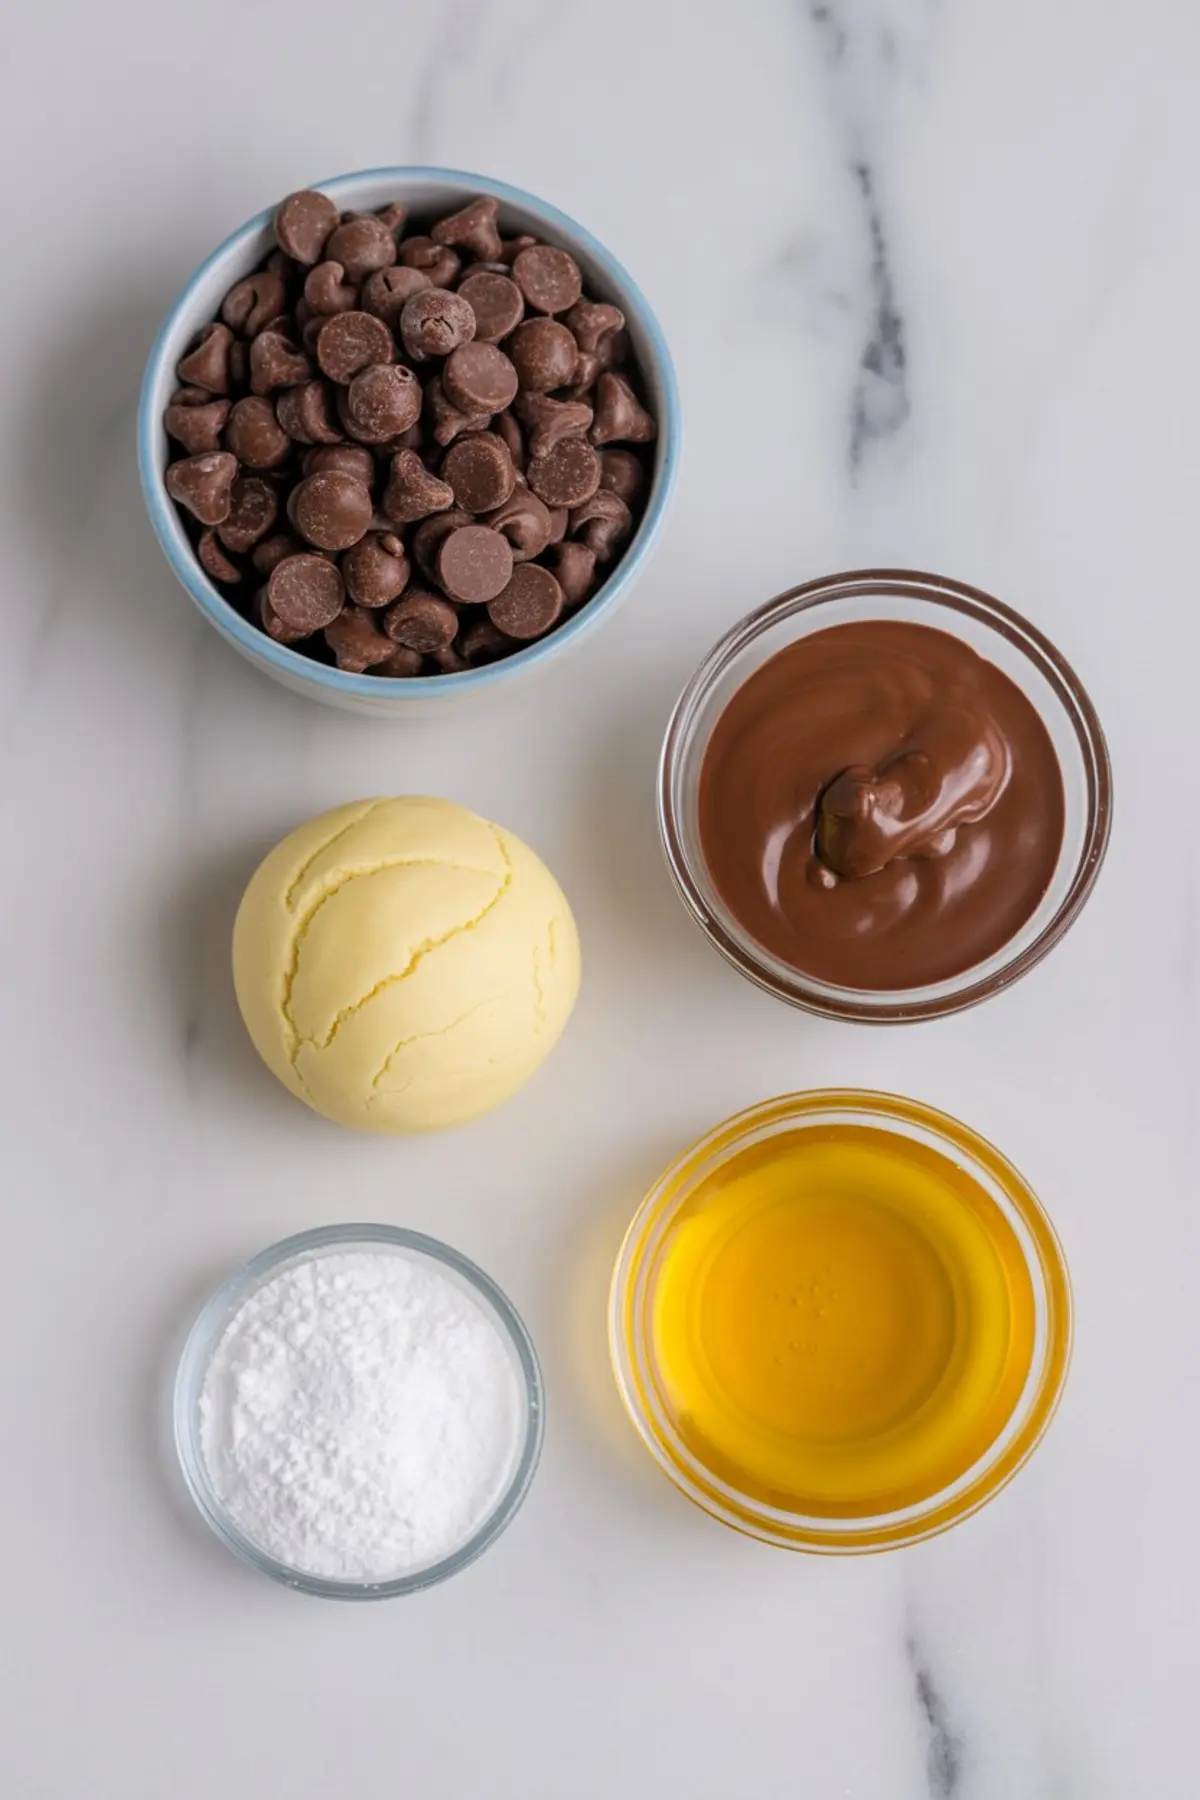
Ingredients
- 1 cup chocolate chips or chocolate melting wafers (milk, dark, or semi-sweet)
- 1 silicone mini top-hat mold (or small dome-shaped mold)
- 1 package fudge-striped cookies (chocolate-side up for the base)
- Yellow fondant
- Small rolling pin and knife or fondant cutter
- Piping bag or ziplock for melted chocolate (optional)
Instructions
- MELT THE CHOCOLATE: Place the chocolate chips or melting wafers in a heat-safe bowl and melt using a double boiler or microwave in 30-second increments, stirring in between, until smooth and fully melted.
- FILL THE HAT MOLDS: Spoon or pipe the melted chocolate into the silicone molds. Tap the mold gently on the counter to remove air bubbles, then use a spatula or knife to level off the tops for clean edges.
- CHILL UNTIL SET: Transfer the filled mold to the refrigerator and chill for 15 to 20 minutes, or until the chocolate is completely firm. Carefully unmold the chocolate hats once they are set.
- ATTACH HATS TO COOKIE BASE: Add a small dot of melted chocolate to the center of each fudge-striped cookie, chocolate-side up. Press a chocolate hat onto the cookie and hold gently for a few seconds until it adheres.
- ROLL OUT YELLOW FONDANT: Using a rolling pin, roll the yellow fondant into a thin sheet. Cut into long, narrow strips to form the decorative bands for the hats.
- CUT AND SHAPE THE BUCKLES: With a small knife or fondant cutter, cut tiny squares or rectangles from the fondant to resemble buckles. Use a drop of water or edible glue to attach each buckle to the center of a fondant band.
- WRAP AND DECORATE: Wrap each fondant band around the base of the chocolate hat and press gently to secure. Position the buckle in front and press lightly to adhere.
Notes
These cookies are best stored in a cool room or refrigerated in an airtight container to prevent the chocolate from softening. Use gel food coloring if you need to tint white fondant yellow. If you don’t have a mini top-hat mold, small half-sphere molds can be used for a similar effect.
Nutrition Information
Yield
12Serving Size
1Amount Per Serving Calories 123Total Fat 6gSaturated Fat 3gTrans Fat 0gUnsaturated Fat 2gCholesterol 1mgSodium 20mgCarbohydrates 19gFiber 1gSugar 15gProtein 1g