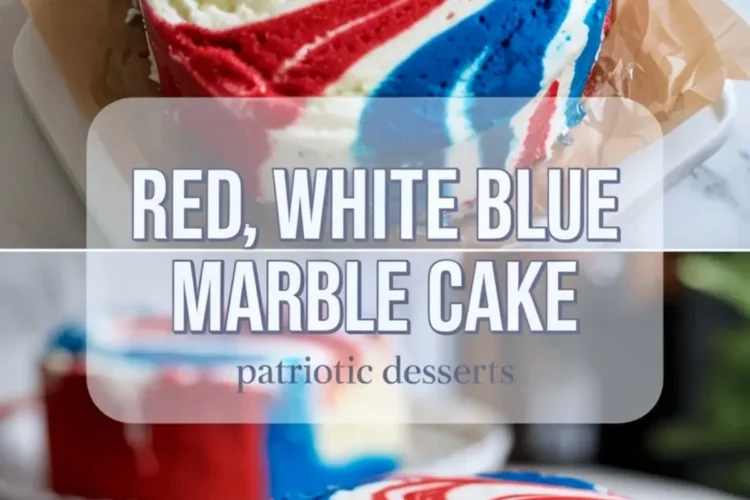
This red white and blue marble cake is a simple way to make a holiday dessert look festive without turning it into a decorating project. The batter starts as a soft vanilla cake, then gets divided and colored so you can swirl plain, red, and blue layers together for a bright marbled interior. Once baked and glazed, it gives you a patriotic cake that feels cheerful, sliceable, and much easier than building a fully frosted celebration cake.
It is especially useful when you want a 4th of July cake that looks themed but still feels approachable for a home baker. The color pattern does most of the visual work, so you do not need piping tricks or complicated layers to make it stand out. If you like festive summer bakes with a strong color payoff, treats like patriotic funfetti blondies have a similar easygoing party feel.
Following a special diet?
Every recipe on this site can be converted to gluten-free, vegan, dairy-free, keto, nut-free or egg-free with adjusted ratios so nothing falls flat.
Try the Recipe Converter →What Makes The Marble Effect Look Clean Instead Of Muddy
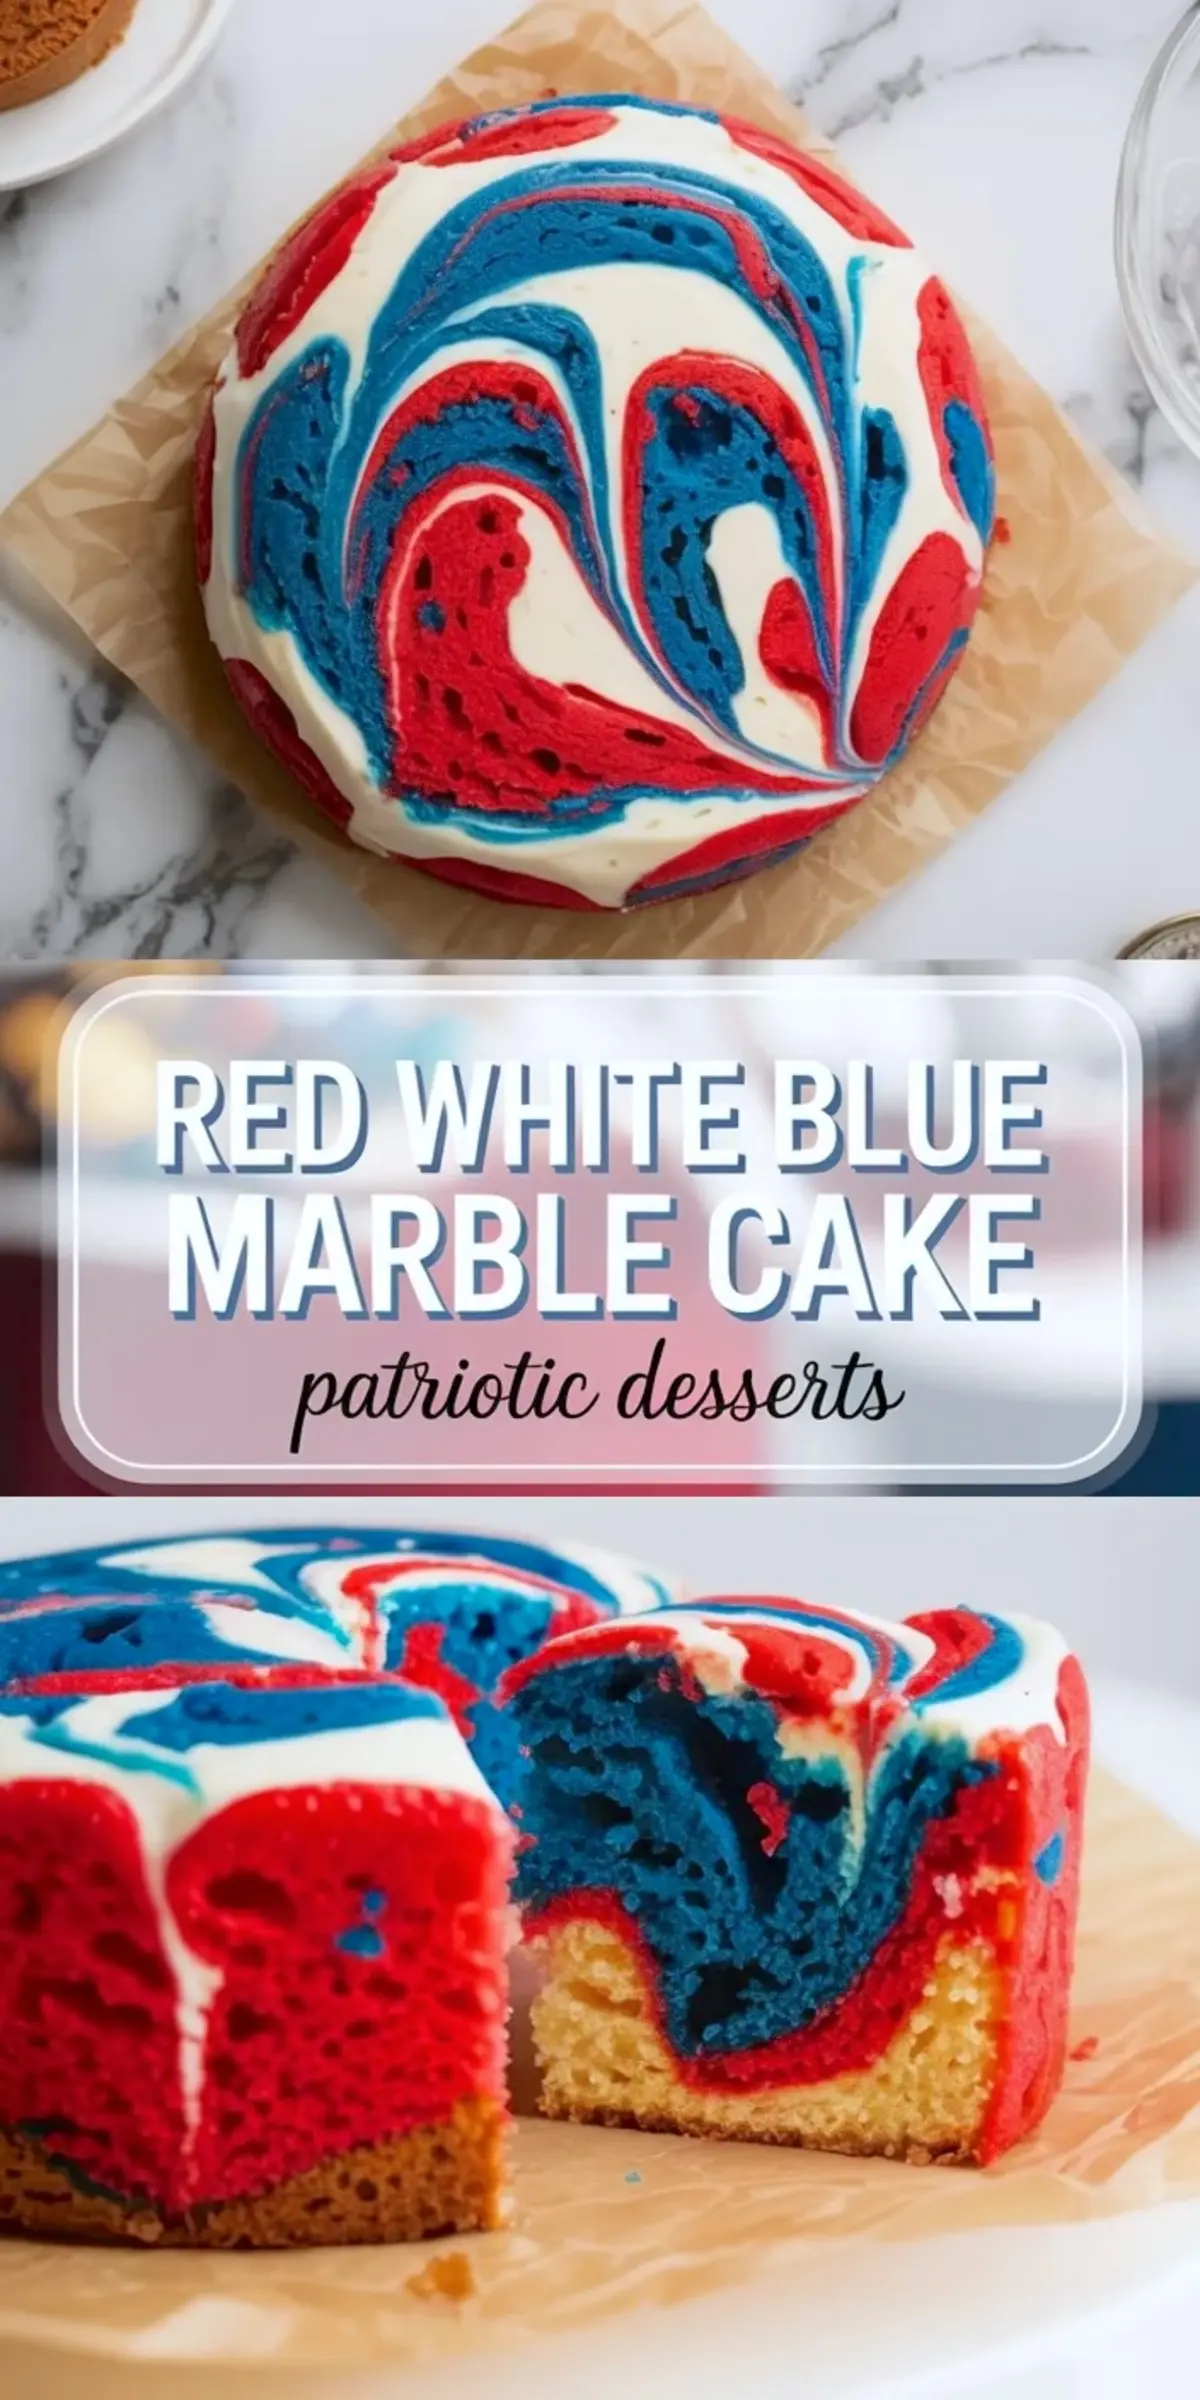
The real trick in a good patriotic marble cake is restraint. You want the red, white, and blue batters to twist into each other enough to create movement, but not so much that the colors blur together. A few gentle passes with a skewer or butter knife are usually all it takes. Once the colors start losing their edges, the swirl can quickly turn dull instead of crisp.
That is why this kind of cake works better with a simple vanilla batter than with anything too heavy or textured. A smooth batter lets the colors stay distinct and helps the marbling show clearly in each slice. When you cut into the finished cake, the inside should look playful and swirled, not streaked into one purple tone.
The Ingredients That Matter Most
Butter, sugar, eggs, flour, baking powder, and milk create a classic soft vanilla cake base, and that familiar structure is exactly what makes the color work so well. The crumb needs to stay tender enough to feel pleasant on its own, but sturdy enough to hold the swirl pattern without collapsing. Butter gives the cake richness, while milk keeps the batter smooth and easy to divide between bowls.
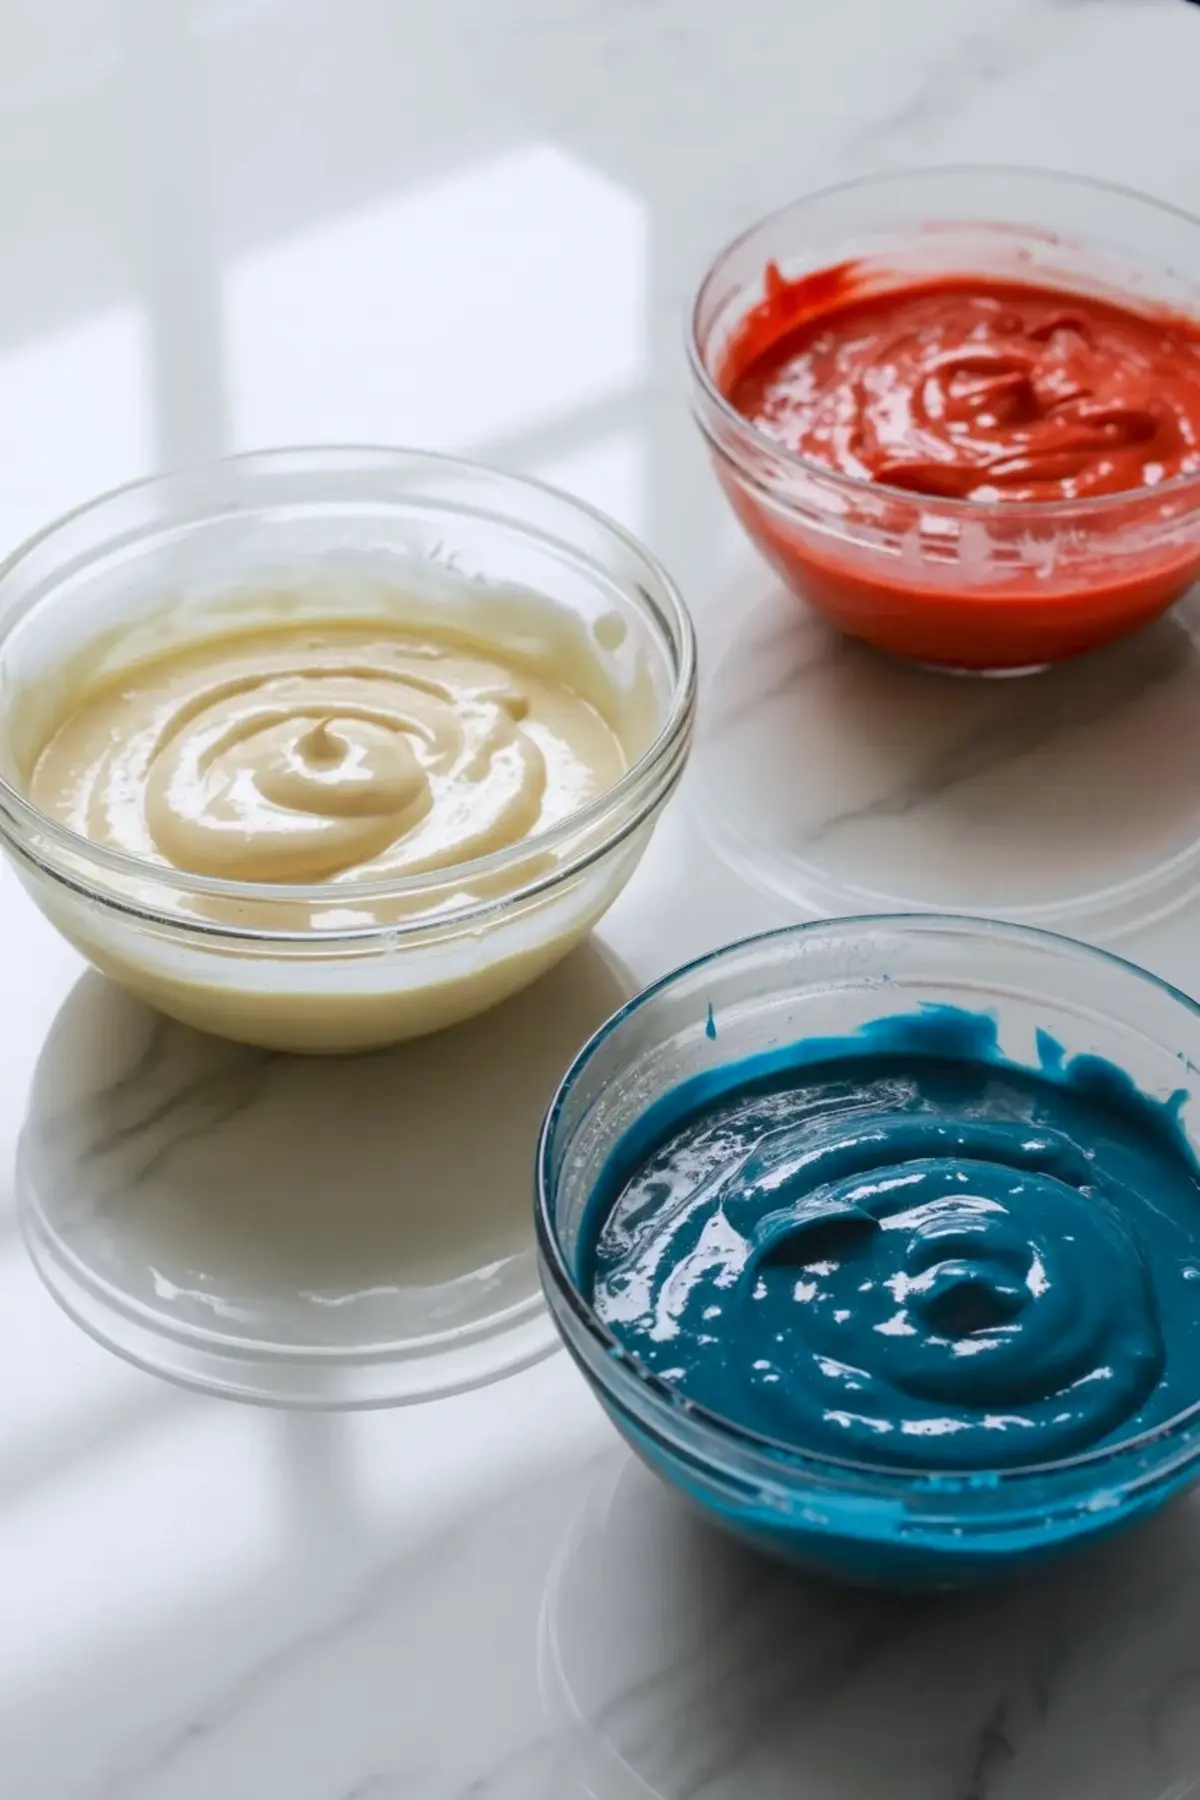
Gel food coloring matters here more than people expect. Liquid coloring can thin the batter and produce weaker shades, while gel coloring gives you the stronger red and blue needed for a clean patriotic look. The simple glaze at the end keeps the finish light rather than heavy, which makes this cake feel more casual than a fully frosted layer cake. If you want another cake with a straightforward sweet topping, blueberry sour cream coffee cake is a nice one to save.
How To Build The Swirl Without Overworking The Batter
Once the vanilla batter is mixed, divide it evenly into three bowls. Leave one plain, then color one portion red and the other blue. Spoon the batters into the pan in alternating dollops so the colors are distributed all over rather than stacked in large heavy sections. That setup gives you a better swirl once the knife moves through the batter.
After the batters are in the pan, drag a skewer or butter knife through them gently. Think of it as guiding the colors, not fully mixing them. Overworking this stage is the fastest way to lose the crisp red white and blue look. A light hand gives the nicest marbled slices and keeps the finished cake looking intentional instead of messy.
Why This Works So Well For Summer Parties
This red white and blue swirl cake is easy to transport, easy to slice, and festive enough to anchor a dessert table without needing much else. Because it is not stacked or heavily frosted, it travels better than many celebration cakes and feels lower stress for cookouts, picnics, and holiday gatherings. That makes it a smart choice when you need a patriotic dessert that still feels practical.
It also fits nicely beside other 4th of July desserts without repeating the same style. If you are putting together a spread, it pairs well with chilled options like patriotic blueberry cheesecake icebox cake or bite sized tray bakes. The contrast helps the cake feel like its own centerpiece instead of just another brightly colored dessert.
Common Mistakes That Change The Look
If the cake colors look muddy, the batter was likely swirled too much. If the shades look pale, the coloring may have been too weak or too little was added. Uneven marbling often comes from dropping all of one color into the pan first instead of alternating the batter throughout. The good news is that none of these are hard problems to avoid once you know where the marble effect can go wrong.
Texture issues can also happen if the batter is overmixed before coloring. Once the flour goes in, mix only until combined so the cake stays soft instead of tough. If you want the glaze to sit neatly on top, wait until the cake is fully cool. A warm cake can make the glaze slide off too quickly and blur the final finish.
Easy Ways To Change The Finish
You can keep the glaze plain for a cleaner look, or add festive sprinkles if you want a little more surface detail. A few extra drops of almond or lemon extract in the glaze can also shift the flavor slightly without changing the core cake. If you want the cake to lean more birthday than holiday, the same marbling idea works well with different color combinations too.
For a more casual serving style, slice the cake and serve it as is. For something a bit more dressed up, pair each slice with whipped cream or berries. If you like colorful celebration desserts, patriotic red velvet cupcakes are another easy option to keep in the same party folder.
Storage And Make Ahead Tips
This cake keeps well covered at room temperature for a few days, which makes it convenient for party prep. If you need to make it ahead, bake the cake first, let it cool fully, then glaze it once you are closer to serving. That keeps the top looking fresher and helps the finish stay clean.
Because the crumb is soft and the decoration is minimal, leftovers stay pleasant without much effort. Just keep the cake covered so it does not dry out. It is the kind of dessert that works well the next day, which is one more reason it is such a practical 4th of July cake.
Save This Patriotic Marble Cake For Your Next Celebration
Save this red white and blue marble cake recipe for the next time you want a patriotic dessert that looks festive without demanding too much decorating work. It gives you a soft vanilla cake, bold swirls, and a simple finish that still stands out on the table. If you make it, save it to Pinterest and come back with questions or a note about how the marbling turned out.
Red White and Blue Marble Cake Recipe
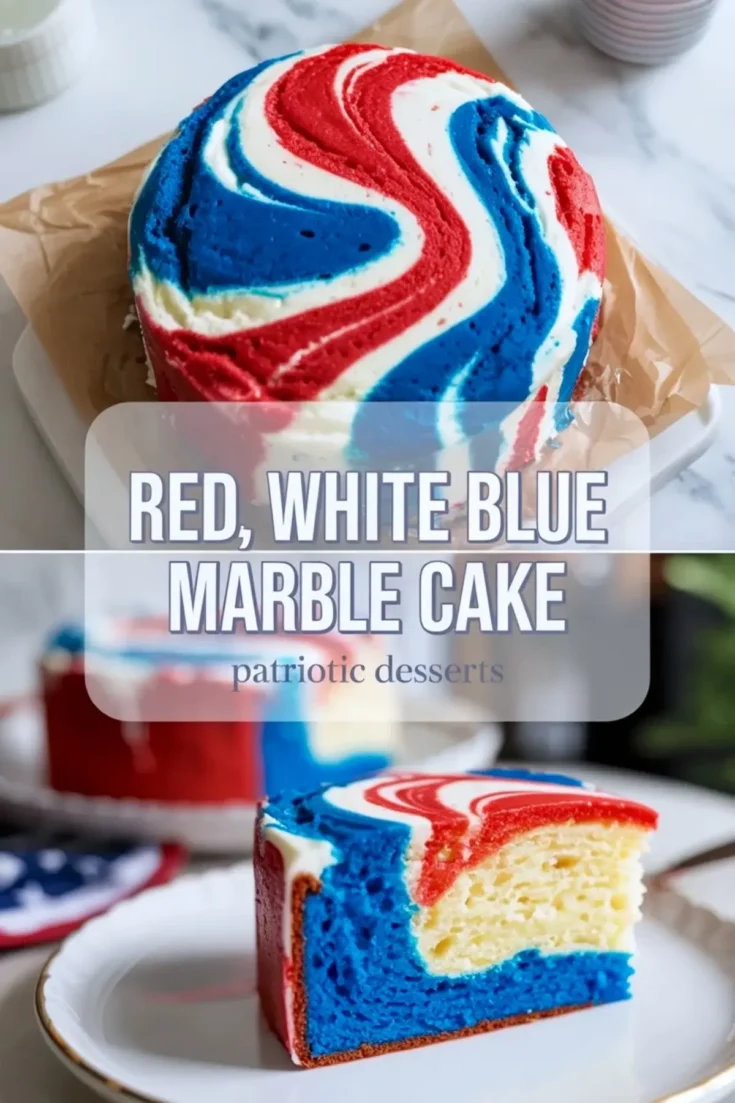
This red white and blue marble cake bakes up soft, buttery, and bright with swirls of plain vanilla batter, red batter, and blue batter layered together in one festive cake. It is an easy patriotic marble cake for summer parties, birthdays, and 4th of July dessert tables because the color does most of the decorating work while a simple glaze keeps the finish clean and light. If you have been looking for a red white and blue swirl cake, patriotic cake, or 4th of July cake that feels cheerful without needing complicated piping, this recipe gives you tender crumb, bold color, and a marbled look that slices beautifully. It is easy to serve, fun to cut into, and a smart choice when you want holiday color without a heavy frosted layer cake.
Ingredients
- FOR THE CAKE BATTER
- 3 cups all-purpose flour
- 2 ½ teaspoons baking powder
- ½ teaspoon salt
- 1 cup unsalted butter, softened
- 2 cups granulated sugar
- 4 large eggs
- 1 tablespoon vanilla extract
- 1 cup whole milk
- Red gel food coloring
- Blue gel food coloring
- FOR THE GLAZE
- 2 cups powdered sugar
- 3-4 tablespoons milk
- 1 teaspoon vanilla extract
Instructions
PREPARE THE PAN: Preheat the oven to 350°F. Grease a 9-inch round cake pan or springform pan and line the bottom with parchment paper to help the cake release easily after baking.
MIX THE DRY INGREDIENTS: In a medium mixing bowl, whisk together the all-purpose flour, baking powder, and salt until evenly combined. Set the bowl aside.
CREAM THE BUTTER AND SUGAR: In a large mixing bowl, beat the softened butter and granulated sugar with an electric mixer for 3-4 minutes until the mixture becomes light, fluffy, and pale in color.
ADD THE EGGS AND VANILLA: Add the eggs one at a time, mixing well after each addition. Stir in the vanilla extract until fully incorporated.
COMBINE THE BATTER: Add half of the flour mixture to the butter mixture and mix gently. Pour in the whole milk, then add the remaining flour mixture. Mix just until combined to keep the cake soft and tender.
COLOR THE BATTER: Divide the batter evenly into three separate bowls. Leave one bowl plain. Add red gel food coloring to one bowl and blue gel food coloring to the other bowl. Stir each batter gently until the colors become rich and evenly mixed.
CREATE THE MARBLE PATTERN: Spoon dollops of the plain, red, and blue batters into the prepared cake pan, alternating colors throughout the pan. Use a butter knife or skewer to gently swirl through the batter a few times to create a marbled effect without overmixing the colors.
BAKE THE CAKE: Bake for 45-50 minutes or until a toothpick inserted into the center comes out clean. The top should look lightly golden and spring back gently when touched.
COOL THE CAKE: Allow the cake to cool in the pan for 15 minutes. Transfer the cake to a wire rack and let it cool completely before adding the glaze.
MAKE THE GLAZE: In a medium bowl, whisk together the powdered sugar, milk, and vanilla extract until smooth and pourable.
GLAZE THE CAKE: Pour the glaze over the cooled cake and allow it to drip naturally down the sides before slicing and serving.
Notes
Use gel food coloring instead of liquid food coloring for brighter colors without thinning the batter.
Avoid overswirling the batter so the red, white, and blue colors stay distinct after baking.
Store the cake covered at room temperature for up to 3 days.
Nutrition Information
Yield
12Serving Size
1Amount Per Serving Calories 747Total Fat 20gSaturated Fat 12gUnsaturated Fat 8gCholesterol 109mgSodium 209mgCarbohydrates 132gFiber 2gSugar 84gProtein 9g