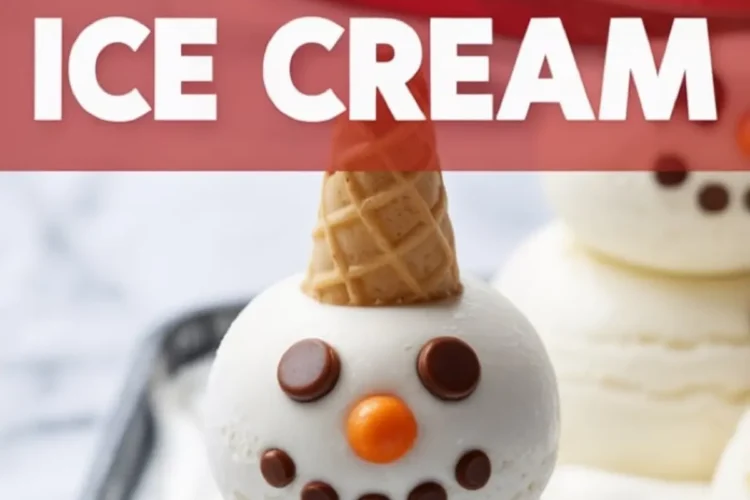
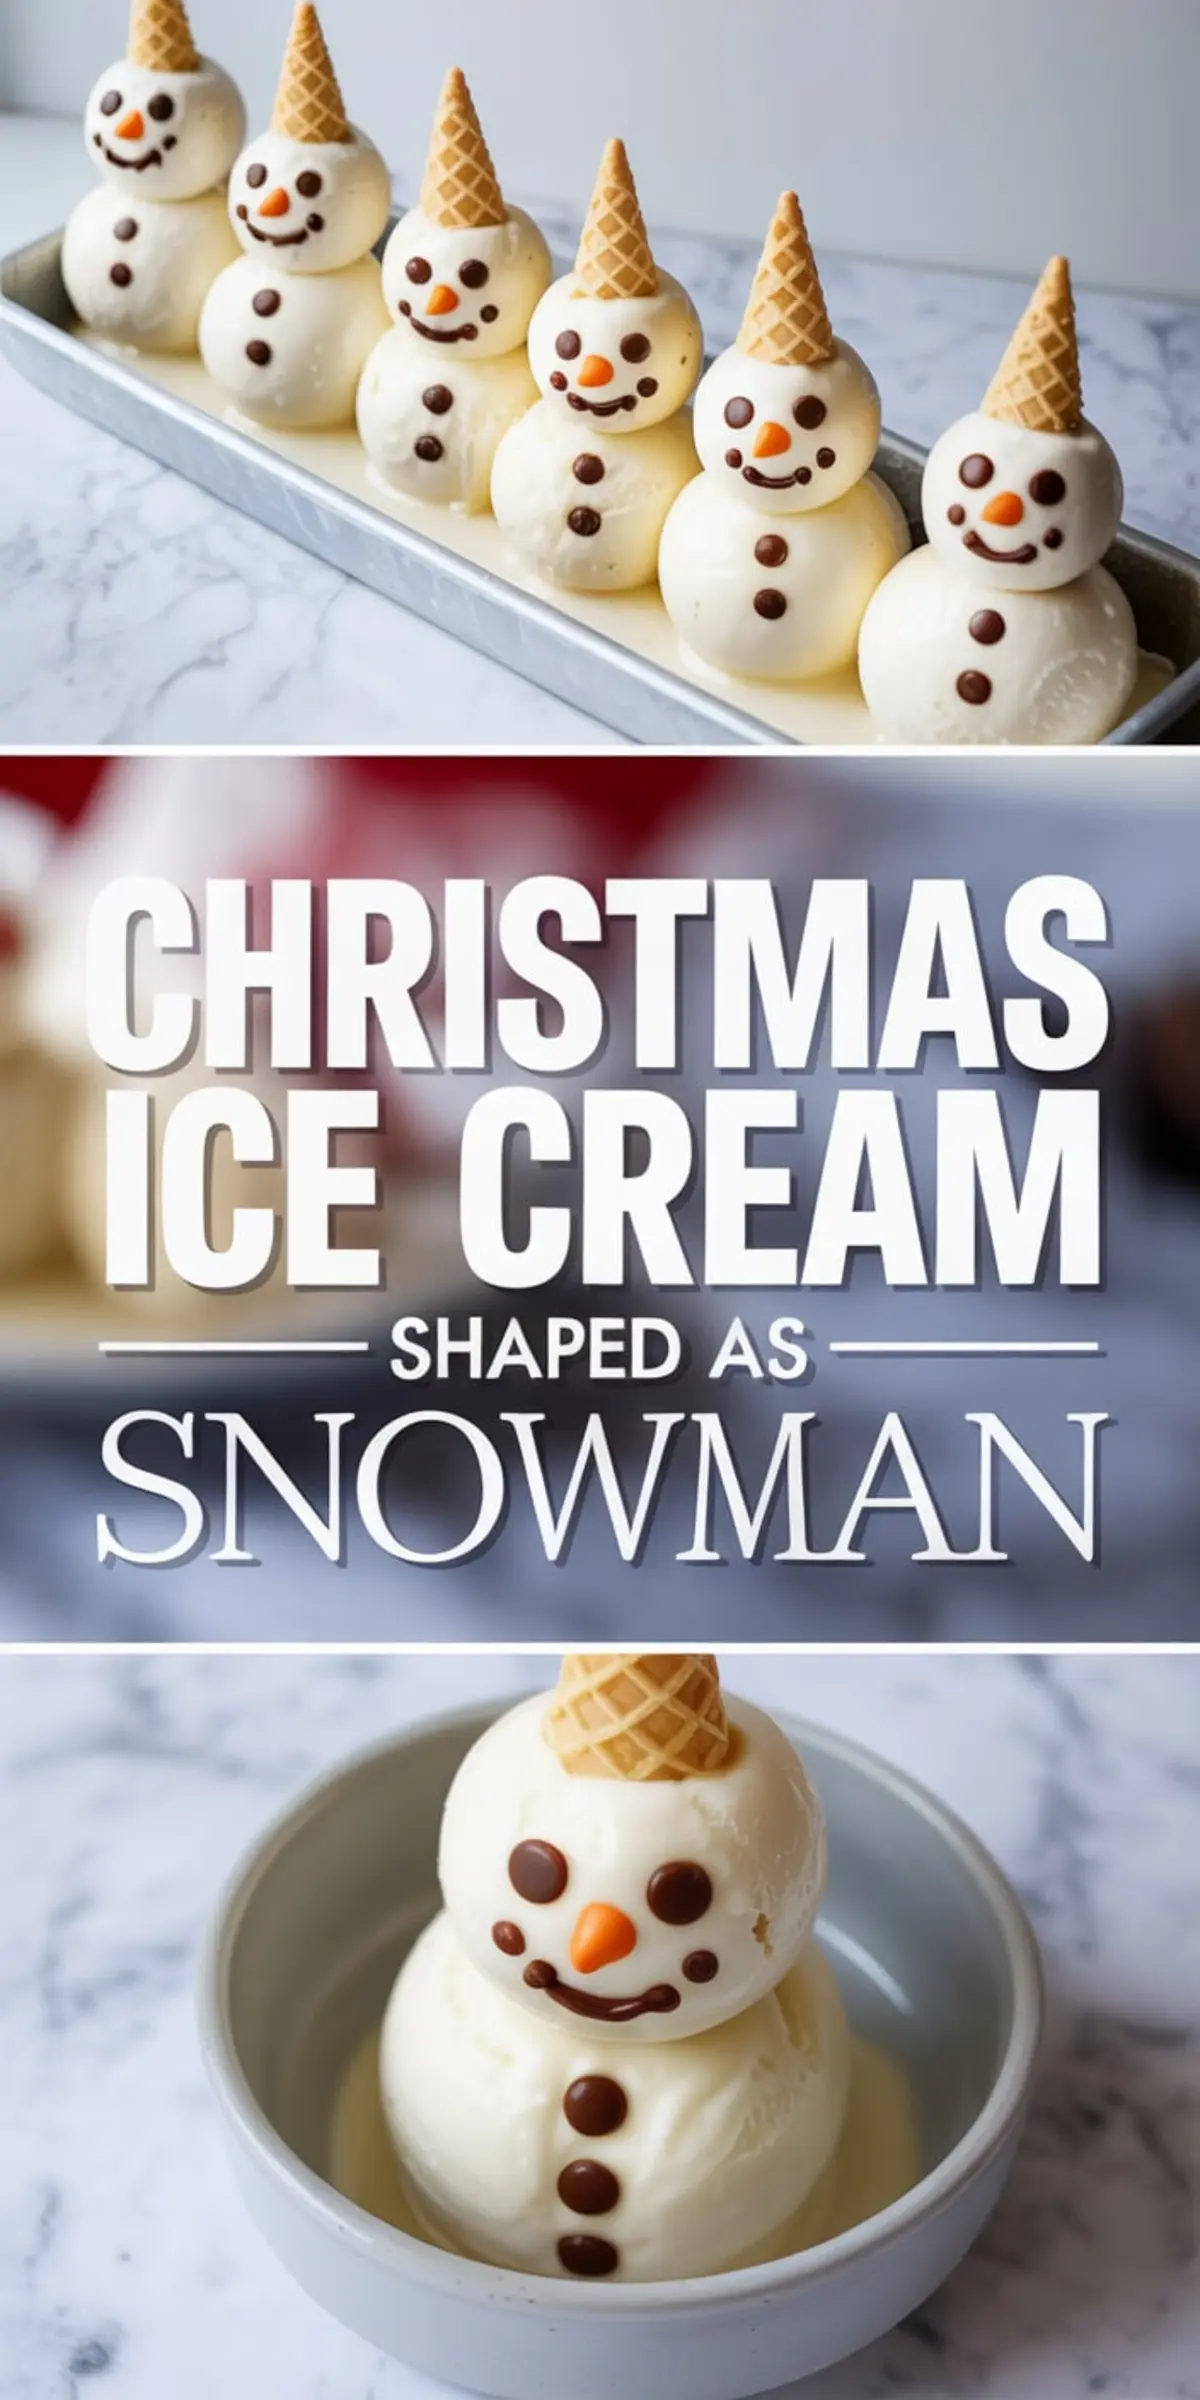
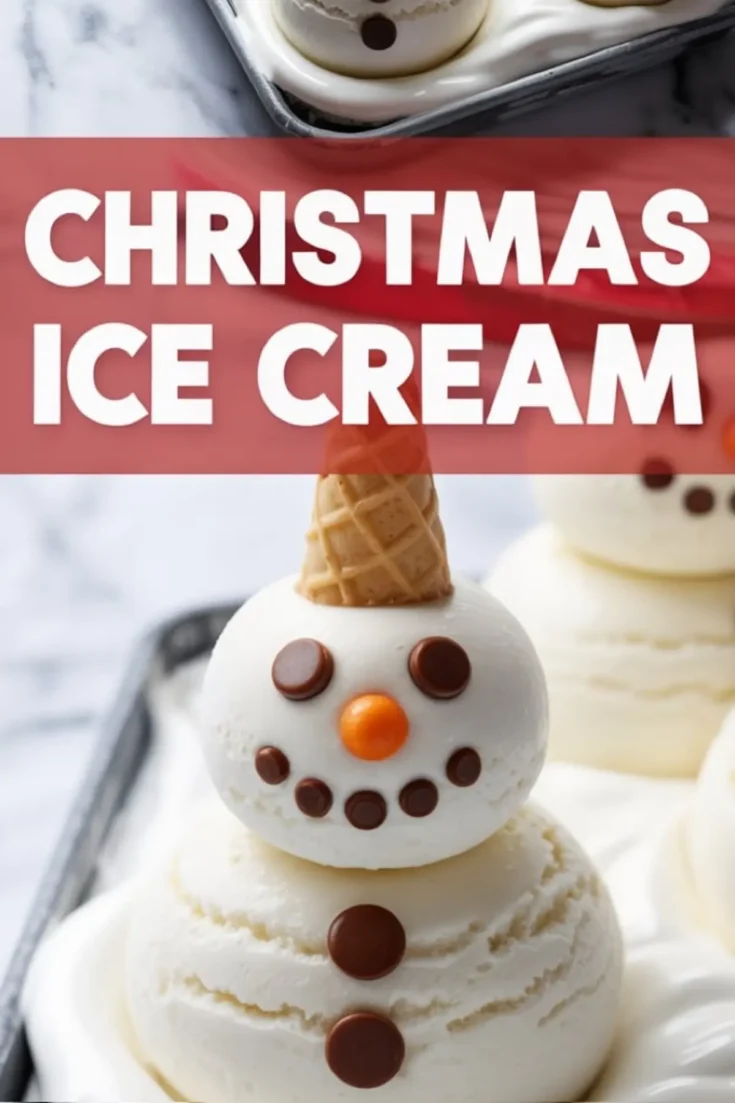
Christmas Ice Cream Snowmen use simple vanilla ice cream and a few candies to create festive treats that double as decoration and dessert. These no-bake snowmen are built with stacked scoops, finished with chocolate chips, candy buttons, and mini cones for hats.
This idea works well for Christmas cooking with kids, holiday treats for casual gatherings, or whimsical Christmas party food. These Christmas desserts also serve as Christmas snacks during the season, especially when you want something fun without the oven.
Ice Cream Consistency Matters
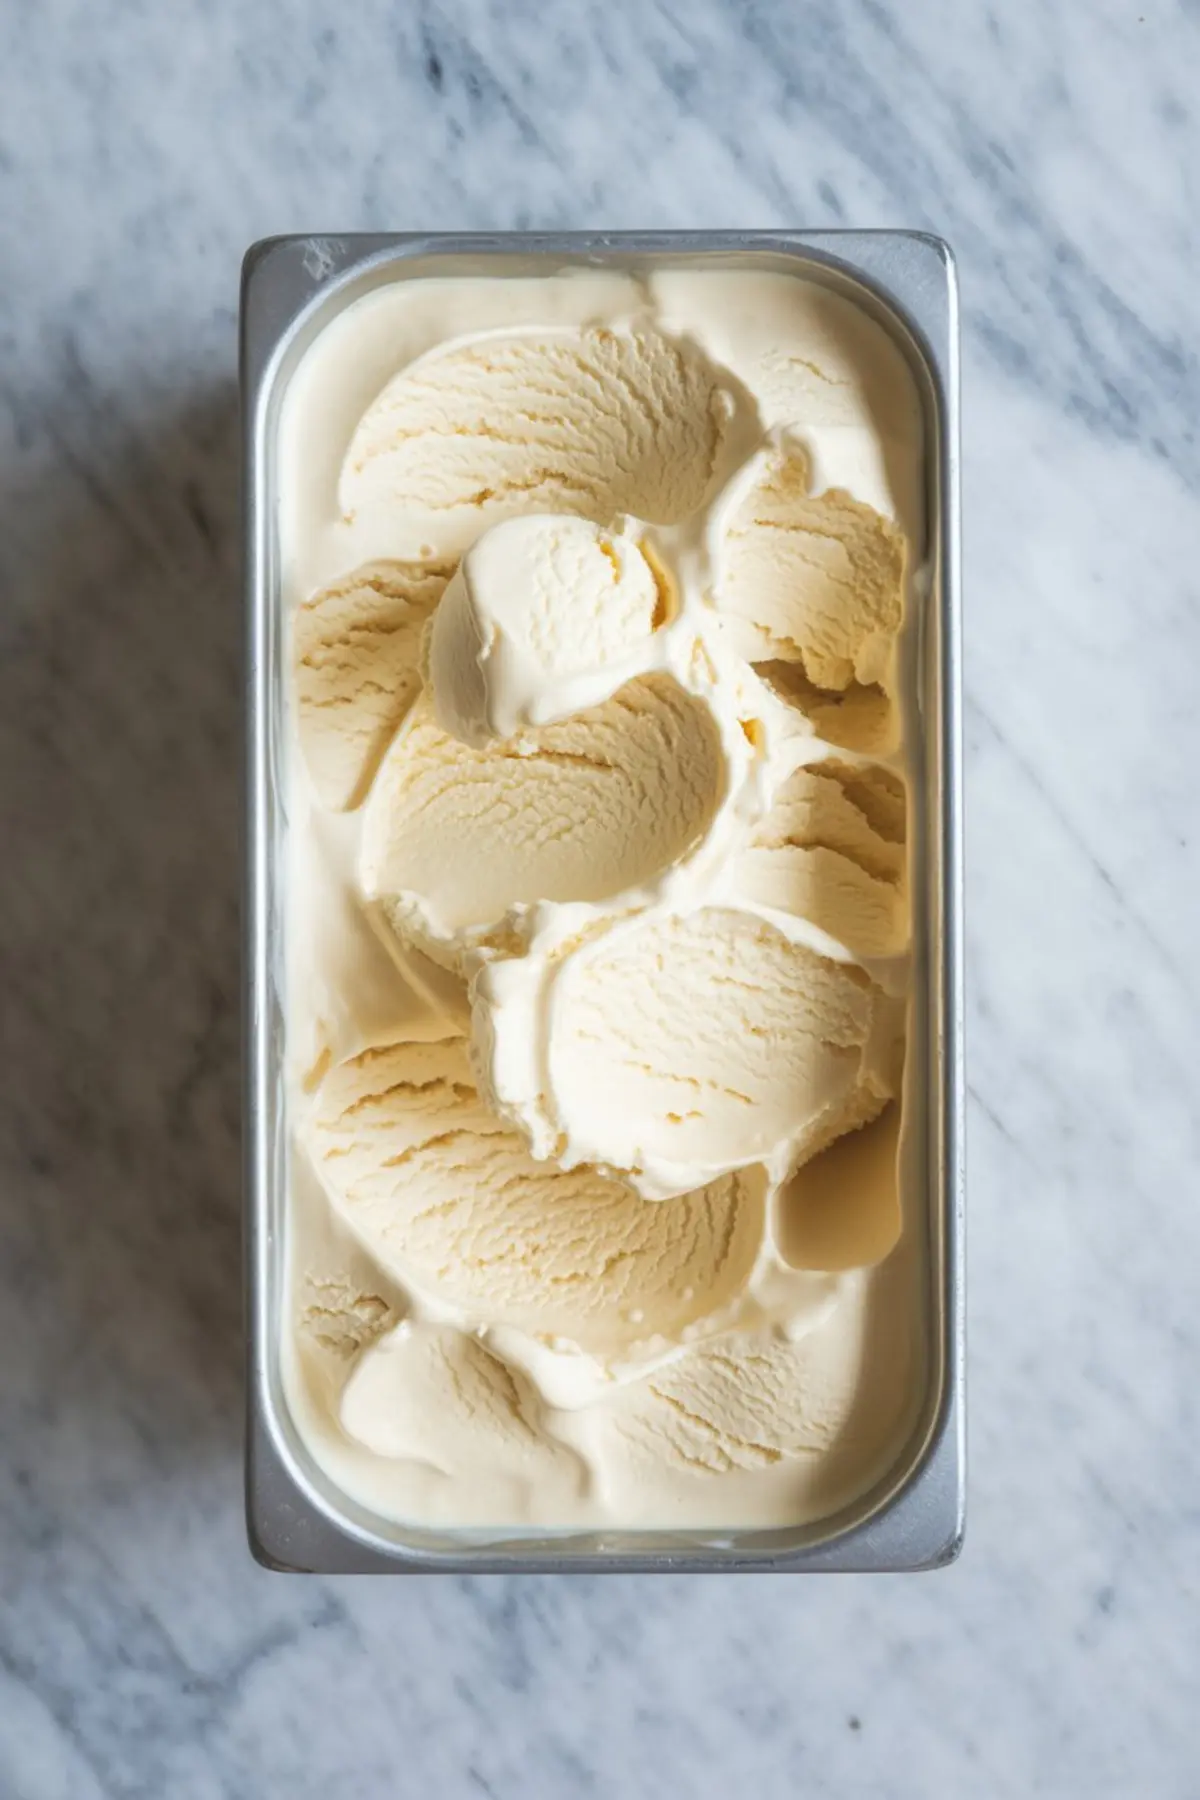
Vanilla ice cream handles best after sitting five minutes on the counter. Too frozen, and the scoops crack or split.
Too soft, and they collapse before the second freeze. If using store-brand ice cream, check for stabilizers. Brands with fewer additives often scoop better and melt more cleanly.
If you’re using coconut-based or dairy-free ice cream, make the scoops a little smaller. The lighter texture tends to soften faster once out of the freezer.
If you’re planning a dessert table with a mix of cold and crunchy textures, these snowmen pair well with no-bake options like Christmas Rice Crispy Treats.
Ingredient Breakdown: Why Each Matters
Vanilla ice cream offers a clean look and blank canvas for decoration. I don’t add food coloring here. The white gives contrast for the chocolate chip faces and orange noses.
Mini sugar cones act as hats. Their shape fits the scoops neatly and adds height. Waffle cones work, but feel bulky.
Mini chocolate chips are easier to press into the head without breaking it. Regular chips look oversized and fall off more easily.
Mini orange candies mimic carrot noses. Tic Tacs stay in place better than rounder ones like M&Ms.
White icing acts as glue when chips don’t want to stick. I use a piping bag with a small tip for control, or just dab with a toothpick.
Classic Yule Log makes a good pairing on the dessert table. The structured look of the log next to these snowmen adds visual balance.
What to Watch as You Build
Scoop the base and head with a gentle hand.
Avoid pressing too firmly. That compacts the texture and can make the scoop stick to the spoon.
Set each pair on a parchment-lined tray, and freeze for at least 20 minutes before adding decorations.
Decorate quickly. Once the tray comes out, you have maybe 5 minutes before the surface softens.
Use cold, dry hands or wear food-safe gloves to avoid melting them from touch.
White Chocolate Cranberry Rice Krispie Treats also do well alongside these on a buffet. They share a light color palette and similar prep time.
How to Tell It’s Ready to Serve
The snowmen should feel firm but scoopable.
Their shape should hold when moved with a spoon or offset spatula.
If the cones feel loose, press them gently down and freeze another 10 minutes.
Melting around the base means they’ve sat too long at room temperature. You can fix that by returning them to the freezer and re-pressing the scoops.
Cracked scoops mean the ice cream was too hard. Let the carton rest longer before scooping the next round.
Use this as part of a prep-ahead plan for Gingerbread Crinkle Cookies or other baked goods. The contrast between frozen and soft texture plays well on a plate.
Change It Up
Swap vanilla for chocolate or strawberry ice cream.
Use mini pretzel sticks as arms. Just insert them after the second freeze.
Add candy scarves by cutting fruit leather into strips and wrapping around the neck joint.
Try colored cones or dip the cone tips in chocolate before assembling. That adds contrast and a slight crunch.
Build them on cupcakes or cookies for single-serve presentation.
How to Store and Serve
Freeze the finished snowmen on a tray until firm, then transfer to an airtight container. Keep layers separated with parchment.
Store up to 2 weeks in the freezer.
Serve straight from the freezer, or let sit 2 minutes before plating.
Do not refrigerate. They melt quickly if kept above freezing.
Use them as part of an ice cream tray, cupcake topper, or individual Christmas desserts. Add a mini spoon or serve on chilled plates to slow melting.
Save This Idea and Share Yours

Pin this idea so you have it ready for your Christmas cooking plans.
Let me know in the comments if you make these snowmen, or if you try different toppings. I’d love to see your variations.
Christmas Ice Cream Snowmen
These Christmas Ice Cream Snowmen are the cutest holiday treats for any winter celebration. Made with scoops of vanilla ice cream stacked and decorated with chocolate chips, candy, and festive toppings, they’re a hit on the Christmas party food table. No baking needed, just a bit of creativity. Ideal for Christmas snacks, festive treats, or a whimsical dessert idea for kids and adults alike. Add this simple yet charming idea to your Xmas food list for the season. One of the easiest Christmas desserts to impress your guests.
Ingredients
- Vanilla ice cream – 1.5 quarts (or approximately 1.4 liters)
- Mini sugar cones – 6 cones
- Mini chocolate chips – about 1/4 cup (for eyes and smiles)
- Regular chocolate chips or candy buttons – about 1/4 cup (for body buttons)
- Mini orange candies (such as orange M&Ms or Tic Tacs) – 6 pieces
- White icing or melted chocolate (optional) – 2 tablespoons, for sticking decorations
- Parchment-lined tray or large plate – for assembling and freezing
Instructions
- SCOOP THE ICE CREAM: Let the ice cream sit at room temperature for about 5 minutes to soften slightly. Use a small scoop to form one larger ball and one smaller ball per snowman. Place the larger scoop on a parchment-lined tray, then gently press the smaller scoop on top to form the head.
- FREEZE TO SET: Transfer the tray to the freezer and chill for 20 to 30 minutes. This firms the snowmen enough for decorating without melting.
- ADD THE FACES: Remove the tray and work quickly. Press two mini chocolate chips into the head scoop for eyes, and arrange several to create a smiling mouth. Use a mini orange candy to form the nose. If pieces don’t stick easily, dab a little icing or melted chocolate as glue.
- DECORATE THE BODY: Add two or three chocolate chips or buttons down the front of the body to create buttons. Gently press them into the ice cream.
- FINISH WITH A HAT: Place a mini sugar cone upside down on top of each snowman’s head to resemble a hat.
- FREEZE AGAIN: Return the decorated snowmen to the freezer until ready to serve. Keep them cold until just before bringing to the table.
Notes
You can substitute coconut-based or other non-dairy ice creams for a dairy-free version. Try using different candy types to match preferences or available ingredients. Assemble snowmen on individual plates if making with kids to avoid crowding and make decorating easier.