How to Make Elegant Gingerbread Mousse Domes with a Hint of Coffee and a Mirror Glaze Finish
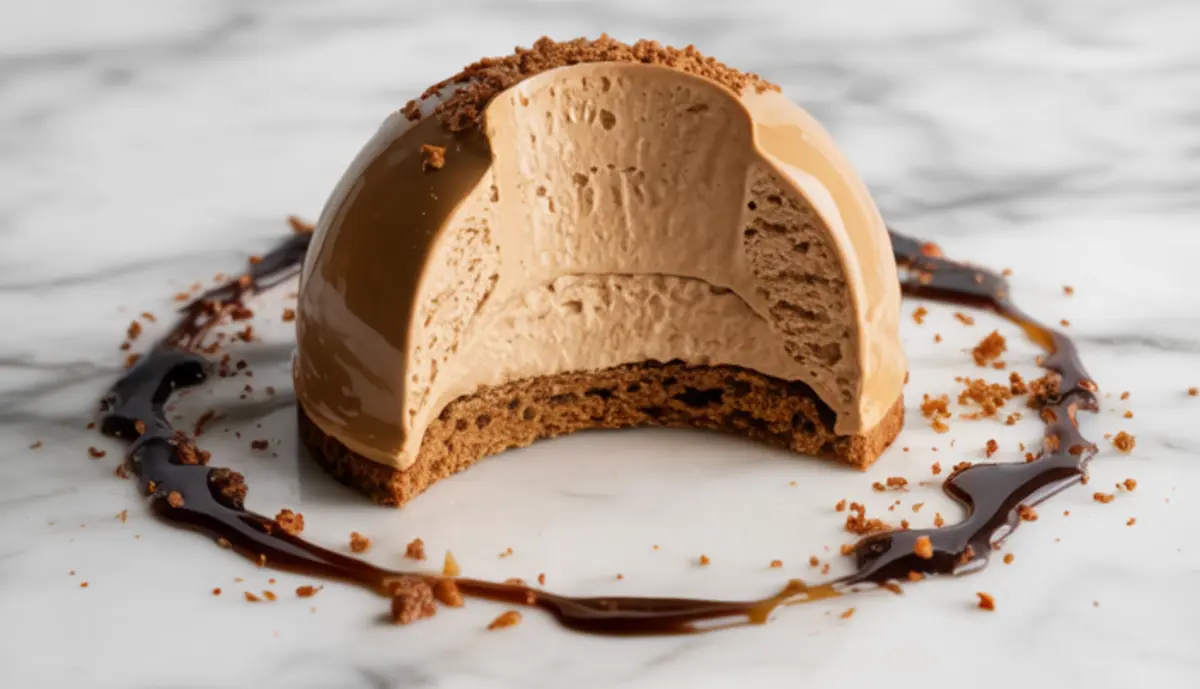
There’s something quietly confident about these Gingerbread Latte Mousse Domes. They’re soft but structured. Light, but grounded. Every bite brings spiced gingerbread mousse and espresso cream together in a glossy dome that looks more complicated than it is. You’ll taste gingerbread, cinnamon, and molasses, anchored by a gingerbread cookie base and wrapped in a shiny mirror glaze.
This is a gourmet gingerbread dessert you can serve at a cozy fall dinner or a holiday party without feeling like you overpromised. The mousse holds its shape, the glaze sets neatly, and the whole thing lifts easily from the mold. In this post, I’ll show you how I build these domes, why I use mascarpone in the mousse (yes, it matters), and what to do if you’re short on time.
You’ll leave with a dependable plan and several ways to make this your own. Whether you’re adding this to your Christmas recipes board or planning your next gingerbread mousse experiment, these domes will serve you well.
Following a special diet?
Every recipe on this site can be converted to gluten-free, vegan, dairy-free, keto, nut-free or egg-free with adjusted ratios so nothing falls flat.
Try the Recipe Converter →Why Coffee and Gingerbread Work So Well Together
Spiced Gingerbread Mousse Meets Strong Espresso for a Winter-Worthy Finish
The mousse base begins with strong brewed coffee. Espresso works better than regular coffee here. I’ve tested both. The richness from espresso pulls the ginger and cinnamon forward, while regular coffee can get lost behind the molasses.
I mix it with brown sugar, white chocolate, and warm spices like cinnamon, cloves, and nutmeg. Each one adds depth, not sharpness. The gingerbread flavor builds in layers, and the result feels warm rather than overwhelming.
Mascarpone adds body to the whipped cream without stiffening the texture. You could leave it out, but the mousse sets more evenly with it. I’ve found this especially helpful if you’re storing the domes overnight or making them ahead for a party.
You’ll also want to check out my Gingerbread Cheesecake Bars if you’re craving something sliceable with a similar spice profile.
Building the Gingerbread Cookie Base
Spiced Dough That Bakes Firm and Holds Its Shape Under the Mousse
The cookie base has to do two things. It needs to carry the dome without breaking apart, and it must echo the mousse without repeating it exactly.

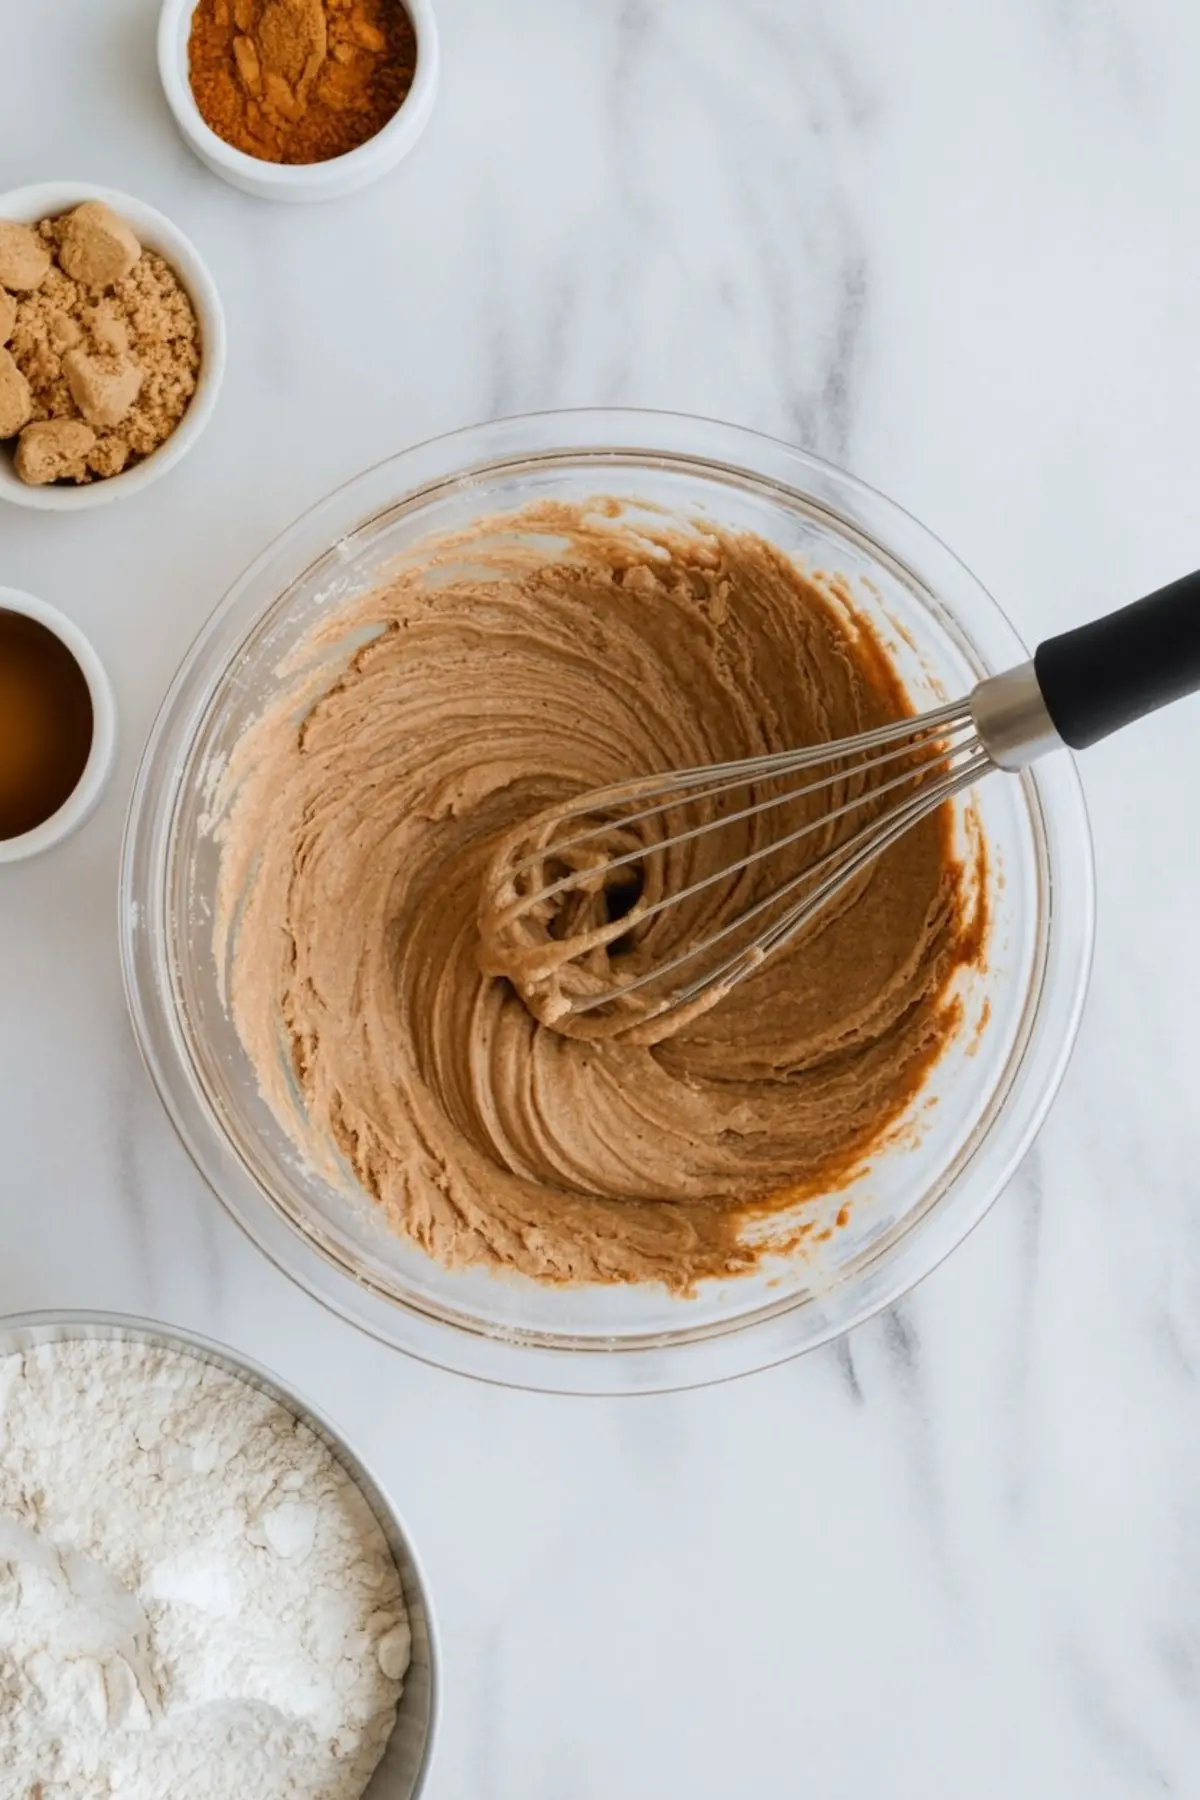
I use a mix of ginger, cinnamon, and cloves for that. The molasses brings sweetness and structure, while the brown sugar softens the texture. One egg yolk is enough to bind the dough. It keeps the cookie tender but firm.
Once rolled and baked, I cut the cookies into rounds slightly larger than the molds. That way, the cookie seals into the mousse when frozen, giving you clean edges and a neat base.

If you prefer a softer finish, compare with my Gingerbread Crinkle Cookies. Those lean into chewiness, while these hold a crisp, short texture.
Folding the Mousse with Confidence
How to Blend Airiness and Flavor without Overmixing
Start by blooming gelatin. It’s a small step, but it controls the final texture of the mousse. Then warm your espresso with brown sugar and spices, stir in the gelatin, and melt the white chocolate into it.
Let that mixture cool before folding it into the whipped cream. If it’s still warm, you’ll lose volume. I always test the bowl with the back of my hand if it feels room temp, you’re ready.
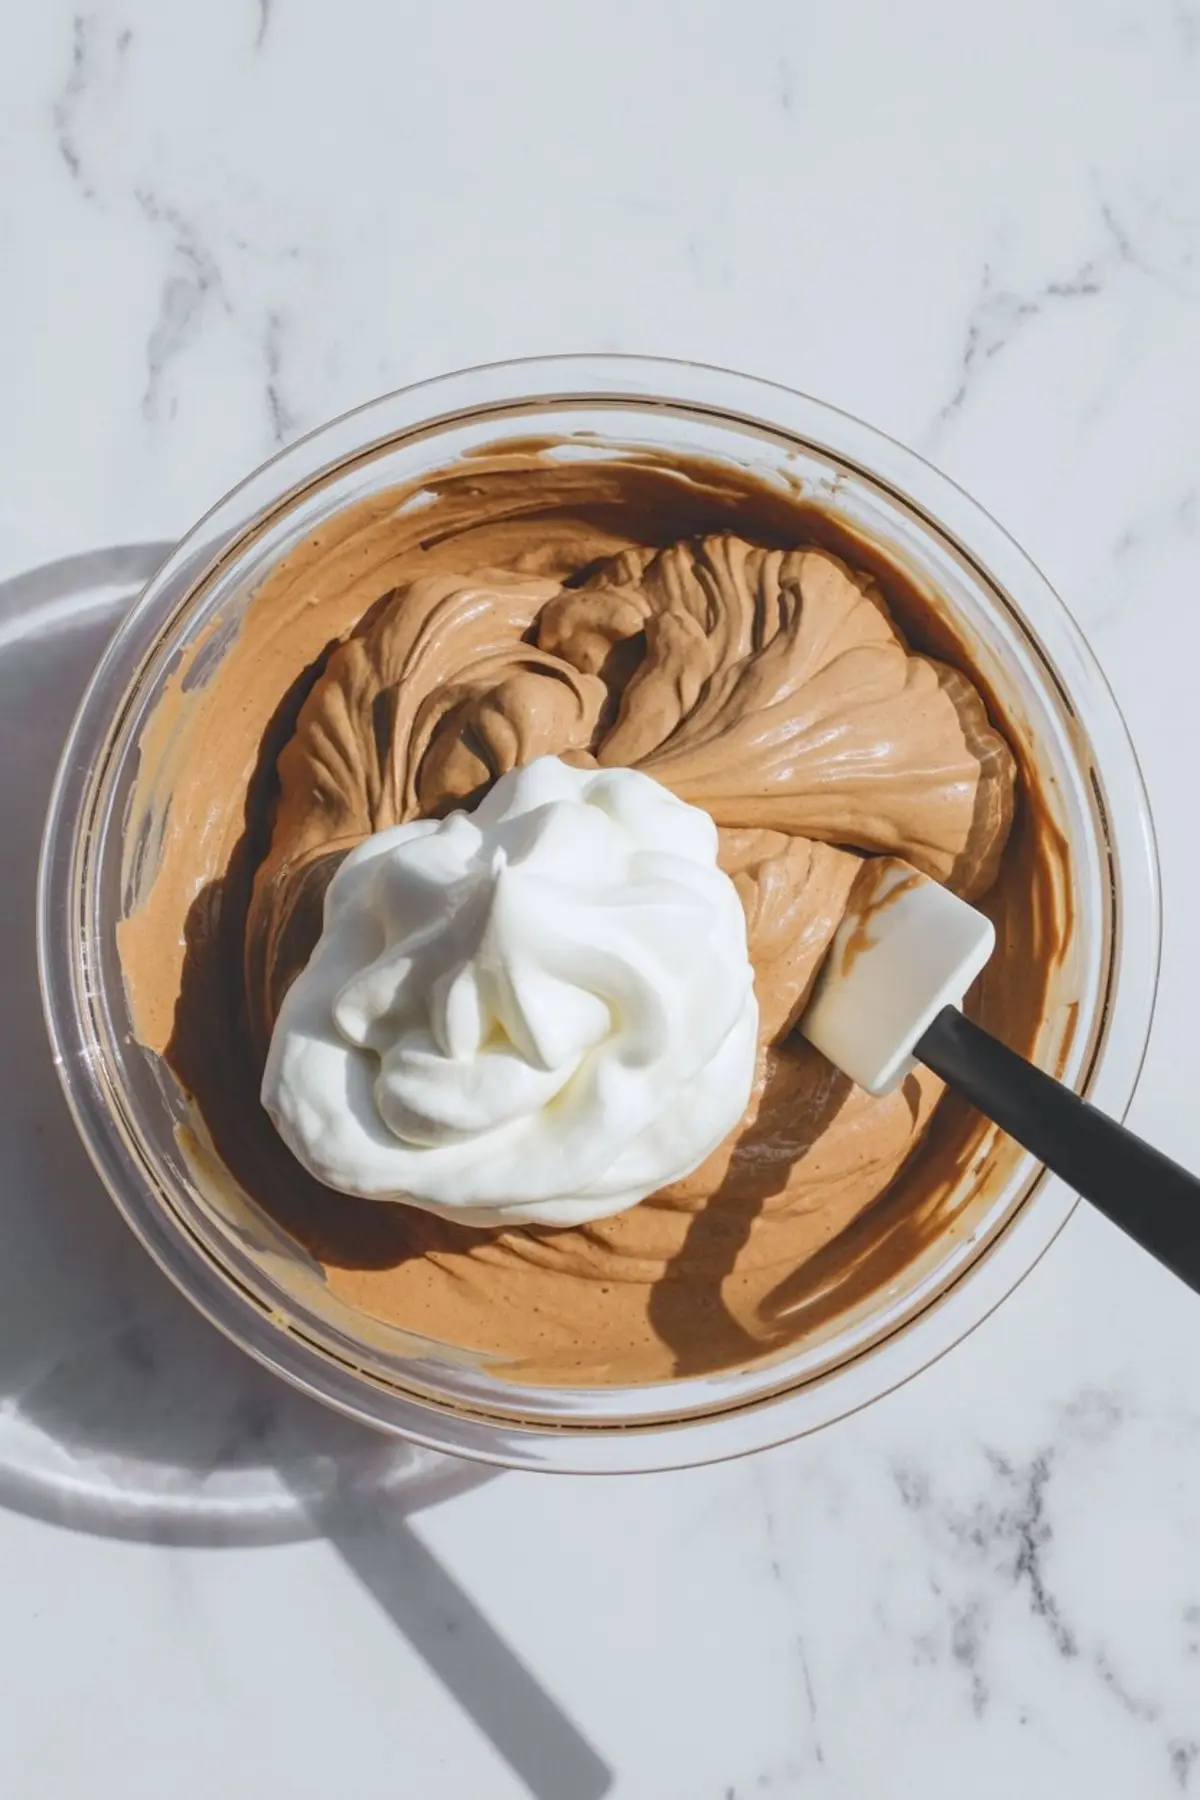
Use long, sweeping motions when folding the espresso base into the cream. Don’t rush. You want to keep the air, but blend evenly. The mousse should look smooth and light, not stiff or grainy.
If you’re looking for something simpler but still rich, my Gingerbread Truffles offer a shortcut version of spiced creaminess.
Assembling the Domes with Clean Edges
How I Freeze and Shape for the Smoothest Result
Spoon the mousse into each dome mold three-quarters full. Then press a cooled cookie base into the center, flat side up. The mousse should rise gently around the edges, sealing the base in.
Give the molds a gentle tap to release any trapped air. I usually freeze them overnight. That ensures a firm structure, which is key for glazing. A shorter freeze may leave soft spots that disrupt the glaze later.
Once frozen solid, they lift easily from high-gloss silicone molds. A smooth mold interior makes all the difference. I’ve tested matte molds, and they always leave texture behind.
The dome structure reminds me a bit of my Gingerbread Wreath, though this one serves smaller individual portions instead of a single centerpiece.
One Ingredient Choice That Changes the Outcome
Mascarpone vs. Cream Cheese in the Mousse
I’ve tried both. Cream cheese adds tang but weighs the mousse down. Mascarpone, on the other hand, disappears into the whipped cream. It gives the mousse a smooth finish and richer mouthfeel without interrupting the coffee and gingerbread.
If you substitute cream cheese, you’ll get a stiffer mousse that leans slightly savory. I prefer mascarpone when I want a cleaner, more balanced bite. Especially when glazing, a lighter mousse sets better inside the dome.
Getting the Mirror Glaze Right
The Final Step That Makes These Domes Look Polished
The glaze needs to be warm, but not hot. Ninety degrees Fahrenheit is the sweet spot. Too cold, and it clumps. Too hot, and it runs off without coating.
White chocolate gives the glaze its shine. The condensed milk adds stretch. A touch of brown gel food coloring deepens the hue to match the gingerbread mousse underneath. You can skip it if you like the natural off-white tone.
Once poured, the glaze sets within minutes. I let it drip cleanly over a wire rack before transferring each dome to a tray. I use an offset spatula and steady hands. Don’t rush that part. It’s worth doing slowly.
If you’re a fan of shiny finishes like this, you might enjoy my Gingerbread Latte, where the same flavor base becomes a warm holiday drink.
Serving and Storing Notes from My Kitchen
How to Make These Ahead and Keep the Finish Clean
You can freeze these mousse domes for up to a week. I recommend glazing the same day you serve them. Once glazed, store in a covered container in the fridge, away from direct airflow. That prevents condensation on the surface.
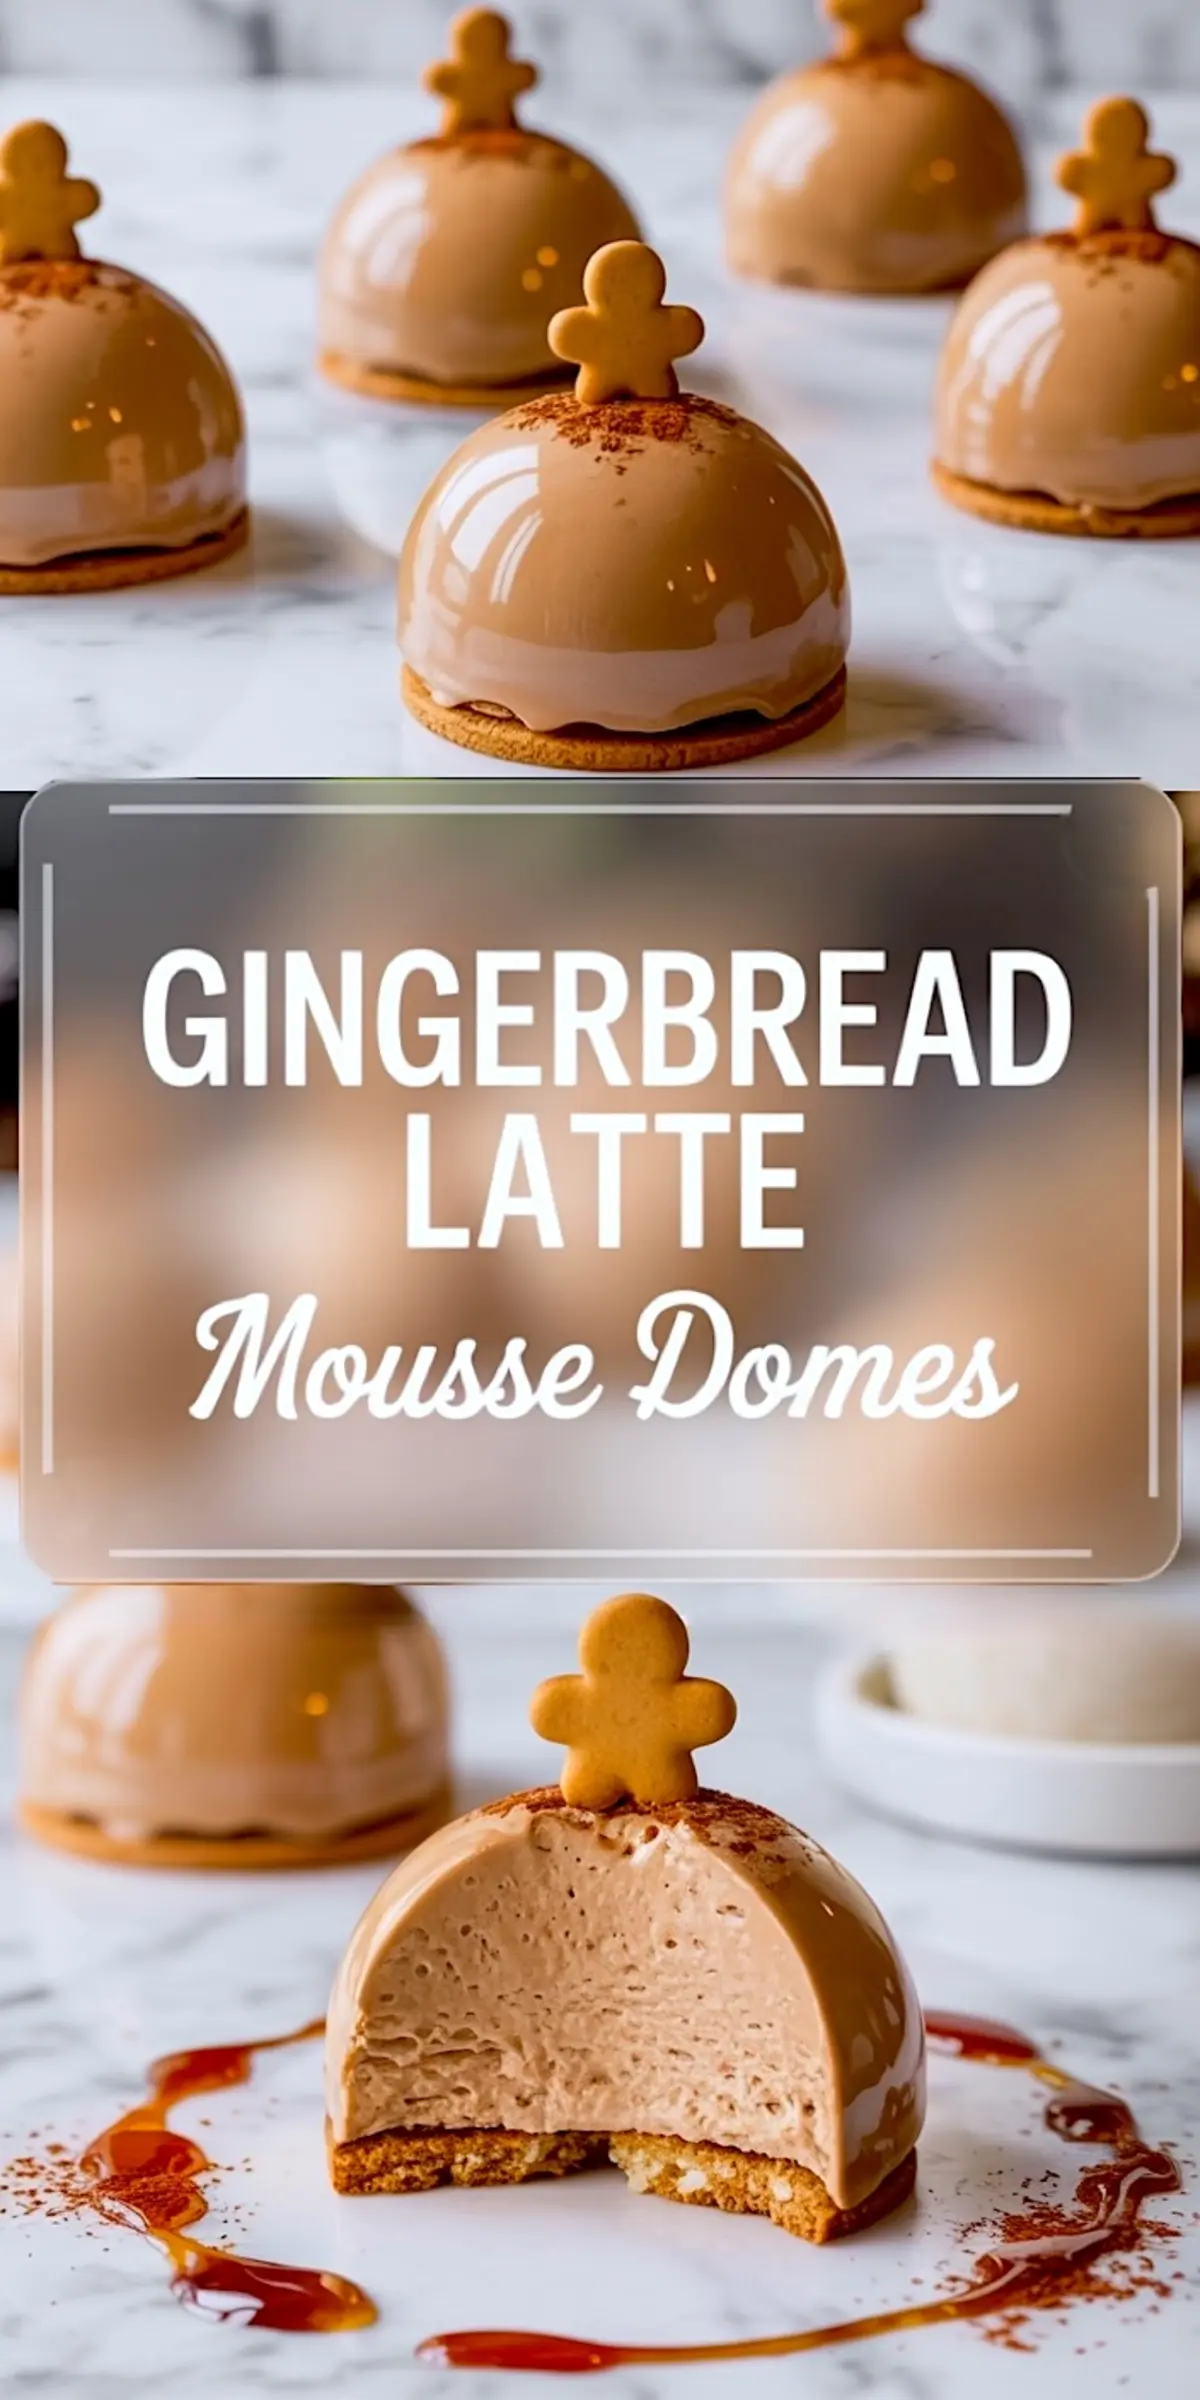
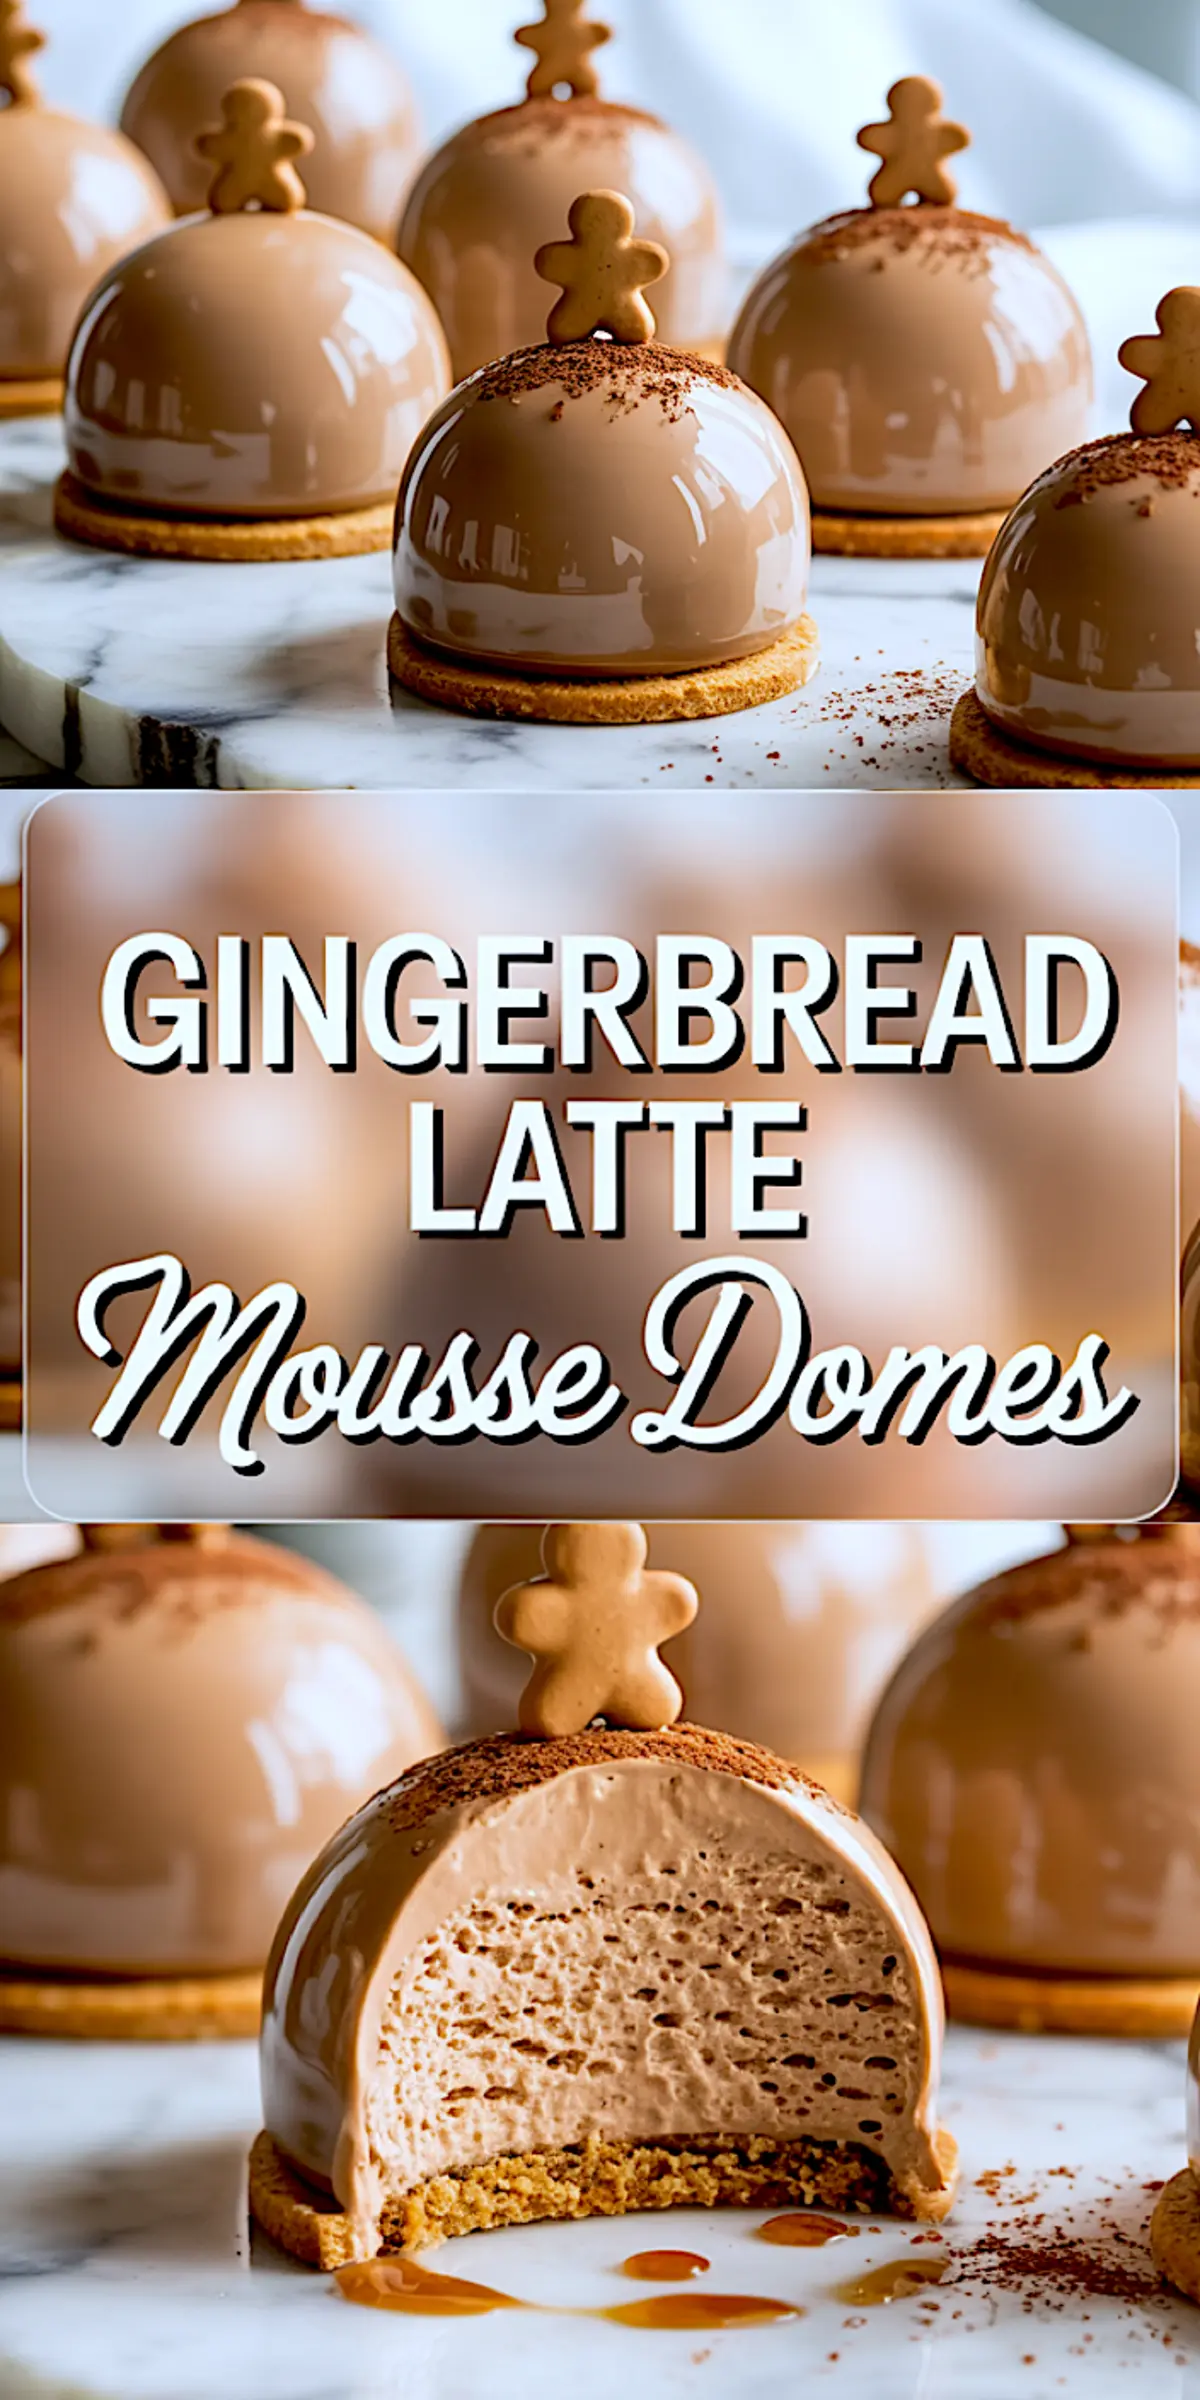
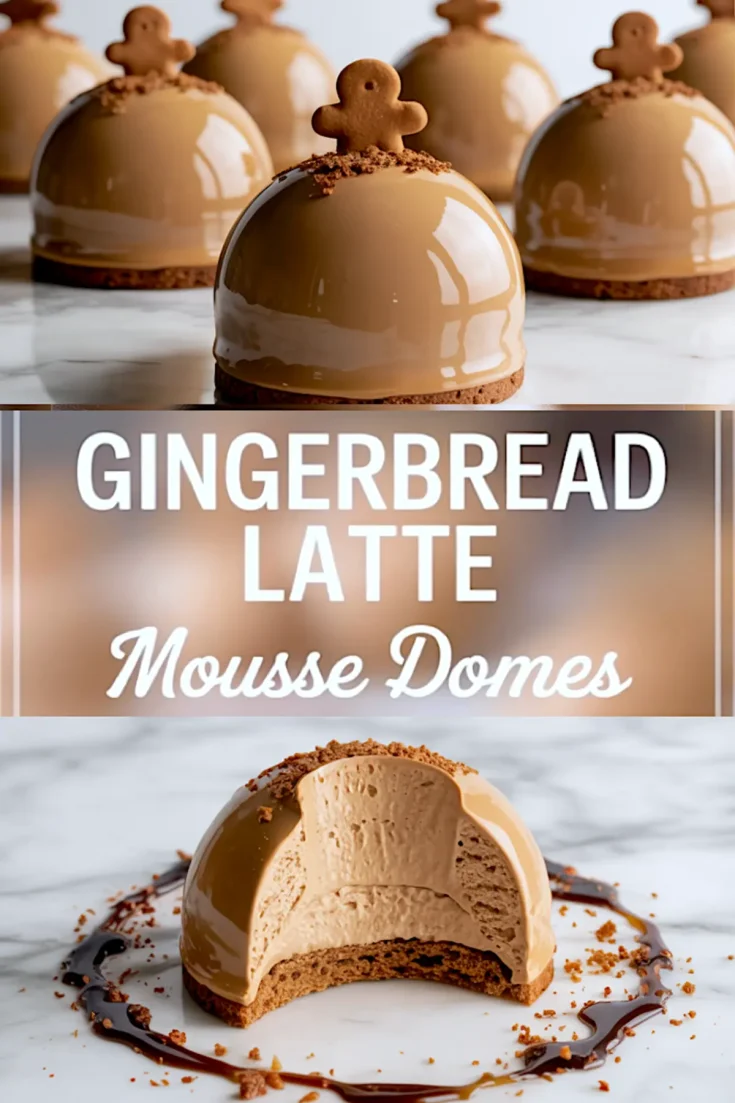
For serving, I like a small white plate with a dusting of cocoa powder or a scatter of edible glitter. A single mini gingerbread cookie on top gives it context and crunch.
If you’re making a dessert tray, these domes pair nicely with the Gingerbread Cheesecake Bars or even simple cookies to balance the richness.
Save and Share – Make It a Christmas Favorite
These Gingerbread Latte Mousse Domes have earned their place on my December rotation. They look impressive, but behave reliably. I trust them on busy days and party nights alike.
If you try them, I’d love to hear how they turned out. Did you use espresso or coffee? Did you decorate with cocoa or go all in with gold leaf?
Leave a comment below, or tag your version. And don’t forget to save this recipe to your Pinterest Christmas board so you can find it again.
Gingerbread Latte Mousse Domes
Elegant and cozy, these gingerbread latte mousse domes are a beautiful addition to your Christmas recipes collection. Made with spiced gingerbread mousse and a hint of coffee, each dome captures the flavor of your favorite gingerbread latte in a light and creamy dessert. Perfect for cozy fall gatherings or gourmet holiday dinner parties, these domes are festive, impressive, and easier to make than they look. Top with a shiny glaze or chocolate shell for a polished finish and serve as the ultimate gingerbread dessert. Save this idea for your next winter celebration or whenever you’re craving a sweet and spiced seasonal treat.
Ingredients
- FOR THE GINGERBREAD COOKIE BASE
- 1 ½ cups all-purpose flour
- ½ tsp baking soda
- 1 tsp ground ginger
- ½ tsp ground cinnamon
- ¼ tsp ground cloves
- ¼ tsp salt
- 6 tbsp unsalted butter, softened
- ¼ cup brown sugar
- ¼ cup molasses
- 1 egg yolk
- FOR THE COFFEE-GINGERBREAD MOUSSE
- 1 tsp powdered gelatin
- 2 tbsp cold water
- 1 cup heavy cream (chilled)
- ¼ cup mascarpone (optional)
- ¼ cup strong brewed espresso or coffee (cooled)
- ⅓ cup white chocolate, melted
- 2 tbsp brown sugar
- ½ tsp cinnamon
- ¼ tsp ground ginger
- Pinch of nutmeg
- ½ tsp vanilla extract
- FOR THE MIRROR GLAZE
- 1 ½ tsp powdered gelatin
- 2 tbsp cold water
- ⅓ cup sweetened condensed milk
- ½ cup sugar
- ¼ cup water
- ⅓ cup white chocolate, chopped
- A few drops of brown gel food coloring (optional)
- OPTIONAL DECORATION
- Mini gingerbread cookies
- Cocoa powder for dusting
- Edible glitter or gold leaf
Instructions
- MAKE THE GINGERBREAD COOKIE BASE: Preheat the oven to 350°F (175°C). In a medium bowl, whisk together the flour, baking soda, salt, ginger, cinnamon, and cloves. In another bowl, cream the softened butter and brown sugar until light and fluffy. Add molasses and egg yolk, mixing until fully incorporated. Gradually add the dry ingredients to form a soft dough. Roll out the dough to ¼-inch thickness and cut into circles slightly larger than the base of your dome molds. Place on a lined baking sheet and bake for 8–10 minutes until edges are set. Let cool completely on a wire rack.
- PREPARE THE MOUSSE: Bloom the gelatin by sprinkling it over cold water and letting it sit for 5 minutes. In a small saucepan, gently heat the espresso, brown sugar, cinnamon, ginger, and nutmeg until warm but not boiling. Add the bloomed gelatin and stir until fully dissolved. Remove from heat and stir in the melted white chocolate and vanilla extract. Let the mixture cool to room temperature. In a separate bowl, whip the cold cream and mascarpone (if using) to soft peaks. Gently fold the cooled coffee mixture into the whipped cream until smooth and light.
- ASSEMBLE THE DOMES: Fill silicone dome molds about ¾ full with the mousse. Press one cookie round gently into each mold, flat side up, aligning it with the bottom. Smooth the edges if needed. Place the molds in the freezer and freeze for at least 6 hours or overnight, until completely firm.
- MAKE THE MIRROR GLAZE: Bloom the gelatin in cold water and set aside. In a small saucepan, combine the sugar, water, and sweetened condensed milk. Heat over medium until it just begins to boil, then remove from heat and stir in the bloomed gelatin until dissolved. Pour the hot mixture over the chopped white chocolate and let sit for 1 minute. Use an immersion blender to blend until smooth, being careful to avoid incorporating air bubbles. Add a few drops of brown food coloring if desired. Let the glaze cool to 90°F (32°C) before using.
- GLAZE THE DOMES: Remove the frozen mousse domes from the silicone molds and place them on a wire rack set over a tray to catch excess glaze. Working quickly, pour the mirror glaze evenly over each dome in a single, continuous motion. Let the glaze drip off and set for a few minutes. Transfer the domes to a serving tray using an offset spatula. Decorate with mini gingerbread cookies, a light dusting of cocoa powder, or edible glitter as desired. Keep chilled until serving.
Notes
Use high-quality silicone molds with a glossy interior for the best dome shape and finish. Domes can be made and frozen up to one week in advance; glaze just before serving for best appearance. For a stronger coffee flavor, use espresso rather than brewed coffee.
Nutrition Information
Yield
6Serving Size
1Amount Per Serving Calories 883Total Fat 46gSaturated Fat 28gTrans Fat 1gUnsaturated Fat 15gCholesterol 182mgSodium 355mgCarbohydrates 109gFiber 2gSugar 77gProtein 11g
Would love to try this recipe but a couple of questions first. I have silicone molds from cocoa bombs- is that the size you recommend? Recipe says to whip cream and mascarpone cheese together- at once, or fold cheese into whipped cream? Thanks!
Appreciate the questions, Jolene 😊 Yes, cocoa bomb molds should work well. That size gives a nice balance between mousse and cookie without being too rich. For the cream and mascarpone, I whip them together in the same bowl until soft peaks form. That step helps everything stay light and smooth when you fold in the coffee mixture later. Let me know how it turns out if you give it a try.
This looks fabulous! How do you get the gingerbread man to stand on top of the dome?
That’s a great question, Tami. The glaze helps a bit, but it’s best to press the gingerbread men gently into the mousse while it’s still slightly soft, right after glazing. Once the domes are chilled again, they’ll firm up and hold the cookies in place. If you’re working in a warm kitchen, a tiny dab of melted chocolate on the base of each cookie can help anchor them securely.
Can you please provide an actual size for the domes? Or a link the domes you use?
Hi Lisa 😊
I use 2.75-inch (7 cm) silicone half-sphere molds for these domes. That size gives a nice balance between visual impact and portion size, especially if you’re serving them as part of a holiday dessert spread.
They hold about 90–100 ml each, which works perfectly with the mousse texture and cookie base. If you’re using a different size, just adjust the cookie diameter slightly to match and be sure not to overfill.
Hi there, just a quick question. How do I keep the glaze to stop at the right at the base of the mousse?
When I want the glaze to stop cleanly at the base, I freeze the domes until they’re completely solid, then set them on a rack that’s lifted just a bit higher. That little bit of height helps the glaze drip off without pooling around the bottom. I also pour in one slow motion rather than circling back, which keeps the edge neat 😊.
You say you cut the bases larger than the mold, but then you shove the cookie into the dome. Those seem contradictory? Is the photo your work or AI? Do you have more process photos??
The cookie bases are cut a touch larger so they line up neatly once the domes come out of the molds. When the mousse is fully frozen, it’s firm enough that the cookie sits in place without needing to force it in. That part can look confusing without visuals, so I’m planning to add a few extra process photos to make it clearer 😊.
How in the world do you keep the cookie from getting covered in the glaze?
Totally get the confusion. The domes are assembled upside down in silicone molds: mousse goes in first, then the cookie is pressed on top (which ends up being the base). After freezing solid, they’re popped out and glazed while still upside down cookie side stays facing down the whole time. Since the cookie is already sealed into the bottom and the glaze is poured gently over the curved frozen mousse, it runs off the sides and doesn’t reach underneath. No flipping happens after glazing, what was the top during freezing becomes the bottom once served. Hope that clears it up a bit 😊
Hi!
I’m looking forward to trying this recipe, but should I be concerned about the texture of the mousse getting weird while it thaws underneath the mirror glaze? Or the thawing impacting the glaze? Also how far in advance of serving should I do the glaze so my guests aren’t spooning frozen mousse? I’ve never froze a mousse before and I know sometimes the air in them can get compressed in this process. Appreciate your response!
Hi, Kaytia! These are great questions, especially if it’s your first time working with frozen mousse. You’re absolutely right that texture matters, and the good news is, if the mousse is stabilized well (with gelatin, as in this recipe), it holds up beautifully through freezing and thawing. I’ve made these domes several times, and the mousse stays light and smooth after thawing without becoming dense or watery.
The mirror glaze actually benefits from going onto frozen domes—it sets more cleanly and gives that shiny finish without melting the mousse. Just make sure your glaze is at the right temperature (around 90–95°F or 32–35°C) when pouring.
For serving, I usually glaze them the day before, then store them in the fridge overnight. That gives the mousse enough time to thaw gently and evenly. If you’re tight on time, glazing them 4 to 5 hours ahead and letting them thaw in the fridge works too. By serving time, they’ll be fully thawed and ready without losing their structure.
Let me know how it goes if you try them 😊
So you are holding the dome by the cookie base while you pour the gelatin over the whole thing without it ever touching the cookie? Wow, you are good. I made the mistake of taking the domes out of the freezer before I finished the gelatin, and it took a while to cool, so the mousse was a bit soft. I had the domes sitting on a wire rack over waxed paper and poured the gelatin over each one with a ladle. It worked but it covered the cookie edges and moving them was a sticky job. If the domes aren’t perfect to start, every crack or bubble shows. I didn’t work hard enough packing the mousse into the mold to ensure there were no imperfections.
Hi Allane Ball, that’s such a relatable experience. The gelatin timing can definitely make or break the finish, especially if the mousse starts to soften before the glaze is ready. I’ve run into the same issue before, and yes, those tiny bubbles or cracks show up like spotlighted flaws once the glaze hits. What’s helped me is keeping the domes frozen solid and placing them on an upside-down glass or small jar when glazing. That way, the cookie base stays untouched and you get a clean drip. The wire rack method works too, but like you said, it can get tricky once the glaze touches the edges. Honestly, it sounds like you handled it really well given the challenge. The next round will go smoother, especially with how much care you’re already putting into it 😊
It would be a nice recipe if it had metric weights and measurements listed.
I made this recipe for christmas, and it was a hit! Everything worked out well. I had a cookie cutter that fit the mold perfectly, and I cut post baking since they spread when baked.
As some others had commented, you cannot glaze these and NOT expect to get the glaze on the cookie, as the photo shows. The only way you can accomplish this is to glaze the dome first, then place it on the cookie. Since my cookie was the same size as the dome, I just glazed it, let it sit to get tacky, then placed sprinkles around the bottom to hide the drip.
Thanks for sharing how it turned out. Using a matching cutter and glazing before placing the dome was a smart call, and the sprinkle trick to cover the drip is exactly the kind of detail that makes a big difference. Love hearing how you made it work for you 😊