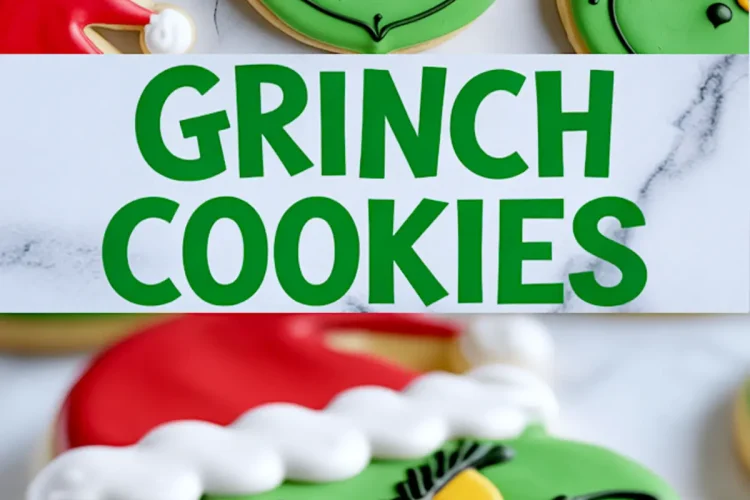
Grinch Cookies are not just decorations for the holiday table. They are playful Christmas sugar cookies decorated with green icing, red hearts, and the face everyone recognizes. The dough is soft, buttery, and holds its shape, which means your decorated cookies stay crisp and clean around the edges. You will learn how to prepare the dough, roll it without stress, and decorate with confidence using royal icing. By the end, you will know how to create Grinch sugar cookies decorated for parties, trays, or gift boxes that look polished and taste delicious.
Holiday baking often mixes tradition with fun. These Grinch Christmas cookies decorated with bold colors are a lighthearted balance to more classic choices like gingerbread crinkle cookies. Families with children especially enjoy this recipe because the playful details invite kids into the kitchen. That combination of flavor and whimsy is why these cookies show up year after year in my own holiday baking folder.

Following a special diet?
Every recipe on this site can be converted to gluten-free, vegan, dairy-free, keto, nut-free or egg-free with adjusted ratios so nothing falls flat.
Try the Recipe Converter →Why These Ingredients Matter

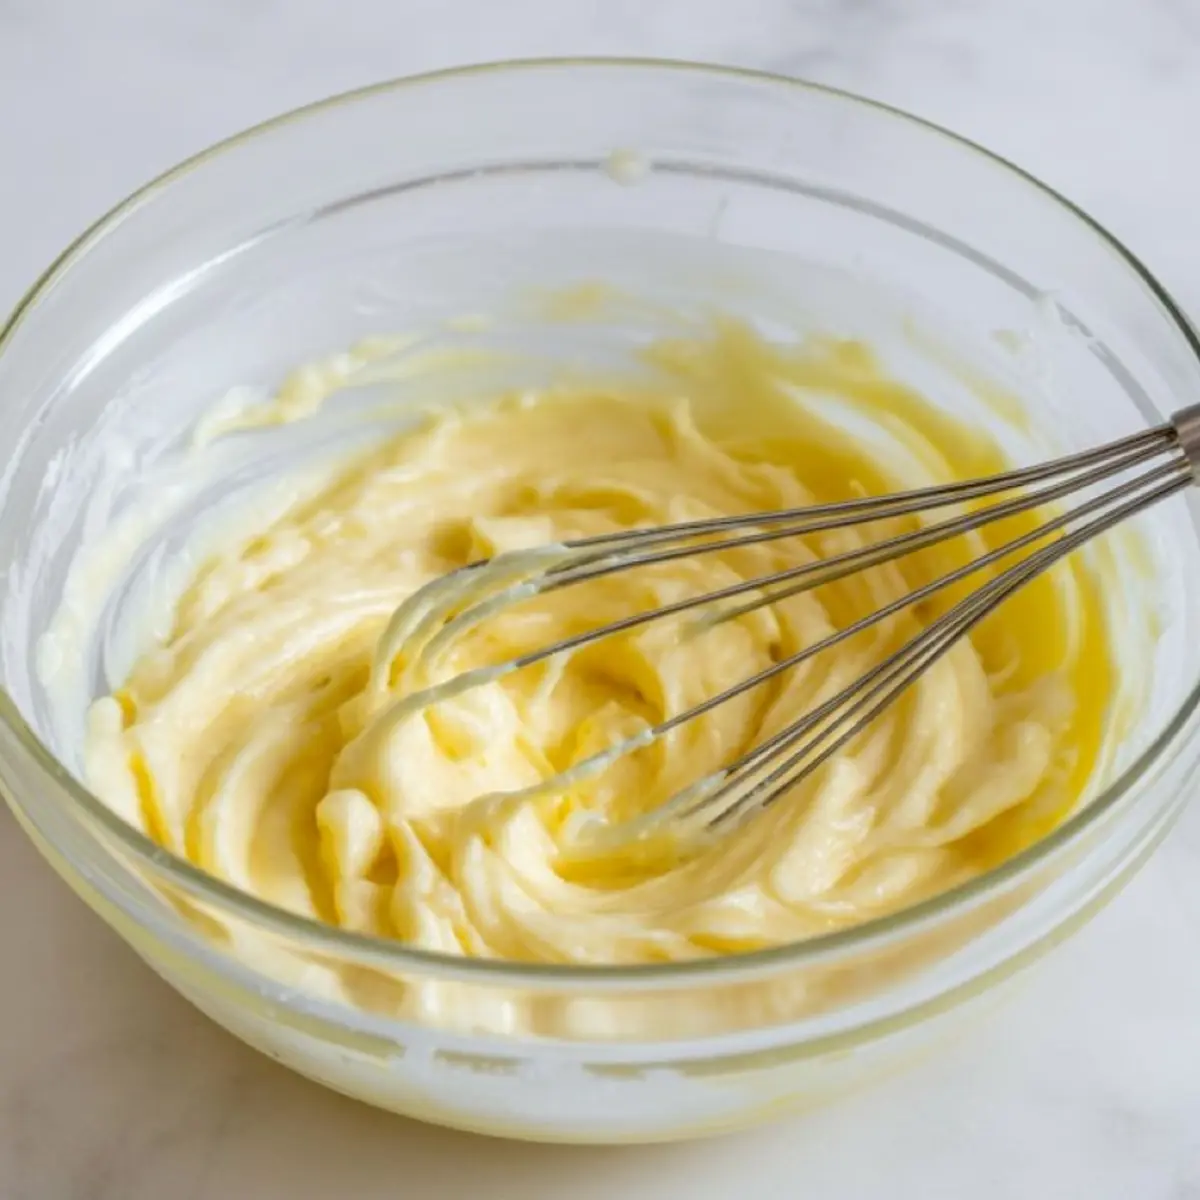
Butter forms the foundation of the dough. I always use unsalted butter softened at room temperature, which blends smoothly with sugar for a creamy base. If you rush this step, the dough can turn grainy, so I take a few minutes to beat them well until light. Sugar not only sweetens but also helps the cookies keep their structure as they bake.
Vanilla extract brings warmth, while a small touch of almond extract adds a gentle aroma. I say optional because not everyone likes almond in cookies, but in my experience it gives the Grinch cookies a more festive flavor. Flour, baking powder, and salt form the dry mix. Salt keeps the sweetness balanced, while baking powder ensures the cookies bake evenly without puffing too high.
The royal icing is where the cookies come alive. Powdered sugar and meringue powder create an icing that dries smooth and firm. I always choose gel food coloring because liquid versions thin the icing too much. The green for the face, red for the hat, and yellow for the eyes all stay vivid, and black outlines give definition. If you enjoy cookie decorating, you already know how a strong icing consistency makes or breaks the final look.
Rolling, Cutting, and Baking the Cookies

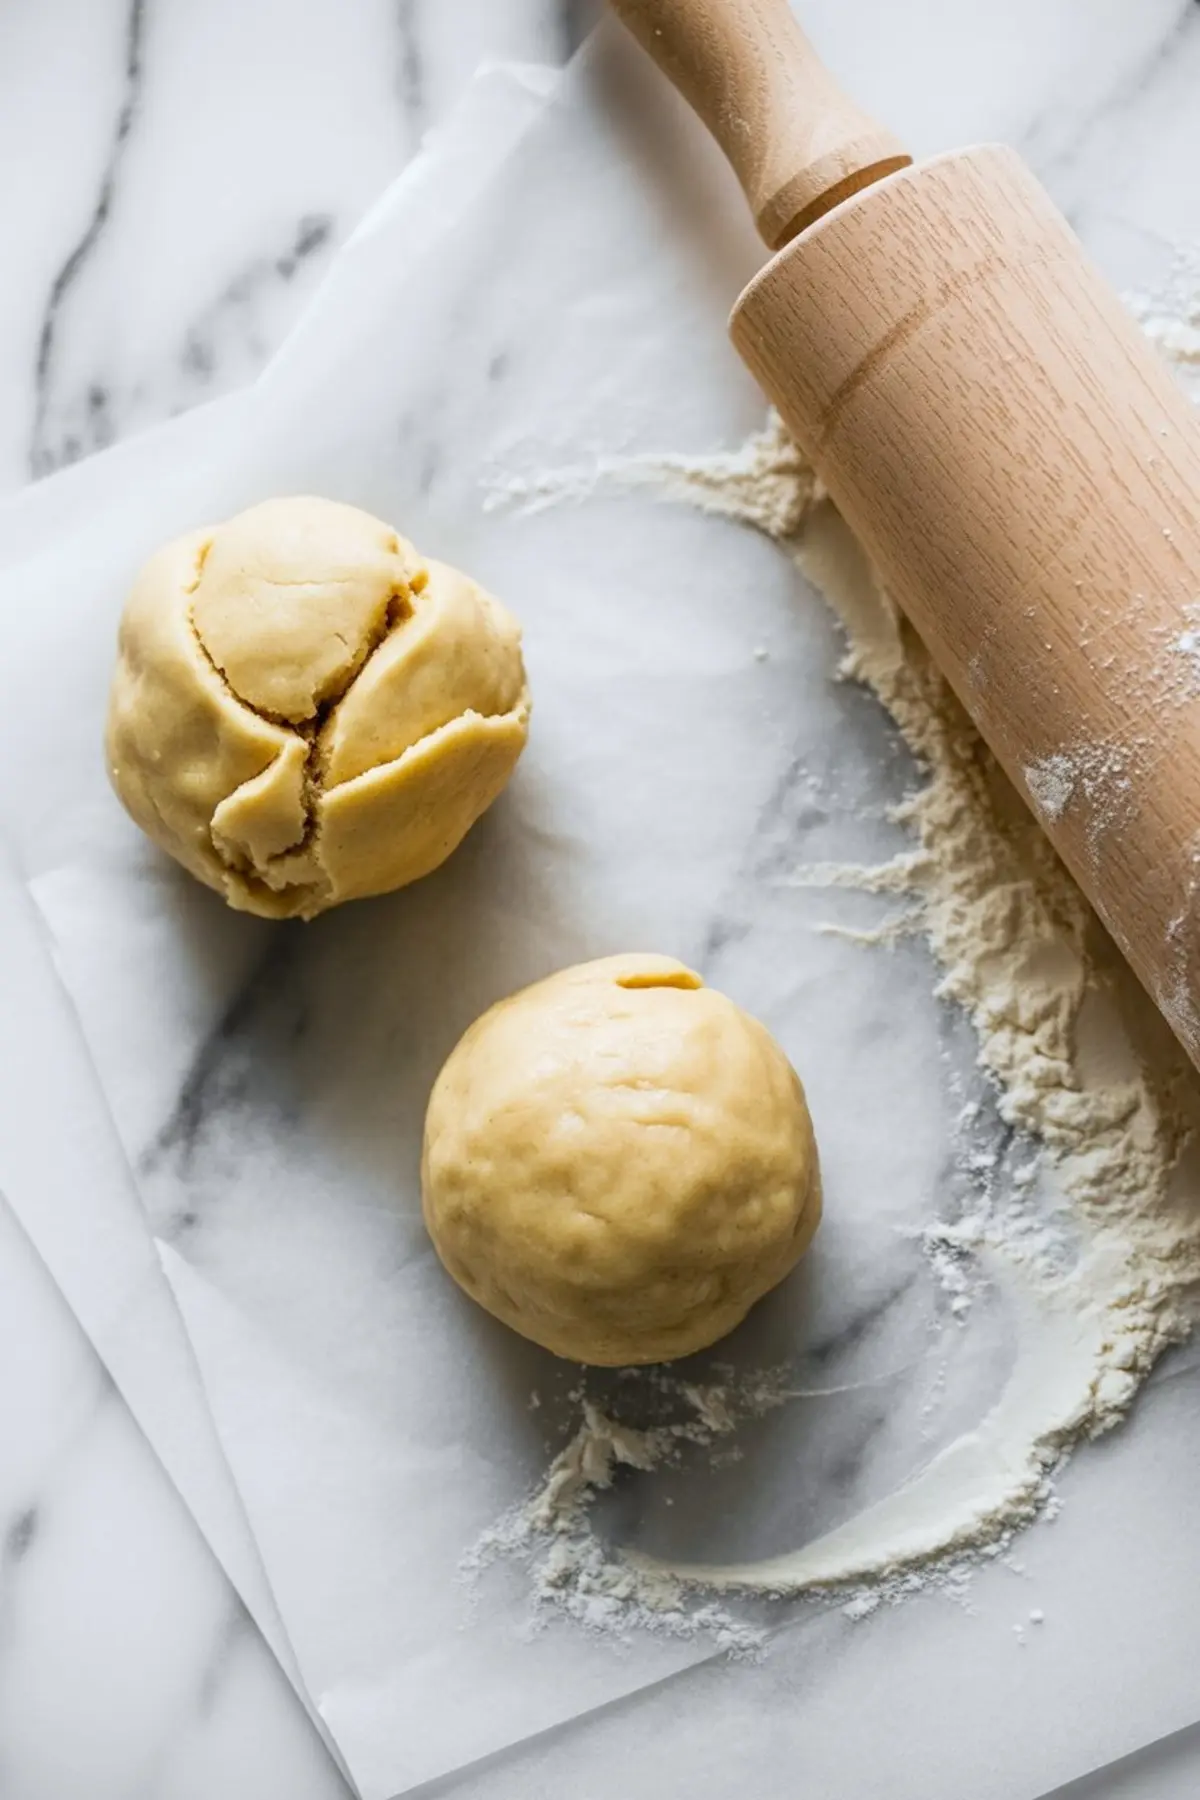
The dough benefits from resting. Chilling is not just an instruction, it is the secret to sharp edges. I wrap my disks tightly and chill them at least an hour, sometimes overnight if the kitchen is warm. Rolling chilled dough feels more controlled and makes cookie cutters cut cleanly.
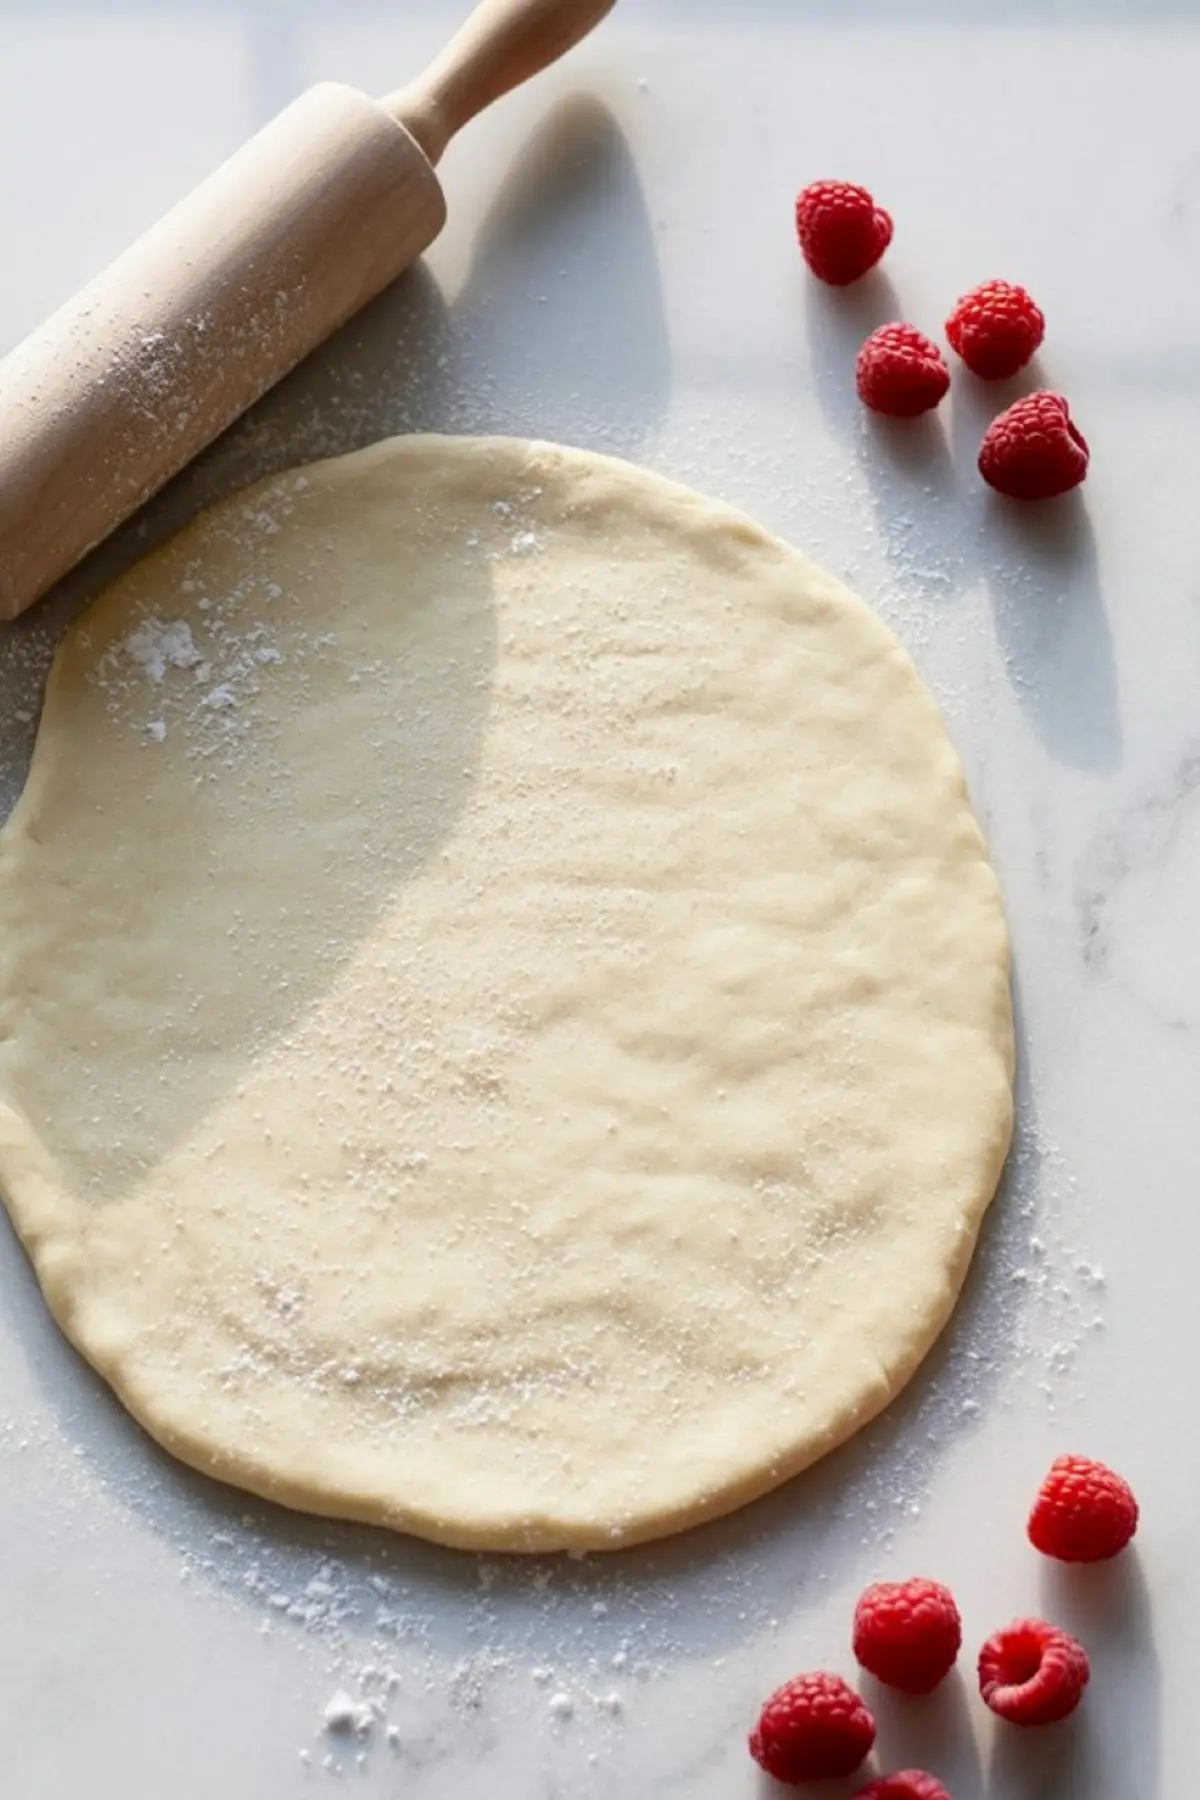
I like to roll the dough on a lightly floured surface to about a quarter inch. Too thin and the cookies brown quickly. Too thick and they lose the clean cutout look. For the shape, you can use Grinch cutters, but I have also used ornament circles with a separate Santa hat cutter for variety. Both give excellent results.
Cookies bake quickly at 350°F. Nine to eleven minutes is enough. I pull them out as soon as the edges begin to turn golden. They finish setting on the sheet for a few minutes before moving them to cool completely. Rushing here risks breaking the base, and decorated cookies need a strong base.
How to Decorate with Ease
Royal icing works in two stages. First, you outline and flood the area with a medium consistency icing. This creates the smooth face layer. Let it sit at least an hour to form a skin before adding more details. I have tried rushing this step, and the colors bleed. Patience rewards you with sharp lines.
Next, add the red Santa hat and white trim. I like to stiffen the white icing slightly so it pipes with texture, looking fluffy. Yellow dots for the eyes and black outlines for the smile and brows complete the look. Each cookie takes shape as the Grinch’s sly grin appears. Leaving the cookies uncovered overnight lets the icing dry fully. That way, when you pack them, the designs stay intact.
If you are new to decorating, start small. Even one color section at a time will give you more confidence than rushing through all steps at once. It is better to decorate a few carefully than to feel overwhelmed by too many at once.
A Helpful Ingredient Comparison
I have tested both almond extract and lemon extract in these cookies. Almond gives a nostalgic, holiday flavor that pairs well with buttery dough. Lemon adds brightness that makes the cookies taste lighter, though the citrus can sometimes compete with the peppermint decorations people often add. In my notes, I lean almond for family gatherings and lemon if I want something fresher. Try both in small batches and decide which works best for your table.
Serving Ideas and Storage Tips
Serving Grinch cookies alongside sugar cookie icing that hardens cookies adds variety to a holiday platter. The contrast between playful designs and classic iced cookies creates a tray people remember.

For gifting, I line small boxes with parchment and place the cookies in a single layer. They travel well and hold up better than more delicate designs like melting snowman cookies. Stored in airtight containers, these cookies stay fresh up to a week at room temperature. Separate layers with parchment if stacking, so the icing does not smudge.
If you enjoy creating cookie assortments, pair these with Christmas kiss sugar cookies. The difference in shape and texture gives people more to choose from. Guests appreciate both playful and traditional cookies, and I find it always makes the tray look complete.
Save and Share Your Holiday Cookies
Grinch cookies bring humor, color, and flavor to holiday baking. They are fun to prepare, rewarding to decorate, and cheerful to gift. You can bake a batch for your own table or send them to friends as a reminder that holiday treats can be playful too.
I would love for you to save this recipe on Pinterest to return to later. And tell me in the comments how your decorated Grinch sugar cookies turned out. Did you try almond or lemon extract? Did you add the little red heart? Your experience might help another baker in the middle of their holiday baking.
Grinch Cookies Recipe

Grinch cookies bake soft with a bright green color and red candy heart in the center, just like the storybook. I use a classic sugar cookie dough, tint it green, and shape it for clean edges before baking. These grinch sugar cookies decorated with care always stand out on a cookie tray. If you need Christmas sugar cookies decorated for gifting or gatherings, this recipe works every time. It’s part of my go-to list for holiday baking, especially when I want something cute but not too fussy. Add these to your grinch Christmas cookies decorated folder or save for your next round of holiday treats. They’re fun to make and even better to share, and they always bring a little cheer to the table.
Ingredients
- For the Sugar Cookies:
- 1 cup unsalted butter, softened
- 1 cup granulated sugar
- 1 large egg
- 1 ½ teaspoons vanilla extract
- ½ teaspoon almond extract (optional)
- 3 cups all-purpose flour
- 1 ½ teaspoons baking powder
- ½ teaspoon salt
- FOR THE ROYAL ICING:
- 4 cups powdered sugar
- 3 tablespoons meringue powder
- 6 to 8 tablespoons water, adjusted for consistency
- Gel food coloring: green, red, yellow, black, white
Instructions
- MAKE THE SUGAR COOKIE DOUGH: In a large bowl, cream the softened butter and granulated sugar together until light and fluffy, about 2 to 3 minutes using a hand or stand mixer. Add the egg, vanilla extract, and almond extract, mixing until fully incorporated. In a separate bowl, whisk together the flour, baking powder, and salt. Gradually add the dry ingredients to the wet mixture, mixing on low until the dough comes together and pulls away from the bowl.
- CHILL THE DOUGH: Divide the dough into two equal portions, shape each into a flat disk, and wrap tightly in plastic wrap. Chill in the refrigerator for at least 1 hour to firm up before rolling and cutting.
- PREHEAT AND PREPARE FOR BAKING: Preheat the oven to 350°F (175°C). Line baking sheets with parchment paper. Lightly flour your work surface and roll out one disk of chilled dough to ¼-inch thickness. Use a Grinch-shaped cookie cutter or a round ornament cutter and a separate Santa hat cutter to form the cookies. Transfer the cutouts to the prepared baking sheets, spacing them about 1 inch apart.
- BAKE THE COOKIES: Bake for 9 to 11 minutes, or until the edges are just beginning to turn golden. Let cookies cool on the baking sheet for 5 minutes before transferring to a wire rack to cool completely.
- PREPARE THE ROYAL ICING: In the bowl of a stand mixer, combine the powdered sugar and meringue powder. Add water one tablespoon at a time, mixing on low until a smooth, glossy icing forms. Adjust water as needed for a medium consistency—thick enough to pipe outlines but fluid enough to flood. Divide icing into separate bowls and color with gel food coloring: green for the face, red for the hat, white for the trim, yellow for the eyes, and black for facial features.
- DECORATE THE GRINCH FACE: Outline and flood the face area with green icing using a piping bag fitted with a small round tip. Allow it to dry for at least 1 hour to form a skin. Add the red Santa hat and use white icing with a stiffer consistency to pipe the trim and pom-pom for a fluffy look. Add yellow ovals for the eyes and a small black dot in each center. Finish with black icing to draw the Grinch's signature smile, nose, and expressive eyebrows using a fine tip. Allow the decorated cookies to dry uncovered for 8 hours or overnight for best results.
Notes
Let royal icing dry completely before storing. Store finished cookies in a single layer or separated by parchment to prevent damage. Cookies will stay fresh in an airtight container at room temperature for up to one week.